
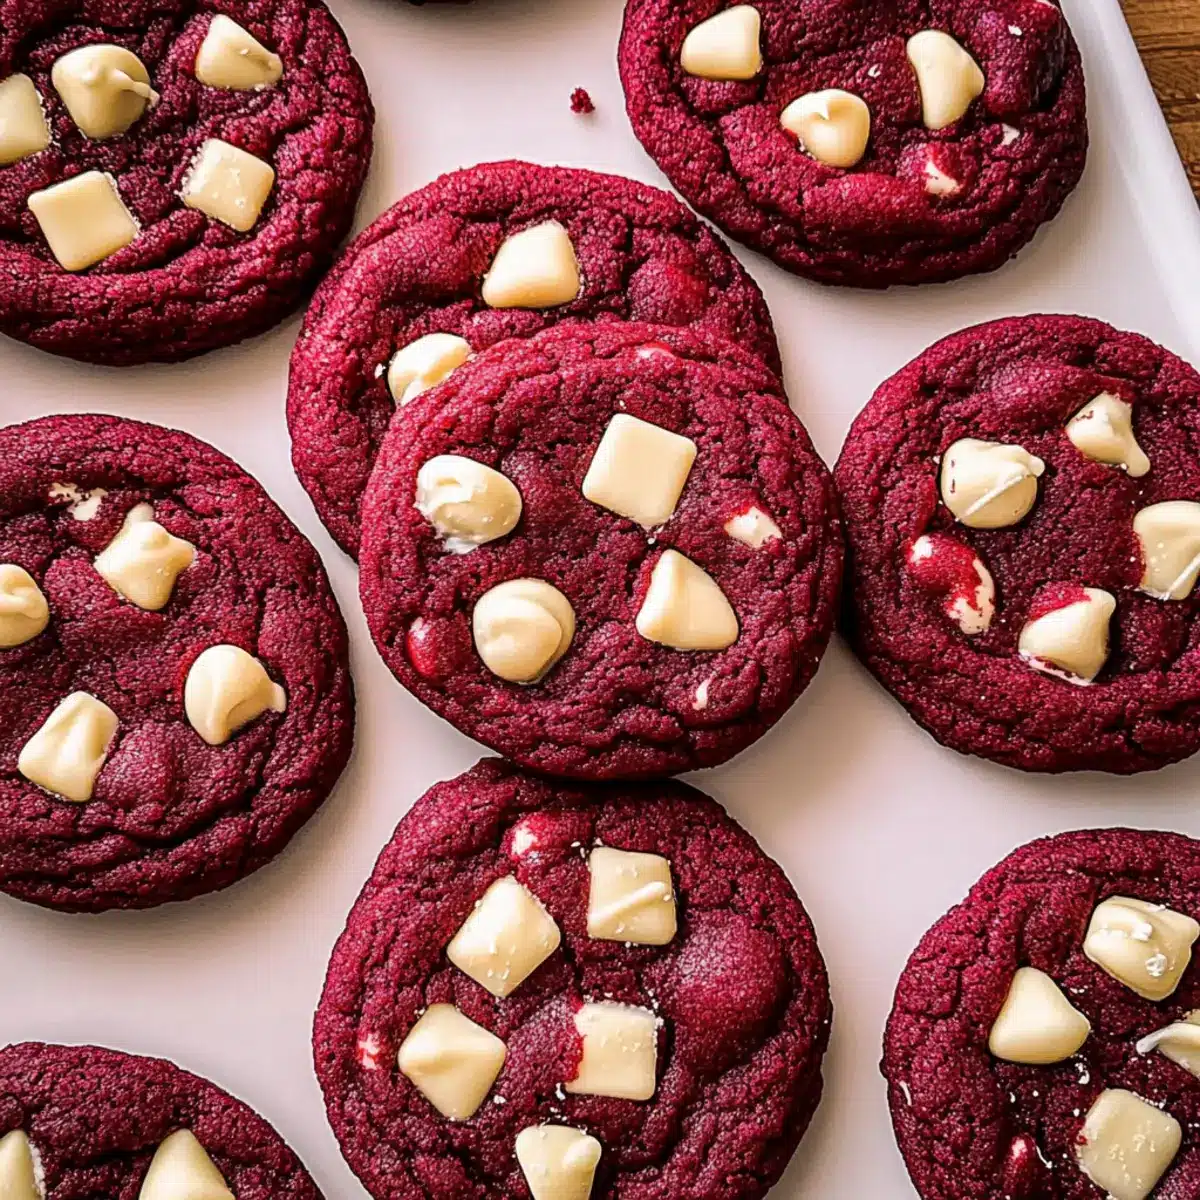
As I stood in my kitchen, the aroma of melted white chocolate mingling with rich cocoa filled the air, instantly transporting me to those joyful moments of baking with family. That’s when I decided to whip up a batch of these Chewy Red Velvet Cookies with White Chocolate Chunks. Perfect for satisfying any sweet tooth, this delightful recipe not only delivers a beautiful pop of red but also offers a range of textures—chewy centers and slightly crisp edges that melt in your mouth. Best of all, there’s no need to chill the dough, meaning you can enjoy these festive cookies in under 30 minutes! Whether it’s a special occasion or a cozy night in, I can’t wait to share this treat with you. Are you ready to make your kitchen smell irresistible?
Why Are Red Velvet Cookies So Irresistible?
Chewy Delight: Each bite of these cookies brings a perfect blend of chewiness that keeps you reaching for more.
Vibrant Color: The striking red hue adds a festive touch, making them an eye-catching treat for any occasion.
Sweet Surprise: With melty white chocolate chunks, every cookie bursts with creamy sweetness that complements the subtle cocoa flavor.
Quick and Easy: Made without the need for chilling, these cookies can be in the oven in no time—perfect for last-minute cravings!
Versatile Treat: They’re not just for special occasions; enjoy them on cozy nights, serve at gatherings, or simply indulge yourself anytime!
Once you’ve made these, you might also like to try my Chewy Pumpkin Cookies for fall or these delightful Chocolate Oat Cookies when you’re in the mood for something different.
Red Velvet Cookies Ingredients
For the Dough
• All-Purpose Flour – Provides structure to the cookies; ensure to measure correctly for best results.
• Dutch Process Cocoa Powder – Adds a subtle chocolate flavor that enhances the red velvet profile; regular cocoa can be a substitute.
• Baking Soda & Baking Powder – Essential leavening agents to help the cookies rise beautifully.
• Salt – Balances sweetness and amplifies the flavors within the dough.
• Salted Butter (softened) – Adds richness and moisture to the cookies; switch to unsalted if you prefer, adjusting added salt.
• Light Brown Sugar – Contributes moisture along with a hint of caramel flavor, enhancing overall taste.
• Granulated White Sugar – Sweetens the cookies and helps achieve the right texture and chewiness.
• Egg Yolks – Provide richness and act as a binder; ensure they’re at room temperature for better mixing.
• Vanilla Extract – Adds deep, warm flavors that elevate the cookie experience.
• Red Gel Food Coloring – Essential for achieving the iconic vibrant hue of red velvet cookies; adjust based on desired intensity.
For the White Chocolate
• Chopped White Chocolate or Chips – Offers sweetness and creamy texture; dark chocolate can be used for a delightful twist.
Step‑by‑Step Instructions for Chewy Red Velvet Cookies with White Chocolate Chunks
Step 1: Preheat and Prepare
Begin by preheating your oven to 350°F (175°C). While it heats, line two baking sheets with parchment paper to prevent sticking and make cleanup a breeze. This step ensures your Red Velvet Cookies bake evenly and develop those desired chewy edges.
Step 2: Whisk Dry Ingredients
In a small bowl, combine 2 cups of all-purpose flour, 2 tablespoons of Dutch process cocoa powder, 1 teaspoon of baking soda, 1 teaspoon of baking powder, and ½ teaspoon of salt. Whisk them together until well blended, creating an even mixture that will provide the perfect structure for your cookies. Set this bowl aside while you prepare the wet ingredients.
Step 3: Cream Butter and Sugars
In a large mixing bowl, use an electric mixer to cream together ½ cup of softened salted butter, ½ cup of light brown sugar, and ½ cup of granulated white sugar. Beat the mixture on medium speed for about 3-5 minutes until it looks light and fluffy. This step is essential for incorporating air, giving your Red Velvet Cookies a delightful texture.
Step 4: Incorporate Egg Yolks and Flavor
Next, add in 2 large egg yolks and 1 teaspoon of vanilla extract to the creamed butter and sugars. Mix on low speed until fully combined. Then, gently fold in 2 tablespoons of red gel food coloring, adjusting the amount until you achieve your desired vibrant red hue. The mixture should be smooth and fluffy.
Step 5: Combine Dry Ingredients
Gradually add the dry ingredient mixture to the wet ingredients, stirring with a rubber spatula or wooden spoon until just combined. Be careful not to overmix as you want your Red Velvet Cookies to remain tender and chewy. The dough may be thick but should come together beautifully.
Step 6: Fold in White Chocolate
Once the dough is combined, gently fold in approximately 1 cup of chopped white chocolate or white chocolate chips. Ensure the chocolate is evenly distributed throughout the dough. The sweet chunks will melt beautifully while baking, adding that irresistible creamy texture in every bite.
Step 7: Scoop Dough onto Baking Sheets
Using a cookie scoop or tablespoon, portion the dough into 18 balls, placing them on the prepared baking sheets. Be sure to space the cookies 2 inches apart to allow for spreading. The vibrant red dough should be each ball’s centerpiece, promising deliciousness as they bake.
Step 8: Bake the Cookies
Place both baking sheets in your preheated oven and bake for 10-12 minutes. Aim for 10 minutes for softer centers and a chewy bite, or go for 12 minutes if you prefer slightly crispier edges. Keep an eye on them, as they should look puffed and just set around the edges when done.
Step 9: Cool Before Transferring
Once baked, remove the cookies from the oven and let them cool on the baking sheets for about 5 minutes. This cooling period allows the cookies to firm up and enhance their chewy texture. Afterward, transfer them to a wire rack to cool completely and enjoy the delightful aroma!
Red Velvet Cookies: Creative Variations
Feel free to let your creativity shine and customize these cookies to suit your taste!
-
Dark Chocolate: Swap white chocolate chunks for rich dark chocolate for an indulgent twist.
-
Nutty Addition: Add chopped pecans or walnuts to the dough for a delightful crunch that pairs beautifully with the sweetness.
-
Colorful Swaps: Experiment with different gel food coloring to create a rainbow of vibrant cookie options for parties or holidays.
-
Spicy Kick: Incorporate a dash of cayenne pepper or cinnamon for a subtle warmth that adds depth to the cookie flavor.
For a more fall-inspired treat, try making these with pumpkin puree by checking out my Chewy Pumpkin Cookies!
-
Oatmeal Version: Fold in rolled oats for a chewy texture that adds heartiness to the cookies.
-
Vegan Option: Substitute with vegan butter, a flax egg, and dairy-free chocolate chips for a plant-based treat everyone can enjoy.
-
Frosted Delight: Top your cookies with a cream cheese frosting for a truly decadent finish, reminiscent of traditional red velvet cake.
Each of these variations offers a unique taste, ensuring you always have something new to savor! Whether you’re craving a cozy batch for the family or a festive treat for gatherings, these options will elevate your baking game. Happy baking!
Storage Tips for Red Velvet Cookies
Room Temperature: Store cookies in an airtight container at room temperature for up to 3 days, keeping them soft and chewy.
Freezer: To extend their life, freeze the cookies in a single layer on a baking sheet, then transfer to a freezer bag for up to 2 weeks.
Reheating: When ready to enjoy, thaw cookies at room temperature and reheat in the microwave for about 10-15 seconds for that just-baked warmth.
Cookie Dough Storage: If you want to save time, the cookie dough can be made ahead and stored in the refrigerator for up to 3 days or frozen for up to 2 weeks. Make fresh Red Velvet Cookies anytime!
What to Serve with Chewy Red Velvet Cookies with White Chocolate Chunks
Looking to create a delightful spread to accompany your vibrant red cookies? Let’s build an unforgettable meal that tantalizes your taste buds and completes your cozy occasion.
- Classic Milk: The perfect partner for any cookie, a cold glass of milk enhances the sweetness and balances flavors.
- Creamy Vanilla Ice Cream: Pair warm cookies with ice cream to create a delicious contrast of temperatures, inviting melts that bring joy with every bite.
- Fresh Berries: Serve a side of supple strawberries or tart raspberries for a refreshing pop of flavor that cuts through the sweetness. Their vibrant colors echo the cookies’ festive appeal!
- Decadent Hot Chocolate: A rich cup of hot chocolate drizzled with marshmallows complements the cocoa in the cookies, making every moment feel warm and special.
- Chocolate Dipped Strawberries: Marrying chocolate with strawberries creates a luxurious treat that pairs perfectly with the velvety flavor of the cookies.
- Fruit Tart: A light, fruity tart offers a refreshing tang that pairs well with the sweet, chewy richness you’ll find in each cookie.
- Coffee or Espresso: The robust flavor of coffee contrasts beautifully with sweetness, making it a delightful drink to enjoy alongside your cookies any time of day.
- Cheesecake Brownies: Indulge your guests with a dual layer of flavors that beckons your cookie to join the dessert table, creating harmony in richness and sweetness.
- Chilled Sparkling Water: Elevate your gathering with refreshing bubbles, cleansing the palate as you enjoy each bite of cookie bliss.
Let these pairings inspire the joy of sharing and savoring your freshly baked, chewy red velvet cookies!
Expert Tips for Red Velvet Cookies
• Measure Flour Accurately: Use a kitchen scale for precision; incorrectly measured flour can lead to dry or dense cookies.
• Warm Ingredients Matter: Ensure your egg yolks are at room temperature for better mixing—this leads to a smoother dough and fluffier cookies.
• Don’t Overmix: Once the dry ingredients are added, mix only until just combined to maintain the chewy texture of your Red Velvet Cookies.
• Perfect Timing: For softer centers, set your timer for 10 minutes; keeping an eye on them ensures you avoid overbaking.
• Add More Chocolate: Consider sprinkling extra white chocolate on top right after baking for a visually appealing and extra sweet touch.
Make Ahead Options
These Red Velvet Cookies are perfect for meal prep enthusiasts! You can prepare the cookie dough up to 3 days in advance. Simply follow the recipe up to Step 6, then wrap the dough tightly in plastic wrap and refrigerate it. This helps maintain the freshness and prevents the cookies from spreading too much while baking. When you’re ready to bake, scoop the dough into balls and place them on a baking sheet straight from the fridge—no need to wait for it to come to room temperature. Bake as instructed, and you’ll have warm, chewy Red Velvet Cookies ready to enjoy with minimal effort!
Red Velvet Cookies Recipe FAQs
How do I choose the right ingredients for Red Velvet Cookies?
When selecting your ingredients, opt for high-quality all-purpose flour and Dutch process cocoa powder for the best flavor and texture. For the red color, I recommend using gel food coloring, as it gives vibrant results without altering the dough’s consistency. Be sure your butter is softened to room temperature for easy creaming with the sugars.
How should I store Red Velvet Cookies?
Store your cookies in an airtight container at room temperature for up to 3 days. To maintain their chewiness, place a slice of bread in the container with the cookies. For longer storage, you can freeze them in a single layer on a baking sheet, then transfer to a freezer bag, where they can be kept for up to 2 weeks.
Can I freeze the cookie dough for Red Velvet Cookies?
Absolutely! To freeze the dough, scoop it into cookie-sized balls and place them on a baking sheet lined with parchment paper. Freeze until solid, then transfer the balls to a freezer bag. They can be frozen for up to 2 weeks. When you’re ready to bake, simply place them on a baking sheet and add an extra minute or two to the baking time, no need to thaw.
What do I do if my cookies spread too much during baking?
If your cookies spread excessively, it could be due to softened butter or too little flour. For next time, make sure your butter is softened without being overly creamy, and be careful to measure your flour properly. Using a kitchen scale is a great way to ensure the correct amount—1 cup is approximately 125 grams.
Are these Red Velvet Cookies safe for pets, or do they contain any allergens?
These cookies contain common allergens such as eggs and dairy, so they are not safe for pets. If you’re serving guests with allergies, be sure to inform them of the ingredients, especially regarding the presence of eggs and possible gluten in traditional all-purpose flour.
Can I use substitutes in this Red Velvet Cookies recipe?
Certainly! If you’re looking for alternatives, you can replace the white chocolate with dark chocolate for a richer flavor. For the gel food coloring, you can use natural alternatives like beet juice, but keep in mind this may impact the texture slightly. If you’re gluten-free, try using a gluten-free all-purpose flour blend to make these cookies suitable for your needs.
Red Velvet Cookies: Chewy Perfection with White Chocolate Chunks
Ingredients
Equipment
Method
- Preheat your oven to 350°F (175°C) and line two baking sheets with parchment paper.
- In a small bowl, whisk together the flour, cocoa powder, baking soda, baking powder, and salt.
- In a large mixing bowl, cream together the softened butter, light brown sugar, and granulated white sugar until light and fluffy.
- Add in the egg yolks and vanilla extract, mixing until fully combined, then fold in the red gel food coloring.
- Gradually mix the dry ingredients into the wet ingredients until just combined.
- Fold in the chopped white chocolate until evenly distributed.
- Scoop the dough into 18 balls and place on the prepared baking sheets, spacing them 2 inches apart.
- Bake for 10-12 minutes, aiming for 10 minutes for softer centers.
- Let the cookies cool on the baking sheets for 5 minutes before transferring to a wire rack.
Leave a Reply