
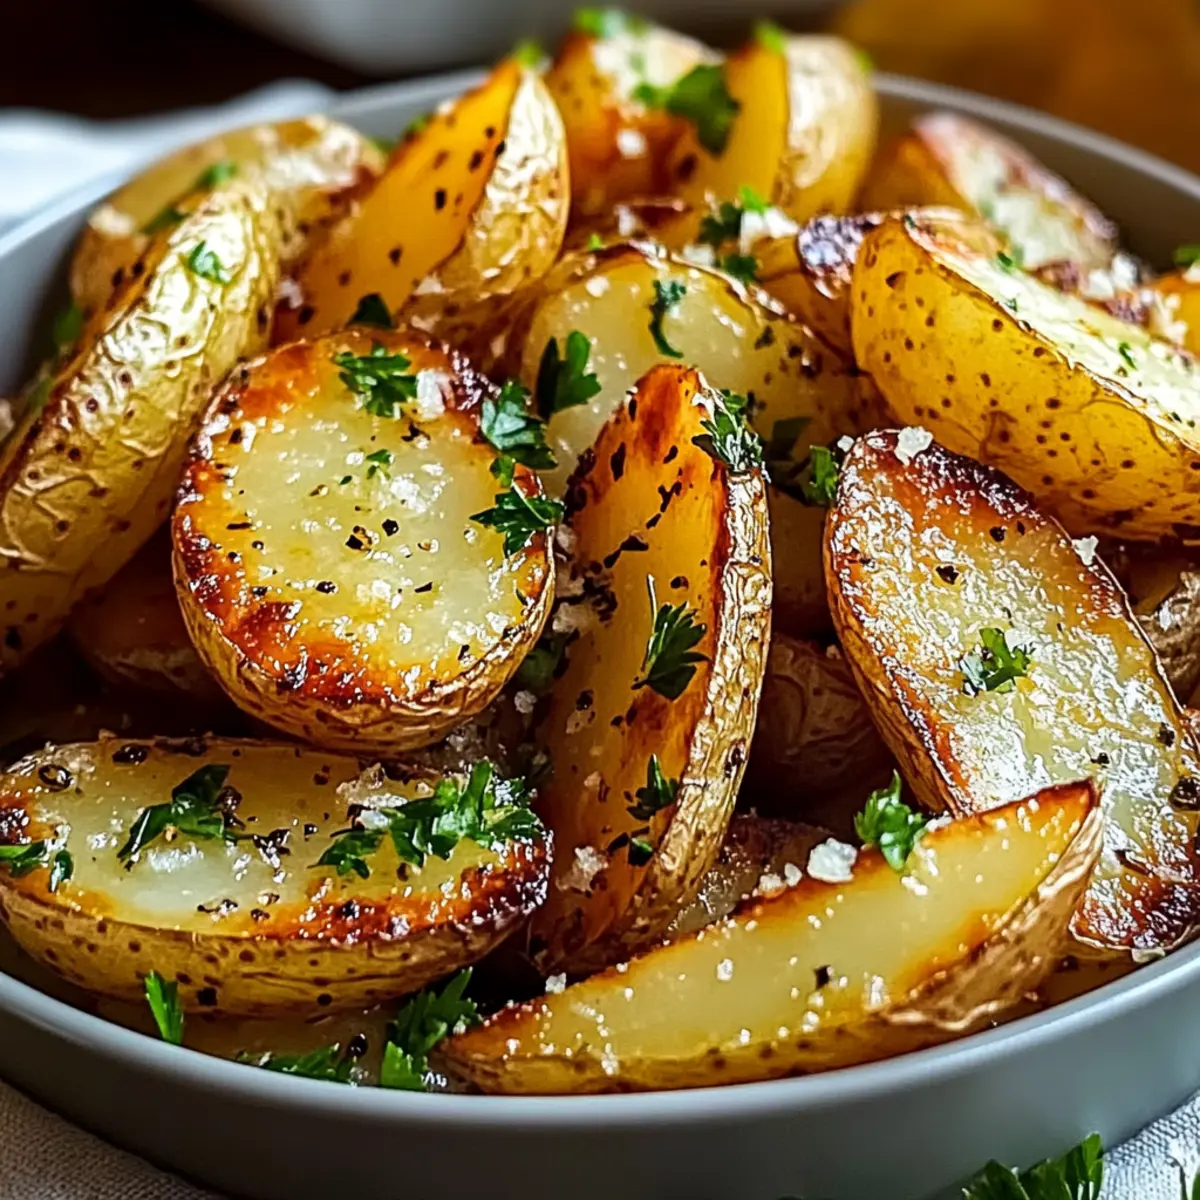
There’s nothing quite like the smell of roasted potatoes wafting through the kitchen, instantly transporting me to sun-soaked Mediterranean shores. These Authentic Greek Potatoes, or Patates Lemonates, are a celebration of simple ingredients transformed into something truly special. With crispy, golden-brown edges and fluffy interiors, they blend the bright tang of lemon and the robust aroma of garlic with earthy oregano, making this dish a much-loved, versatile side that’s gluten-free and vegetarian-friendly. The best part? They’re so easy to prepare, perfect for busy weeknights or weekend feasts alike. Ready to elevate your dinner table with this delightful recipe? Let’s dive into the world of crispy lemon perfection!
Why are Greek Potatoes a must-try?
Flavor Explosion: These Authentic Greek Potatoes are bursting with zesty lemon, aromatic garlic, and fragrant oregano, creating a taste experience you’ll crave.
Easy to Make: Even novice cooks can master this recipe—just a bit of soaking and roasting makes all the difference!
Versatile Side Dish: Pair them with everything from roasted lamb to baked fish for an impressive meal!
Crowd-Pleasing: Whether at family gatherings or casual dinners, these potatoes are sure to be a hit.
Quick Cooking Time: With minimal prep and under an hour in the oven, you can enjoy this delicious dish with ease.
Storage Friendly: Leftovers hold up well; you can save them for lunch or dinner throughout the week!
Greek Potatoes Ingredients
For the Potatoes
• Russet or Yukon Gold Potatoes – These varieties are perfect for achieving that crispy texture.
• Lemon Juice – Freshly squeezed for a bright, tangy flavor that enhances the whole dish.
• Extra Virgin Olive Oil – A good quality oil not only adds richness but helps in creating a golden crust.
• Garlic – Infuses a savory depth; consider adding it halfway through roasting for a sweeter note.
• Dried Oregano – Traditional in Greek cuisine, gives authentic flavor; feel free to substitute with fresh if desired.
• Salt – Essential for balancing and enhancing the flavors; adjust based on your taste preferences.
• Black Pepper – Freshly ground adds a gentle warmth and complexity to the dish.
• Vegetable or Chicken Broth – Introduces moisture and additional flavor when roasting; low-sodium options help control salt levels.
For Garnish
• Fresh Parsley or Oregano – Optional but adds a beautiful touch of color and herbal freshness that elevates your presentation.
Enjoy creating these Greek Potatoes that promise not only a delightful taste but also a memorable dining experience!
Step‑by‑Step Instructions for Greek Potatoes
Step 1: Prep Potatoes
Begin by washing and scrubbing your Russet or Yukon Gold potatoes under cold water. For a smoother texture, peel them if you prefer. Next, cut the potatoes into consistent wedges or chunks, aiming for about 1 to 1.5 inches in size to ensure even cooking. This preparation sets the foundation for your delicious Greek Potatoes.
Step 2: Soak
Submerge the potato pieces in a large bowl of cold water and let them soak for 30 to 60 minutes. This step draws out excess starch, which is key for achieving crispy edges. After soaking, drain the potatoes thoroughly and use a clean kitchen towel or paper towels to dry them completely, preparing them for the marinade.
Step 3: Preheat Oven
While the potatoes are drying, preheat your oven to 400°F (200°C). This ensures that your Greek Potatoes will roast evenly and develop that golden-brown color we all love. A properly heated oven is crucial for achieving a beautifully crispy exterior while keeping the insides fluffy and tender.
Step 4: Marinate
In a large mixing bowl, whisk together the freshly squeezed lemon juice, extra virgin olive oil, minced garlic, dried oregano, salt, and black pepper until fully combined. Add the dried potato pieces to the bowl and toss them thoroughly in the marinade, making sure each piece is well coated with the flavorful mixture. This step is essential for infusing your Greek Potatoes with vibrant flavor.
Step 5: Arrange
Spread the marinated potatoes out in a single layer on a large baking sheet, ensuring they are not overcrowded. This helps them roast properly, allowing for maximum crispiness. Utilize parchment paper for easier cleanup and to prevent sticking. Avoid overlapping the pieces to let each potato have their chance to develop crispy edges.
Step 6: Initial Roast
Place the baking sheet in the preheated oven and roast the potatoes for about 20 to 25 minutes. Resist the urge to stir or flip them during this time, as allowing them to sit helps form a crispy crust. You’ll want to keep an eye on them, looking for a nice golden-brown hue before continuing to the next step.
Step 7: Flip & Add Broth
After the initial roasting, carefully flip the potatoes to ensure even cooking on all sides. Pour vegetable or chicken broth around the edges of the baking sheet, creating steam that helps keep the potatoes moist while they roast. Return the baking sheet to the oven to allow the potatoes to soak up this added flavor.
Step 8: Final Roast
Continue roasting the potatoes for an additional 25 to 35 minutes. Flip them every 10 to 15 minutes to ensure they cook evenly and achieve that perfect golden-brown color. For extra crispiness, consider increasing the oven temperature to 425°F (220°C) for the last few minutes or broil them to finish, but watch closely to prevent burning.
Step 9: Rest & Garnish
Once the potatoes are fork-tender and gloriously golden-brown, remove them from the oven and let them rest on the baking sheet for about 5 to 10 minutes. This resting time helps them firm up slightly. Before serving, garnish the Greek Potatoes with fresh parsley or oregano to add a pop of color and freshness, enhancing both the presentation and flavor.
Make Ahead Options
These Greek Potatoes are a fantastic option for meal prep, saving you precious time on busy weeknights! You can wash, peel, and cut the potatoes up to 24 hours in advance—just store them submerged in cold water in the refrigerator to prevent browning. Additionally, you can prepare the marinade (lemon juice, olive oil, garlic, oregano, salt, and pepper) and refrigerate it separately for up to 3 days. When ready to cook, drain and dry the potatoes, toss them in the marinade, then follow the roasting instructions as detailed. This way, you’ll enjoy crispy, flavorful Greek Potatoes with minimal effort, making your meals not just quicker but still delicious!
What to Serve with Authentic Greek Potatoes?
There’s nothing quite like the delicious aroma of roasted potatoes mingling with vibrant, fresh flavors, ready to create the perfect meal.
-
Roasted Lamb: Rich and succulent, the savory notes of roasted lamb elevate the lemony zing of Greek Potatoes, resulting in a match made in Mediterranean heaven.
-
Grilled Chicken Souvlaki: Juicy grilled chicken skewers bring a delightful smoky flavor to your plate, perfectly balancing the crispy potatoes’ texture and brightness.
-
Baked Fish: Light and flaky, a beautifully baked fish dish, such as lemon cod, pairs wonderfully with the zesty and herbaceous qualities in the Greek Potatoes for a refreshing meal.
-
Greek Salad: The crunch of fresh vegetables, paired with tangy feta and olives, complements the hearty potatoes while adding a splash of vibrant color to your dinner spread.
-
Hummus and Pita Bread: Creamy yet light, hummus provides a smooth contrast to the crispy potatoes, and when scooped with warm pita, it becomes an inviting appetizer or side.
-
Tzatziki Sauce: This cooling yogurt-based sauce, infused with cucumber and dill, not only adds a refreshing bite but also enhances the Mediterranean flavor profile of your meal.
-
Roasted Vegetables: A medley of seasonal vegetables, roasted to caramelized perfection, provides additional textures and colors alongside your Greek Potatoes for an extra hearty side.
-
Lemonade or Iced Tea: Bright, refreshing drinks like homemade lemonade or iced tea pair nicely with the vibrant flavors of the potatoes and help to quench your thirst while enjoying this comforting dish.
Storage Tips for Greek Potatoes
Room Temperature: Allow Greek Potatoes to cool completely before storing; they can be left out for up to 2 hours.
Fridge: Store leftovers in an airtight container in the refrigerator for up to 3 days. Reheat in the oven to restore their crispy texture.
Freezer: For longer storage, freeze Greek Potatoes in a single layer on a baking sheet, then transfer to an airtight container. They can be frozen for up to 2 months.
Reheating: To reheat from the fridge or freezer, preheat the oven to 400°F (200°C) and bake until heated through and crispy again, about 10-15 minutes.
Greek Potatoes Variations & Substitutions
Feel free to put your own spin on these delightful Greek Potatoes—the possibilities are endless!
- Dairy-Free: Skip the cheese topping or use nutritional yeast for a cheesy flavor without dairy.
- Herb Boost: Mix fresh thyme or rosemary with the oregano to add aromatic notes that brighten the dish. A little extra fragrance goes a long way!
- Spicy Kick: Add crushed red pepper flakes or a dash of cayenne for a warming, spicy twist that complements the lemony flavor beautifully.
- Roasted Veggie Medley: Toss in other veggies like carrots or bell peppers alongside the potatoes for a nutritious, colorful dish. They will caramelize beautifully in the oven!
- Zesty Marinade: Combine lemon and orange juice for a citrusy burst that adds another layer of flavor to your potatoes. The sweetness of the orange works wonders!
- Different Oils: Try sesame oil or avocado oil for a unique taste; each brings its own character that beautifully enhances the potatoes.
- Texture Variation: For a crispy topping, mix breadcrumbs with your olive oil and herbs before sprinkling over the potatoes during the last 10 minutes of roasting. It’s like a crunchy crown!
Embark on a culinary adventure with these variations, and if you’re looking for other delicious sides, try pairing these Greek Potatoes with Crockpot Garlic Potatoes or Ground Turkey Potatoes!
Tips for the Best Greek Potatoes
Dry Potatoes Well: Ensure your potatoes are thoroughly dried after soaking to achieve that coveted crispy texture—damp potatoes won’t roast effectively.
Marinade Magic: Allow the potatoes to marinate for at least 15 minutes before cooking for a deeper flavor infusion; don’t skip this step!
Watch the Broiling: If you choose to broil for extra crispiness, stay close and keep a close eye—things can go from perfect to burnt very quickly!
Flavor Variations: Experiment with spices like smoked paprika or fresh rosemary to elevate your Greek Potatoes. Just a pinch can add warm, new dimensions.
Batch Cooking: It’s better to roast in smaller batches; overcrowding the pan leads to steaming rather than crisping, so spread them out!
Quality Ingredients: Use the best quality olive oil you can find; it really makes a difference in flavor and texture in your Greek Potatoes.
Greek Potatoes Recipe FAQs
What type of potatoes are best for Greek Potatoes?
Absolutely! For the crispiest and most delicious results, I highly recommend using Russet or Yukon Gold potatoes. These varieties have the perfect balance of starch and moisture, ensuring that your Greek Potatoes turn out delightfully crispy on the outside while remaining fluffy within.
How can I store leftover Greek Potatoes?
Very simple! Allow the Greek Potatoes to cool completely, then store them in an airtight container in the refrigerator for up to 3 days. When you’re ready to enjoy them again, just reheat them in the oven at 400°F (200°C) for about 10-15 minutes to regain their crispy texture.
Can I freeze Greek Potatoes?
Yes, you can! To freeze Greek Potatoes, first, arrange them in a single layer on a baking sheet and freeze until solid. Then, transfer them to an airtight container or freezer bag. They can be kept in the freezer for up to 2 months. For reheating, preheat your oven to 400°F (200°C) and bake the frozen potatoes for 20-25 minutes, flipping them halfway through.
What should I do if my Greek Potatoes are not crispy?
No worries! If your Greek Potatoes turn out soggy, it might be that they weren’t dried enough after soaking or were overcrowded on the baking sheet. Ensure that after soaking, you dry them very well using a clean towel. When baking, spread them out in a single layer so they have room to crisp up. If they need a little extra help, try increasing the oven temperature to 425°F (220°C) in the final roasting stage for a few minutes.
Are Greek Potatoes suitable for a gluten-free diet?
Absolutely! These Authentic Greek Potatoes are naturally gluten-free and vegetarian-friendly, making them an excellent side dish for various dietary needs. Just ensure that any broth used is also labeled gluten-free to keep the dish safe for those avoiding gluten. Enjoy knowing that everyone at your table can share in this delicious delight!
Greek Potatoes: Crispy Lemon Delight for Every Meal!
Ingredients
Equipment
Method
- Begin by washing and scrubbing your Russet or Yukon Gold potatoes under cold water. For a smoother texture, peel them if you prefer. Cut the potatoes into consistent wedges or chunks, about 1 to 1.5 inches in size.
- Submerge the potato pieces in a large bowl of cold water and let them soak for 30 to 60 minutes. Drain thoroughly and dry them completely.
- Preheat your oven to 400°F (200°C). This ensures evenly roasted Greek Potatoes.
- In a large mixing bowl, whisk together lemon juice, olive oil, minced garlic, oregano, salt, and pepper. Toss the dried potato pieces in the marinade until well coated.
- Spread the marinated potatoes in a single layer on a baking sheet lined with parchment paper.
- Roast the potatoes in the preheated oven for about 20 to 25 minutes without stirring.
- Carefully flip the potatoes and pour broth around the edges of the baking sheet. Return to the oven.
- Continue to roast for an additional 25 to 35 minutes, flipping every 10 to 15 minutes for even cooking.
- Once fork-tender and golden-brown, remove from oven and let rest for 5 to 10 minutes. Garnish with parsley or oregano before serving.
Leave a Reply