
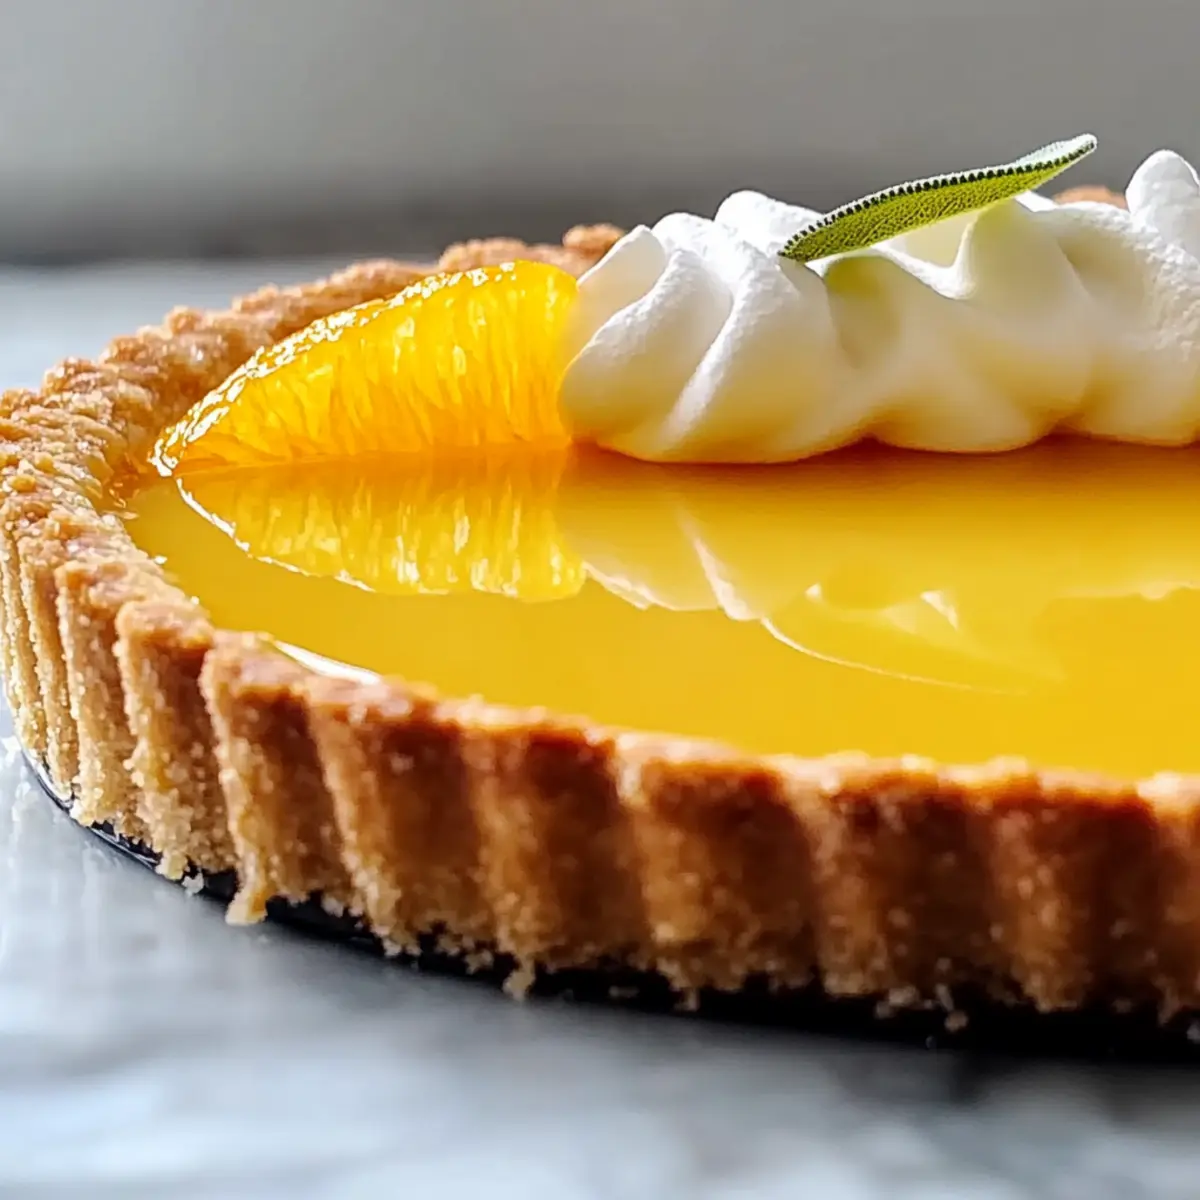
As the last rays of sunlight dance through my kitchen window, the scent of zesty oranges fills the air, leading me to an enchanting, sun-kissed Classic Orange Tart. This elegant dessert captures the essence of homemade joy, combining a tender, flaky crust with a luscious orange curd that’s both sweet and tangy. Best of all, it requires simple ingredients and no special tools, making it perfect for any home-chef eager to impress without the fuss. Whether it’s a special occasion or a cozy dinner, this delightful tart can be prepped ahead of time, giving you more moments to cherish with loved ones. Ready to brighten up your dessert table? Let’s dive into this zesty adventure together!
Why Is This Orange Tart So Special?
Impressive Simplicity: You’ll be amazed at how easy it is to create a stunning dessert with just a handful of common ingredients.
Vibrant Flavor: The delightful balance of sweet and tart from the fresh orange juice and zest will leave your taste buds dancing.
Make-ahead Convenience: Prepare the tart shell and orange curd in advance, making it a stress-free option for last-minute gatherings or dinner parties.
Crowd-Pleasing Appeal: With its exquisite presentation, this homemade Classic Orange Tart is sure to impress your guests and elevate any occasion.
Versatile Options: Feel free to switch up toppings or add a swirl of berry puree for a unique twist, enhancing your dessert experience.
Classic Orange Tart Ingredients
• Here’s what you need to create the perfect Classic Orange Tart!
For the Crust
- All-Purpose Flour – Base for the tart crust; provides structure. Can substitute with gluten-free flour.
- Powdered Sugar – Sweetens the tart crust and keeps it tender. No alternative needed.
- Almond Flour – Adds flavor and helps create a flaky texture. Substitute with additional all-purpose flour if necessary.
- Salt – Enhances flavor in the crust; promotes browning. No substitutes needed.
- Orange Zest – Infuses the pastry with citrus aroma; adds flavor. Can swap with lemon zest for variation.
- Unsalted Butter – Creates a rich, buttery crust; chilled for flakiness. Use vegan butter for a dairy-free option.
- Egg Yolk – Acts as a binding agent for the dough; contributes richness. No direct substitute.
- Cold Water – Helps bring the dough together without melting the butter. Use ice water for best results.
For the Orange Curd
- Fresh Orange Juice – Main flavoring in the curd; provides acidity and sweetness. Can substitute with a mix of orange and lemon juice.
- Superfine Sugar – Sweetens the curd; dissolves easily. Regular granulated sugar can be used in a pinch.
- Cornstarch – Thickens the curd; helps achieve a smooth texture. Can substitute with arrowroot starch.
- Gelatin – Stabilizes the curd; ensures it sets properly. For vegetarian, use agar-agar instead.
For the Whipped Topping
- Heavy Cream – For whipped topping; adds richness. Use coconut cream for a dairy-free option.
Optional Garnishes
- Pistachios – Adds a delightful crunch and color contrast.
- Mint Leaves – Freshens up the presentation and flavor profile.
- Fresh Berries – Elevates the tart visually and adds a pop of sweetness.
Now you’re all set to embark on your zesty baking adventure with this Classic Orange Tart!
Step‑by‑Step Instructions for Classic Orange Tart
Step 1: Prepare Crust
In a food processor, combine all-purpose flour, powdered sugar, almond flour, salt, and orange zest. Pulse in chilled, cubed butter until the mixture resembles coarse crumbs. Then, add an egg yolk and enough cold water to form a shaggy dough. Wrap the dough in plastic wrap and chill for at least 30 minutes to allow the flavors to meld and the butter to re-solidify.
Step 2: Blind Bake Tart Shell
Roll out the chilled dough on a lightly floured surface to fit a tart pan. Press the dough firmly into the pan’s edges and refrigerate for another 20 minutes. Preheat your oven to 200°C (390°F). Line the tart shell with foil, fill with weights, and bake for 12-15 minutes. Remove the weights and foil, then bake for an additional 10-12 minutes until the crust is golden brown. Allow cooling completely.
Step 3: Make Orange Curd
In a saucepan, heat fresh orange juice over medium heat until steaming, but not boiling. In a mixing bowl, whisk together egg yolks, superfine sugar, and cornstarch until smooth. Gradually pour the warm juice into the egg mixture, whisking constantly. Return this mixture to the saucepan, stirring until it thickens and bubbles, about 5-7 minutes. Remove from heat and stir in gelatin and butter until melted and smooth.
Step 4: Assemble Tart
Once the orange curd has cooled slightly, pour it into the prepared tart shell, smoothing the top with a spatula. Gently tap the tart pan on the counter to remove any air bubbles. Cover with plastic wrap and refrigerate for a minimum of 3 hours, or even better, overnight, to allow the curd to set perfectly.
Step 5: Prepare Topping
When ready to serve the Classic Orange Tart, whip heavy cream with a bit of sugar until stiff peaks form. Once the tart has set, garnish it with dollops of whipped cream, fresh orange segments, and any additional toppings, such as pistachios or mint leaves, to elevate the presentation. Serve chilled and savor every delicious bite!
What to Serve with Classic Orange Tart
Brighten your dessert table with delightful pairings that enhance the zesty flavors of this elegant tart.
-
Creamy Mashed Potatoes: Their rich, buttery flavor creates a delightful contrast to the tart’s brightness, perfect for a comforting meal.
-
Herb-Crusted Chicken: Juicy chicken with savory herbs will complement the citrus notes of the tart, providing a balanced flavor profile.
-
Mixed Green Salad: A fresh salad tossed with tangy vinaigrette adds a crisp, light bite that refreshes the palate between sweet bites.
-
Sparkling White Wine: The effervescence of sparkling wine lifts the flavors, enhancing the fruity brightness of the orange tart without overpowering it.
-
Vanilla Bean Ice Cream: A scoop of creamy vanilla ice cream served alongside the tart marries well with the tangy orange curd, creating a delicious contrast.
-
Fresh Berries: Scatter a mix of raspberries or blueberries on the plate—they add a burst of flavor and a pop of color, enhancing the visual appeal of your dessert.
How to Store and Freeze Classic Orange Tart
Fridge: Keep the Classic Orange Tart covered in the refrigerator for up to 3 days. This helps preserve its flavor and texture.
Freezer: You can freeze the tart (without toppings) for up to 2 months. Wrap it tightly in plastic wrap followed by aluminum foil to prevent freezer burn.
Reheating: Thaw the tart in the fridge overnight before serving. For a chilled dessert, serve directly from the fridge.
Garnishing: Add fresh toppings like whipped cream or berries just before serving for the best taste and presentation.
Expert Tips for Classic Orange Tart
• Chill Your Dough: Properly chilling the dough is essential for flakiness. If it gets too warm while handling, it may become tough when baked.
• Blind Baking Wisely: To avoid a soggy crust, ensure thorough blind baking. Use pie weights or dried beans to keep the crust flat, especially during the first bake.
• Avoid High Heat for Curd: Cook the orange curd over medium heat only. High temperatures can lead to scrambled eggs and ruin the smooth texture.
• Longer Setting Time: For the best results, chill the tart for at least 6 hours or overnight. This allows the orange curd to set completely and flavors to meld beautifully.
• Don’t Skip the Garnish: While optional, toppings like pistachios and fresh berries add not just flavor but a vibrant visual appeal to your Classic Orange Tart.
Make Ahead Options
These Classic Orange Tart preparations are perfect for busy weeknights or special occasions! You can prepare the tart shell and orange curd up to 2 days in advance—simply store the baked tart shell covered with plastic wrap at room temperature and let the curd cool completely before refrigerating it. When you’re ready to serve, pour the curd into the cooled shell and refrigerate for at least 3 hours, preferably overnight. This ensures the curd sets beautifully, guaranteeing a delightful texture. For the freshest presentation, whip your cream and add any garnishes right before serving, ensuring that your Classic Orange Tart remains just as delicious as when freshly made. Enjoy your time-saving culinary masterpiece!
Classic Orange Tart Variations & Substitutions
Feel free to get creative and customize this Classic Orange Tart into something uniquely yours!
-
Lemon Twist: Swap fresh orange juice with lemon juice for a zesty alternative that brightens the tart even more!
-
Berry Infusion: Add a swirl of raspberry or strawberry puree into the orange curd before chilling for a stunningly colored layer.
-
Gluten-Free: Use a gluten-free flour blend in place of all-purpose flour to accommodate dietary restrictions without sacrificing flavor.
-
Nut-Free Option: Omit almond flour and use solely all-purpose flour to make this tart nut-free while retaining that delightful texture.
-
Tropical Vibes: Incorporate pineapple juice with the orange juice for a refreshing Hawaiian twist that transports your taste buds to paradise.
-
Spice it Up: Mix in a pinch of cinnamon or nutmeg to the orange curd for a delightful, warm spice that elevates the flavor profile.
-
Chill with Coconut: For a dairy-free option, swap heavy cream with coconut cream to whip up a luscious alternative that complements the citrus.
-
Simple Garnish Upgrade: Top with toasted coconut flakes along with your favorite fruits for an exciting and textured presentation.
Feel free to explore these variations and let your creativity shine. Each twist brings its own charm, making every Classic Orange Tart a delightful surprise. For more ideas, check out my easy Berry Tart or explore the world of Coconut Desserts for more inspiration!
Classic Orange Tart Recipe FAQs
What kind of oranges should I use for the tart?
Absolutely! Fresh, juicy oranges are ideal for making your curd. Look for oranges that are firm and fragrant, avoiding any with dark spots or blemishes. Navel oranges are a great choice for their sweetness, while blood oranges can add a stunning color and unique flavor to your tart.
How long can I store the Classic Orange Tart?
The Classic Orange Tart can be kept in the refrigerator for up to 3 days. Make sure to cover it tightly with plastic wrap or store it in an airtight container to maintain its freshness and flavor. I recommend letting it chill overnight for the best flavor integration!
Can I freeze the tart?
Yes, you can freeze the Classic Orange Tart! Here’s how: wrap it tightly in plastic wrap, then in aluminum foil to prevent freezer burn. It will keep well for up to 2 months. When you’re ready to enjoy it, thaw in the refrigerator overnight before serving, adding any fresh toppings like whipped cream right before serving.
Help! My orange curd won’t thicken! What did I do wrong?
The most common issue with curd not thickening is cooking it over too high heat, which may cause the eggs to scramble. Be sure to cook your curd over medium heat and stir continuously. If it’s still not thickening after about 7 minutes of cooking, try whisking in a tablespoon more of cornstarch dissolved in a little cold water. Return it to the heat and stir until you achieve a smooth consistency.
Is this Classic Orange Tart safe for people with allergies?
Always check with your guests, as allergies can vary widely! This tart contains common allergens like gluten and dairy. For gluten-free options, substitute the all-purpose flour with a gluten-free blend. For dairy allergies, you can use vegan butter and coconut cream in place of the regular butter and heavy cream. Just make sure to confirm the ingredients are safe for specific dietary needs!
Can I make the tart ahead of time?
Very! The tart shell and orange curd can be prepared a day in advance. Simply store the cooled shell in an airtight container at room temperature and the curd in the refrigerator. Assemble and add your fresh whipped topping just before serving, ensuring it’s at its best when enjoyed!
Delightful Classic Orange Tart that Impresses Every Time
Ingredients
Equipment
Method
- Prepare Crust: In a food processor, combine all-purpose flour, powdered sugar, almond flour, salt, and orange zest. Pulse in chilled, cubed butter until the mixture resembles coarse crumbs. Then, add an egg yolk and enough cold water to form a shaggy dough. Wrap the dough in plastic wrap and chill for at least 30 minutes.
- Blind Bake Tart Shell: Roll out the chilled dough on a lightly floured surface to fit a tart pan. Press the dough firmly into the pan's edges and refrigerate for another 20 minutes. Preheat your oven to 200°C (390°F). Line the tart shell with foil, fill with weights, and bake for 12-15 minutes. Remove the weights and foil, then bake for an additional 10-12 minutes until the crust is golden brown. Allow cooling completely.
- Make Orange Curd: In a saucepan, heat fresh orange juice over medium heat until steaming. In a mixing bowl, whisk together egg yolks, superfine sugar, and cornstarch until smooth. Gradually pour the warm juice into the egg mixture, whisking constantly. Return this mixture to the saucepan, stirring until it thickens and bubbles, about 5-7 minutes. Remove from heat and stir in gelatin and butter until melted and smooth.
- Assemble Tart: Once the orange curd has cooled slightly, pour it into the prepared tart shell, smoothing the top with a spatula. Gently tap the tart pan on the counter to remove any air bubbles. Cover with plastic wrap and refrigerate for a minimum of 3 hours, or overnight, to allow the curd to set perfectly.
- Prepare Topping: When ready to serve the Classic Orange Tart, whip heavy cream with a bit of sugar until stiff peaks form. Once the tart has set, garnish it with dollops of whipped cream, fresh orange segments, and any additional toppings.
Leave a Reply