
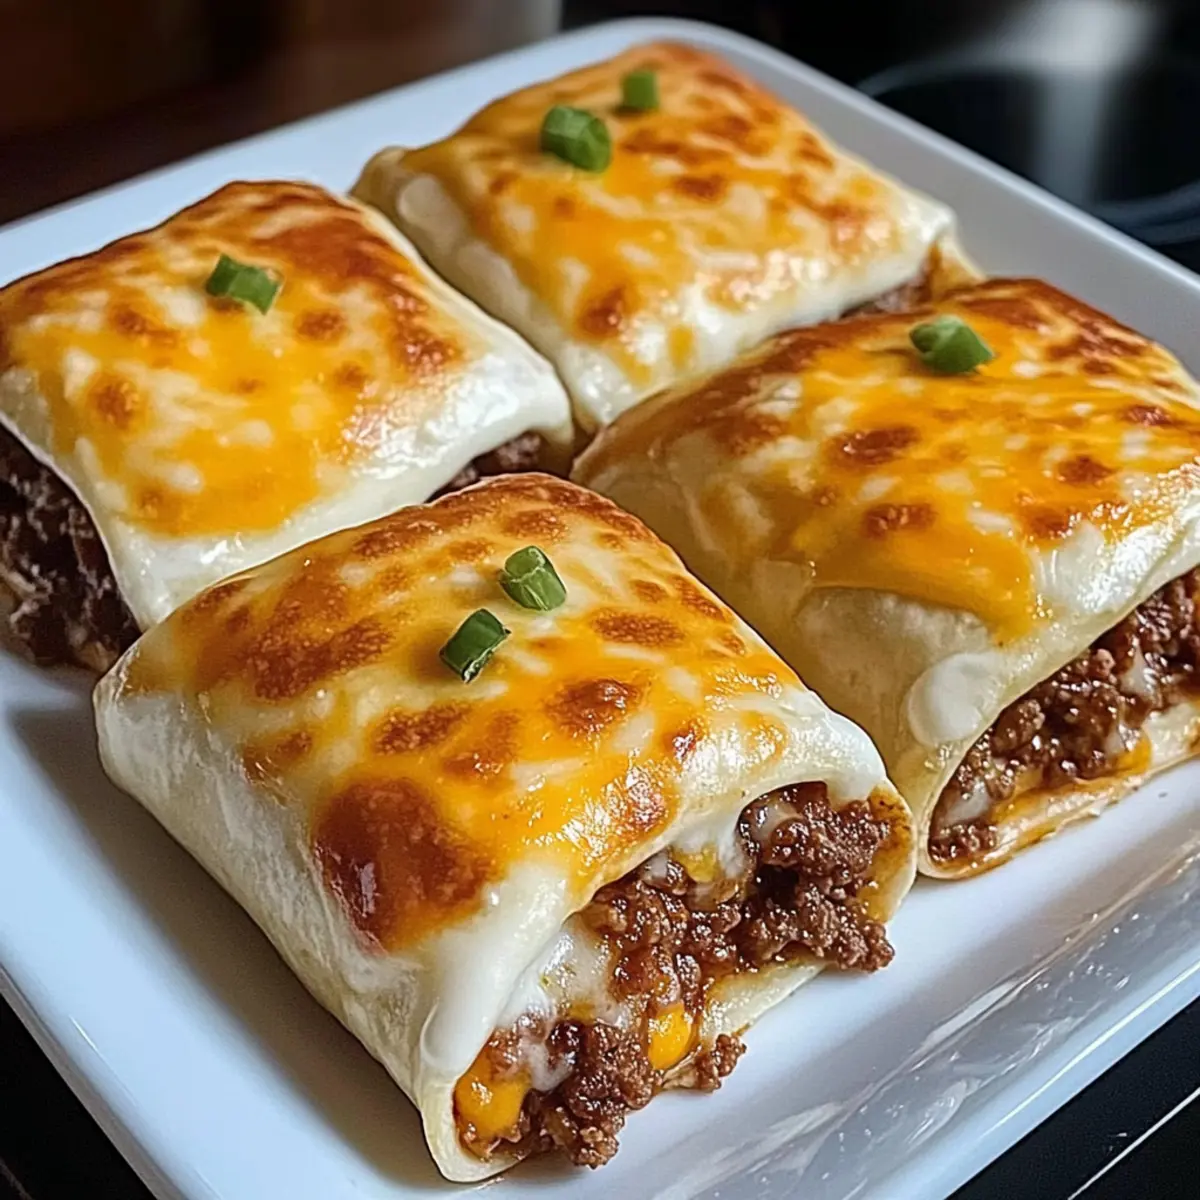
“Have you ever craved that cozy, satisfying meal that feels like a warm hug? My Loaded Cheesy Pocket Tacos deliver just that, marrying the vibrant flavors of Mexican cuisine with the cheesy goodness we all love. This recipe is a game-changer for those busy weeknights when you want something delicious without spending hours in the kitchen! Not only are these tacos incredibly quick to whip up, but they are also family-friendly—sure to please both kids and adults alike. Imagine crispy taco shells encasing a gooey, cheesy filling bursting with flavor. Are you ready to elevate your dinner game and savor a slice of cheesy heaven?”
Why Do You Need These Tacos?
Quick and Convenient: Perfect for those busy weeknights, these Loaded Cheesy Pocket Tacos come together in no time, making dinner a breeze.
Crowd-Pleasing Flavor: With their rich, savory filling and gooey texture, these tacos are sure to satisfy both kids and adults alike.
Customizable Options: Want to spice things up? Try adding black beans or jalapeños, or switch out the cheese for something sharper!
Make-Ahead Magic: Prepare them in advance and pop them in the oven when ready to serve. A savory dinner triumph awaits!
Crispy Delight: Enjoy a satisfying crunch with every bite, thanks to their crisp taco shells holding all that cheesy goodness. If you love quick meals, consider also checking out my recipe for Spicy Southern Cheesy or Fish Tacos Lime for even more flavors.
Loaded Cheesy Pocket Tacos Ingredients
• Get ready for a cheesy experience!
For the Taco Shells
- Taco Shells – Look for pre-made shells for easy assembly that holds your delicious filling.
For the Filling
- Ground Beef or Chicken – Adds protein and heartiness; substitute with turkey or plant-based options for a lighter option.
- American Cheese – Delivers a creamy, gooey texture; can be swapped for cheddar or a vegan cheese alternative.
- Taco Seasoning – Enhances flavor with classic spices; consider a homemade seasoning mix for added health benefits.
For Optional Toppings
- Sour Cream – Offers a smooth, tangy finish; Greek yogurt can be a healthier substitute.
- Salsa or Pico de Gallo – Adds a fresh and zesty kick; consider fresh chopped tomatoes for a simple change.
With these ingredients, you’re all set to create satisfying Loaded Cheesy Pocket Tacos that your family will rave about!
Step‑by‑Step Instructions for Loaded Cheesy Pocket Tacos
Step 1: Preheat the Oven
Begin by preheating your oven to the temperature specified on your taco shell package, usually around 350°F (175°C). This ensures your Loaded Cheesy Pocket Tacos come out crispy and delicious. While the oven heats up, gather your ingredients—having everything in place makes the cooking process seamless!
Step 2: Cook the Filling
In a large skillet over medium heat, add your choice of ground beef or chicken, breaking it apart with a wooden spoon. Sprinkle in the taco seasoning and cook until the meat is browned and fully cooked, about 5-7 minutes. Stir occasionally to ensure even cooking. You’ll know it’s ready when the meat is no longer pink and exudes a mouthwatering aroma.
Step 3: Assemble the Tacos
Once your filling is cooked, it’s time to assemble the Loaded Cheesy Pocket Tacos. Carefully fill each taco shell with a generous amount of the meat mixture. Be sure to pack it in well to create a hearty taco, allowing each bite to overflow with flavor. This step brings you one step closer to indulging in cheesy goodness!
Step 4: Add the Cheese
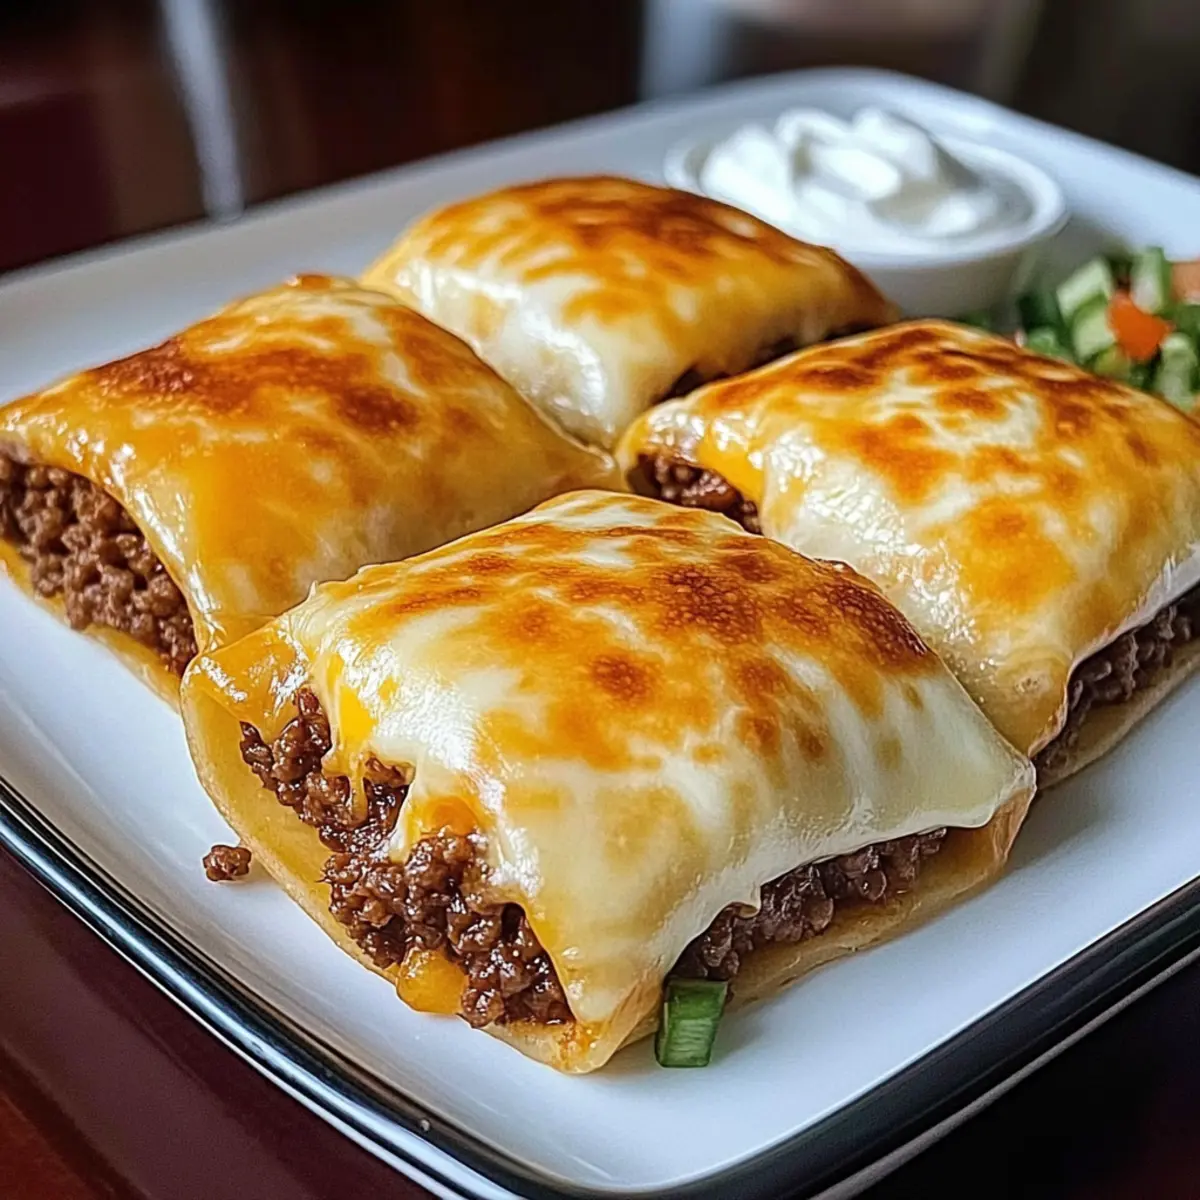
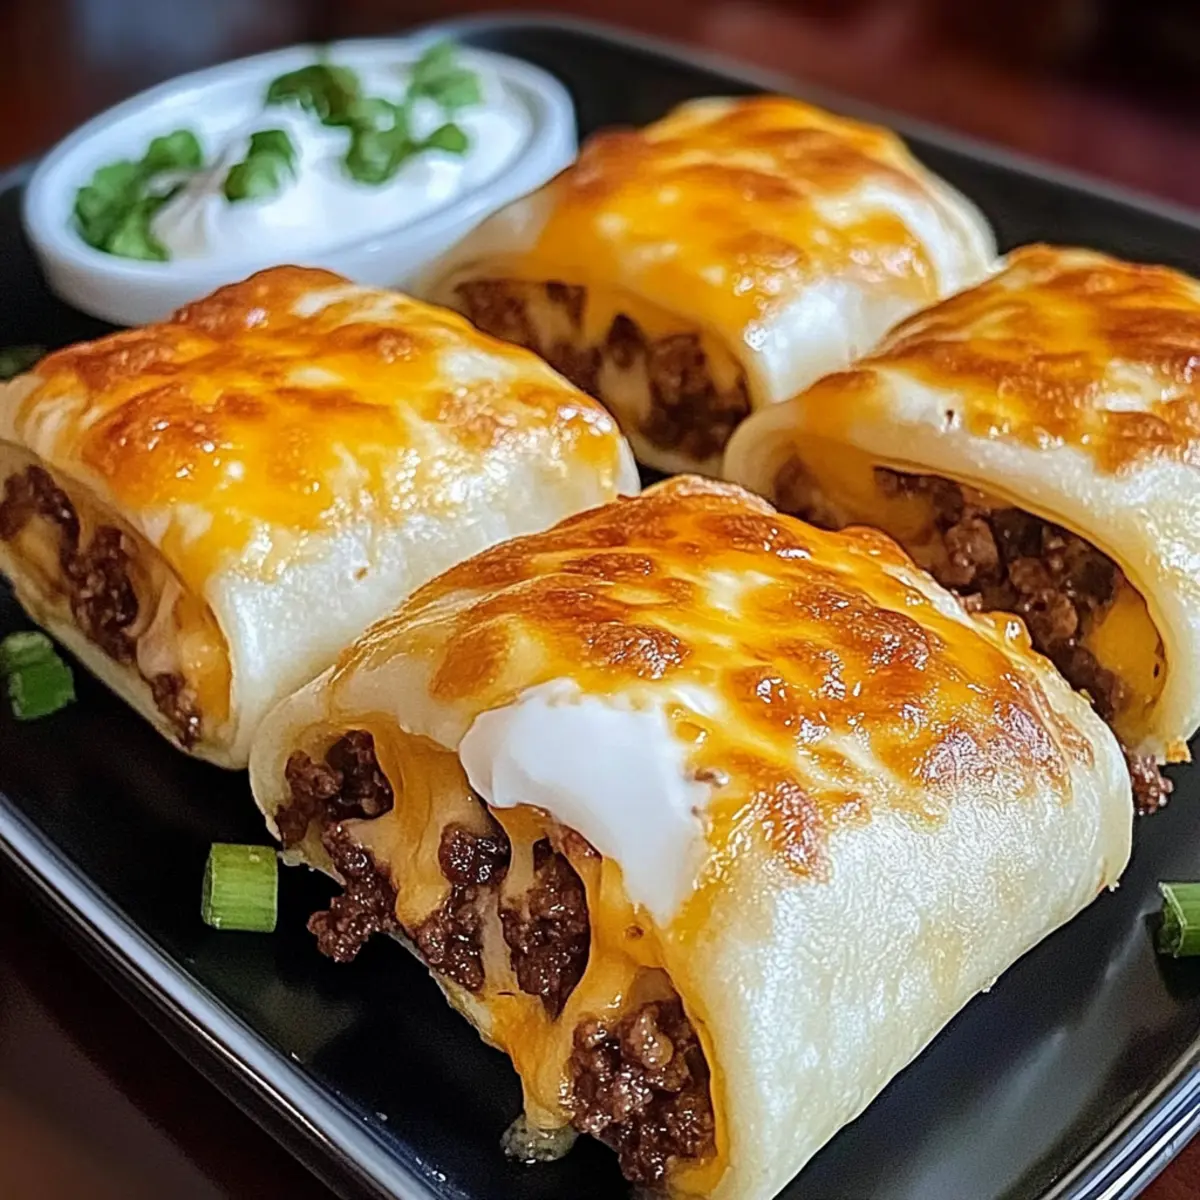
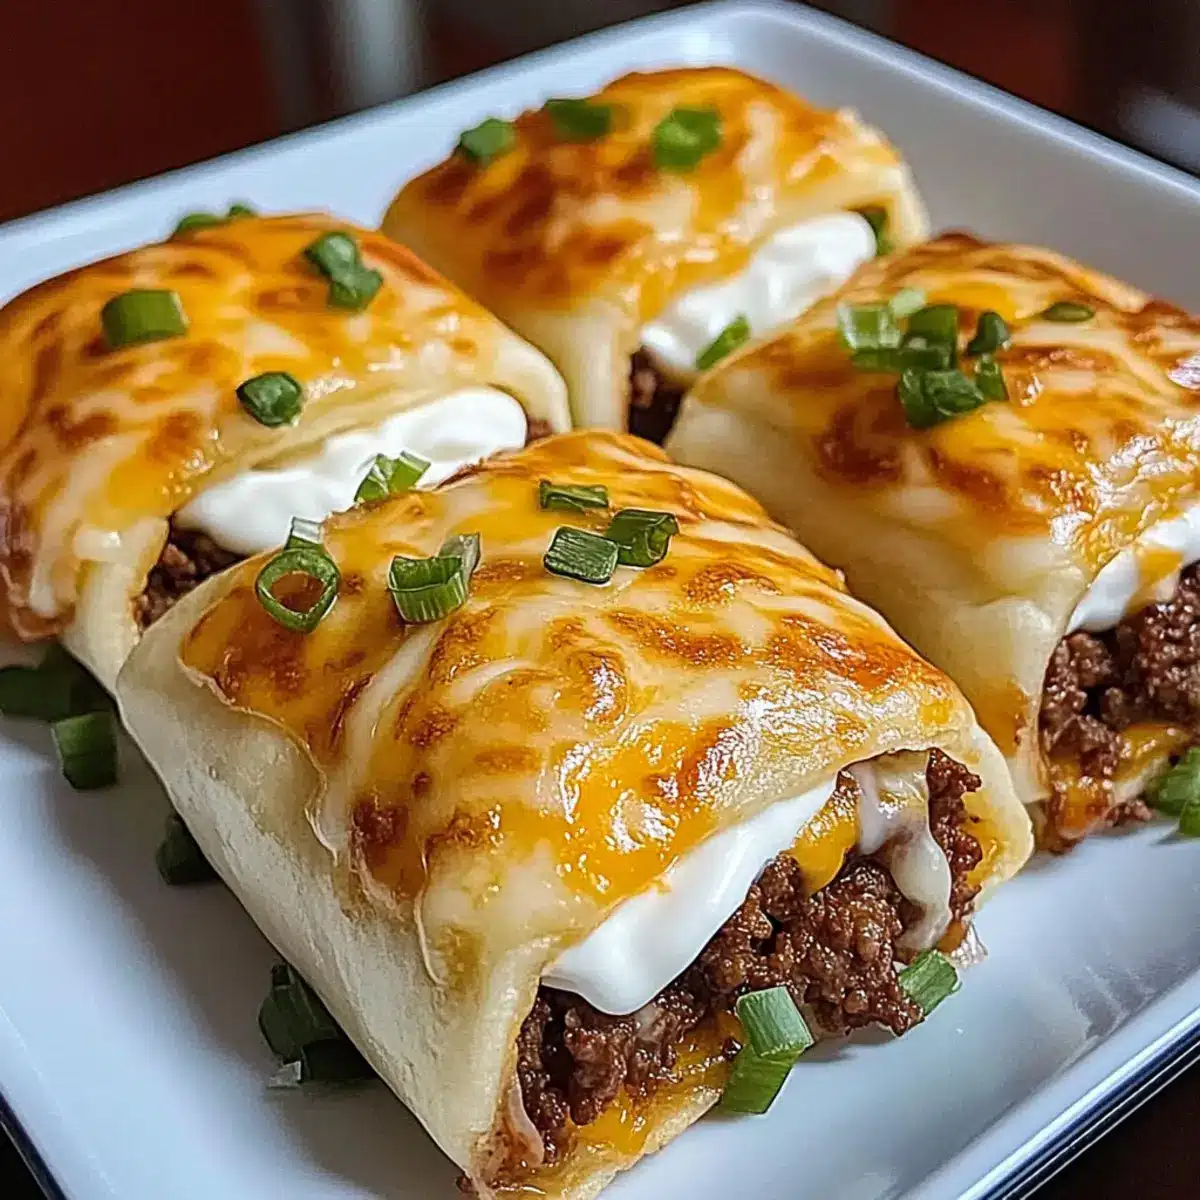
Next, sprinkle slices or shredded American cheese over the filled taco shells, ensuring they are well-covered. This creamy layer will melt beautifully and bind all the delicious flavors together. Take a moment to appreciate the sight of the colorful shells and melting cheese before baking!
Step 5: Bake to Perfection
Place the assembled tacos on a baking sheet and transfer them to your preheated oven. Bake for about 5-10 minutes or until the taco shells are golden brown and the cheese is gooey and bubbly. Keep an eye on them to prevent over-crisping, as the visual cues will guide you to their perfect doneness.
Step 6: Serve Warm
Once baked, carefully remove the Loaded Cheesy Pocket Tacos from the oven. Allow them to cool slightly before serving. For extra flavor, consider garnishing with sour cream, salsa, or fresh chopped veggies. This delightful presentation not only makes for a vibrant dish but also enhances the overall taco experience!
Expert Tips for Loaded Cheesy Pocket Tacos
• Seal It Well: Ensure taco shells are well-sealed to prevent leakage during baking. A tight seal keeps all the cheesy goodness inside!
• Watch the Bake Time: Check the tacos frequently in the oven; they’re ready when golden brown. Over-baking can lead to overly crispy shells.
• Customize Your Fillings: Feel free to experiment with toppings or fillings, like adding black beans or changing the cheese. This makes your Loaded Cheesy Pocket Tacos uniquely yours!
• Prep in Advance: For busy nights, assemble tacos ahead and store in the fridge. Bake them fresh just before dinner to retain crispiness.
• Adjust Spice Levels: If your family loves heat, consider adding jalapeños or using a spicier taco seasoning to kick things up a notch!
Storage Tips for Loaded Cheesy Pocket Tacos
Fridge: Store any leftover Loaded Cheesy Pocket Tacos in an airtight container for up to 3 days. This keeps them fresh and flavorful, ready for a quick snack or meal.
Freezer: For longer storage, freeze assembled but unbaked tacos in a single layer. Use parchment paper between layers and airtight wrapping to prevent freezer burn. Use within 2 months for best quality.
Reheating: To reheat, bake thawed tacos at 350°F (175°C) for about 10-15 minutes, or until heated through and the cheese is gooey. This method helps maintain their crispy texture.
Make-Ahead: Assemble the tacos before baking, then refrigerate or freeze. This makes for a perfect meal prep option—simply pop them in the oven when you’re ready to serve!
Make Ahead Options
These Loaded Cheesy Pocket Tacos are perfect for meal prep enthusiasts! You can prepare the meat filling up to 3 days in advance and store it in an airtight container in the fridge. To maintain quality, ensure it cools completely before refrigerating, preventing condensation. You can also pre-fill the taco shells, keeping them assembled for up to 24 hours. Just remember to refrigerate them tightly wrapped to keep them fresh. When ready to serve, simply bake the stuffed tacos in a preheated oven until golden and the cheese is bubbly—just as delicious as fresh! With this make-ahead method, you’ll save time during busy weeknights and still enjoy a satisfying, homemade meal.
Loaded Cheesy Pocket Tacos Variations
Feel free to unleash your creativity and make these tacos truly your own with delicious twists and substitutions!
-
Rotisserie Chicken: Use shredded rotisserie chicken for a faster, time-saving filling that’s incredibly flavorful.
-
Spicy Pepper Jack: Swap American cheese for pepper jack to add a delightful kick of heat that warms your taste buds.
-
Loaded Veggie: Add black beans and corn for an extra layer of nutrition and texture, making each bite even more satisfying.
-
Gluten-Free: Use corn tortillas as a gluten-free alternative, creating a crispy base without sacrificing flavor.
-
Homemade Seasoning: Replace store-bought taco seasoning with a blend of cumin, paprika, and chili powder for a fresh flavor boost that’s all your own.
-
Creamy Avocado: Top your tacos with a creamy avocado slice or a dollop of guacamole instead of sour cream for a vibrant, fresh taste.
-
Extra Crunch: For added crunch, sprinkle crushed tortilla chips over the cheese before baking, delivering a delightful texture contrast.
-
Mild to Wild: Adjust the spice level to your preference by including chopped jalapeños or a dash of hot sauce for that fiery touch!
With these variations, your Loaded Cheesy Pocket Tacos can always surprise and delight! For more cheesy options, consider making my Cheesy Chicken Crescent or enjoy some zesty Fish Tacos Lime.
What to Serve with Loaded Cheesy Pocket Tacos
Elevate your taco night with delightful sides and beverages that make your meal truly unforgettable!
-
Crispy Sweet Potato Fries: The sweetness complements the savory tacos while adding a delightful crunch. These golden fries are perfect for dipping in tangy sauces too.
-
Zesty Cilantro Lime Rice: This fragrant, citrus-infused rice brings a refreshing balance to your spicy tacos. It’s not only filling but also an ideal base for all the delicious toppings.
-
Fresh Guacamole: Creamy and rich, guacamole enhances each bite of cheesy goodness with its smooth texture and vibrant flavors. Serve it as a dip or a topping for added zest.
-
Mexican Street Corn Salad: A colorful mix of corn, cilantro, and lime delivers both sweetness and freshness. This salad adds a refreshing counterpoint to the richness of the tacos.
-
Spinach Avocado Salad: Packed with nutrients, this light salad offers a crisp texture and a creamy dressing. It’s a great way to incorporate greens into your meal without sacrificing flavor.
-
Classic Margaritas: These refreshing cocktails, with their balance of sweet and tart, pair beautifully with the bold flavors of your tacos. The perfect way to unwind after a long day!
-
Churros for Dessert: End the meal on a sweet note with warm, cinnamon-sugar coated churros. They’re a popular Mexican treat that will round out your taco night with delightful indulgence!
Loaded Cheesy Pocket Tacos Recipe FAQs
How do I select the best ingredients for Loaded Cheesy Pocket Tacos?
Absolutely! For taco shells, choose pre-made ones marked crisp and sturdy to hold your filling without breaking. When selecting ground meat, look for fresh options with minimal additives—opt for leaner cuts if you want a lighter meal. If using cheese, ensure it’s fresh, as it melts better and enhances flavor!
How should I store leftover Loaded Cheesy Pocket Tacos?
You can store any leftovers in an airtight container in the fridge for up to 3 days. This keeps your tacos fresh, ready for a quick reheat. Just remember to enjoy them quickly to savor the cheesy goodness while it’s at its best!
Can I freeze Loaded Cheesy Pocket Tacos?
Yes! For a convenient meal prep option, freeze assembled but unbaked tacos by laying them out in a single layer on a baking tray. Use parchment paper between layers, then wrap tightly in plastic wrap or use an airtight container. They’ll maintain optimal quality for about 2 months. When ready to enjoy, bake them from frozen at 350°F (175°C) for about 15-20 minutes.
Why did my Loaded Cheesy Pocket Tacos turn out soggy?
The most common culprit for soggy tacos is undercooked fillings that release moisture. To prevent this, ensure your meat is browned thoroughly before filling the taco shells. Also, avoid overstuffing as this can lead to spillage and sogginess. If you find they’re soggy after baking, try pre-baking the shells for a few minutes to make them crispier!
Are there any dietary considerations for these tacos?
Certainly! If you have allergies to dairy, consider using vegan cheese alternatives or skip the cheese altogether for a dairy-free version. For gluten sensitivity, swap traditional taco shells with gluten-free varieties. This recipe is versatile enough to cater to various dietary needs, making it a family favorite for everyone!
How can I customize the spice level in Loaded Cheesy Pocket Tacos?
Very easy! Adjusting spice levels is fun and simple. Add diced jalapeños to the meat mixture or use a spicy taco seasoning blend for a kick. You can also mix in some hot sauce to your filling or serve it on the side. The more the merrier when it comes to flavor!
Loaded Cheesy Pocket Tacos: The Family Meal You'll Crave
Ingredients
Equipment
Method
- Preheat your oven to the temperature specified on your taco shell package, usually around 350°F (175°C). Gather your ingredients.
- In a large skillet over medium heat, cook ground beef or chicken with taco seasoning for 5-7 minutes until browned.
- Carefully fill each taco shell with the meat mixture, packing it in well.
- Sprinkle slices or shredded American cheese over the filled taco shells.
- Place the tacos on a baking sheet and bake for about 5-10 minutes until golden brown and the cheese is gooey.
- Remove from oven, let cool slightly, and serve garnished with sour cream, salsa, or fresh veggies.
Leave a Reply