
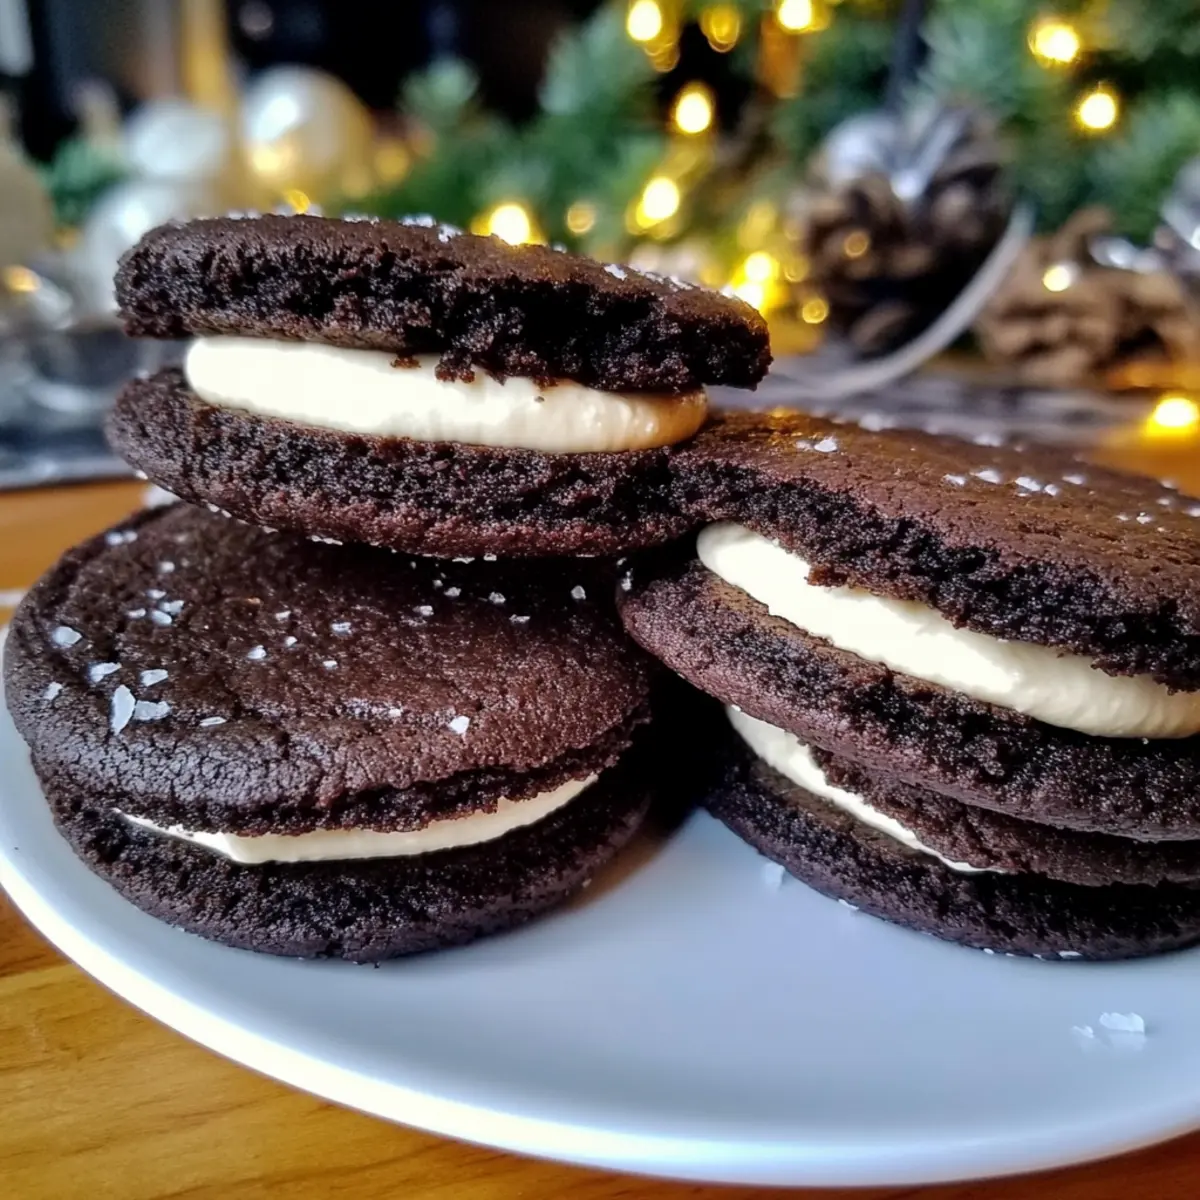
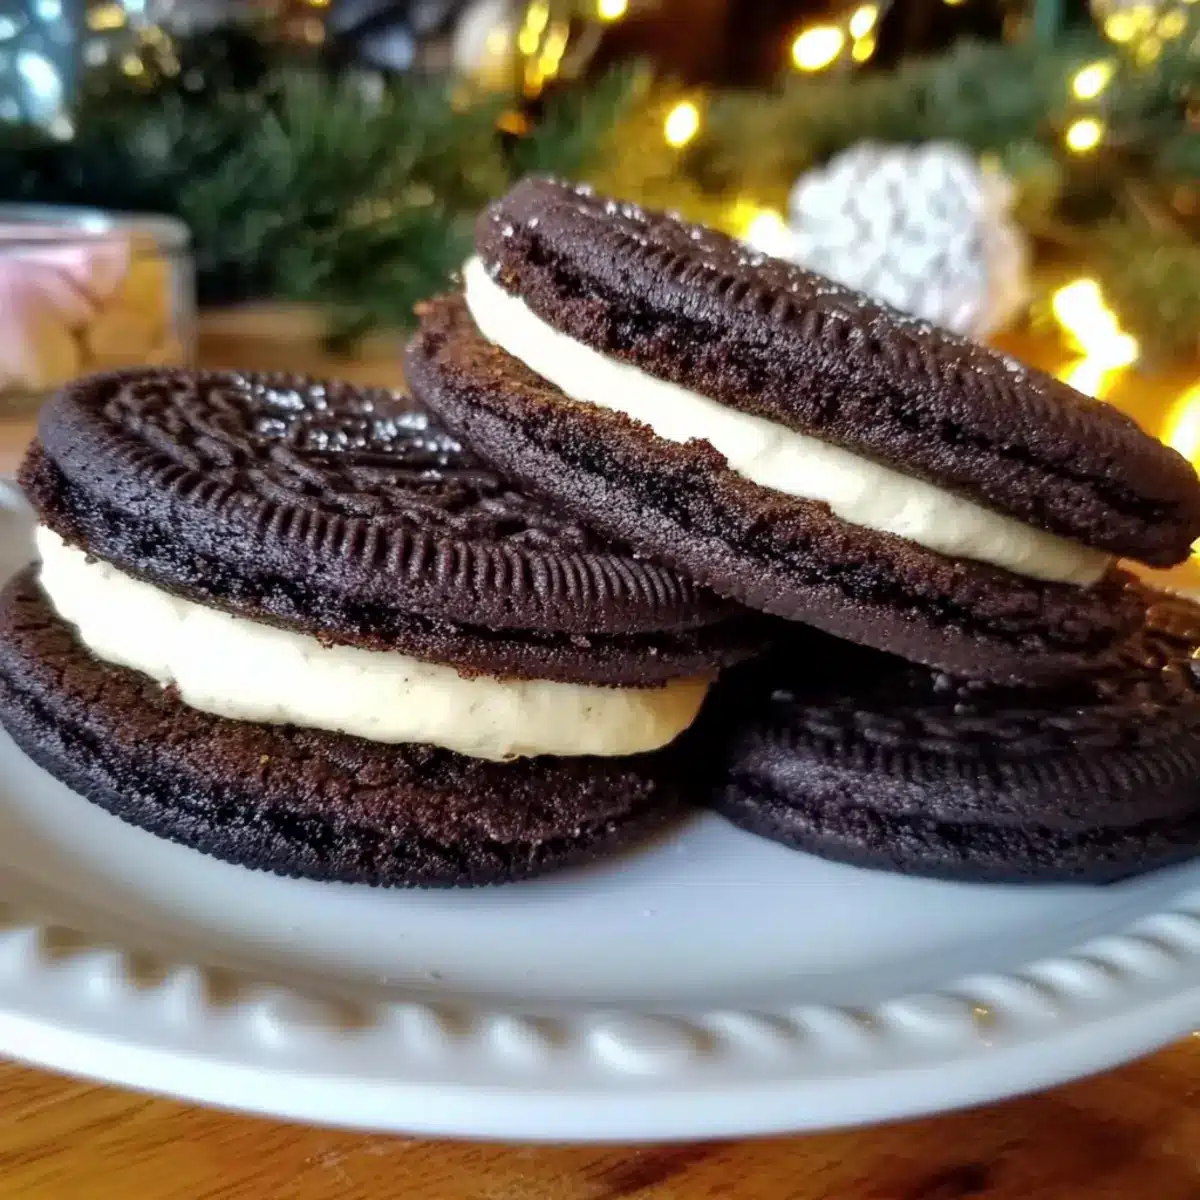
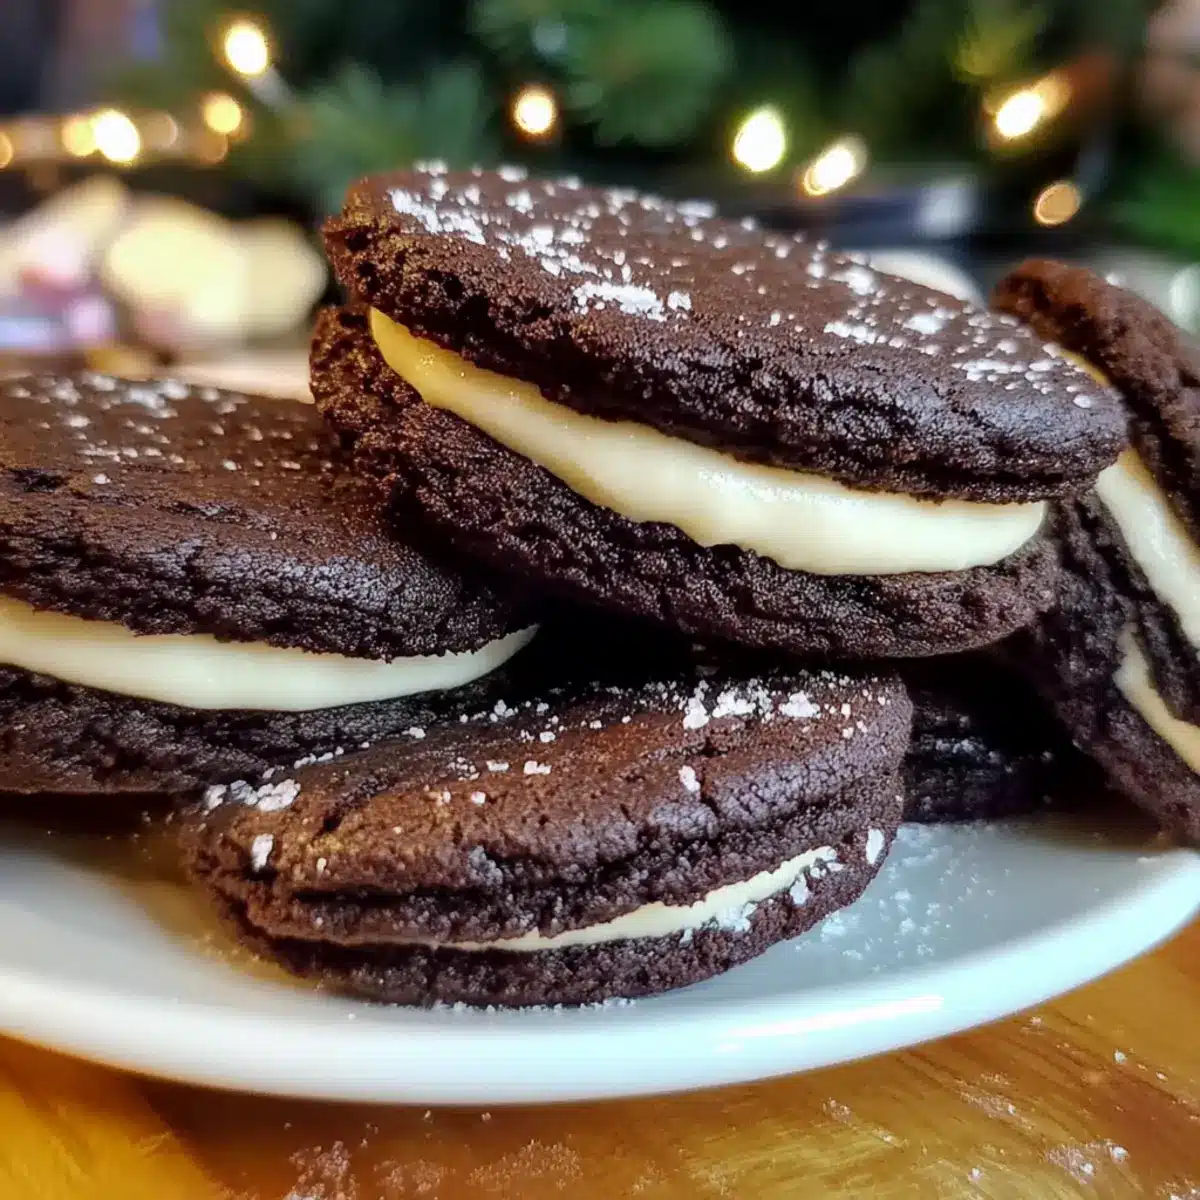
There’s something enchanting about the smell of cookies wafting through the house, and nothing quite beats the nostalgic delight of a classic Oreo cookie—except, perhaps, a batch of crispy homemade Oreo cookies! With each bite, you’ll discover a rich, chocolaty crunch and a tender center that feels like a warm hug for your taste buds. This recipe elevates the original with high-quality dark cocoa and a whisper of espresso powder for an unforgettable flavor. Plus, these cookies are quick to whip up, making them perfect for both spontaneous snacking and special gatherings. And if you follow a gluten-free or vegan lifestyle, I’ve got you covered with simple substitutions! Are you ready to bake up a deliciously nostalgic treat that’s sure to impress? Let’s dive into the recipe!
Why Are These Cookies So Special?
Nostalgic Appeal: Each bite of these Crispy Homemade Oreo Cookies brings back childhood memories, making them a hit for all ages.
Customization Options: With simple substitutions for gluten-free and vegan diets, everyone can enjoy them. Give your cookies a personal twist by adding orange zest or experimenting with different cream fillings.
Quick to Prepare: Whipping up a fresh batch is a breeze, ideal for a cozy night in or a festive gathering.
Rich, Indulgent Flavor: Made with dark cocoa and a hint of espresso, these cookies take classic Oreos to a new level. Pair them with a glass of cold milk or a scoop of vanilla ice cream for an irresistible treat! If you’re a fan of cookies, check out my Chewy Pumpkin Cookies for another delightful option.
Crispy Homemade Oreo Cookies Ingredients
For the Cookies
- All-Purpose Flour – Provides structure and texture. Substitution: Use gluten-free 1:1 baking flour for a gluten-free version.
- Dark Cocoa Powder – Adds rich chocolate flavor and color. Recommended to use Dutch-processed cocoa for deeper flavor.
- Baking Soda – Acts as a leavening agent to achieve the right texture. Check freshness to prevent flat cookies.
- Granulated Sugar – Contributes sweetness and aids in cookie crispness. Use all granulated sugar for a crunchier texture instead of brown sugar.
- Butter – Adds richness and creates tender cookies. Substitution: Use vegan butter for a dairy-free version.
- Espresso Powder – Enhances the depth of chocolate flavor. Optional: Can be omitted without losing much flavor.
- Salt – Balances sweetness and enhances flavors. Essential for all baked goods.
For the Filling
- Powdered Sugar – Provides sweetness and creaminess; be sure to use sifted for a smoother filling.
- Butter or Coconut Cream – Adds that classic Oreo creaminess. Substitution: Use coconut cream for a dairy-free filling.
Ready to bake these delightful Crispy Homemade Oreo Cookies? Let’s indulge in the bliss of homemade treats that everyone will love!
Step‑by‑Step Instructions for Crispy Homemade Oreo Cookies
Step 1: Prepare Dough
In a mixing bowl, combine the all-purpose flour, dark cocoa powder, baking soda, and salt, then set it aside. In a separate large bowl, cream together the softened butter and granulated sugar until light and fluffy, about 3–5 minutes. Next, beat in the eggs and vanilla extract until fully incorporated, creating a smooth mixture.
Step 2: Combine Ingredients
Gradually mix the dry ingredient mixture into the wet ingredients using a spatula, folding until just combined. Avoid overmixing to keep your Crispy Homemade Oreo Cookies tender. Once blended, wrap the dough in plastic wrap and chill it in the refrigerator for at least 1 hour to firm up, enhancing the cookie’s texture.
Step 3: Shape Cookies
Preheat your oven to 350°F (175°C) and line baking sheets with parchment paper. Once the dough is chilled, scoop portions and roll them into balls about 1 inch in diameter. Place the cookie balls on the prepared baking sheets and gently flatten them with your hand or the bottom of a glass to create slightly thicker discs.
Step 4: Bake
Bake the cookies in the preheated oven for 10-12 minutes, until the edges are firm but the centers might still look soft. For even baking, rotate the sheets halfway through the baking process. Once baked, remove them from the oven and let the cookies cool on the sheets for a few minutes before transferring to a wire rack.
Step 5: Cool and Fill
Allow the cookies to cool completely on the wire rack before filling. In a separate bowl, prepare your filling by blending powdered sugar with softened butter or coconut cream until smooth and creamy. Spread a generous layer of filling on the flat side of one cookie, then sandwich it with another cookie, creating delightful pairs of your homemade Oreos!
Make Ahead Options
These Crispy Homemade Oreo Cookies are perfect for meal prep, allowing you to enjoy all the joy of homemade cookies without the last-minute rush. You can prepare the cookie dough up to 24 hours in advance—just wrap it tightly in plastic wrap and refrigerate. Additionally, you can make the filling up to 3 days ahead; store it in an airtight container in the fridge to maintain its freshness. When you’re ready to bake, simply shape and bake the chilled dough as directed, and assemble with the creamy filling once cooled. This way, you’ll have delicious cookies ready at a moment’s notice, saving time and keeping your sweet cravings satisfied!
What to Serve with Crispy Homemade Oreo Cookies
Indulge in the bliss of these delightful cookies by elevating your snack time or dessert table with complementary options.
-
Cold Milk: The classic pairing that enhances the chocolate flavor while softening the cookie’s crunch. A sip between bites is pure joy!
-
Vanilla Ice Cream: Creamy and dreamy, this treat adds a lovely contrast to the rich cocoa and sweet filling. Sandwiching the cookies with ice cream takes it to the next level!
-
Fresh Berries: Raspberries or strawberries add a burst of freshness, balancing the sweetness and providing a colorful presentation. Their tartness pairs beautifully with the rich cookie.
-
Coffee or Espresso: A warm cup of coffee or a shot of espresso complements the deep chocolate and espresso notes in the cookies. Perfect for a cozy afternoon treat!
-
Chocolate Milkshake: For an indulgent dessert, serve a chocolate milkshake alongside your cookies, creating a delightful chocolate experience that no one can resist.
-
Mint Tea: The soothing herbal notes of mint tea offer a refreshing contrast to the cookies’ sweetness. It’s a delightful way to wind down after a day.
-
Peanut Butter Dip: Whip up a simple peanut butter dip by mixing peanut butter with a touch of honey or maple syrup for a nutty, creamy companion to the cookies.
Elevate your serving experience and create memorable moments with these delightful pairings!
Crispy Homemade Oreo Cookies Variations
Feel free to let your creativity shine with these delicious variations, perfect for customizing your Crispy Homemade Oreo Cookies!
- Gluten-Free: Swap all-purpose flour for a gluten-free 1:1 baking flour mix. You won’t lose any deliciousness with this sweet substitute!
- Vegan Option: Replace butter with vegan butter in the cookie dough and filling. This way, everyone can indulge in these delights guilt-free!
- Coconut Cream Filling: Use coconut cream instead of butter to create a rich, dairy-free filling. This will give a tropical flair to each bite.
- Zesty Twist: Add the zest of an orange or lemon to the cookie dough for a bright, citrusy flavor. This mini twist can elevate your cookie game to new heights!
- Minty Fresh: For a refreshing surprise, add 1/2 teaspoon of peppermint extract to the filling. It’s like bringing a scoop of peppermint ice cream to your cookies!
- Peanut Butter Filling: Replace the cream filling with a peanut butter mixture for a peanut buttery surprise. Imagine the delectable blend of chocolate and peanut – pure bliss!
- Chocolate Drizzle: Melt dark chocolate and drizzle it over the assembled cookies for an extra touch of indulgence. The warm, glossy finish makes them irresistibly inviting!
- Spicy Kick: For those who love a bit of heat, add a pinch of cayenne or chili powder to the dough. It adds an unexpected dimension that chocolate lovers will adore.
For more delightful baking adventures, try my Chewy Pumpkin Cookies or explore the heavenly world of Chocolate Oat Cookies. Enjoy your sweet creations!
How to Store and Freeze Crispy Homemade Oreo Cookies
Room Temperature: Store cookies in an airtight container for up to 5 days. This keeps them fresh while maintaining their delightful crunch.
Fridge: If you’d like an extra layer of crispness, consider storing them in the fridge. They’ll stay fresh for about a week, but allow them to come to room temperature for the best flavor.
Freezer: To prolong the life of your crispy homemade Oreo cookies, freeze them individually in an airtight container or zip-top bag for up to 3 months.
Reheating: When ready to enjoy, let the frozen cookies thaw at room temperature. For a warm treat, pop them in a preheated oven at 350°F (175°C) for about 5–7 minutes, bringing that fresh-baked aroma back to life!
Expert Tips for Crispy Homemade Oreo Cookies
- Chill Dough Thoroughly: Ensure you chill the dough for at least 1 hour. This step is crucial for achieving the perfect texture in your Crispy Homemade Oreo Cookies.
- Prevent Sticky Dough: If your dough feels sticky while shaping, lightly dust it with flour. Just be cautious not to add too much, as it can dry out the cookies.
- Rotate Baking Sheets: Always rotate your baking sheets halfway through baking. This ensures even heat distribution, resulting in perfectly baked cookies.
- Monitor Baking Time: Bake until the edges firm up but the centers remain soft. Overbaking can lead to crunchy cookies instead of the intended crisp-tender balance.
- Experiment with Flavors: Feel free to add zest from citrus fruits like orange or lemon for a refreshing twist. It’s a lovely way to create a unique version of your Crispy Homemade Oreo Cookies!

Crispy Homemade Oreo Cookies Recipe FAQs
How do I know if my ingredients are ripe or fresh?
Absolutely! For the best results, check the freshness of your baking soda by adding a little to vinegar; if it fizzes, it’s still good. Always use fresh butter—if it smells off or has dark spots, it’s best to toss it out!
What’s the best way to store my cookies?
For sure! Store your Crispy Homemade Oreo Cookies in an airtight container at room temperature for up to 5 days to keep them fresh and crunchy. If you want extra crispness, the fridge is an option, where they’ll last about a week.
Can I freeze these cookies?
Yes, indeed! To freeze your cookies, allow them to cool completely, then place them in a single layer on a baking sheet to freeze individually. Once frozen, transfer them to an airtight container or zip-top bag, and they’ll stay fresh for up to 3 months. Enjoy them by thawing at room temp or warming them in a 350°F oven for 5-7 minutes!
What should I do if my cookie dough is too sticky?
No worries! If your dough feels too sticky, lightly dust your hands and the surface with flour to make handling easier. Just be cautious—too much flour can make your cookies dry! If needed, chill the dough a bit longer, which helps improve its consistency.
Are there any dietary considerations for these cookies?
Very much so! You can make these cookies gluten-free by swapping in a 1:1 gluten-free baking flour, and for a vegan version, simply use vegan butter and coconut cream for the filling. These simple swaps allow everyone to indulge safely and deliciously!
How can I troubleshoot if my cookies come out too hard?
Oh, definitely! If your cookies turn out too hard, they might have been overbaked. Keep an eye on them while baking—remove them from the oven when the edges are firm but the centers still appear soft. Baking time can vary based on your oven, so setting a timer as a guideline and checking regularly is a smart move!
Crispy Homemade Oreo Cookies That You'll Never Forget
Ingredients
Equipment
Method
- In a mixing bowl, combine all-purpose flour, dark cocoa powder, baking soda, and salt, then set it aside. In a separate bowl, cream together butter and sugar until light and fluffy.
- Gradually mix the dry ingredients into the wet ingredients using a spatula until just combined. Wrap the dough in plastic wrap and chill in the refrigerator for at least 1 hour.
- Preheat the oven to 350°F (175°C) and line baking sheets with parchment paper. Scoop dough and roll into balls, flatten them slightly.
- Bake the cookies for 10-12 minutes until edges are firm. Let cool on sheets for a few minutes before transferring to a wire rack.
- Prepare the filling by blending powdered sugar with butter or coconut cream until smooth. Spread filling on one cookie and sandwich with another.
Leave a Reply