
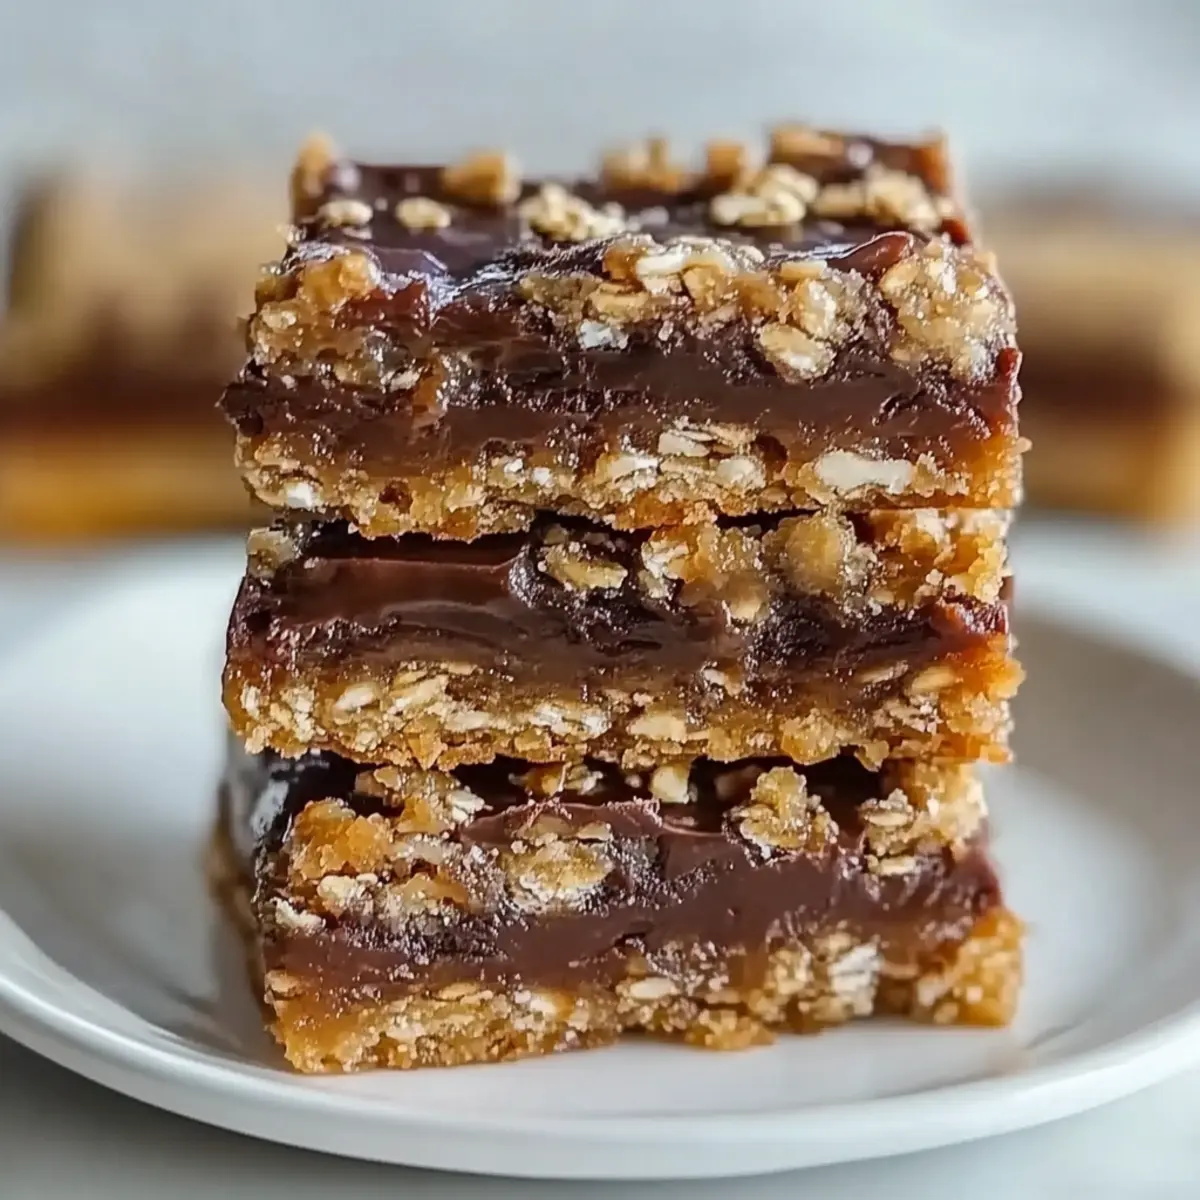
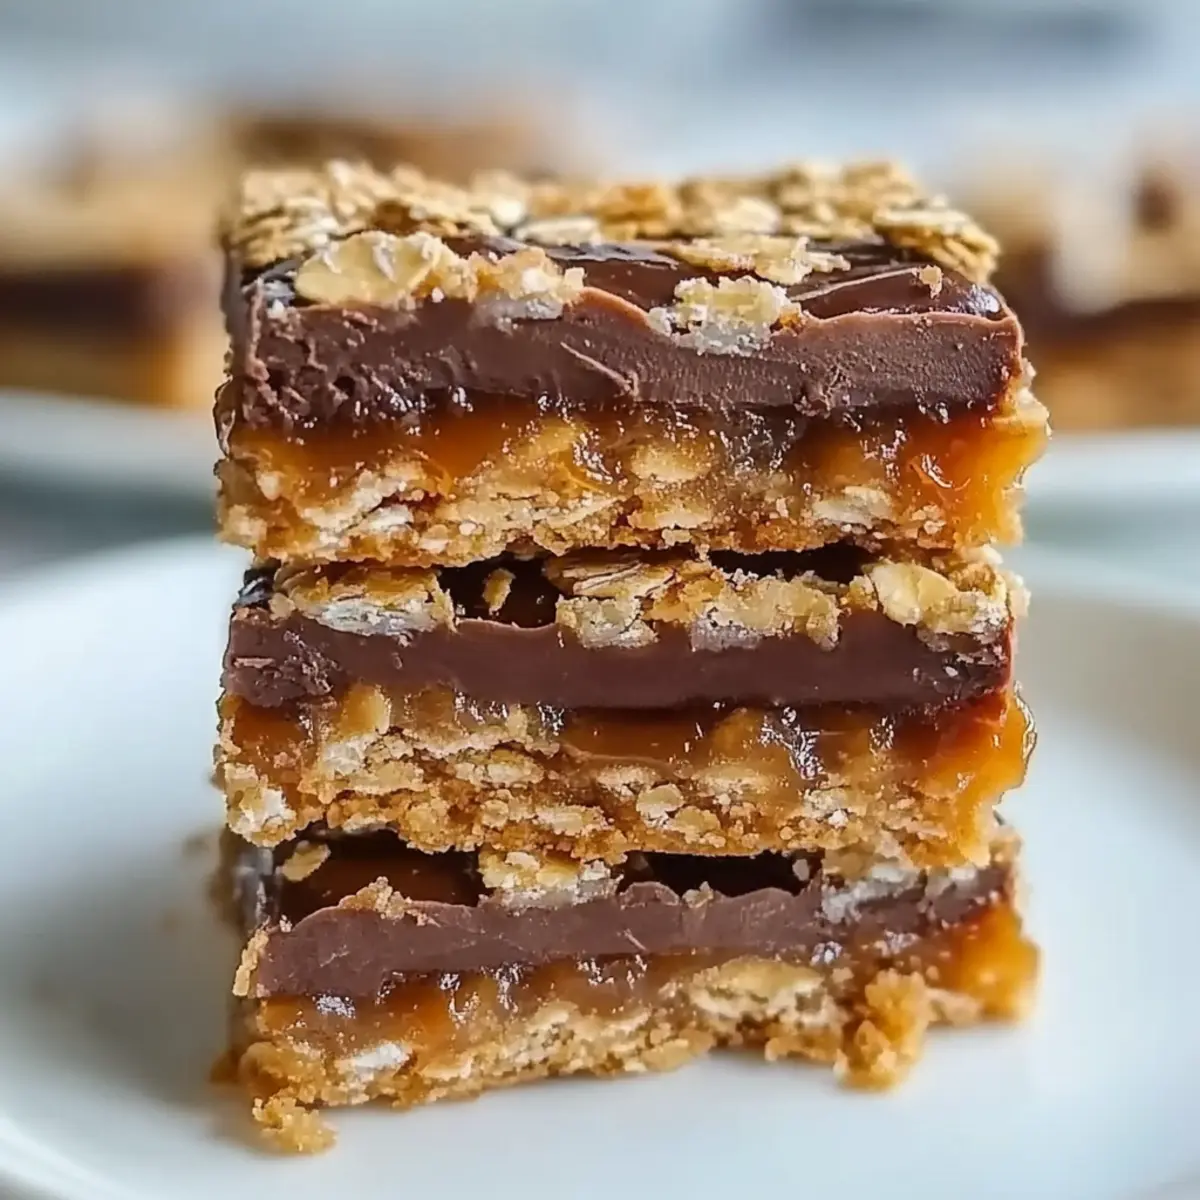
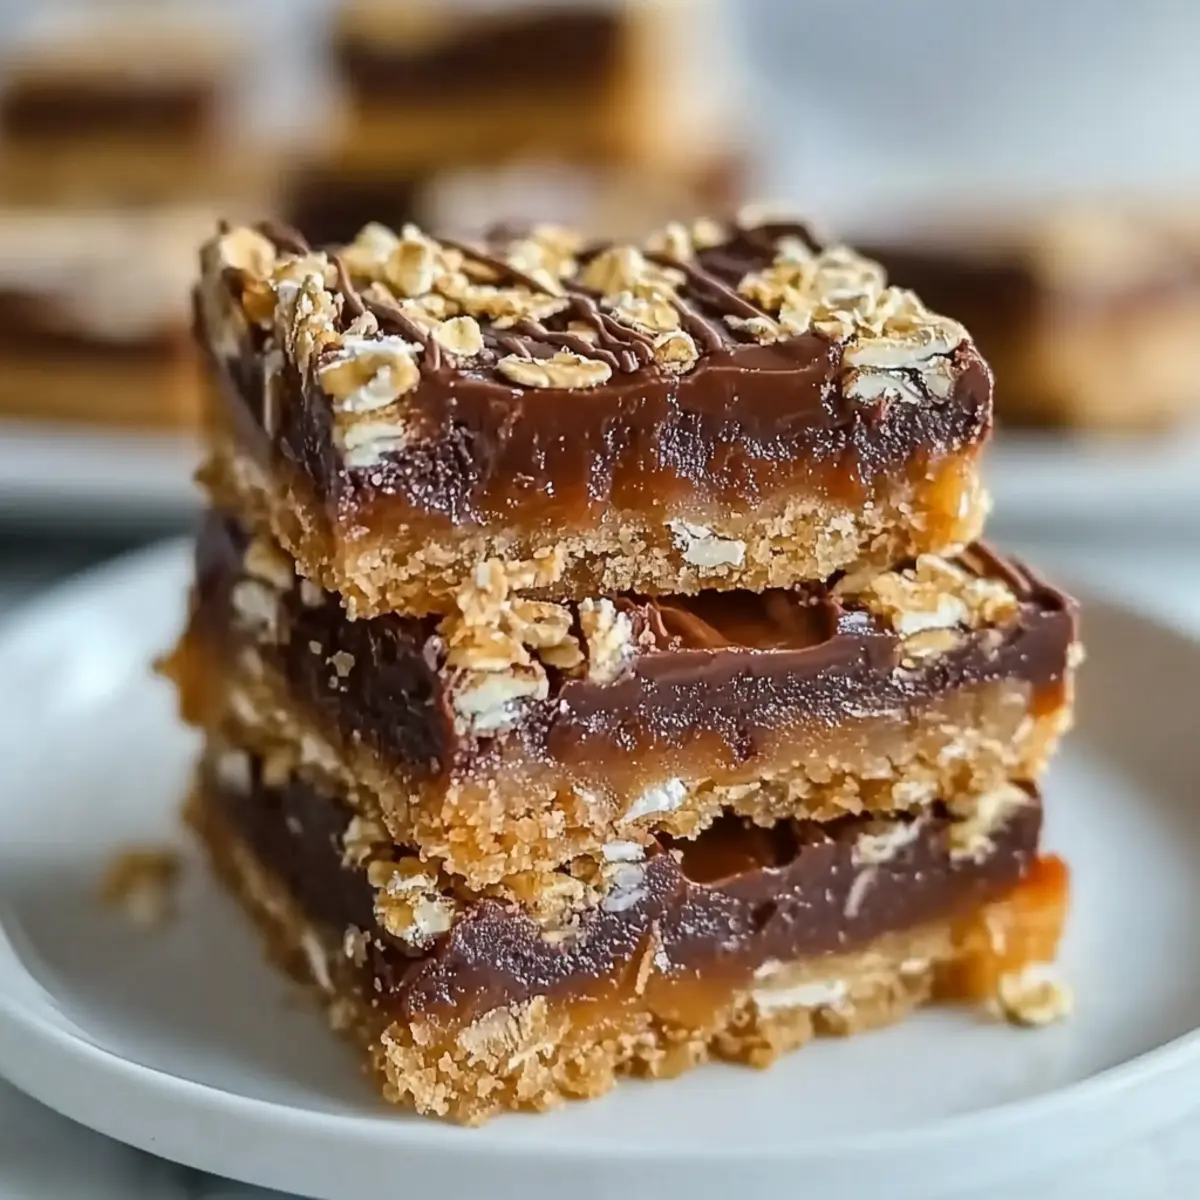
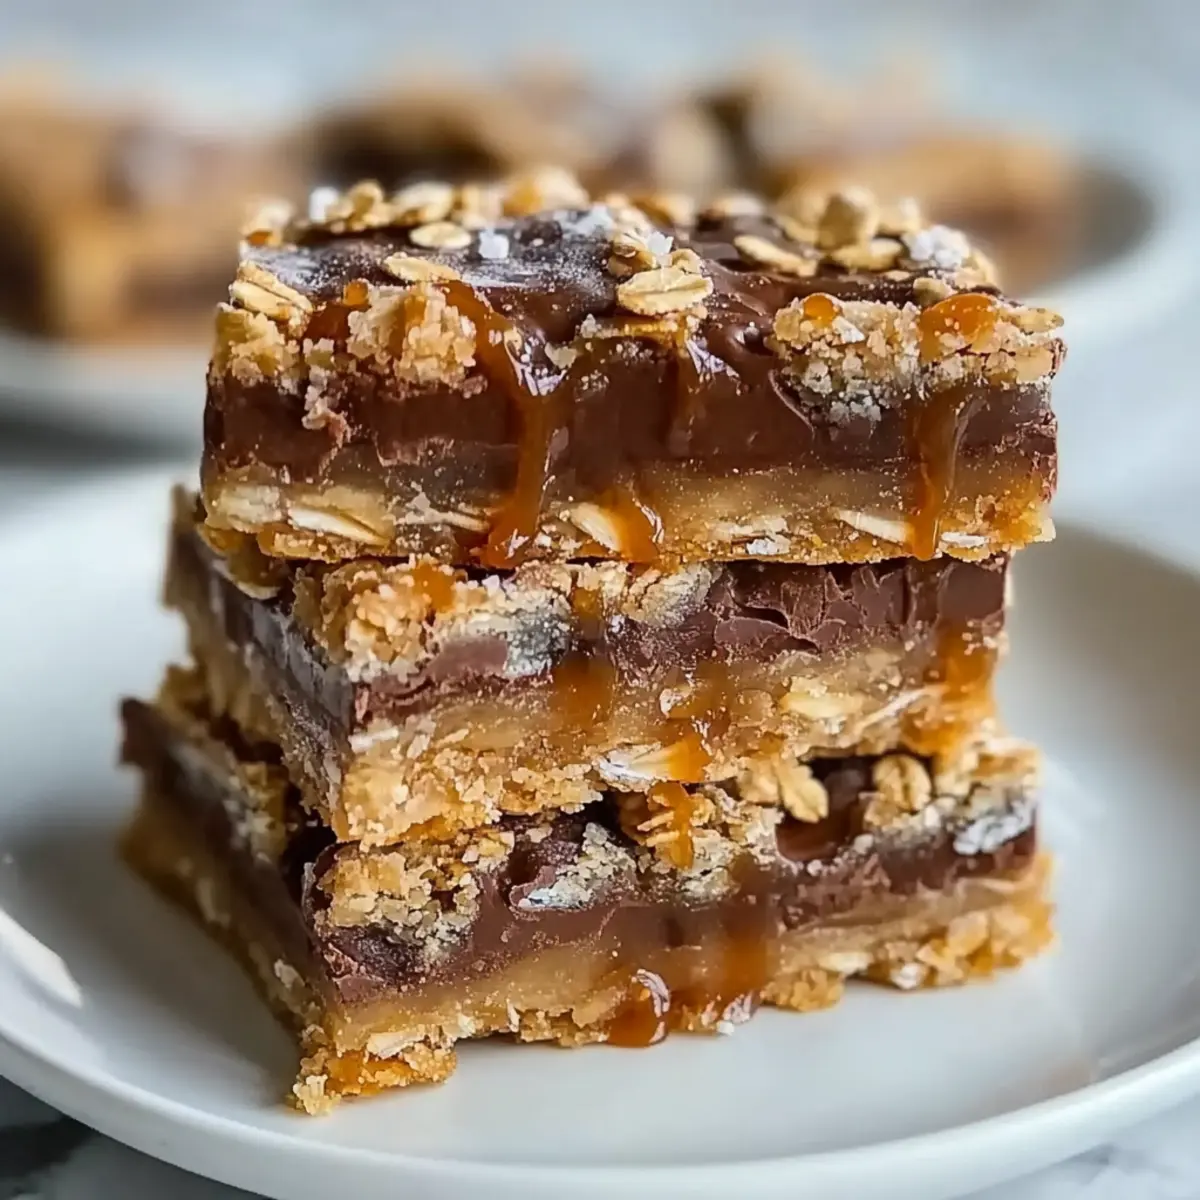
The warm scent of baking oats filled my kitchen as I crafted a batch of Soft & Chewy Carmelitas, and I couldn’t help but feel a wave of nostalgia wash over me. These gooey oat and chocolate bars are everything you need for a quick dessert fix—easy to whip up and incredibly satisfying. Perfect for sharing at gatherings or simply indulging after a long day, they boast a delightful texture with crunchy edges and a soft, gooey center that melts in your mouth. The combination of rich caramel and melty chocolate creates a sweet treat that’s tempting enough to bring anyone’s taste buds to life. Plus, they’re vegetarian-friendly, making them a versatile option for every occasion. Ready to bring a little sweetness into your life? Let’s dive into this indulgent recipe that you won’t want to miss!
Why Are Carmelitas So Irresistible?
Irresistible flavor: These Soft & Chewy Carmelitas combine rich caramel and chocolate for a decadent treat. Easy to make: With simple ingredients and just one pan, they’re perfect for both novice bakers and seasoned chefs. Gooey goodness: Each bar features a chewy middle that’s simply divine! Versatile delights: Customize with your favorite nuts or chocolates for a unique twist. Crowd-pleaser: They’re a hit at parties or family gatherings, surely satisfying even the pickiest eaters. For extra fall flavor, consider pairing them with Chewy Pumpkin Cookies or Pumpkin Smores Cookies!
Soft & Chewy Carmelitas Ingredients
• Here’s everything you need to whip up these delectable bars!
For the Crust
- Unsalted Butter – Provides a rich, tender texture for the crust; substitute with margarine for a dairy-free option.
- Brown Sugar – Adds moisture and depth with its caramel-like sweetness; avoid white sugar to maintain flavor integrity.
- Vanilla Extract – Enhances the flavor profile with a warm aroma; using pure vanilla will yield the best results.
- All-Purpose Flour – Offers structure to ensure the crust can hold the filling; a gluten-free blend can be used as an alternative.
- Old-Fashioned Oats – Essential for chewy texture and contribute a rustic crumb; quick oats provide a softer texture but may alter the bars.
- Baking Soda – Helps lighten the crust for the perfect texture; no substitutes needed.
- Salt – Balances sweetness and enhances flavors; opting for sea salt adds a sophisticated finish.
For the Filling
- Soft Caramels – Create the gooey layer that makes these bars special; choose store-bought soft caramels over jarred sauce for best results.
- Heavy Cream – Loosens the melted caramel for easy pouring; using milk is a substitute, but it changes the creaminess.
- Semisweet Chocolate Chips – Forms rich pockets of chocolate throughout; dark chocolate can intensify the flavor if desired.
Optional Topping
- Flaky Sea Salt – Adds a delightful sweet-salty contrast finish to the bars; apply sparingly to taste for the perfect touch.
Step‑by‑Step Instructions for Soft & Chewy Carmelitas
Step 1: Preheat the Oven
Begin by preheating your oven to 350°F (175°C). Meanwhile, line an 8×8-inch baking pan with parchment paper, allowing some overhang for easy removal later. This step is crucial for ensuring that your Soft & Chewy Carmelitas bake evenly and come out effortlessly when they are ready.
Step 2: Mix the Wet Ingredients
In a medium mixing bowl, melt ½ cup of unsalted butter, then add ¾ cup of brown sugar and 1 teaspoon of vanilla extract. Stir these ingredients together until the mixture is smooth and well combined, filling your kitchen with a warm aroma. This will create a rich, flavorful base for your oat crust.
Step 3: Combine the Dry Ingredients
Add 1 cup of all-purpose flour, 1 ½ cups of old-fashioned oats, ½ teaspoon of baking soda, and ½ teaspoon of salt to the wet mixture. Mix until a thick, crumbly dough forms, resembling wet sand. This dough will serve as both the foundation and topping layer for your gooey Carmelitas.
Step 4: Form the Base Layer
Press half of the oat mixture firmly and evenly into the bottom of your prepared baking pan. Ensure that it is packed tightly and covers the entire bottom surface. This solid base will provide structure to your Soft & Chewy Carmelitas, helping to keep that delightful filling contained.
Step 5: Bake the Base
Place the pan in the preheated oven and bake the crust for 10 minutes, or until lightly set and starting to turn a golden color. Keep an eye on it—this will ensure that your base has a great texture that stays chewy and support the caramel and chocolate layers.
Step 6: Prepare the Caramel Filling
While the crust is baking, melt 16 ounces of soft caramels with ¼ cup of heavy cream in a small saucepan over low heat. Stir continuously until the mixture is smooth and creamy. This step creates the gooey layer that will be drizzled over the baked crust, adding a sweet richness to your Soft & Chewy Carmelitas.
Step 7: Assemble the Layers
Once the base is out of the oven, sprinkle 1 cup of semisweet chocolate chips evenly over the warm crust. Pour the smooth caramel mixture over the chocolate chips, ensuring an even distribution. This creates an irresistible combination of flavors that will make your bars truly indulgent.
Step 8: Add the Crumble Topping
Crumble the remaining oat mixture evenly over the caramel layer, leaving small gaps to allow bubbling. This topping will create a deliciously textured finish to your dessert bars, sealing in all the gooey goodness from below while adding a slight crunch on top.
Step 9: Bake the Carmelitas
Return the pan to the oven and bake for an additional 15-18 minutes, or until the topping is golden brown and the caramel is bubbly. Watch closely to ensure that the edges do not over-bake, giving you perfectly Soft & Chewy Carmelitas with contrasting crispy and gooey textures.
Step 10: Cool and Slice
Allow the baked Carmelitas to cool completely in the pan at room temperature. For best results, chill them in the refrigerator before slicing to achieve clean, even bars. Once cooled, take them out using the parchment overhang and cut them into squares, optionally sprinkling flaky sea salt on top to enhance the flavor.
Variations & Substitutions for Soft & Chewy Carmelitas
Customize your Soft & Chewy Carmelitas to match your cravings and dietary needs with these delightful twists!
-
Nutty Flavor: Add almond or peanut butter to the oat mixture for a deeper richness and nutty undertone that complements the caramel.
-
Chocolate Variety: Use dark or milk chocolate chips instead of semisweet to alter the sweetness level, creating a sweeter or more intense chocolate experience.
-
Gluten-Free Option: Substitute gluten-free flour blend for all-purpose flour to allow those with dietary restrictions to enjoy these bars without sacrifice.
-
Extra Texture: Fold in chopped nuts or shredded coconut for added crunch and flavor; this will elevate the overall experience with every bite.
-
Sweet and Salty: Drizzle honey or maple syrup on top before baking for an extra layer of sweetness that pairs delightfully with the salty finish of flaky sea salt.
-
Fruit Infusion: Toss in dried fruits, such as cranberries or raisins, to the oat mixture; their chewy texture complements the bars’ richness beautifully.
-
Spiced Warmth: Enhance the flavors by adding a sprinkle of cinnamon or pumpkin spice to the dry ingredients, giving your bars a seasonal twist reminiscent of cozy fall treats.
-
S’mores Style: Mix in mini marshmallows with the chocolate chips for a fun twist reminiscent of Pumpkin Smores Cookies, adding a creamy texture that contrasts with the crunchy crust!
Embrace your creativity in the kitchen—every variation offers a chance to create a new family favorite!
Expert Tips for Soft & Chewy Carmelitas
- Cool Before Cutting: Allow the bars to cool completely before slicing to prevent messy edges; chilling them enhances neat cuts for beautiful presentation.
- Perfect Baking Time: Watch for bubbling caramel in the center; bake until the edges are golden but the center remains slightly soft for that trademark gooeyness.
- Use Parchment Paper: Line your pan with parchment for effortless removal; it helps you lift out the cooked bars without breaking them apart.
- Texture Control: For a chewy texture, stick to old-fashioned oats; quick oats will result in a softer bar but may alter the classic consistency.
- Flaky Salt Finish: A sprinkle of flaky sea salt elevates the flavors; use it sparingly, enhancing the sweet and salty contrast everyone loves in these Soft & Chewy Carmelitas.
How to Store and Freeze Soft & Chewy Carmelitas
Room Temperature: Store in an airtight container at room temperature for up to 3 days to maintain their soft texture and flavor.
Fridge: For extended freshness, refrigerate the bars for up to a week. Ensure they are covered to prevent them from drying out.
Freezer: Freeze Soft & Chewy Carmelitas for up to 2 months. Wrap them tightly in plastic wrap and place in a sealed freezer bag for best results.
Reheating: Thaw at room temperature for a few minutes before serving; gently warm in the microwave for a few seconds if desired, to restore gooiness.
What to Serve with Soft & Chewy Carmelitas
The perfect meal isn’t complete without a delightful ensemble of accompaniments to elevate those gooey bars into an unforgettable experience.
-
Vanilla Ice Cream: A scoop of creamy vanilla provides a cool contrast to the warm, rich Carmelitas, enhancing their indulgent flavor.
-
Fresh Berries: Juicy strawberries or tart raspberries add a refreshing burst that balances the sweetness, making every bite feel lighter.
-
Whipped Cream: A dollop of lightly sweetened whipped cream adds an airy texture and complements the richness of caramel and chocolate perfectly.
-
Coffee: A steaming cup of rich coffee brings a delightful bitterness that complements the sweetness, making it a classic pairing with dessert.
-
Chocolate Sauce: Drizzling warm chocolate sauce over the bars heightens the decadence, ensuring that chocolate lovers are utterly satisfied.
-
Milk: A cold glass of milk acts as the ultimate companion, softening the richness of the Carmelitas and enhancing their sweet flavors.
-
Caramel Drizzle: Elevate your dessert experience by drizzling extra caramel over the cut bars for added sweetness all around.
-
Tea: A fragrant herbal tea can provide a soothing contrast to the decadent bars, rounding out the flavors beautifully.
Make Ahead Options
These Soft & Chewy Carmelitas are perfect for meal prep enthusiasts! You can prepare the oat mixture and pressed crust up to 24 hours in advance by storing it tightly wrapped in the refrigerator. Simply mix the ingredients and chill them in your prepared baking pan, covered with plastic wrap. When you’re ready to serve, bake the crust, layer in the chocolate and caramel filling, then crumble the remaining oat mixture on top. If baked bars are your preference, they can also be made in advance and stored in an airtight container at room temperature for up to 3 days or refrigerated for up to a week. For longer storage, freeze them for up to 2 months. Just be sure to let them thaw at room temperature before serving to maintain their gooey goodness!
Soft & Chewy Carmelitas Recipe FAQs
What kind of oats should I use for Soft & Chewy Carmelitas?
Absolutely use old-fashioned oats for that signature chewy texture! While quick oats can be used, they result in a softer and less textured bar. If you’re after that perfect rustic crumb that contributes to the bars’ heartiness, stick with the traditional oats!
How should I store Soft & Chewy Carmelitas?
To keep your Carmelitas fresh, store them in an airtight container at room temperature for up to 3 days. If you want to enjoy them longer, you can refrigerate them for up to a week. Just make sure they’re covered to avoid drying out.
Can I freeze Soft & Chewy Carmelitas? If so, how?
Yes, you can freeze these delightful bars! Wrap them tightly in plastic wrap and place them in a sealed freezer bag. They can be stored for up to 2 months. When you’re ready to enjoy them, let them thaw at room temperature for a few minutes before serving. You may gently warm them in the microwave for a few seconds to bring back the gooeyness.
What if my caramel mixture is too runny?
If your caramel mixture seems too runny, this could be due to using jarred caramel sauce instead of soft caramels. I recommend using store-bought soft caramels for the recipe, as they melt and blend beautifully with heavy cream, helping you achieve that ideal gooey layer. If you’re already mid-bake and notice it’s runny, try adding a touch more chocolate chips to help firm it up once it’s assembled.
Are Soft & Chewy Carmelitas safe for people with allergies?
These bars include ingredients that may trigger common allergies, such as wheat (in flour and oats), dairy (in butter and cream), and possibly nuts if you choose to add them. Always check with your guests about dietary restrictions. For gluten-free options, simply swap in a gluten-free flour blend and use certified gluten-free oats!
Soft & Chewy Carmelitas: Indulge in Irresistible Gooey Bliss
Ingredients
Equipment
Method
- Preheat your oven to 350°F (175°C) and line an 8x8-inch baking pan with parchment paper.
- In a medium mixing bowl, melt ½ cup of unsalted butter, then add ¾ cup of brown sugar and 1 teaspoon of vanilla extract, stirring until smooth.
- Add 1 cup of all-purpose flour, 1 ½ cups of old-fashioned oats, ½ teaspoon of baking soda, and ½ teaspoon of salt to the wet mixture, mixing until a thick, crumbly dough forms.
- Press half of the oat mixture firmly into the bottom of your prepared baking pan.
- Bake the crust for 10 minutes or until lightly set and starting to turn a golden color.
- Melt 16 ounces of soft caramels with ¼ cup of heavy cream over low heat, stirring continuously until smooth.
- Once the base is out of the oven, sprinkle 1 cup of semisweet chocolate chips evenly over the warm crust and pour the caramel mixture over them.
- Crumble the remaining oat mixture evenly over the caramel layer, leaving small gaps.
- Return the pan to the oven and bake for an additional 15-18 minutes until the topping is golden brown and the caramel is bubbly.
- Allow the baked Carmelitas to cool completely before slicing, cooling them in the refrigerator for best results.
Leave a Reply