
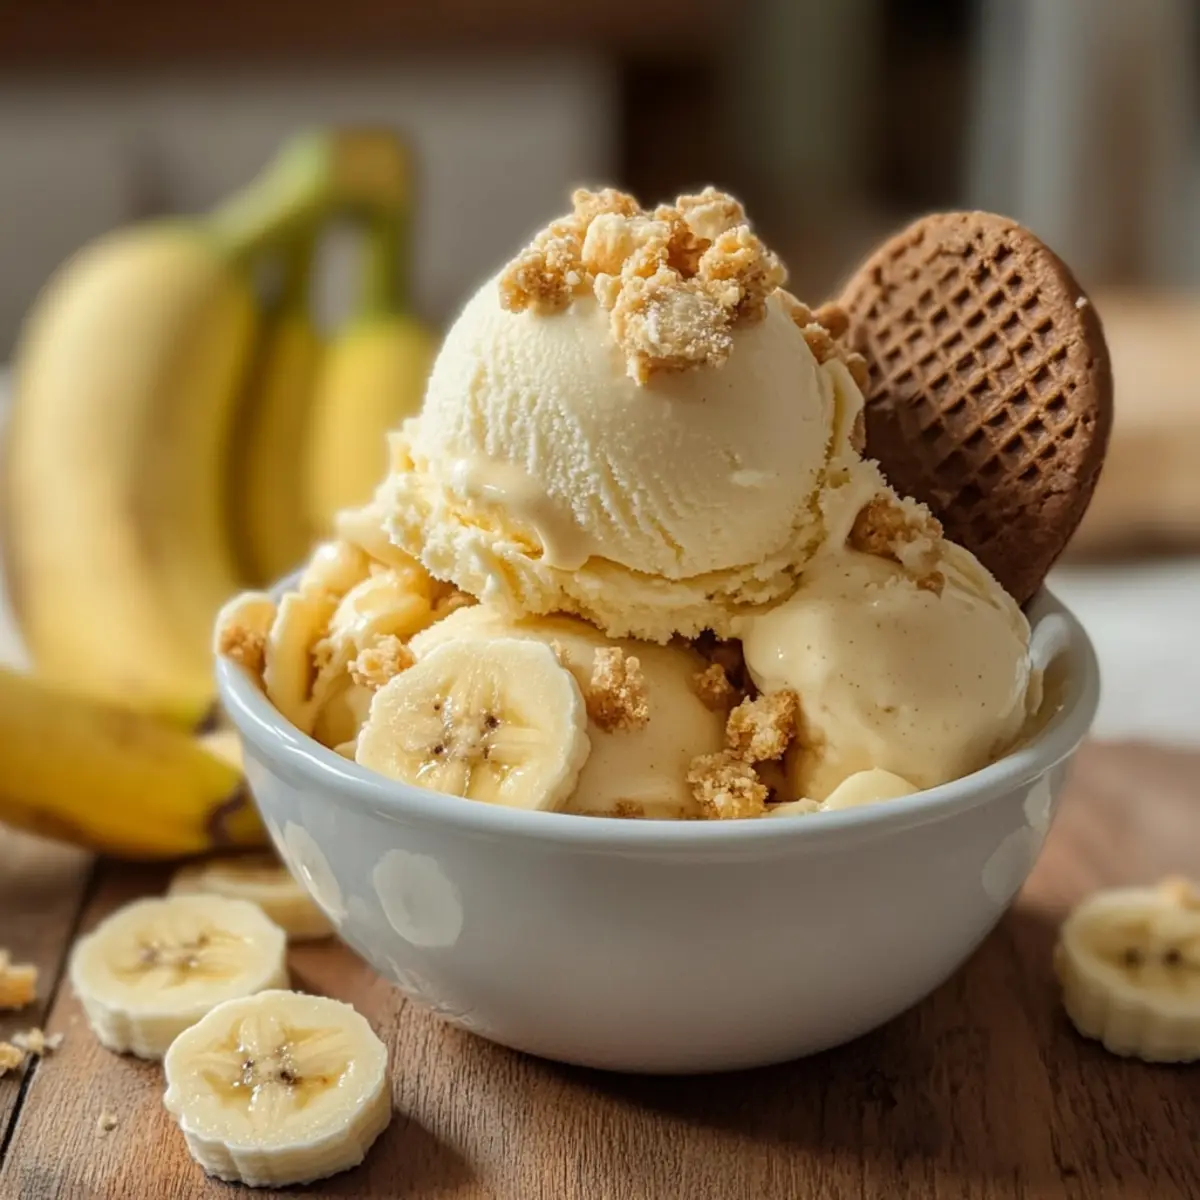
As the summer sun warms the days, I can’t help but reminisce about childhood afternoons filled with laughter and sweetness. There’s something extraordinary about the combination of creamy custard and ripe bananas that instantly transports me back to my grandmother’s kitchen, where the air was thick with the comforting aroma of her famous Banana Pudding Ice Cream. This homemade delight is not just a treat; it’s a nostalgic Southern dessert that offers a refreshingly cool escape from the heat. Whipping this up requires minimal effort, and it’s a summertime crowd-pleaser—perfect for gatherings or simple family gatherings. In just a few simple steps, you can create a scoopable version of the beloved classic, where each bite reveals soft banana goodness and a delightful crunch from the vanilla wafers. Ready to make some memories and cool off with this irresistible Banana Pudding Ice Cream? Let’s dive into the recipe!
Why is this ice cream so special?
Creamy Comfort: This Banana Pudding Ice Cream combines the rich, velvety texture of custard with the natural sweetness of ripe bananas, making it a must-try for any home chef.
Nostalgic Delight: Each scoop brings back warm memories of family gatherings and Southern summers, featuring the perfect crunch of vanilla wafers that will remind you of classic banana pudding.
Quick & Easy: With simple ingredients and straightforward steps, you can whip this up in no time, making it the perfect solution for spontaneous dessert cravings.
Versatile Dessert: Enjoy it in a bowl, in mason jars, or even drizzled over warm waffles for a brunch twist—endless serving options to impress your guests!
Make Ahead Magic: Prepare the custard base the day before to intensify the flavors, allowing you more time to relax and savor your creation.
For more delightful banana treats, don’t miss out on my easy Cinnamon Swirl Banana or Chocolate Chip Banana recipes!
Banana Pudding Ice Cream Ingredients
For the Custard Base
- Half-and-half – Provides a creamy base; can substitute with whole milk for a lighter version.
- Light brown sugar – Adds depth with molasses undertones; substitute with brown sugar for similar flavor.
- White sugar – Provides sweetness; can be replaced with coconut sugar for a less refined option.
- Salt – Enhances sweetness and balances flavors; essential for taste.
- Eggs – Give structure to the custard, ensuring a rich and thick texture; use egg replacer for a vegan version.
- Heavy whipping cream – Creates a luxurious mouthfeel; substitute with full-fat coconut cream for a dairy-free option.
- Vanilla extract – Enhances flavor; use real vanilla extract for the best results, but imitation can be used if needed.
For the Banana Mixture
- Very ripe bananas – The star ingredient, mashed for flavor; overripe bananas yield the best taste.
For the Crunch
- Crushed vanilla wafers – Adds a classic cookie crunch; substitute with graham crackers for a different flavor.
This homemade Banana Pudding Ice Cream is a delightful treat that brings back sweet memories while providing a refreshing escape from the summer heat!
Step‑by‑Step Instructions for Banana Pudding Ice Cream
Step 1: Prepare the Custard Base
In a medium saucepan, combine 2 cups of half-and-half, ½ cup light brown sugar, ¼ cup white sugar, and a pinch of salt. Heat over medium-low, stirring gently for about 5 minutes until sugars dissolve, and the mixture just begins to steam. Keep an eye on it to avoid boiling, which can alter the custard’s texture.
Step 2: Temper the Eggs
In a separate bowl, whisk together 4 large eggs. Gradually add half of the warm half-and-half mixture to the eggs, whisking constantly to temper them. This prevents curdling. Once combined, pour the egg mixture back into the saucepan with the remaining custard base, stirring well to blend.
Step 3: Cook the Custard
Return the saucepan to the heat and stir in 1 cup of heavy whipping cream. Cook gently for 5 to 10 minutes, stirring continuously until the custard thickens and coats the back of a spoon. You know it’s ready when it registers about 170°F, and you can make a line with your finger on the spoon.
Step 4: Add Vanilla and Strain
Remove the saucepan from the heat and stir in 1 tablespoon of pure vanilla extract. Then, strain the mixture through a fine-mesh sieve into a clean bowl to remove any cooked egg bits, ensuring a smooth custard base for your Banana Pudding Ice Cream. Let it cool to room temperature, about 20-30 minutes.
Step 5: Incorporate the Bananas
Once the custard base is cooled, mash 2-3 very ripe bananas with a fork until smooth. Stir the mashed bananas into the cooled custard until evenly mixed. This step infuses your Banana Pudding Ice Cream with wholesome sweetness and flavor that echoes the beloved classic dessert.
Step 6: Churn the Mixture
Pour the banana-infused custard into an ice cream maker, following the manufacturer’s instructions for churning. Typically, this process takes about 20-30 minutes. Keep an eye on it—it’s ready when it reaches a soft-serve consistency and looks fluffy and airy.
Step 7: Add Vanilla Wafers
In the last 5-10 minutes of churning, fold in 1 cup of crushed vanilla wafers gently. This delightful crunch will mimic the traditional banana pudding layers, giving your Banana Pudding Ice Cream that classic twist. Ensure the wafers are evenly distributed.
Step 8: Freeze the Ice Cream
Transfer the churned ice cream into a lidded container, pressing plastic wrap against the surface to prevent freezer burn. Freeze for at least 2-3 hours until firm. Your Banana Pudding Ice Cream will be perfectly scoopable and ready to serve, making it an irresistible summer treat!
Storage Tips for Banana Pudding Ice Cream
Freezer: Keep your Banana Pudding Ice Cream in an airtight container in the freezer for up to 2 weeks to preserve its creamy texture.
Wrapping: For extra protection against ice crystals, press plastic wrap directly onto the surface of the ice cream before sealing the container.
Serving: If the ice cream becomes too hard after freezing, let it sit at room temperature for about 5-10 minutes before scooping for easier serving.
Reheating: There’s no need to reheat this frozen treat, as it’s best enjoyed straight from the freezer in its deliciously cold state!
Banana Pudding Ice Cream Variations
Inviting readers to add their personal touch, these variations are sure to excite your taste buds!
- Dairy-Free: Substitute half-and-half and heavy cream with coconut milk and full-fat coconut cream for a luscious and creamy alternative.
- Crunchy Surprise: Add chopped nuts like pecans or walnuts along with the vanilla wafers for a delightful, crunchy texture that complements the softness of the ice cream.
- Caramel Swirl: Drizzle in homemade caramel during the last churning minutes for a rich flavor twist that elevates this classic treat to new heights!
- Chocolate Lovers: Mix in mini chocolate chips just before serving for a delightful contrast against the sweet banana flavor. The chocolate will bring a wonderful richness to each scoop.
- Banana Split Style: Serve your ice cream sundae-style, topped with fresh strawberries, chocolate syrup, and a cherry on top for a nostalgic twist that sparks memories of summer days.
- Spiced Up: Sprinkle in a dash of cinnamon or nutmeg for a warm, cozy flavor that perfectly complements the banana. It adds a unique depth that pairs beautifully with the creaminess.
- Flavor Infusion: Replace the vanilla extract with almond extract or a splash of rum for an unexpected but delightful flavor change. It’s a fun and bold way to mix things up.
- Fruit Fusion: Fold in diced strawberries or crushed mango during the churning process for a fruity explosion that lightens up the richness and adds a refreshing touch.
Feel free to explore these options and make this Banana Pudding Ice Cream your own! And for more delectable banana-inspired recipes, check out my Banana Bread Cinnamon or rich Chocolate Chip Banana creations!
Make Ahead Options
This Banana Pudding Ice Cream is perfect for meal prep, allowing you to enjoy a nostalgic treat without last-minute stress. You can prepare the custard base up to 24 hours in advance, letting the flavors mingle overnight in the refrigerator. To do so, simply follow the custard preparation steps, cool it, and store it in an airtight container. When you’re ready to make the ice cream, just incorporate the mashed bananas and churn the mixture. Remember to press plastic wrap against the surface before freezing to maintain its creamy texture and prevent ice crystals. With these make-ahead tips, you’ll savor this chilled delight with minimal effort on busy days!
What to Serve with Banana Pudding Ice Cream
Indulging in creamy homemade ice cream transports you to a sun-soaked season bursting with flavor, and it pairs beautifully with delightful accompaniments!
- Fresh Berries: Strawberries, blueberries, or raspberries add a refreshing burst of tartness, perfectly balancing the sweetness of the ice cream.
- Chocolate Sauce: A rich drizzle of warm chocolate sauce creates an indulgent contrast that enhances every scoop’s flavor. It’s a heavenly combination!
- Toasted Coconut Flakes: Sprinkle toasted coconut on top for a tropical twist and a lovely crunch that complements the creamy texture of the ice cream.
- Pound Cake Slices: Serve a scoop of ice cream over moist slices of pound cake for a delightful dessert experience that feels both elegant and comforting.
- Banana Waffles: For a breakfast-inspired treat, pour the ice cream over warm banana waffles, creating a blissful brunch that everyone will adore.
- Caramel Swirl: A swirl of salted caramel sauce offers a tantalizing depth of flavor, creating a luxurious finish to each mouthful of ice cream.
- Mint Leaves: A sprinkle of fresh mint leaves adds a refreshing touch and brighten the creamy dessert, elevating its flavor profile.
- Coffee: Pair with a cup of rich, brewed coffee for a delightful contrast that rounds out the tasting experience—a perfect after-dinner treat!
Expert Tips for Banana Pudding Ice Cream
Choose Ripe Bananas: Use bananas that are heavily speckled for the sweetest flavor. Overripe bananas will give your ice cream that rich, banana taste.
Prepare in Advance: Making the custard base a day ahead can elevate flavors significantly. Letting it sit overnight is a game-changer!
No Ice Cream Maker?: If you don’t have an ice cream maker, pour the mixture into a shallow dish and stir every 30 minutes as it freezes. This will help create the right texture.
Watch the Heat: Be cautious while cooking the custard. Too much heat can scramble the eggs, ruining the creamy texture of your banana pudding ice cream.
Don’t Skip the Straining: Always strain the custard after cooking to remove any lumps. This ensures a smooth, velvety finish.
Add Crunch Last: Fold in the crushed vanilla wafers during the last few minutes of churning. This preserves their texture, giving you that perfect crunch in each scoop!
Banana Pudding Ice Cream Recipe FAQs
What kind of bananas should I use for this recipe?
Absolutely! For the best flavor, use very ripe bananas with lots of brown spots. The overripe bananas are sweeter and will give your ice cream a richer banana flavor. If you notice dark spots all over, that’s the time to use them!
How should I store my Banana Pudding Ice Cream?
To keep your ice cream fresh, store it in an airtight container in the freezer. It’s best enjoyed within 2 weeks for optimal texture and taste. After transferring it, press plastic wrap directly against the surface to prevent ice crystals from forming, ensuring that it’s as creamy as can be!
Can I freeze this Banana Pudding Ice Cream for longer?
Yes! You can store it for up to 3 months in the freezer. However, keep in mind that while it’s safe to eat beyond the 2-week mark, the texture may start to change, becoming a bit harder. Just let it sit out for about 10 minutes before scooping to soften it up.
What can I do if my ice cream is too hard after freezing?
Very! If your Banana Pudding Ice Cream is too hard, simply let it sit at room temperature for about 5-10 minutes. This will allow it to soften enough for easy scooping. If you prefer to enjoy it straight out of the freezer, consider running a hot scoop under warm water before serving!
Is this recipe suitable for people with egg allergies?
I often make variations to cater to everyone! You can use an egg replacer like flax eggs or store-bought substitutes if you’re avoiding eggs. Just follow the directions on the packaging for proper measurements to achieve similar custard-like results.
Can I make this without an ice cream maker?
Absolutely! If you don’t have an ice cream maker, pour the custard mixture into a shallow dish and freeze it. Stir every 30 minutes for about 3-4 hours until it reaches a creamy consistency. This method will mimic the churning process and help ensure a delightful texture!
Creamy Banana Pudding Ice Cream for Ultimate Summer Bliss
Ingredients
Equipment
Method
- In a medium saucepan, combine 2 cups of half-and-half, ½ cup light brown sugar, ¼ cup white sugar, and a pinch of salt. Heat over medium-low, stirring gently for about 5 minutes until sugars dissolve. Avoid boiling.
- In a separate bowl, whisk together 4 large eggs. Gradually add half of the warm half-and-half mixture, whisking constantly to temper them. Pour back into the saucepan.
- Return the saucepan to heat and stir in 1 cup of heavy whipping cream. Cook gently for 5 to 10 minutes until the custard thickens and coats the back of a spoon.
- Remove from heat, stir in 1 tablespoon of vanilla extract, and strain through a fine-mesh sieve into a clean bowl to remove cooked egg bits. Let cool.
- Mash 2-3 ripe bananas with a fork until smooth and stir into the cooled custard until evenly mixed.
- Pour the banana-infused custard into an ice cream maker and churn according to manufacturer's instructions for 20-30 minutes.
- In the last 5-10 minutes of churning, fold in 1 cup of crushed vanilla wafers gently.
- Transfer the churned ice cream into a lidded container, press plastic wrap against the surface, and freeze for at least 2-3 hours until firm.
Leave a Reply