
There’s something magical about the aroma of freshly baked pastries wafting through the kitchen that instantly takes me back to sunlit mornings spent at the neighborhood bakery. Today, I’m excited to share my recipe for Easy Cheese Danishes—an indulgent treat that’s as delightful to taste as it is to create! Made using simple crescent roll dough, these cream cheese-filled pastries come together in a flash, making them perfect for a quick brunch or a luxurious breakfast at home. Not only are these danishes incredibly easy to whip up, but they also deliver that comforting bakery-quality goodness right to your table. So, are you ready to dive into the world of homemade pastries? Let’s get baking!

Why You’ll Love These Cheese Danishes
Quick and Easy: These Cheese Danishes are a breeze to make, combining just a few pantry staples for a fuss-free baking experience.
Delicious Creamy Filling: The sweetened cream cheese filling adds a rich, creamy surprise to every bite, elevating these pastries to new heights of comfort.
Perfectly Flaky Texture: Thanks to the crescent roll dough, you will enjoy a delightful contrast of flaky pastry with a luscious interior, just like those from your favorite bakery.
Versatile Treat: Serve them as a sweet breakfast, enjoy them at brunch, or savor them as a delightful dessert. These danishes are perfect for any occasion!
Make-Ahead Convenience: Prep these pastries in advance, and keep them in the fridge before baking, just like in my Easy Cheeseburger Soup. You’ll love having fresh treats ready to go!
With just a bit of time and effort, you can bring this magical bakery experience right to your home. Let’s get started!
Cheese Danishes Ingredients
• Get ready to create these delightful Cheese Danishes with just a few simple ingredients!
For the Pastry
- Crescent Roll Dough – This flaky dough is the perfect base for your Cheese Danishes; feel free to use puff pastry for a different texture.
- Salted Butter (melted) – Adds richness to the pastry, making it even more indulgent and flavorful.
For the Cream Cheese Filling
- Cream Cheese – The star ingredient, it provides a creamy texture that pairs beautifully with the pastry; consider low-fat cream cheese as a substitution.
- Granulated Sugar – Sweetens the cream cheese filling to perfection, balancing out the richness.
- Vanilla Extract – Enhances the flavor with a warm, inviting aroma that complements the cream cheese.
For the Topping
- Light Brown Sugar – Sprinkle on top of the danishes before baking for added sweetness and a touch of caramel flavor.
- Powdered Sugar – Perfect for making a sweet glaze to drizzle over your finished danishes.
- Milk – Used to thin the glaze to the desired consistency, ensuring a beautiful drizzle over your pastries.
With these ingredients, your Cheese Danishes will transform your kitchen into a cozy bakery filled with tempting aromas! Happy baking!
Step‑by‑Step Instructions for Easy Cheese Danishes
Step 1: Prepare Dough
Begin by preheating your oven to 375°F (190°C). While it’s heating, unroll the crescent roll dough and lay it flat, keeping it in two rectangles. Gently press the seams together to seal any gaps, creating a smooth surface for your Easy Cheese Danishes.
Step 2: Make Filling
In a mixing bowl, combine the softened cream cheese, granulated sugar, vanilla extract, and melted butter. Using a hand mixer, blend until the mixture is completely smooth and creamy, about 2 minutes. This delicious filling will add that sweet, rich flavor that makes your Cheese Danishes irresistible.
Step 3: Fill and Shape
Evenly spread the cream cheese mixture over each rectangle of dough, leaving a small border around the edges. Next, fold the rectangles in half lengthwise, sealing the edges by pinching them together. Cut the folded dough into triangles or squares, depending on your preference, to create individual portions of Cheese Danishes.
Step 4: Prep for Baking
Arrange the shaped danishes on a baking sheet lined with parchment paper, ensuring they are spaced apart. Sprinkle a little light brown sugar over the top of each danish for that extra hint of sweetness and delightful caramelization. This step enhances both the flavor and visual appeal of your pastries.
Step 5: Bake
Place the baking sheet in your preheated oven and bake for approximately 18 minutes, or until the danishes are puffed and golden brown. Keep an eye on them, as you want a beautiful golden hue without overbaking. The flaky texture will emerge, signaling that your Easy Cheese Danishes are almost ready to enjoy.
Step 6: Make Glaze
While the danishes bake, prepare the glaze by whisking together powdered sugar, a teaspoon of vanilla extract, and enough milk to achieve a smooth drizzling consistency. This sweet glaze will add the perfect finishing touch to your danishes, combining flavors beautifully.
Step 7: Finish
Once the danishes are out of the oven and slightly cooled, drizzle the glaze over the warm pastries. The glaze will melt slightly onto the danishes, creating a luscious coating that enhances their sweetness. Serve these delightful Easy Cheese Danishes warm for a delightful treat at breakfast or brunch.

Cheese Danishes Variations & Substitutions
Feel free to get creative with these Cheese Danishes—your imagination is the only limit when it comes to enhancing this delicious treat!
-
Fruit Topping: Add fruit preserves or fresh fruit on top of the cheese filling for a delightful burst of flavor. Think strawberries or blueberries—so refreshing!
-
Cinnamon Twist: Introduce a sprinkle of cinnamon into the filling or glaze for a warm, spiced flavor. The comforting aroma will make your kitchen feel like home.
-
Flavored Cream Cheese: Use flavored cream cheese like strawberry or blueberry to switch up the taste profile. This adds a fun twist that your family will love!
-
Nutty Crunch: Sprinkle chopped nuts, such as pecans or walnuts, atop the cream cheese filling for added texture and nutty flavor. It enhances the chewiness and crunch factor.
-
Sugar Substitution: Use natural sweeteners like honey or maple syrup instead of granulated sugar for a healthier option. The flavors will deepen and add a unique taste!
-
Dairy-Free: Swap cream cheese for a dairy-free alternative like coconut cream for a plant-based option. The slight coconut flavor makes for a delicious combo!
-
Zesty Lemon: Add a bit of lemon zest into the cream cheese mixture for a citrusy zing that brightens the overall flavor. It’s a refreshing twist that’s sure to impress!
-
Savory Version: For a savory take, consider filling with a mixture of cream cheese, herbs, and cooked spinach instead. Perfect as an appetizer or brunch dish, and a delightful change from sweet!
Whether you stick to the classic or try out these wonderful variations, each danish is a step toward transforming your home into a cozy, delicious bakery. Enjoy the journey, and don’t forget to pair these with a cup of coffee and some of my Cinnamon Cottage Cheese for a sweet morning treat!
What to Serve with Easy Cheese Danishes
Indulge in these flaky pastries with delicious sides that elevate your breakfast or brunch experience to a whole new level.
- Fresh Fruit Salad: A medley of vibrant, juicy fruits adds a refreshing balance to the sweet richness of the danishes.
- Crispy Bacon Strips: The salty, savory crunch of bacon contrasts beautifully with the creamy filling, creating a delightful flavor combination.
- Flavored Coffee: Pair with a rich vanilla or hazelnut coffee for an aromatic experience that complements the sweet notes of the danishes.
- Creamy Scrambled Eggs: Silky scrambled eggs provide a protein-packed side that rounds out your meal nicely, especially for brunch gatherings.
- Yogurt Parfait: Layer yogurt with granola and berries for a light yet decadent side, perfect for balancing the sweetness of your danishes.
- Sweet Tea: A chilled glass of sweet tea can bring a touch of Southern charm, harmonizing with the danishes’ flavors and making each bite refreshing.
- Mimosa: Celebrate with a bubbly mimosa; the citrusy brightness perfectly offsets the rich cheese filling of your danishes.
- Chocolate Croissant: If you’re feeling adventurous, serve alongside a rich chocolate croissant for a delightful pastry platter that feels indulgent and special.
- Cinnamon Roll: Consider adding a cinnamon roll to the table for a cozy nod to beloved breakfast traditions, enhancing the overall pastry theme of your meal.
- Homemade Lemonade: Refreshing lemonade brings a tangy zest that cuts through the sweetness, perfect for a sunny evening brunch.
Expert Tips for Cheese Danishes
-
Chill Before Baking: Assembled danishes can be refrigerated before baking; this will help maintain their shape and make for quicker morning prep.
-
Watch the Bake Time: Overbaking can lead to dryness. Keep an eye on the danishes and remove them once they’re golden brown and flaky.
-
Creative Fillings: Don’t hesitate to add fruit preserves or even chocolate chips to the cream cheese filling for a fun twist on traditional Cheese Danishes.
-
Even Spacing: When placing the danishes on the baking sheet, ensure they are spaced apart. This allows for even baking and prevents them from sticking together.
-
Glaze Consistency: Adjust your glaze thickness by adding more or less milk; a slightly thicker glaze works well if you prefer it to hold up on the danishes.
-
Storing Leftovers: If you have any leftover Cheese Danishes, store them in an airtight container. Reheat in the oven to restore that delightful flakiness!
How to Store and Freeze Cheese Danishes
Fridge: Store any uneaten Cheese Danishes in an airtight container for up to 3 days to maintain freshness and flavor.
Freezer: To freeze, wrap baked danishes tightly in plastic wrap and then aluminum foil, storing for up to 2 months. Reheat from frozen in the oven for the best results.
Reheating: For optimal texture, reheat danishes in a preheated oven at 350°F (175°C) for about 10 minutes to restore that fluffy, flaky quality.
Make Ahead Options
These Easy Cheese Danishes are perfect for meal prep enthusiasts! You can assemble the danishes up to 24 hours in advance by following the first four steps of the recipe. After shaping the danishes, simply cover them with plastic wrap and refrigerate until ready to bake. This will save you valuable time on busy mornings! When you’re ready to enjoy, bake the refrigerated danishes straight from the fridge for about 18 minutes or until golden brown. For longer storage, consider freezing the baked danishes for up to 3 months; just reheat them in the oven to maintain their crispiness. You’ll always have fresh, delicious Cheese Danishes ready at a moment’s notice!

Easy Cheese Danishes Recipe FAQs
What type of crescent roll dough is best for Cheese Danishes?
I highly recommend using the classic refrigerated crescent roll dough for its flaky, buttery texture. If you prefer something a bit different, feel free to substitute it with puff pastry, which will yield a lighter, airier danish.
How should I store leftover Cheese Danishes?
To keep your uneaten Cheese Danishes fresh, store them in an airtight container in the fridge. They will maintain their best quality for up to 3 days. Just remember to enjoy them warm for the ultimate taste experience!
Can I freeze Cheese Danishes? How should I do it?
Absolutely! To freeze your baked Cheese Danishes, wrap each one tightly in plastic wrap, then in aluminum foil, which helps prevent freezer burn. They can be kept frozen for up to 2 months! When you’re ready to enjoy them, reheat directly from frozen in a preheated oven at 350°F (175°C) for about 10 minutes to bring back their delightful flakiness.
What should I do if my Cheese Danishes are too dry?
If you find your danishes have turned out dry, it may be that they were overbaked. Always keep an eye on their oven time; remove them as soon as they turn golden brown. To moisten them before serving, a light drizzle of glaze or a sprinkle of milk over the warming danishes can bring them back to life.
Are Cheese Danishes suitable for people with lactose intolerance?
If you or your guests are lactose intolerant, you can substitute the cream cheese with lactose-free cream cheese or even a vegan cream cheese alternative. These adjustments allow everyone to enjoy this scrumptious treat without worry.
Can I add additional flavors to the cream cheese filling?
Very! You can elevate your Cheese Danishes by adding fruit preserves, chocolate chips, or even a splash of lemon zest to the cream cheese filling. This fruity twist or a cheesy sweetness can take your danishes to a whole new level of deliciousness!
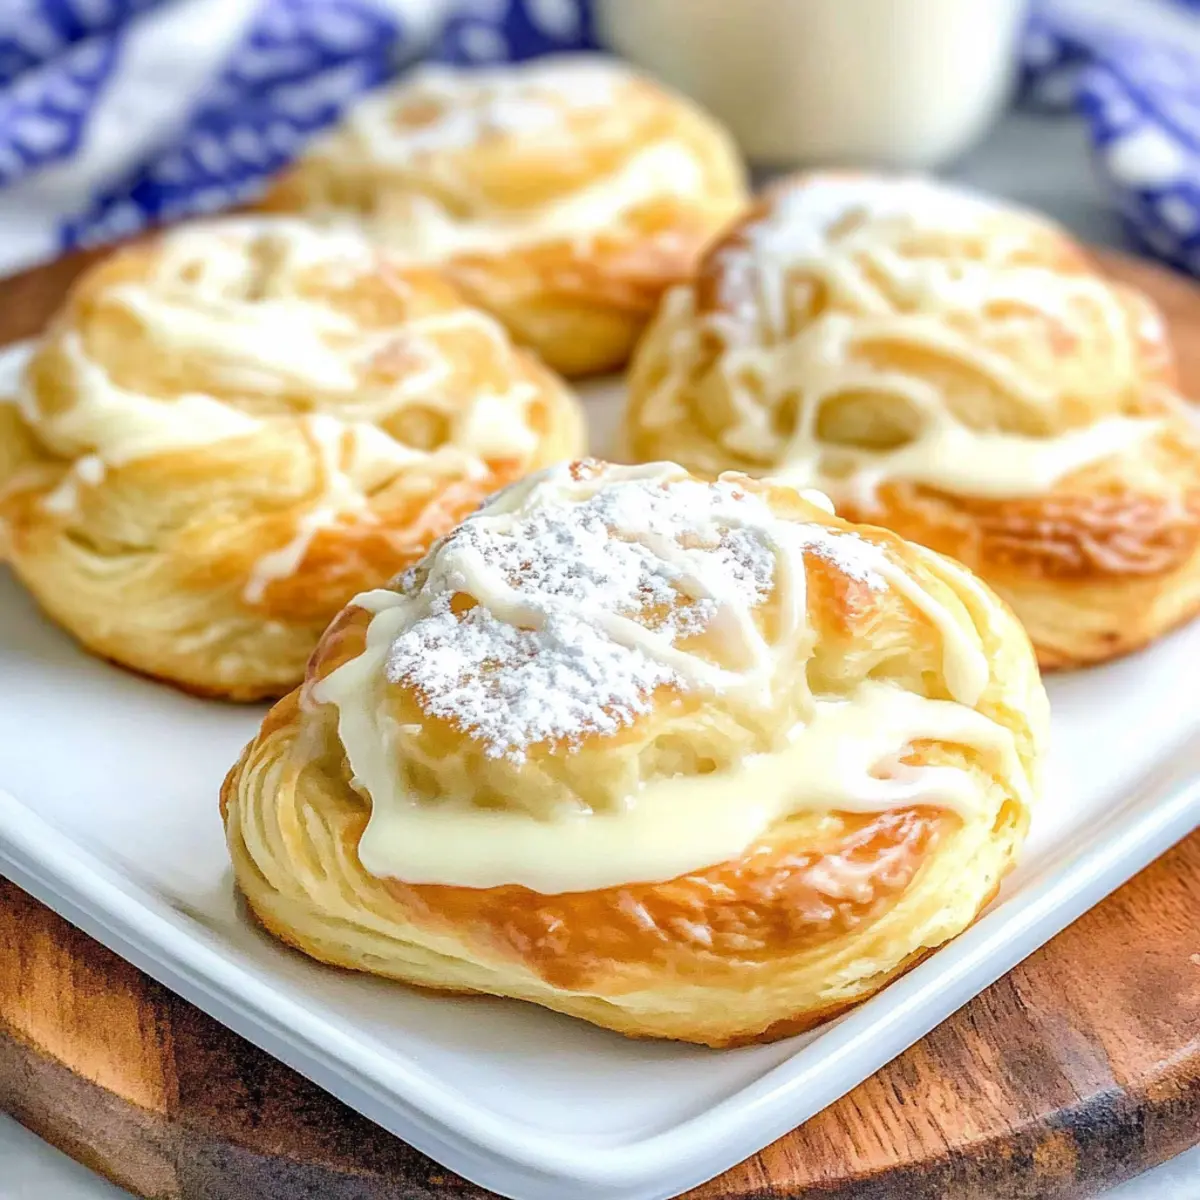
Delicious Cheese Danishes Ready in Under 30 Minutes
Ingredients
Equipment
Method
- Preheat your oven to 375°F (190°C). Unroll the crescent roll dough and lay it flat, keeping it in two rectangles. Seal the seams.
- In a mixing bowl, combine the softened cream cheese, granulated sugar, vanilla extract, and melted butter. Blend until smooth, about 2 minutes.
- Spread the cream cheese mixture over each rectangle of dough, then fold in half and cut into triangles or squares.
- Arrange the danishes on a baking sheet lined with parchment paper, sprinkle with light brown sugar.
- Bake for approximately 18 minutes or until puffed and golden brown.
- Prepare glaze by whisking powdered sugar, vanilla extract, and milk to a smooth consistency.
- Drizzle the glaze over the warm danishes and serve.
Leave a Reply