
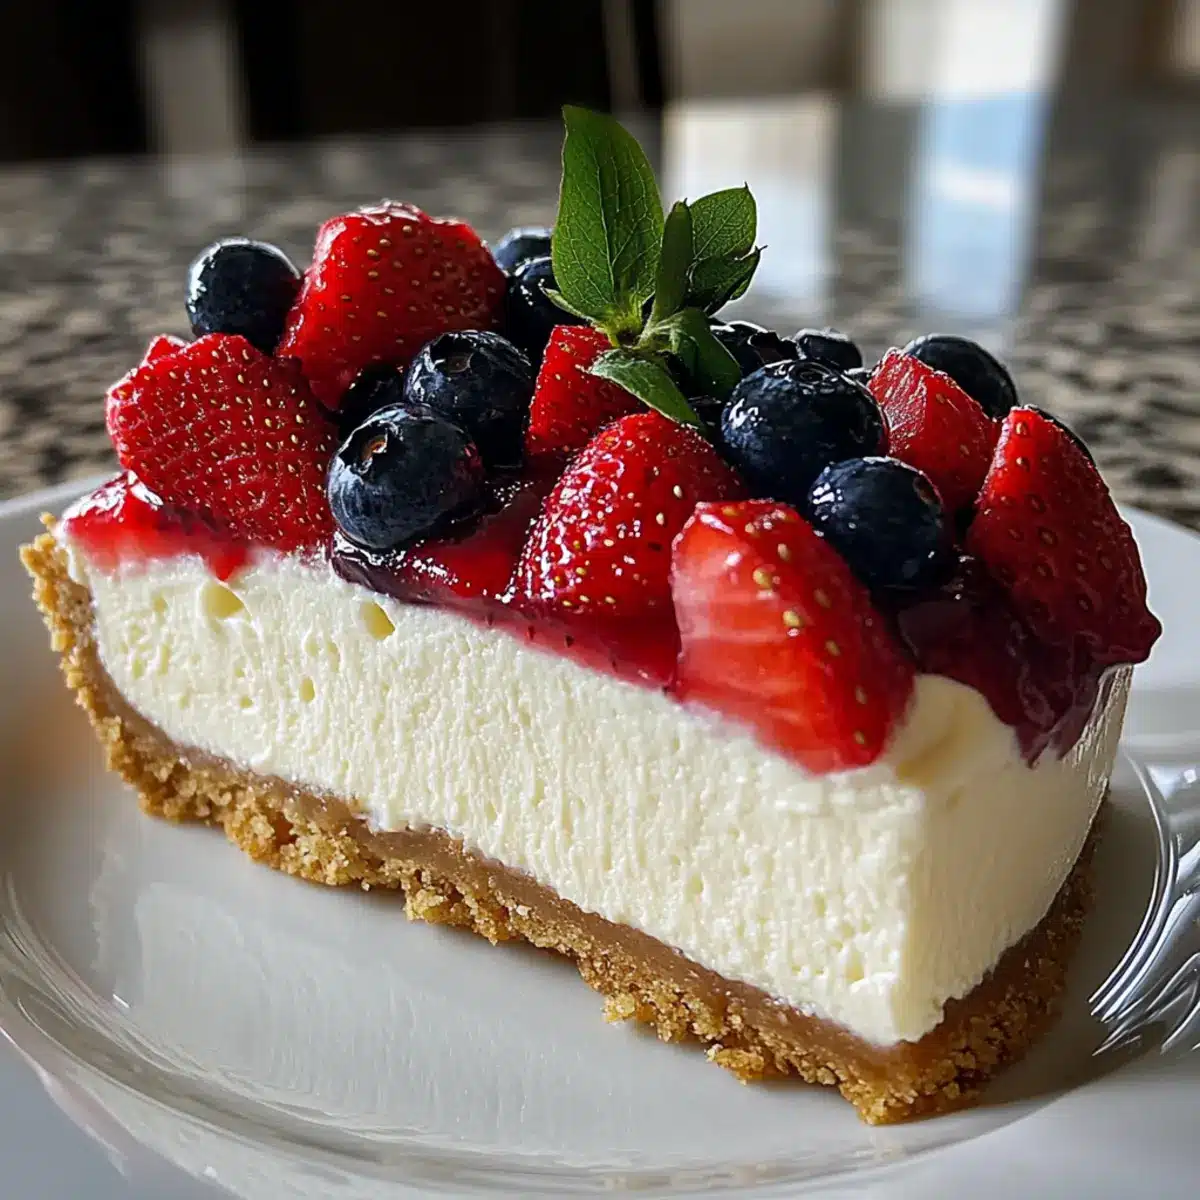
As the summer sun blazes down, a memory flickers—a kitchen filled with laughter, the joyful clinking of spoons, and the tantalizing aroma of fresh fruit. That’s how I feel whenever I whip up this stunning Red White Blue Cheesecake, perfect for celebrating Independence Day or any festive gathering. With its layers of ripe strawberries and juicy blueberries nestled in a creamy cheesecake base, this dessert not only delights the eyes but also captivates taste buds. In just 30 minutes of prep time, you can create a crowd-pleaser that’s both easy and impressive—ideal for those hectic times when fast food tempts us. Why settle for ordinary when you can present a showstopper? Are you ready to dive into a dessert that sings summer flavors?
Why You’ll Adore This Cheesecake Recipe
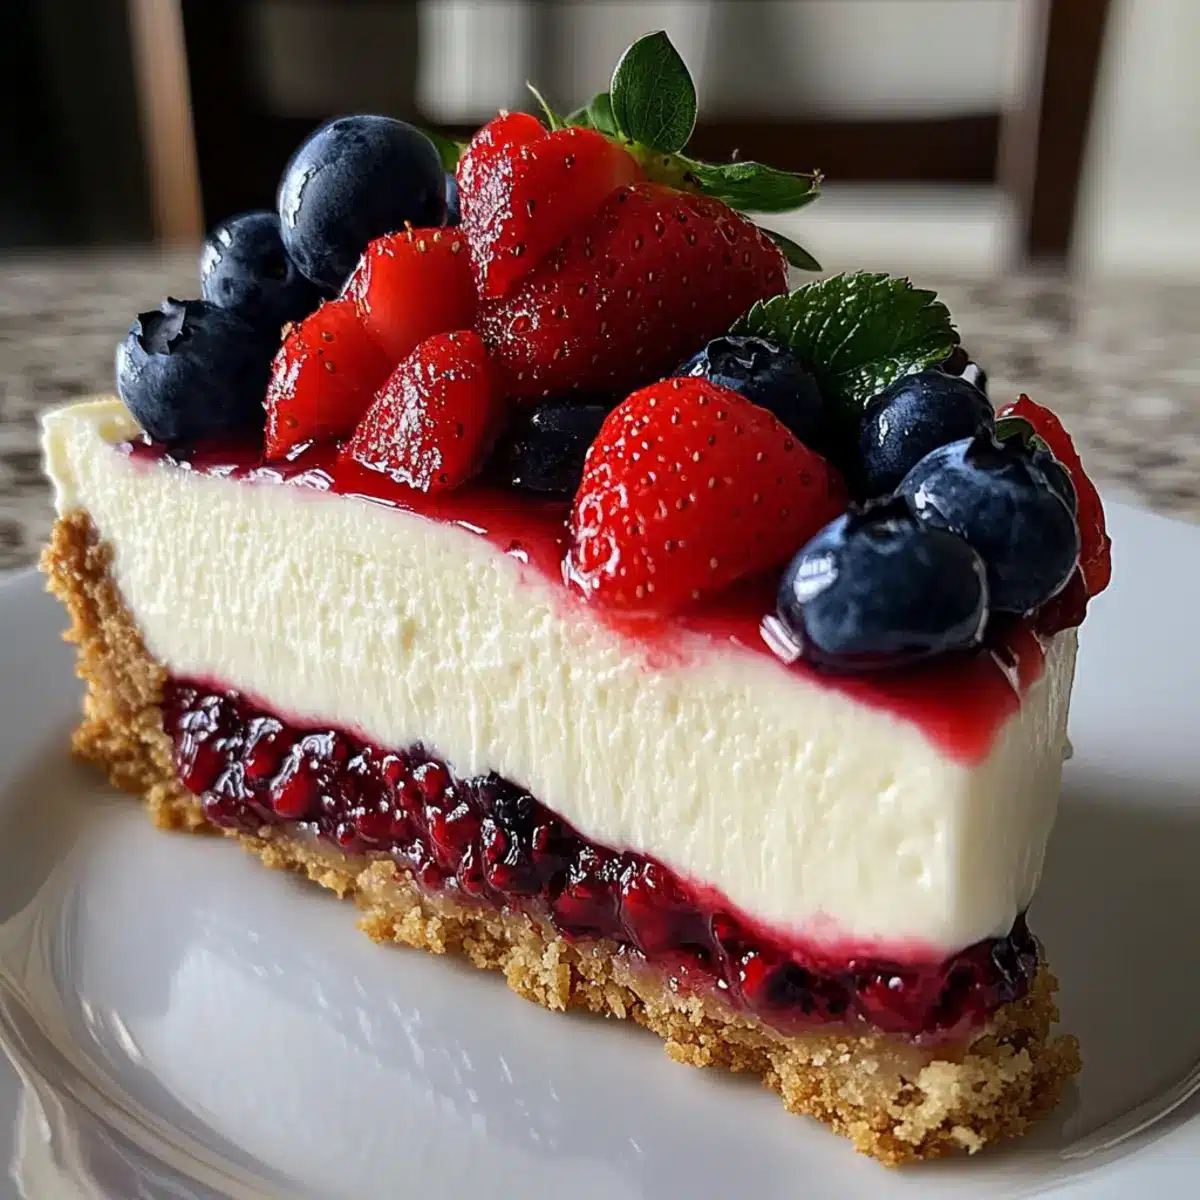
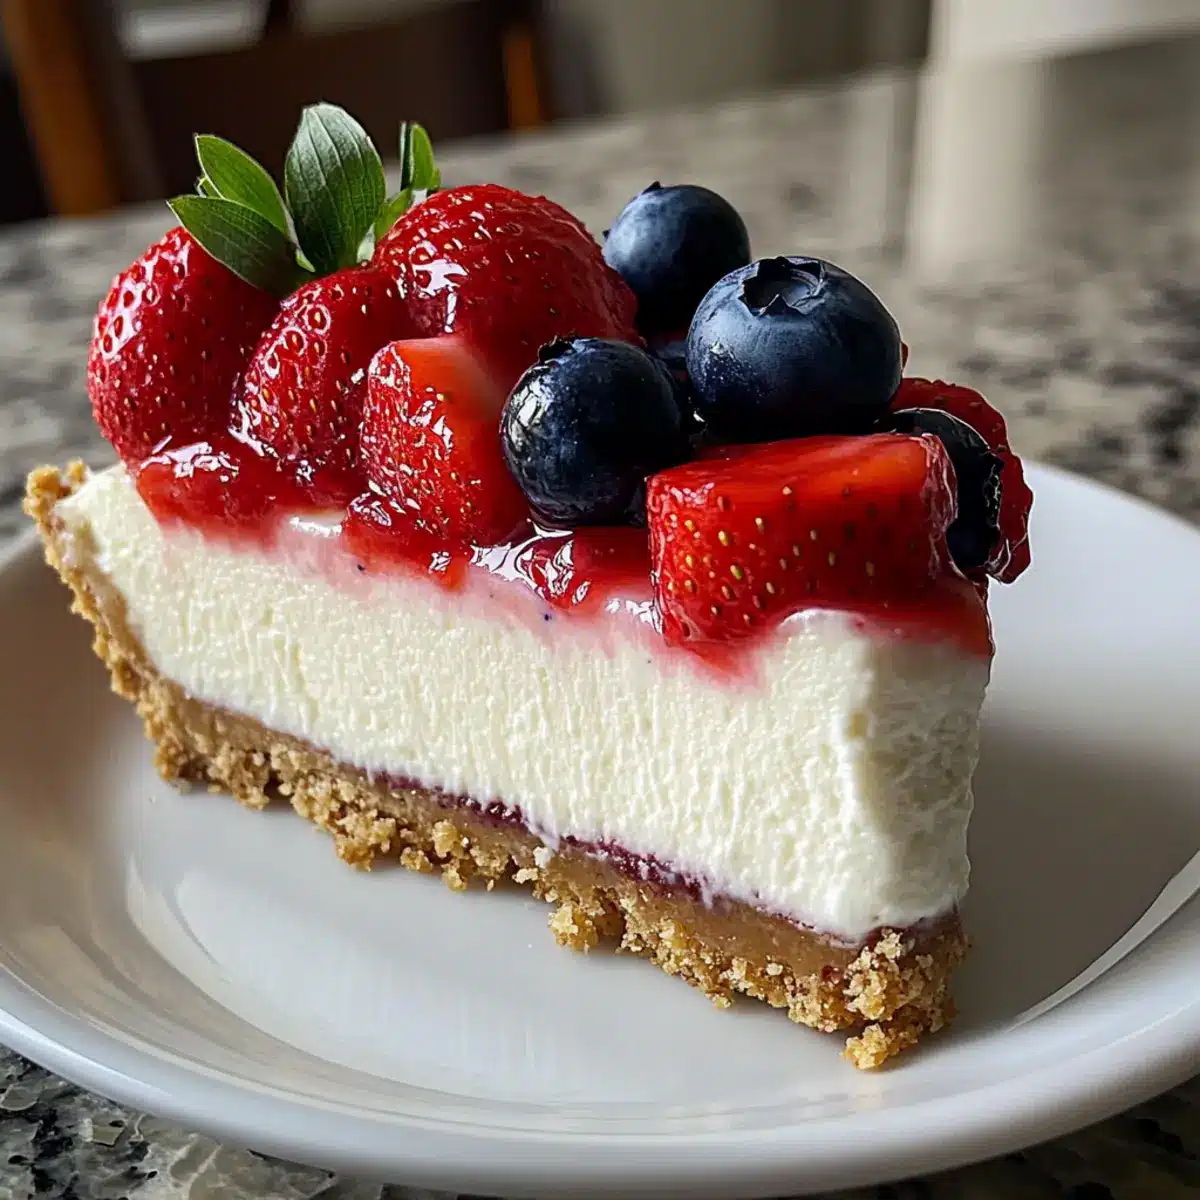
Vibrant Layers: Each slice boasts stunning colors of red and blue, perfect for vibrant summer gatherings and patriotic holidays.
Easy Preparation: With just 30 minutes of prep, this dessert is quick and stress-free, ensuring you spend less time in the kitchen and more time with loved ones.
Irresistible Flavor: The creamy cheesecake paired with fresh strawberries and blueberries creates a delightful contrast that’s sure to captivate your taste buds.
Versatile Options: Enjoy the freedom to swap fruit or crust variations—try chocolate with an Oreo crust, or even experiment with different berry combinations!
Crowd-Pleasing Delight: Friends and family will be raving about this dessert, making it a guaranteed hit at your next BBQ or gathering. For more delicious summer recipes, check out my Chicken Alfredo Pasta and Smothered Chicken Rice.
Red White Blue Cheesecake Ingredients
For the Crust
• Graham Cracker Crumbs – Provides the base for a crispy crust; substitute with Oreo crumbs for a rich chocolate twist.
• Unsalted Butter – Binds the crumbs into a crust and adds richness; can be replaced with coconut oil for a dairy-free option.
For the Cheesecake Filling
• Cream Cheese – Main structure for the cheesecake filling contributing to its richness; use low-fat cream cheese for a lighter version.
• Sour Cream – Adds creaminess and tang to the cheesecake; Greek yogurt may be used as a substitute.
• Granulated Sugar – Sweetens the cheesecake; a sugar alternative can be used for a sugar-free version.
• Vanilla Extract – Enhances overall flavor profile; using pure vanilla extract guarantees the best results.
For the Toppings
• Fresh Strawberries – Delivers sweetness and vibrant color; frozen strawberries can work, just ensure they are thawed and drained.
• Fresh Blueberries – Offers antioxidants and a beautiful color contrast; frozen blueberries can be substituted similarly.
Step‑by‑Step Instructions for Red White Blue Cheesecake
Step 1: Prepare the Crust
In a medium bowl, combine the graham cracker crumbs and melted unsalted butter until well mixed. Press the mixture firmly and evenly into the bottom of a 9-inch springform pan using a flat-bottomed measuring cup or your fingers. Aim for a compact crust that will hold together when sliced. Set it aside to firm up while you prepare the cheesecake filling.
Step 2: Make the Cheesecake Filling
In a large mixing bowl, use a hand mixer to beat the cream cheese and granulated sugar together until the mixture is smooth and creamy, about 2-3 minutes. Add in the sour cream and vanilla extract, continuing to blend until fully incorporated—be careful not to overmix to avoid cracks. This rich creaminess is the heart of your Red White Blue Cheesecake!
Step 3: Layer the Cheesecake
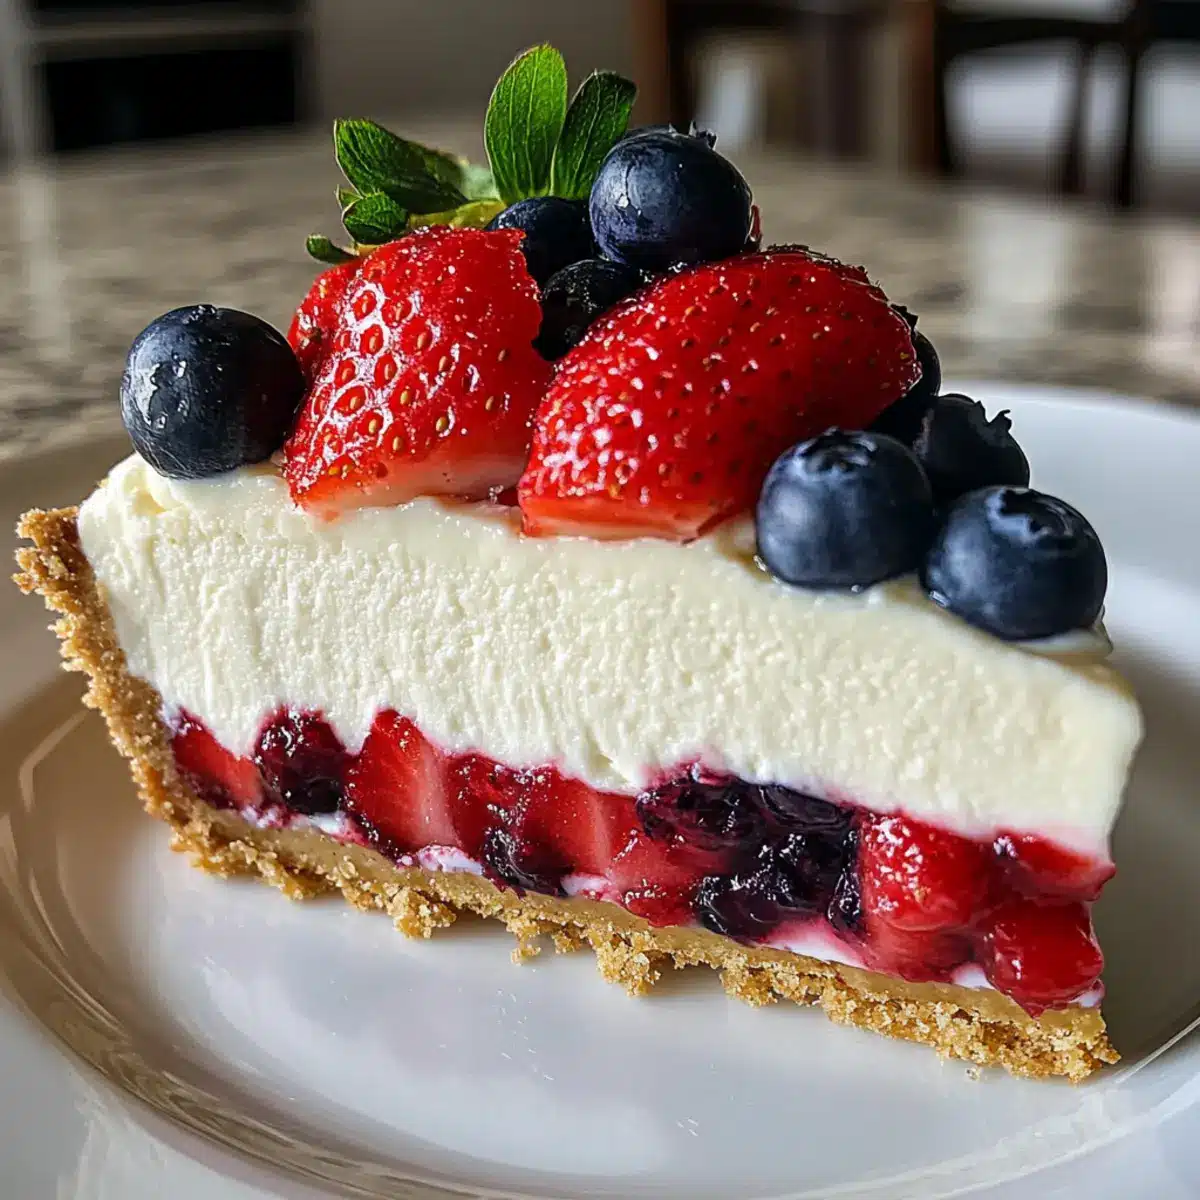
Pour half of the creamy cheesecake filling into the prepared crust and spread it evenly. Then, layer on the sliced fresh strawberries, carefully arranging them for an eye-catching look. Pour the remaining cheesecake filling over the strawberries, smoothing the top with a spatula. This will create a beautiful base for the blueberries on top.
Step 4: Bake
Preheat your oven to 325°F (163°C). Once heated, place the filled springform pan on the center rack and bake the cheesecake for about 60 minutes. The edges should be set while the center still jiggles a bit when gently shaken. This slight jiggle indicates that the cheesecake will continue to set as it cools.
Step 5: Cool Gradually
After baking, turn off the oven and crack the oven door slightly, allowing the cheesecake to cool in the oven for an additional hour. This gradual cooling helps prevent cracks in your cheesecake. After this time, carefully remove it from the oven and let it cool to room temperature on a wire rack.
Step 6: Chill
Cover the cheesecake with plastic wrap or foil and refrigerate it for at least 4 hours, or preferably overnight. This chilling process allows the flavors to meld beautifully and ensures the cheesecake sets properly. After chilling, your Red White Blue Cheesecake will be ready to slice and serve, showcasing those delightful layers!
Expert Tips for Red White Blue Cheesecake
• Firm Crust: Press the crust down firmly for a sturdy base. A loose crust can crumble when slicing, making serving difficult.
• Mix Gently: Combine the cheesecake ingredients slowly and carefully to avoid incorporating too much air, which can lead to cracks.
• Cooling In Oven: Let the cheesecake cool gradually in the oven after baking to minimize cracking. This step is essential for a smooth top!
• Chill Thoroughly: Refrigerate your cheesecake for at least 4 hours (or overnight) to allow it to set properly and enhance flavors for a delightful taste experience.
• Fruit Variations: Experiment with different fruits for toppings; try raspberries or blackberries for a unique twist on this Red White Blue Cheesecake!
Red White Blue Cheesecake Variations
Feel free to let your imagination run wild as you customize this stunning cheesecake to suit your taste buds!
-
Oreo Crust: Swap graham cracker crumbs for crushed Oreo cookies for a chocolatey twist that adds rich flavor.
-
Coconut Oil: Use coconut oil instead of unsalted butter for a dairy-free crust option that still binds beautifully.
-
Low-Fat Cream Cheese: For a lighter cheesecake, switch to low-fat cream cheese, allowing you to enjoy without the guilt.
-
Greek Yogurt: Substitute sour cream with Greek yogurt for a tangy flavor while also boosting protein content.
-
Berry Blend: Mix fresh strawberries and blueberries with raspberries or blackberries for a delightful mix of tangy flavors that pop.
-
Almond Flour Crust: For a gluten-free version, consider an almond flour crust—it’s nutty and provides a lovely texture.
-
Flavored Cream Cheese: Try using flavored cream cheese, like strawberry or vanilla bean, to infuse extra layers of taste into the filling.
-
Spicy Kick: For adventurous eaters, adding a pinch of cayenne or chili powder to the blueberry layer can create an exciting sweet and spicy contrast. If you’re looking for more creamy recipes, consider pairing this dish with my delicious Shrimp Crab Alfredo for a complete meal!
How to Store and Freeze Red White Blue Cheesecake
Fridge: Store the cheesecake covered in plastic wrap or aluminum foil for up to 5 days. This retains its creamy texture and fresh fruit toppings.
Freezer: For longer storage, freeze the cheesecake for up to 3 months. Wrap it tightly in plastic wrap followed by aluminum foil to prevent freezer burn.
Thawing: To serve, thaw the frozen cheesecake overnight in the refrigerator. This preserves the flavor and texture while allowing it to return to a creamy consistency.
Enjoying Leftovers: Serve the chilled cheesecake with a dollop of whipped cream and fresh fruit for a delightful treat, even after the initial celebrations!
Make Ahead Options
These Red White Blue Cheesecakes are a lifesaver for busy home cooks seeking time-saving solutions! You can prepare the crust and cheesecake filling up to 24 hours in advance, allowing them to set beautifully. Simply mix the graham cracker crumbs with melted butter and press them into the springform pan, then store it tightly wrapped in the fridge. The cheesecake filling can also be made ahead; just remember not to overmix when preparing. When you’re ready to serve, layer the fresh strawberries and blueberries on top as a finishing touch. Your dessert will still be just as delicious, perfect for any summer gathering!
What to Serve with Red White Blue Cheesecake
Get ready to create a flawless feast that beautifully complements the stunning layers of your dessert!
-
Grilled Peaches: Juicy and warm, grilled peaches brushed with honey add a sweet contrast that complements the cheesecake’s creamy richness.
-
Patriotic Fruit Salad: A colorful mix of strawberries, blueberries, and raspberries provides a refreshing and light accompaniment, echoing the bright flavors of your cheesecake.
-
Minted Lemonade: A crisp drink infused with fresh mint is incredibly refreshing, cutting through the sweetness of the cheesecake with its zesty notes.
-
Whipped Cream Topping: Light, fluffy whipped cream served alongside enhances the decadent cheesecake, inviting guests to indulge even further.
-
Shortbread Cookies: A buttery cookie crunch contrasts beautifully with the cheesecake’s smoothness, adding delightful texture to each bite.
-
Chocolate Drizzle: A rich chocolate sauce drizzled over the cheesecake provides a luxurious touch and an irresistible flavor boost.
-
Vanilla Ice Cream: Creamy vanilla ice cream offers a classic pairing, providing a cool balance to the cheesecake’s rich layers.
-
Lemon Tart: A zesty lemon tart serves as a perfect palate cleanser with its bright and tangy notes, rejuvenating your taste buds after each slice!
-
Sparkling Wine: A celebratory glass of bubbly is an elegant choice that elevates your dessert experience, perfect for any summer gathering!
Red White Blue Cheesecake Recipe FAQs
How do I select ripe strawberries and blueberries for my cheesecake?
Absolutely! Choose strawberries that are bright red with a natural shine and no dark spots. Blueberries should be plump, firm, and smooth. Avoid any that appear shriveled or have dark spots, as these can indicate overripeness. Fresh, flavorful fruit will elevate your cheesecake!
What’s the best way to store my leftover cheesecake?
Very good question! You can store your Red White Blue Cheesecake covered in plastic wrap or aluminum foil in the refrigerator for up to 5 days. This ensures it maintains its creamy texture and the beautiful fruit toppings remain fresh.
Can I freeze the Red White Blue Cheesecake? How?
Yes, you can freeze it! To freeze, wrap the cheesecake tightly in plastic wrap, then cover with aluminum foil to prevent freezer burn. It can be frozen for up to 3 months. When you’re ready to enjoy it, thaw the cheesecake overnight in the refrigerator for the best texture and flavor.
What should I do if my cheesecake cracks while baking?
Don’t worry—it happens to the best of us! If your cheesecake cracks, here are a few steps to prevent future incidents: First, avoid overmixing the batter to keep air bubbles to a minimum. Second, remember to cool it gradually in the oven after baking to relieve pressure on the surface. If cracks do form, consider topping them with whipped cream or fresh fruit for a beautiful finish—imperfections can be charming!
What dietary considerations should I keep in mind when making this cheesecake?
Wonderful question! If you have guests with dietary restrictions, this cheesecake can be adjusted to meet various needs. Use low-fat cream cheese for a lighter version, opt for coconut oil in place of butter for dairy-free, and select sugar substitutes for a sugar-free option. Always ensure your fruit selections are free from allergens appropriate to your guests.
Red White Blue Cheesecake: Celebrate Summer with a Slice of Joy
Ingredients
Equipment
Method
- In a medium bowl, combine the graham cracker crumbs and melted unsalted butter until well mixed. Press the mixture firmly and evenly into the bottom of a 9-inch springform pan using a flat-bottomed measuring cup or your fingers.
- In a large mixing bowl, use a hand mixer to beat the cream cheese and granulated sugar together until smooth and creamy, about 2-3 minutes. Add in the sour cream and vanilla extract, blending until fully incorporated.
- Pour half of the cheesecake filling into the prepared crust and spread it evenly. Layer on the sliced fresh strawberries carefully. Pour the remaining filling over the strawberries, smoothing the top with a spatula.
- Preheat your oven to 325°F (163°C). Once heated, place the filled springform pan in the center and bake the cheesecake for about 60 minutes. The edges should be set while the center jiggles slightly.
- Turn off the oven and crack the door slightly, allowing the cheesecake to cool in the oven for an additional hour to prevent cracks.
- Cover the cheesecake with plastic wrap or foil and refrigerate for at least 4 hours, or preferably overnight before slicing and serving.
Leave a Reply