
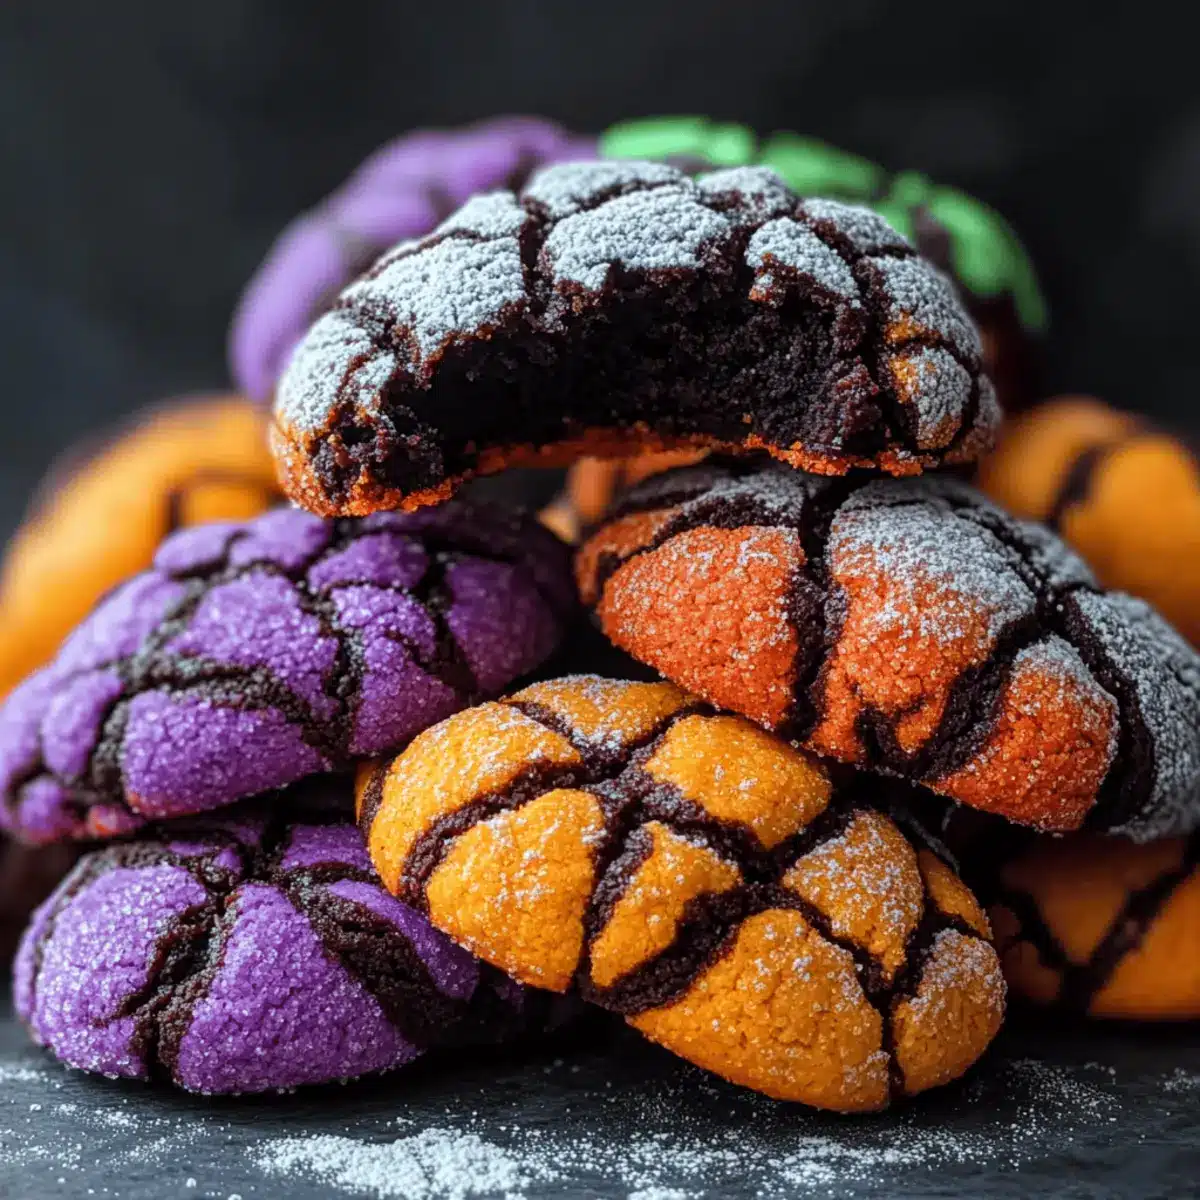
The air is crisp, and the scent of autumn spices fills my kitchen as I dive into the joys of Halloween baking. These spooky Halloween Crinkle Cookies make this season extra special, combining rich chocolate goodness with a playful splash of color. Whether you’re a novice baker or looking to share some festive fun with your kids, this easy recipe brings cheer and deliciousness to your home. The crackled tops, dusted with powdered sugar, reveal vibrant surprises beneath—perfect for delighting guests at a Halloween gathering. Plus, they’re a nostalgic twist on childhood favorites, ensuring smiles all around! Are you ready to stir up some magic with these Halloween Crinkle Cookies and get everyone into the festive spirit?
Why are Halloween Crinkle Cookies a Must-Bake?
Festive Fun: These cookies add a colorful flair to your Halloween gatherings, making them an instant hit with both kids and adults.
Nostalgic Treat: Reminiscent of childhood cookie moments, they evoke heartwarming memories that make baking together even more special.
Easy to Master: With straightforward instructions, even beginner bakers can successfully create these delightful treats without stress.
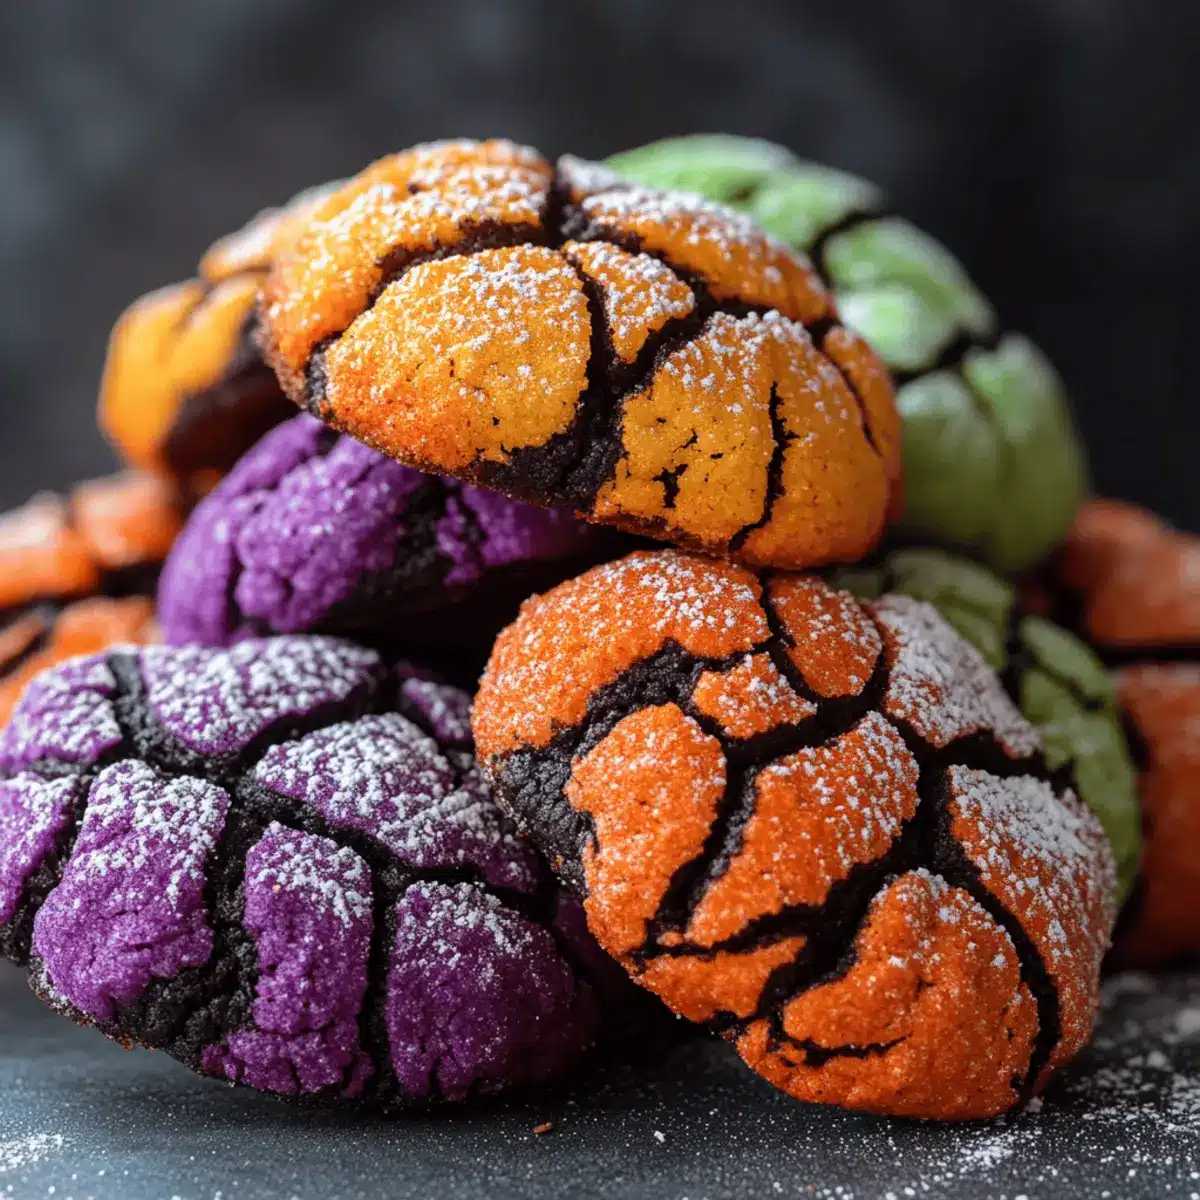
Customizable Colors: Choose from vibrant shades like orange, purple, or black to match your spooky celebrations; mix and match for a playful platter!
Perfectly Chewy: Enjoy a blissful experience with soft, fudgy interiors and a delightful powdered sugar crunch as you take your first bite.
Halloween Crinkle Cookies Ingredients
For the Cookies
• All-Purpose Flour – Provides the structure for these delightful Halloween Crinkle Cookies; substitute with a 1:1 gluten-free flour blend for those with dietary restrictions.
• Unsweetened Cocoa Powder – Infuses the dough with rich chocolate flavor; remember to sift it to avoid lumps for a smoother texture.
• Baking Powder – Acts as a leavening agent; always check for freshness, as expired baking powder can result in dense cookies.
• Salt – Elevates the sweetness of the cookies; a small yet essential ingredient for a balanced flavor.
• Granulated Sugar – Sweetens the mix; can be swapped with a sugar alternative, but note that it may alter the texture slightly.
• Vegetable Oil – Keeps the cookies moist and tender; for a twist, use melted coconut oil to add a hint of tropical flavor.
• Eggs – Bind ingredients together while adding moisture; bring your eggs to room temperature for the best incorporation.
• Vanilla Extract – Enhances flavor; opt for pure vanilla for a more authentic taste that elevates these crinkle cookies.
• Gel Food Coloring – Essential for vibrant hues; make sure to use gel over liquid coloring for concentrated, striking colors.
• Powdered Sugar – Forms a snowy coating that makes these cookies look festive; don’t skimp on it to achieve that delightful crunch.
For Serving (Optional)
• Milk – A classic pairing that complements the sweet flavors of the cookies; consider serving with cold milk for a nostalgic treat.
• Hot Cocoa – Adds a cozy touch, especially during chilly fall evenings; perfect for immersing yourself in the Halloween spirit.
• Pumpkin Spice Lattes – An aromatic choice that elevates the seasonal experience and pairs beautifully with sweet treats.
Step‑by‑Step Instructions for HALLOWEEN CRINKLE COOKIES
Step 1: Mix Dry Ingredients
In a medium-sized bowl, whisk together 1 cup of all-purpose flour, 1/3 cup of unsweetened cocoa powder, 1 teaspoon of baking powder, and 1/4 teaspoon of salt. This dry mixture sets the foundation for your Halloween Crinkle Cookies, ensuring even distribution of the leavening agent. Set the bowl aside, ready for incorporation into the wet mix.
Step 2: Mix Wet Ingredients
In a larger mixing bowl, combine 1 cup of granulated sugar and 1/3 cup of vegetable oil. Beat in 2 room-temperature eggs and 1 teaspoon of vanilla extract until the mixture is smooth and lightened in color. Gradually add a few drops of gel food coloring to create your desired festive hue, mixing thoroughly until evenly colored.
Step 3: Combine Mixtures
Carefully fold the dry ingredient mixture into the wet mixture, stirring gently until just combined. Be mindful not to overmix, as this can impact the texture of your Halloween Crinkle Cookies. The dough should be thick and slightly sticky, ready for the final chilling stage to achieve that signature cracked surface.
Step 4: Chill Dough
Cover the mixing bowl tightly with plastic wrap and refrigerate the dough for at least 1 hour, or up to 4 hours. Chilling is crucial for your cookies to develop the perfect texture and crackle upon baking. This step allows the flavors to meld and ensures your dough is firm enough to shape.
Step 5: Preheat Oven
As the dough chills, preheat your oven to 350°F (175°C). Line your baking sheets with parchment paper to prevent sticking and allow for easy cleanup. Getting your oven hot ensures that the cookies will puff up nicely and create that delightful crinkle as they bake.
Step 6: Shape Cookies
Once the dough has chilled, scoop out tablespoon-sized portions and roll them into balls. Roll each ball in a generous coating of powdered sugar so they are completely dusted. This snowy top will give your Halloween Crinkle Cookies their signature look, as well as a delightful sweetness.
Step 7: Bake
Place the powdered sugar-coated dough balls on the prepared baking sheets, spacing them about 2 inches apart. Bake in your preheated oven for 10-12 minutes, or until they are cracked on the top yet still soft in the center. Be careful not to overbake, as the cookies will continue to firm up once removed from the oven.
Step 8: Cool
After baking, let the cookies cool on the baking sheets for about 5 minutes. This allows them to set before transferring them to a wire rack. Once on the rack, allow your Halloween Crinkle Cookies to cool completely, revealing their soft, fudgy interiors and perfect crackled tops.
Variations & Substitutions for HALLOWEEN CRINKLE COOKIES
Feel free to get creative with these Halloween Crinkle Cookies and make them your own delightful treats.
-
Colorful Crinkle Effect: Experiment with different gel colors beyond the classic shades. How about a spooky green or ghostly white? The vibrant colors add fun surprises to your festive platters!
-
Sprinkle Surprise: Roll your dough balls not just in powdered sugar but also in colorful sprinkles or crushed candy for an added crunch and festive flair. Your cookies will dazzle like a Halloween carnival!
-
Chocolate Chip Boost: For an extra chocolatey delight, mix in semi-sweet or white chocolate chips into the batter. Imagine biting into cookie goodness that melts in your mouth!
-
Nutty Twist: Incorporate finely chopped nuts or seeds to add a delightful crunch and contrast to the soft texture. Walnuts or pecans would be particularly scrumptious alongside the chocolate flavor.
-
Gluten-Free Alternative: Swap the all-purpose flour for a 1:1 gluten-free flour blend to accommodate gluten sensitivities. Your guests with dietary restrictions can enjoy these too!
-
Vegan Option: Replace the eggs with a flax egg (1 tablespoon ground flaxseed mixed with 2.5 tablespoons water) and use a plant-based oil. You won’t sacrifice any of the deliciousness!
-
Spicy Central: Add a pinch of cinnamon or cayenne pepper to the dry mix for a subtle warm kick that contrasts beautifully with the sweetness. It’ll surprise and delight cookie lovers in your crowd!
-
Boozy Essence: For a grown-up twist, drizzle a little splash of your favorite liqueur (like orange or coffee flavored) into the wet ingredients—perfect for adding depth to the flavor profile!
For more festive twists, consider pairing these treats with a rich pumpkin spice latte or a cozy hot cocoa. For those who want to indulge, check out my delicious Pumpkin Smores Cookies and the irresistible Chewy Pumpkin Cookies. Mix, match, and enjoy the magic of Halloween baking!
What to Serve With Halloween Crinkle Cookies
Indulge in the sweet and festive flavors of Halloween with these delightful treats, and find the perfect pairings to enhance your spooky celebrations.
- Cold Milk: A classic companion that complements the sweetness, refreshing your palate after each chocolatey bite.
- Hot Cocoa: Warmth in a cup, this creamy beverage amplifies the cozy vibe, creating a nostalgic treat for chilly evenings.
- Pumpkin Spice Lattes: Infused with seasonal spices, this drink adds an aromatic touch, perfectly elevating the festive spirit.
- Fresh Fruit Salad: Crisp and juicy, the refreshing mix helps balance the rich, fudgy texture of the cookies, offering a burst of freshness.
- Caramel Sauce Dipping: Drizzle warm caramel over the top for a gooey touch that brings a touch of fall fun with each bite.
- Chocolate Chip Ice Cream: The cool creaminess of this dessert melts beautifully with the warm cookies for a decadent contrast that’s hard to resist.
- Spiced Apple Cider: Serve this warm beverage for a comforting pairing, immersing everyone in the essence of autumn and Halloween festivities.
- Pumpkin Muffins: For a delightful treat spread, these muffins boast a soft texture and warm spices that echo the flavors of the season.
- Gingerbread Cookies: Spice up your Halloween with these festive treats that bring a different yet complementary flavor profile to your dessert table.
- Halloween-themed cupcakes: Display these colorful delights alongside your cookies for a visually captivating spread that delights guests of all ages.
How to Store and Freeze Halloween Crinkle Cookies
Room Temperature: Keep baked Halloween Crinkle Cookies in an airtight container at room temperature for up to 3 days to maintain their chewiness and flavor.
Fridge: For extended freshness, you can refrigerate the cookies in an airtight container for up to a week. Just allow them to come to room temperature before serving.
Freezer: Freeze the rolled cookie dough balls coated in powdered sugar for up to 3 months. When ready to bake, simply place them directly in the oven, adding an extra 1-2 minutes to the baking time.
Reheating: To enjoy warm cookies, microwave them for 10-15 seconds, or you can place them in a 350°F (175°C) oven for about 5 minutes for that fresh-out-of-the-oven experience.
Expert Tips for Halloween Crinkle Cookies
Chill the Dough: Ensure your dough is adequately chilled to achieve that perfect crackle. Warm dough can lead to flat cookies, which we want to avoid!
Use Gel Colors: Opt for gel food coloring instead of liquid; it provides vibrant colors without altering the dough consistency, ensuring beautiful Halloween Crinkle Cookies.
Double-Coat for Effect: For a pronounced snowy appearance, double-coat your cookie balls in powdered sugar before baking. This trick enhances their festive look!
Avoid Overbaking: Aim for a slightly underbaked center to maintain the fudgy texture. Overbaking can make cookies dry instead of that delightful chewy texture we crave.
Storage Made Easy: If you want to make them ahead, refrigerate the dough for up to 2 days or freeze the rolled cookie balls. Bake from frozen, adding a couple of extra minutes to the time.
Make Ahead Options
These Halloween Crinkle Cookies are perfect for busy home cooks looking to save time during the festive season! You can refrigerate the dough for up to 3 days before shaping and baking. To prep ahead, simply mix the dough as directed, cover it tightly with plastic wrap, and store it in the refrigerator. For longer storage, roll the cookie dough into balls, coat them in powdered sugar, and freeze them for up to 2 months. When you’re ready to bake, just place the frozen cookie dough on baking sheets and add 1-2 minutes to the baking time. This way, you’ll enjoy delicious, oven-fresh Halloween Crinkle Cookies with minimal effort, ready to impress your guests!

Halloween Crinkle Cookies Recipe FAQs
What type of flour should I use for Halloween Crinkle Cookies?
I recommend using all-purpose flour for this recipe, as it provides the right structure. If you need a gluten-free option, a 1:1 gluten-free flour blend works great as a substitute!
How should I store my Halloween Crinkle Cookies?
To keep your cookies fresh, store them in an airtight container at room temperature for up to 3 days. If you want them to last longer, refrigerate them in an airtight container for about a week.
Can I freeze Halloween Crinkle Cookies?
Absolutely! You can freeze the rolled cookie dough balls coated in powdered sugar for up to 3 months. When you’re ready to enjoy them, simply bake from frozen, adding an extra 1-2 minutes to the baking time.
What if my Halloween Crinkle Cookies don’t crack?
If your cookies didn’t develop the desired crackled tops, it might be due to insufficient chilling of the dough. Make sure to chill the dough for at least 1 hour, or longer if possible, to ensure a perfect texture and appearance.
Are there any dietary restrictions I should be aware of?
Yes, these cookies contain gluten, eggs, and sugar. For allergic considerations, ensure you use a gluten-free flour blend, and you can replace the eggs with a flaxseed or chia seed egg for a vegan option. Just note that this may slightly alter the texture.
Can I make Halloween Crinkle Cookies ahead of time?
Certainly! You can prepare the dough up to 2 days in advance and refrigerate it. Alternatively, freeze the prepared dough balls coated in powdered sugar for future baking. Just bake them directly from the freezer when you’re ready, adding a couple of minutes to the bake time.

Irresistible Halloween Crinkle Cookies – Fun, Fudgy Treats to Bake!
Ingredients
Equipment
Method
- In a medium-sized bowl, whisk together flour, cocoa powder, baking powder, and salt. Set the bowl aside.
- In a larger mixing bowl, combine granulated sugar and vegetable oil. Beat in eggs and vanilla extract until smooth. Add gel food coloring as desired.
- Carefully fold the dry mixture into the wet mixture until just combined. The dough should be thick and slightly sticky.
- Cover the bowl with plastic wrap and refrigerate the dough for at least 1 hour.
- Preheat your oven to 350°F (175°C) and line baking sheets with parchment paper.
- Scoop tablespoon-sized portions of dough, roll into balls, and coat in powdered sugar.
- Place coated dough balls on prepared baking sheets and bake for 10-12 minutes, or until cracked on top.
- Let cookies cool on the baking sheets for about 5 minutes before transferring to a wire rack.
Leave a Reply