
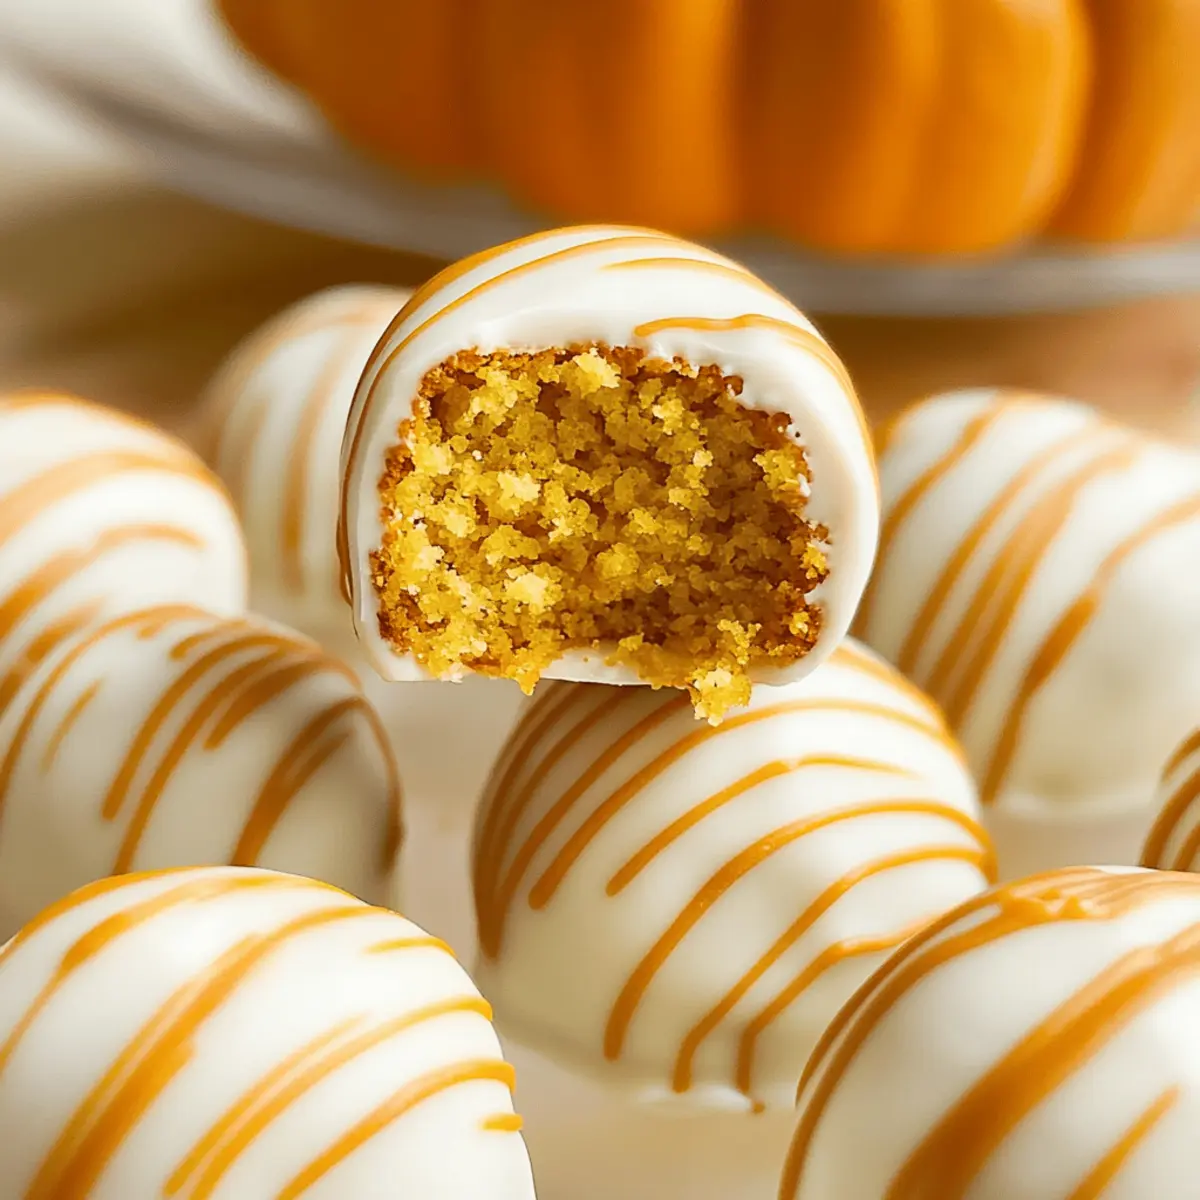
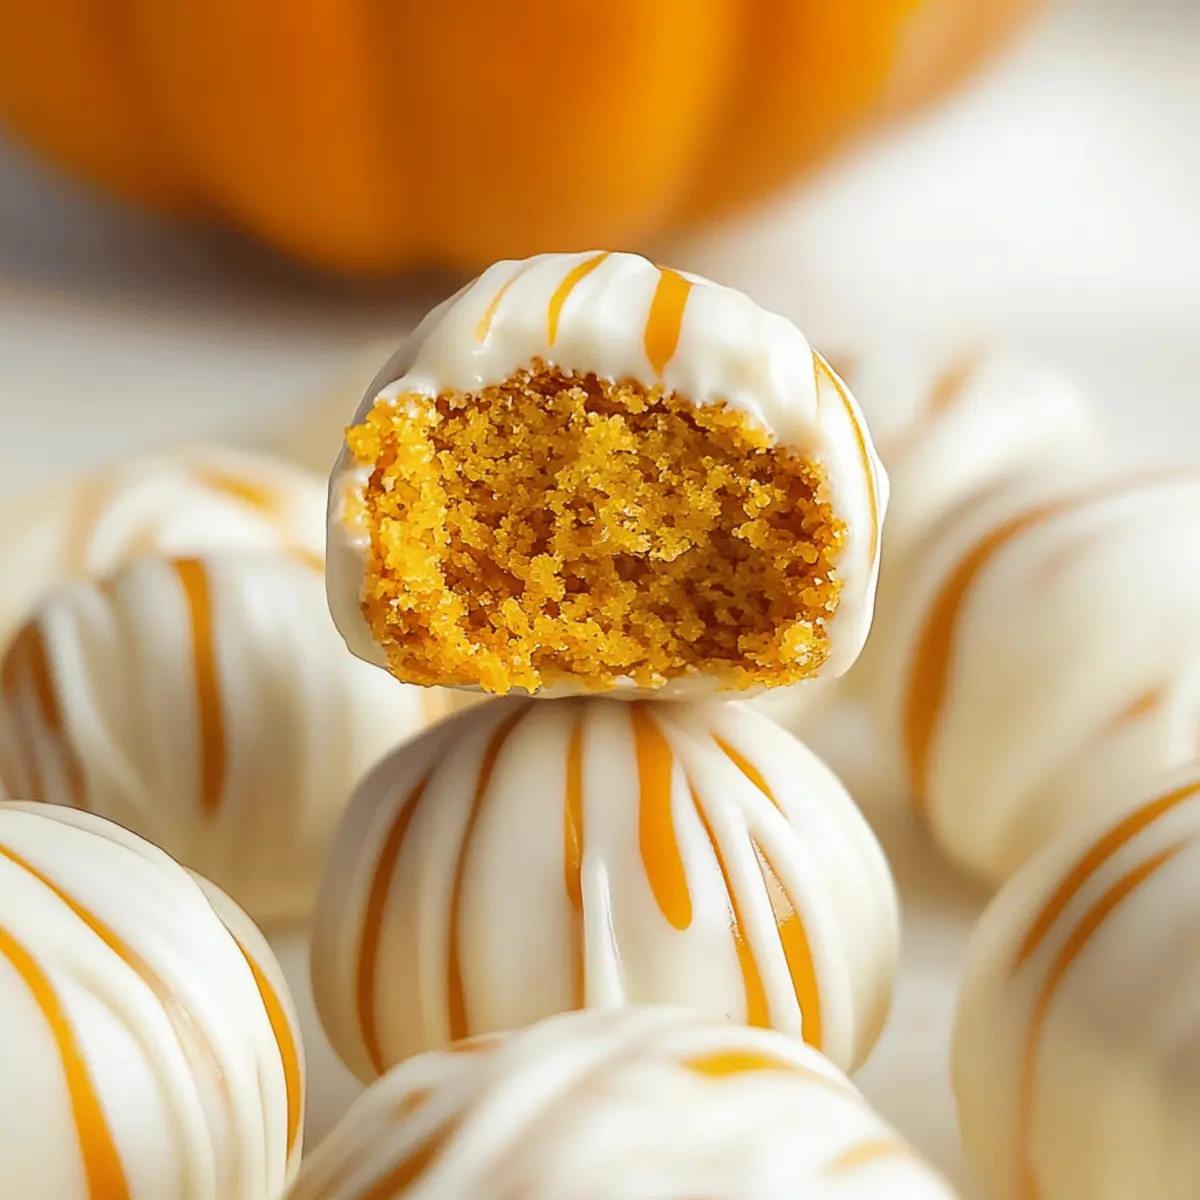
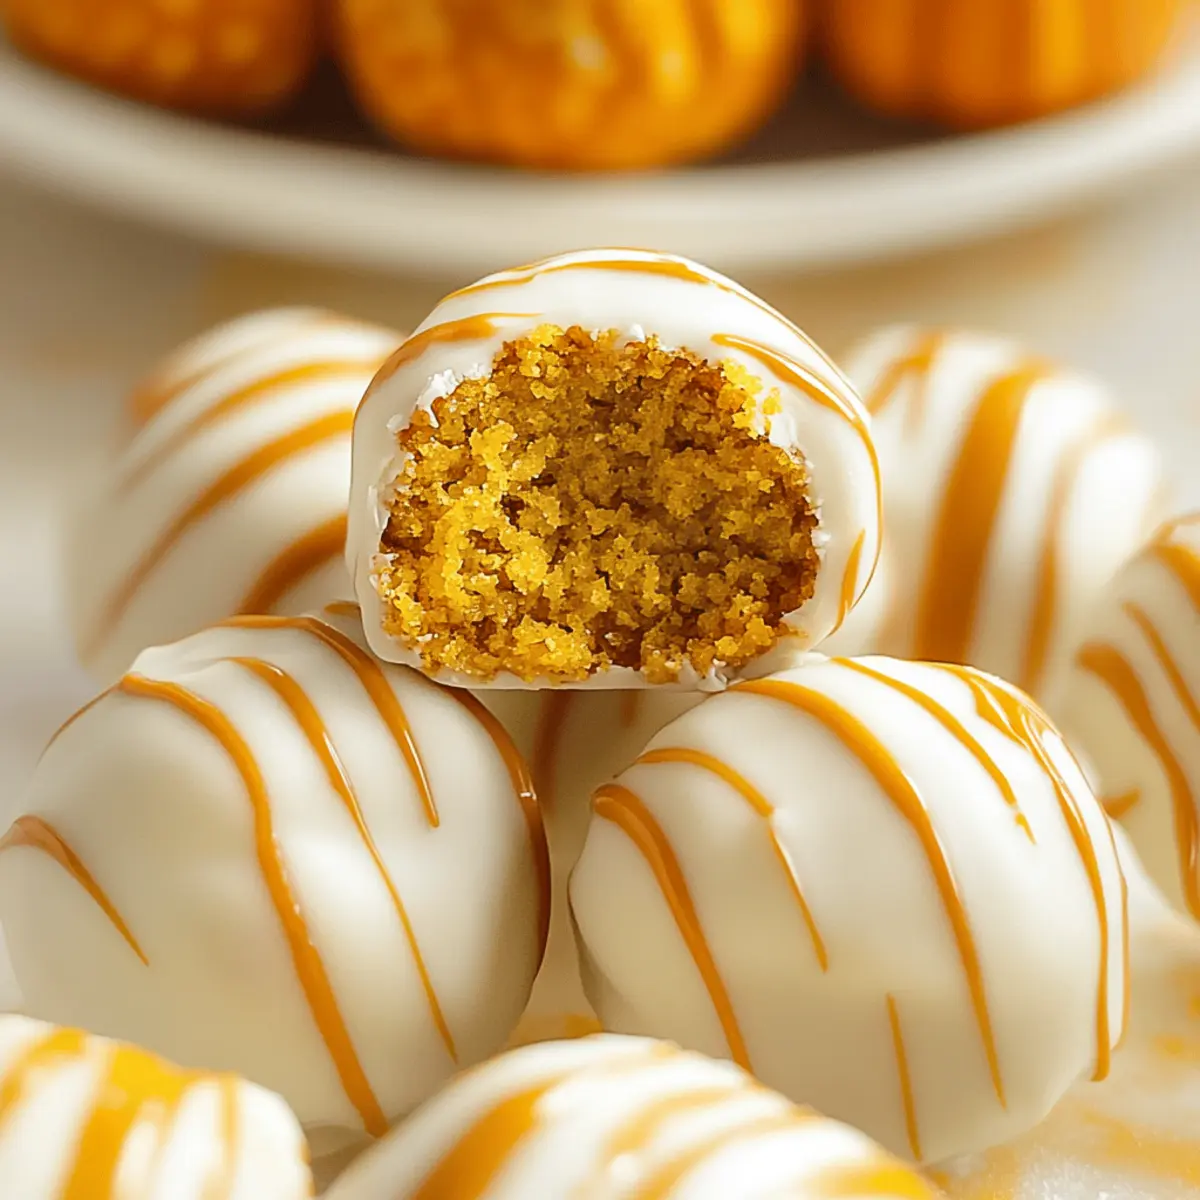
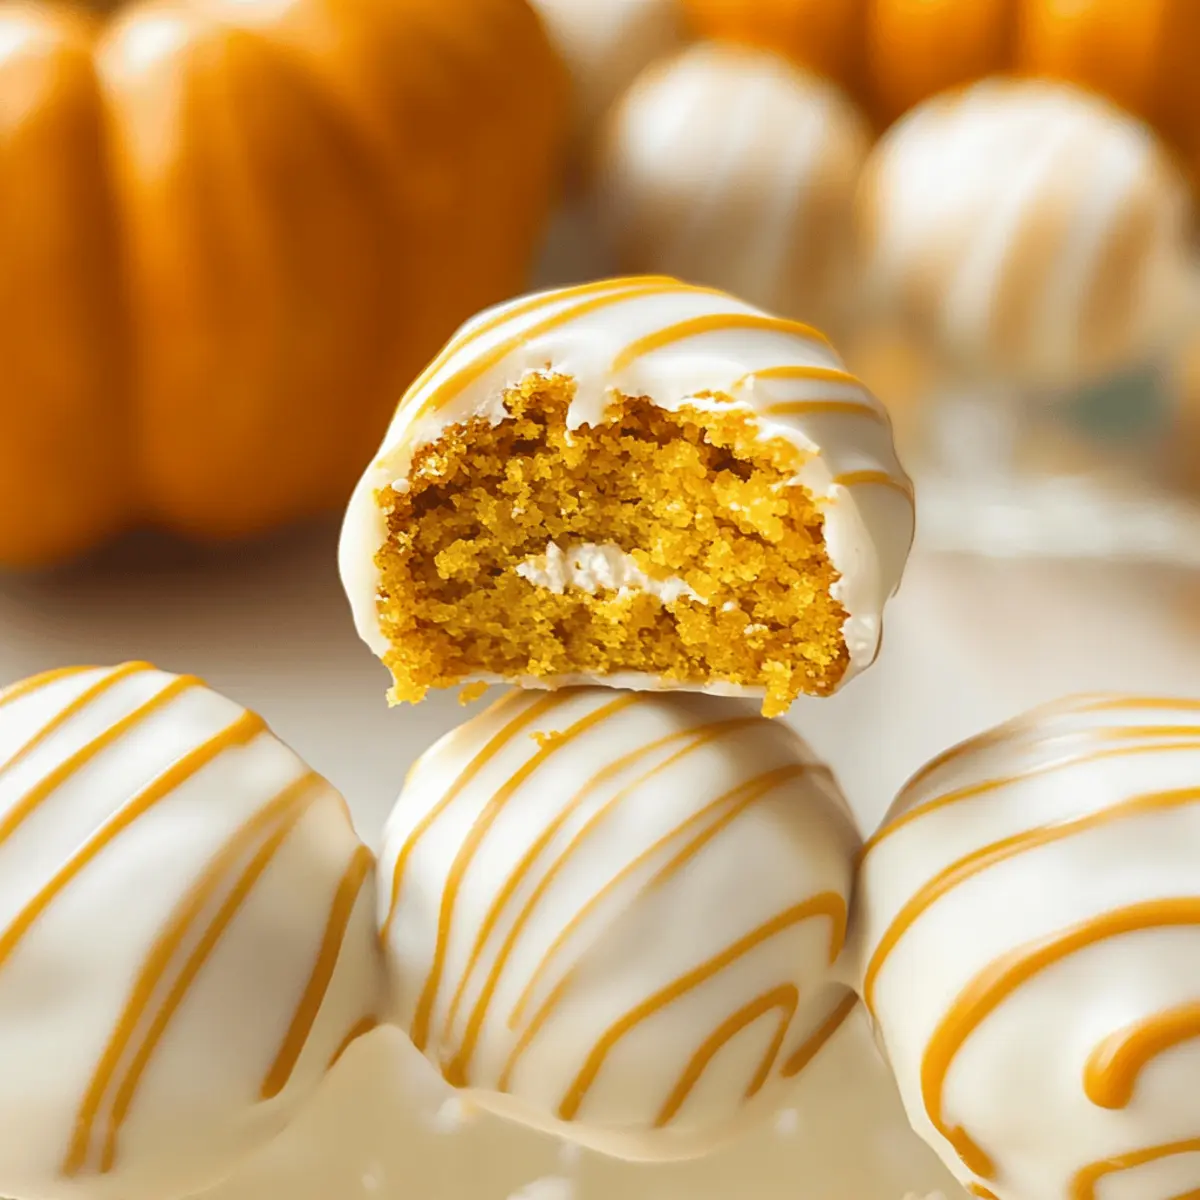
As I stood in my kitchen, the sweet aroma of pumpkin spices filled the air, transporting me straight into the heart of fall. That’s when I decided to whip up these delightful Pumpkin Cake Pops, the perfect blend of cozy flavors ideal for this season. With an irresistible cheesecake frosting center, every bite is a celebration of warmth and nostalgia, making these pops not only simple to prepare but also a wonderful gift option. Whether you’re looking to impress at your next gathering or just craving a touch of homemade sweetness, these treats are sure to please. How can something so easy be so enchanting? Let’s dive into the magic of making these delicious bites!
Why are Pumpkin Cake Pops so irresistible?
Unmatched Flavor: The combination of pumpkin and warm spices creates a cozy taste that screams fall.
Easy to Make: Minimal steps mean you can whip these up even on a busy day.
Perfect for Gifting: Wrapped in sweet chocolate, they look festive and are a delightful homemade gift option.
Versatile Treat: Feel free to swap the frosting or chocolate to match your taste!
Crowd-Pleasing: These pops are a hit at any gathering—who can resist a sweet bite of pumpkin goodness?
For more delightful fall flavors, check out my recipes for Pumpkin Coffee Cake or Baked Pumpkin Donuts!
Pumpkin Cake Pops Ingredients
For the Cake
- Pumpkin Cake – Homemade or store-bought pumpkin spice cake mix works beautifully for a flavorful base.
- Butter – Room temperature butter enhances richness and makes for easy mixing.
For the Frosting
- Cream Cheese – Use full-fat cream cheese for a richer and creamier frosting experience.
- Confectioners’ Sugar – This sweet ingredient gives your frosting a smooth texture; substitute with powdered erythritol for a low-sugar version.
For the Coating
- White or Milk Chocolate – Melted chocolate creates a sweet, delectable outer layer; ensure it’s at the right temperature for a smooth dip.
Add these ingredients to your shopping list and get ready to enjoy the sweet flavors of homemade Pumpkin Cake Pops, the perfect treat for fall festivities or gifting!
Step‑by‑Step Instructions for Pumpkin Cake Pops
Step 1: Prepare the Cake
Begin by baking the pumpkin spice cake according to your choice of recipe or package instructions. Preheat your oven to 350°F (175°C) and grease a baking pan. Bake until a toothpick inserted in the center comes out clean, typically 25-30 minutes. The aroma of warm spices will fill your kitchen as the cake rises to a beautiful golden brown.
Step 2: Make the Frosting
While the cake is cooling, it’s time to prepare the luscious cream cheese frosting. In a mixing bowl, beat together the softened cream cheese and room temperature butter until light and fluffy, about 2-3 minutes using an electric mixer. Gradually add in the confectioners’ sugar, mixing until the frosting is smooth and creamy. Set this aside while the cake cools completely.
Step 3: Crumble the Cake
Once your pumpkin cake has fully cooled, cut it into bars and transfer the pieces into a large mixing bowl. Use your hands or a fork to crumble the cake into fine crumbs. This should yield a soft texture that resembles sand, enabling easy mixing with the frosting.
Step 4: Combine Cake and Frosting
Next, add the cream cheese frosting to the crumbled pumpkin cake. Mix with your hands or a spatula until the mixture becomes a moist dough that holds together. This step is crucial for achieving the delightful filling found in your Pumpkin Cake Pops, ensuring each bite is deliciously creamy.
Step 5: Shape the Cake Pops
Take a scoop of the cake mixture and roll it into 1.5-inch balls. Place these formed balls on a sheet of wax paper, making sure they aren’t touching. Once all balls are shaped, cover them and freeze for 10-15 minutes, allowing them to firm up for easy dipping later.
Step 6: Dip the Cake Pops
While your cake balls are freezing, melt your choice of chocolate in a microwave-safe bowl. Heat in short intervals, stirring until smooth and melted. Once the cake balls have firmed up, dip each one into the melted chocolate, ensuring an even coating. Allow excess chocolate to drip back into the bowl before placing them back on the wax paper.
Step 7: Set the Coating
Finally, let the dipped Pumpkin Cake Pops sit on the wax paper until the chocolate coating is completely set. This may take about 30 minutes at room temperature. For faster results, you can place them in the refrigerator for about 15 minutes. Ensure they are placed apart to maintain their beautiful shape.
Expert Tips for Pumpkin Cake Pops
-
Clean Hands Matter: Always ensure your hands are clean and dry when rolling the dough to avoid sticking. Using gloves can help keep everything neat!
-
Chocolate Temperature: Melt your chocolate at a gentle temperature to prevent it from becoming too thick. Properly warmed chocolate ensures a smooth dip for your Pumpkin Cake Pops.
-
Preventing Cracks: If the chocolate coating sets unevenly or cracks, simply break off the excess chocolate once it hardens for a polished look.
-
Make Ahead: These cake pops can be prepared in advance! Store them in an airtight container for up to a week, or freeze them to enjoy later.
-
Customize Flavors: Feel free to swap the cream cheese frosting for a different flavor, like vanilla or chocolate, to personalize your Pumpkin Cake Pops.
Storage Tips for Pumpkin Cake Pops
Fridge: Store your Pumpkin Cake Pops in an airtight container; they can last up to 1 week in the refrigerator, maintaining their deliciousness.
Freezer: These treats freeze beautifully! Place the pops in a single layer on a wax paper-lined tray and freeze until firm. Then, transfer them to a freezer bag or container for up to 3 months.
Reheating: There’s no need to reheat these cake pops! Just thaw them overnight in the fridge before serving for optimal taste and texture.
Wrapping: If gifting, wrap the pops individually in cellophane bags and tie with a ribbon, making for a festive presentation while keeping them fresh.
Make Ahead Options
These delightful Pumpkin Cake Pops are perfect for meal prep enthusiasts! You can prepare the cake mixture up to 24 hours in advance; simply crumble the cooled pumpkin spice cake and mix it with the cream cheese frosting, then shape into balls. Store them in an airtight container in the refrigerator to maintain their freshness. Once you’re ready to serve, just melt the chocolate, dip the cake balls, and let them set. For an even longer storage solution, freeze the uncoated cake balls for up to 3 months. When the time comes, dip them in chocolate as needed, ensuring each pop remains just as delicious as fresh!
Pumpkin Cake Pops Variations & Substitutions
Feel free to get creative with these Pumpkin Cake Pops, adding your own twist! Let’s explore some exciting possibilities that can enhance or suit different tastes.
-
Dairy-Free: Substitute the cream cheese with a dairy-free version and use coconut or almond milk chocolate for coating.
-
Low-Sugar: Swap confectioners’ sugar for powdered erythritol in the frosting; perfect for a healthier option without sacrificing taste.
-
Flavor Explosion: Drizzle melted caramel over the chocolate coating for a sweet and gooey finish that elevates each pop!
-
Nutty Crunch: Add crushed pecans or walnuts into the cake mixture for an unexpected texture and flavor boost; it’s like a surprise in every bite!
-
Increased Spice: Incorporate pumpkin pie spice into both the cake and frosting for a warm, spiced flavor that will have everyone asking for more.
-
Chocolate Lovers: Use dark chocolate for coating instead of white; the richer flavor will pair nicely with the sweetness of the pops.
-
Sprinkles Galore: Before the coating sets, sprinkle on some colorful holiday sprinkles to boost the fun factor; great for kids’ parties!
-
Mini Pops: Roll smaller balls for bite-sized treats that are perfect for events, making them easier to munch on during gatherings.
Remember, these delightful variations not only enhance the taste and look of your Pumpkin Cake Pops but also allow you to cater to different dietary preferences. For more delicious pumpkin-inspired recipes, take a peek at my Chewy Pumpkin Cookies or Pumpkin S’mores Cookies!
What to Serve with Pumpkin Cake Pops
Indulge in a delightful array of side treats that will elevate your pumpkin-themed festivities to new heights.
- Cinnamon Sugar Donuts: These fluffy, sweet donuts echo the warm spices in the cake pops, creating a harmonious fall experience.
- Caramel Apple Slices: A crunchy, tart contrast to the sweetness of the cake pops, these treats add freshness to your dessert table.
- Hot Apple Cider: The warm, spiced aroma of this classic beverage is a perfect companion to the rich flavors of the cake pops.
- Creamy Vanilla Ice Cream: Serve with a scoop for a delicious texture contrast; the creaminess complements the dense pumpkin cake beautifully.
- Chai Latte: This spiced tea drink enhances the cozy feel of your dessert spread, perfectly echoing the flavors in each bite.
- Roasted Chestnuts: These earthy nuts add a seasonal flair and a crunch that balances the soft texture of your pumpkin treats.
- Pumpkin Spice Cookies: Reinforce that rich pumpkin flavor with these chewy cookies, making for a delightful treat pairing at gatherings.
- Chocolate-Dipped Pretzels: The salty-sweet combination of pretzels dipped in chocolate introduces a playful crunch alongside your cake pops.
Embrace these suggestions for a memorable autumnal gathering that warms your heart and delights your guests!
Pumpkin Cake Pops Recipe FAQs
How do I choose the best pumpkin for my cake?
Absolutely! When selecting pumpkin for your cake, look for small sugar or pie pumpkins, which are sweeter and have a smoother texture than larger carving pumpkins. Make sure it feels heavy for its size and has a firm, smooth skin. A pumpkin that’s vibrant orange and free of dark spots is ideal!
How should I store my Pumpkin Cake Pops?
Very good question! Store your Pumpkin Cake Pops in an airtight container in the refrigerator for up to 1 week. They’ll remain deliciously moist and fresh. If you want to keep them longer, they freeze beautifully—just follow the freezing instructions below!
Can I freeze Pumpkin Cake Pops?
Of course! To freeze your Pumpkin Cake Pops, place them in a single layer on a baking sheet lined with wax paper. Freeze until solid, typically about 1-2 hours, then transfer them to a freezer bag or container. They can last up to 3 months in the freezer without losing quality. When you’re ready to enjoy, simply thaw them overnight in the refrigerator.
Why is my chocolate coating not setting properly?
Great question! If your chocolate coating isn’t setting properly, it may be too thick or not properly tempered during melting. Ensure that you’re melting the chocolate gradually in short intervals, stirring frequently to maintain a smooth consistency. If it does begin to harden unevenly, you can gently break off any excess chocolate once it’s set to achieve a cleaner look.
Are Pumpkin Cake Pops suitable for pets or people with allergies?
While Pumpkin Cake Pops are a delightful treat for humans, they should not be shared with pets due to ingredients like chocolate and sugar that are harmful to them. For those with allergies, always be cautious and substitute ingredients as needed. For example, using a dairy-free cream cheese and ensuring the chocolate is allergen-free can make them more accessible for those with dietary restrictions.
Do I need to use a special chocolate for dipping?
Not at all! You can use any white or milk chocolate you prefer for coating your Pumpkin Cake Pops. However, I often recommend using chocolate chips or melting chocolate specifically labeled as candy coating, as they typically melt smoothly and hold their shape better than regular chocolate. Enjoy coating your pops until they’re perfectly delicious!
Delicious Pumpkin Cake Pops for Fall Festivities and Gifting
Ingredients
Equipment
Method
- Preheat your oven to 350°F (175°C). Grease a baking pan. Bake pumpkin spice cake according to package instructions until a toothpick comes out clean, about 25-30 minutes.
- In a mixing bowl, beat together cream cheese and butter until light and fluffy, about 2-3 minutes. Gradually add confectioners' sugar until smooth and creamy.
- Cut the cooled pumpkin cake into bars and crumble it into fine crumbs in a large mixing bowl.
- Add the cream cheese frosting to the crumbled pumpkin cake and mix until it forms a moist dough.
- Roll the mixture into 1.5-inch balls and place on wax paper. Freeze for 10-15 minutes.
- Melt chocolate in a microwave-safe bowl. Once cake balls are firm, dip each one into the melted chocolate and allow excess to drip off.
- Let the dipped cake pops sit on wax paper until the chocolate coating sets, about 30 minutes or refrigerate for 15 minutes.
Leave a Reply