
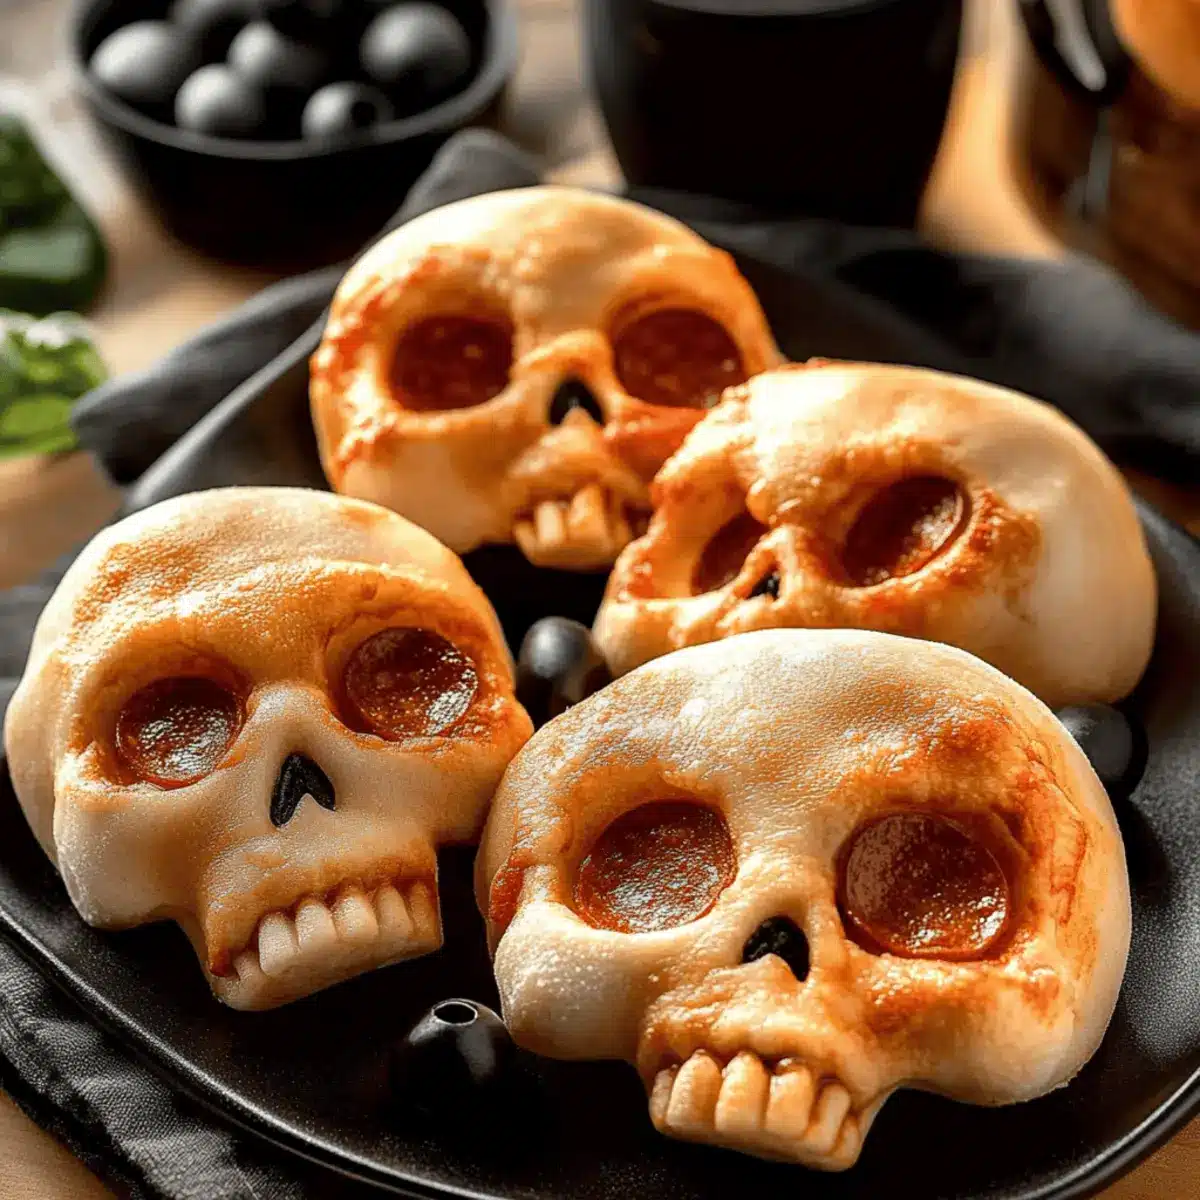
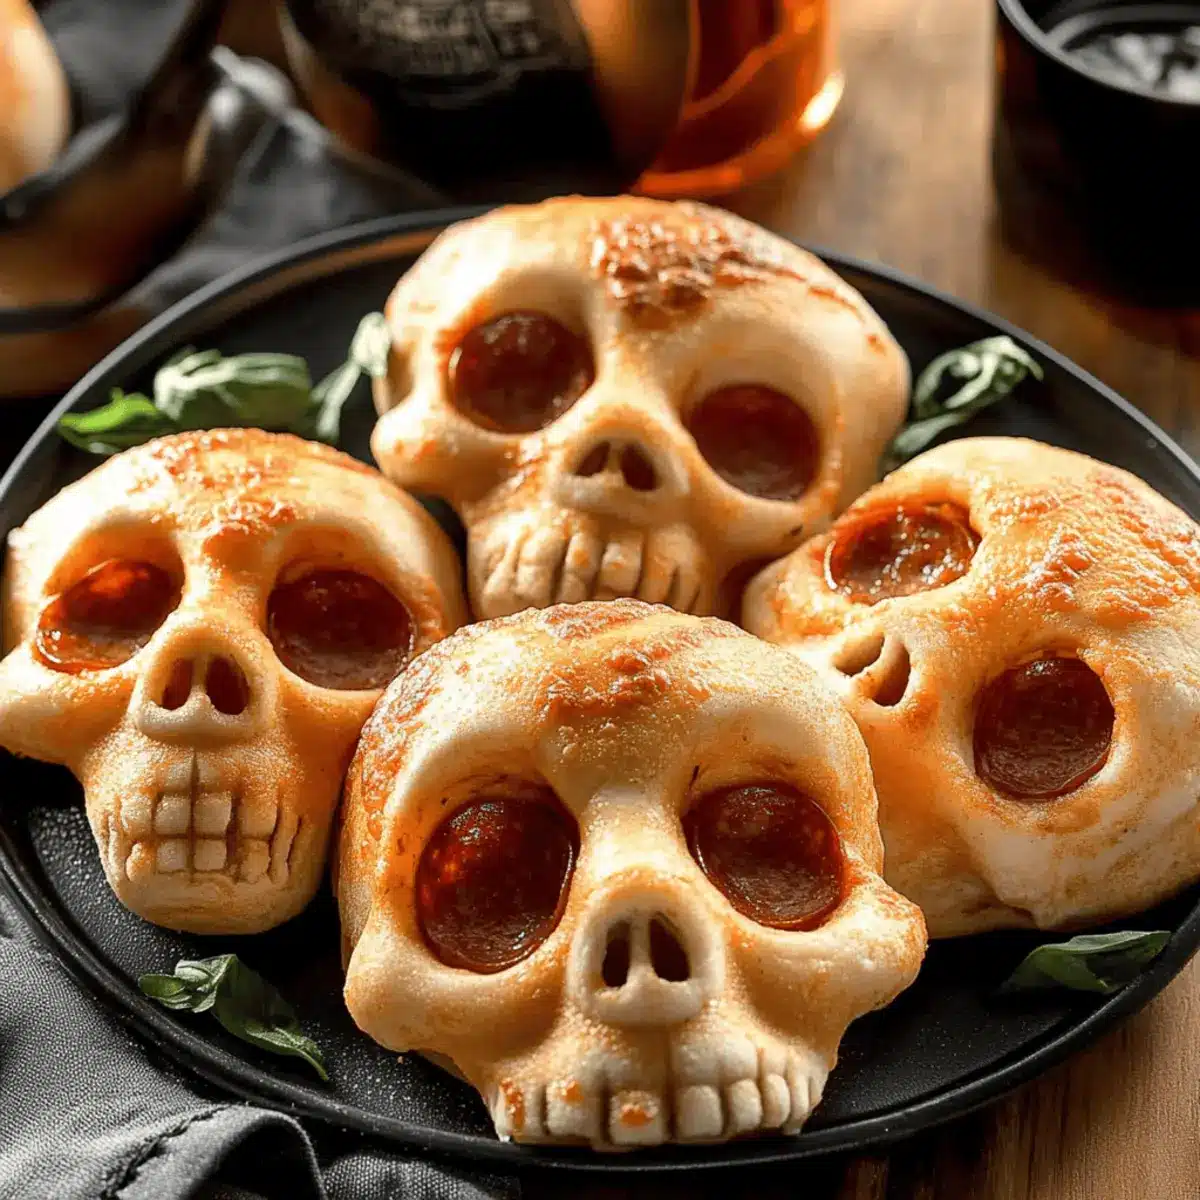
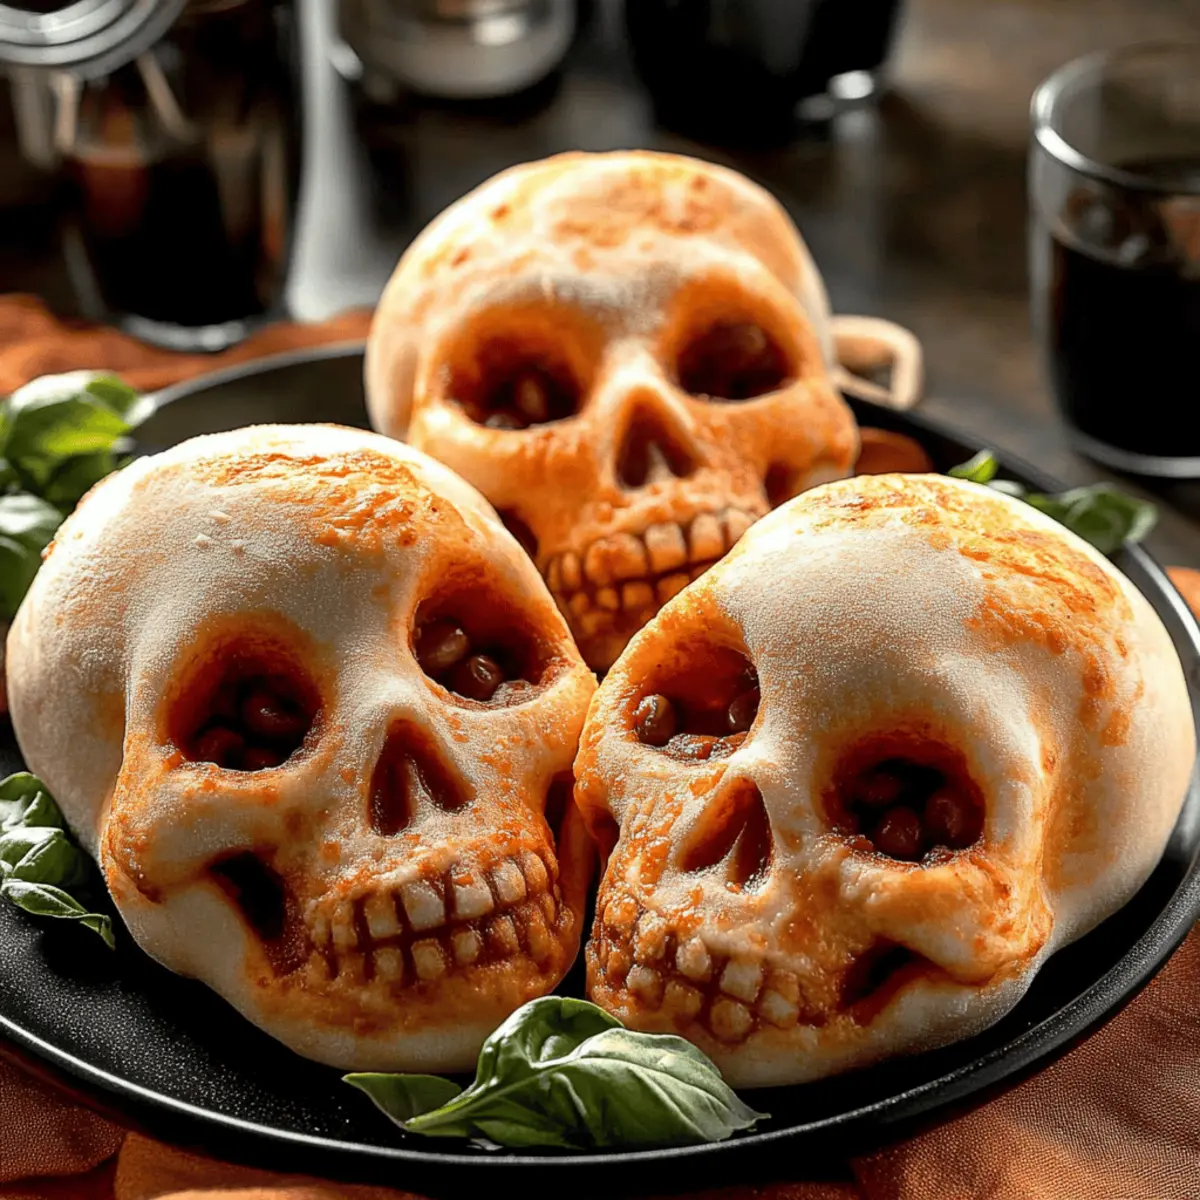
As I was flipping through old recipe books, I stumbled upon a fantastic memory: the joy of pulling a gooey pizza pocket from the oven, its cheesy goodness spilling out with every bite. It immediately inspired me to recreate that classic experience in a fun Halloween twist! These Halloween Pizza Skulls are perfect for adding a touch of whimsy to your festivities while being entirely customizable. Whether you’re a meat lover or a veggie enthusiast, everyone can craft their unique flavors within these delightful skulls. What’s more, they come together quickly, making them an ideal choice for busy weeknights or spooky gatherings. So, are you ready to turn your kitchen into a haunted pizzeria? Let’s dive into this delicious adventure!

Why Are Halloween Pizza Skulls So Fun?
Ghoulishly Creative: These playful skull-shaped treats invite your imagination to run wild with toppings, allowing for endless customization.
Easy to Make: Perfect for aspiring chefs or busy parents, the simple steps make this a breeze even on hectic days.
Kid-Approved: With gooey cheese and fun shapes, these will capture the hearts and appetites of children and adults alike, making them a hit at any Halloween party.
Spooky Presentation: They deliver a perfect blend of festive fun and delicious flavor, setting a theatrical mood for your celebrations. Don’t forget to pair them with Hot Honey Pizza for a spicy twist!
Versatile Options: Cater to all taste preferences, whether you’re in the mood for meaty goodness or savory veggies, ensuring everyone feels included at your table.
Halloween Pizza Skulls Ingredients
For the Dough
• Pizza Dough – 13 to 16 ounces of pre-made dough is essential for structure; feel free to use homemade for a personal touch.
For the Sauce
• Pizza Sauce – 3/4 to 1 cup helps keep the filling moist and flavorful; marinara can work as a tasty substitute.
For the Cheese
• Shredded Mozzarella – 2 cups ensure that each bite is gooey and stretchy; experiment with different cheeses for varied flavors.
• Parmesan Cheese – About 1/4 cup adds a savory kick but can be omitted for a lighter option.
For the Fillings
• Cooked Sausage – 8 ounces provides a hearty protein addition; ground turkey is a great lighter swap.
• Mini Pepperoni – 6 ounces delivers that classic taste; feel free to replace it with any deli meats or skip altogether for vegetarians.
• Black Olives (sliced) – Add a savory touch; adjust the amount based on your preference or leave out if you like.
• Sliced Ham (chopped) – More protein and flavor; turkey ham is a great substitute for a lighter choice.
• Crumbled Crispy Bacon – Adds delightful crunch; omit for a vegetarian-friendly version.
• Mini Italian Meatballs – A fun surprise inside; swap for chickpea balls to keep it vegetarian.
• Cooked Corn Kernels, Baby Spinach, Fresh Basil – Incorporate these for added nutrition and vibrant flavor.
Dipping Sauce
• Marinara Sauce – Suggested for serving alongside; optional depending on your taste preferences.
These Halloween Pizza Skulls are bound to be a hit at your spooky get-together, allowing everyone to enjoy a taste of customizable fun!
Step‑by‑Step Instructions for Halloween Pizza Skulls
Step 1: Preheat the Oven
To kick off your Halloween Pizza Skulls, preheat your oven to 400°F (200°C). This creates the perfect toasty environment for your delicious creations. While the oven warms, gather your skull-shaped baking tin and spray it generously with cooking spray to ensure easy removal later.
Step 2: Prepare the Dough
On a floured surface, roll out your pizza dough to about 1/4 inch thick. Use a rolling pin to create an even, flat surface that’s ready for cutting. Next, cut the dough into 6 rectangles, making sure they are large enough to fit into the skull cavities of your baking tin.
Step 3: Form the Pizza Skulls
Gently press each dough piece into the prepared skull cavities. Spoon in a layer of pizza sauce followed by a generous sprinkle of shredded mozzarella and Parmesan cheese. Feel free to layer in your favorite toppings, whether that’s savory sausage or colorful veggies, for fun Halloween Pizza Skulls that please everyone!
Step 4: Seal Your Skulls
Once your toppings are added, fold over the excess dough to create pockets that will contain all that gooey goodness. Pinch the edges together to seal them tightly, ensuring they’re not overfilled to prevent any spillage. This is where your skulls start to take shape!
Step 5: Chill Until Ready to Bake
Place the filled baking tray in the refrigerator while the oven finishes preheating. This step is crucial as it helps firm up the dough, making it easier for your Halloween Pizza Skulls to hold their form while baking. It only needs about 10–15 minutes of chilling.
Step 6: Bake to Golden Perfection
Once the oven is ready, carefully place the tray in and bake for 16 to 20 minutes. Keep an eye on them—your Halloween Pizza Skulls are done when they turn a beautiful golden brown and the cheese starts bubbling out just a bit.
Step 7: Cool and Serve
After baking, remove the tray from the oven and let it cool for about 5 minutes. This wait allows the cheesy filling to set slightly, making the pizza skulls easier to handle. Once cooled, gently unmold them and prepare to wow your guests with these delightful Halloween Pizza Skulls!
How to Store and Freeze Halloween Pizza Skulls
Room Temperature: Allow cooled Halloween Pizza Skulls to sit at room temperature for up to 2 hours before storing.
Fridge: Store any leftovers in an airtight container in the fridge for up to 3 days. Reheat in the oven or microwave until warmed through.
Freezer: Freeze individually wrapped pizza skulls for up to 3 months. Thaw in the fridge overnight before baking from frozen for 25–30 minutes at 375°F (190°C).
Reheating: For best results, reheat in the oven to retain crispiness. Use a baking sheet lined with parchment paper for easy cleanup.
What to Serve with Cheesy Halloween Pizza Skulls
These delightful cheesy pockets are perfect for creating a whimsical spread that will enchant your guests and satisfy all appetites.
-
Crispy Side Salad: A fresh mix of greens, cherry tomatoes, and a tangy vinaigrette adds a refreshing contrast to cheesy pizza goodness. The salad’s crunch complements the tender filling and brings brightness to the meal.
-
Garlic Breadsticks: Soft, buttery breadsticks infused with garlic and herbs make an irresistible accompaniment. Their warm, toasty flavor pairs delightfully with the gooey pizza skulls, inviting everyone to indulge.
-
Spicy Marinara Dipping Sauce: A zesty marinara with a kick offers a perfect dip for those cheesy bites. The sauce balances flavors beautifully, enhancing the overall dish with its rich, tangy taste.
-
Mini Meatball Skewers: Juicy meatballs on skewers make for easy finger food. Served alongside pizza skulls, they create a hearty snack that keeps spirits high at any gathering.
-
Roasted Veggie Platter: Seasoned roasted vegetables provide a delightful medley of colors and flavors. Their earthy sweetness pairs well with the savory pizza treats, making for a wholesome fun display.
-
Apple Cider Sangria: This fruity, refreshing drink brings an autumnal touch to your spread. The sweet and spicy notes enhance the meal while providing a festive flair that complements the Halloween theme.
Variations & Substitutions for Halloween Pizza Skulls
Feel free to get creative with these delicious Halloween Pizza Skulls—there’s no limit to how you can customize them!
-
Dairy-Free: Substitute shredded mozzarella with vegan cheese and use plant-based pizza sauce for a completely dairy-free option.
It’s a fantastic way to make these treats accessible for everyone at your table! -
Gluten-Free: Opt for gluten-free pizza dough to ensure all your friends can enjoy the spooky fun.
Just check the packaging for the right baking instructions to achieve golden perfection! -
Extra Veggie: Add more nutrition with chopped bell peppers, zucchini, or mushrooms.
These colorful veggies not only enhance the flavor but also brighten up each skull, making them even more enticing. -
Spicy Twist: Spice things up by incorporating jalapeños or adding a layer of hot sauce to the pizza sauce.
If you enjoy a little heat, these fiery additions bring a delightful kick to your Pizza Skulls! -
Sweet Version: Swap out savory toppings with sweet ingredients like Nutella or chocolate chips for a dessert version.
These unexpected treats are perfect for satisfying those post-party sweet cravings! -
Different Shapes: Use cookie cutters for various holiday-themed shapes, like bats or pumpkins, instead of skulls.
This fun twist keeps things exciting for every festive occasion, not just Halloween! -
Meat Lover’s Delight: For those craving more protein, incorporate pepperoni and Italian sausage along with crumbled meatballs.
This blend makes each mouthful a hearty and satisfying bite, perfect for meat enthusiasts. -
Herb Infusion: Mix fresh herbs like oregano or basil into the pizza sauce for added flavor depth.
The aroma of fresh herbs will waft through your kitchen, inviting everyone in for a taste!
For inspiration, try pairing these fun variations while enjoying your delightful creations with Tortilla Pizza Rolls or give your taste buds a treat with Tortilla Pizza Rolls for a different twist on party food!
Make Ahead Options
These Halloween Pizza Skulls are perfect for meal prep enthusiasts! You can prepare the skulls up to 24 hours in advance by assembling them fully and placing them in the refrigerator until ready to bake. To maintain quality, ensure they are well-sealed in a covered container to prevent the dough from drying out. If you’re preparing them for a longer period, freeze the unbaked pizza skulls for up to 3 months—just remember to thaw them in the refrigerator overnight before baking. When it’s time to serve, simply preheat your oven and bake them directly from the fridge or after thawing, following the baking instructions. You’ll end up with delightful, gooey treats that save you time while still being just as delicious!
Expert Tips for Halloween Pizza Skulls
• Grease the Pan Well: Thoroughly spray your baking tin with cooking spray to prevent the pizza skulls from sticking during baking.
• Avoid Overfilling: Be mindful of how much filling you add; overstuffing can lead to messy spills and ruined shapes. Aim for a balanced amount of cheese and toppings.
• Chill Before Baking: Refrigerating the filled tray for 10–15 minutes helps the dough firm up, ensuring your Halloween Pizza Skulls maintain their shape as they bake.
• Customize with Fun Toppings: Feel free to experiment with various toppings, from different cheeses to assorted vegetables, catering to every taste preference in your crowd.
• Check for Doneness: Keep an eye on baking time; the perfect pizza skulls should be golden brown and slightly bubbling with gooey cheese for the ultimate treat.
Halloween Pizza Skulls Recipe FAQs
What kind of pizza dough should I use?
You can use 13 to 16 ounces of pre-made pizza dough for convenience, or try making your own for a personal touch! If you prefer a flakier texture, crescent dough can also be a delightful alternative.
How should I store leftover Halloween Pizza Skulls?
Once cooled, you can store any leftover Halloween Pizza Skulls in an airtight container in the fridge for up to 3 days. Just make sure they are cooled for no more than 2 hours at room temperature before sealing them up.
Can I freeze Halloween Pizza Skulls?
Absolutely! Individually wrap the Halloween Pizza Skulls in plastic wrap or foil and store them in an airtight container for up to 3 months. When you’re ready to enjoy them, thaw overnight in the fridge and bake from frozen for about 25–30 minutes at 375°F (190°C) until they are hot and golden.
What toppings work best for these pizza skulls?
The great thing about Halloween Pizza Skulls is their versatility! You can use any combination of toppings like cooked sausage, mini pepperoni, or veggies like black olives and baby spinach. Just be sure not to overfill each pocket to avoid spillage during baking!
Are these Pizza Skulls kid-friendly?
Very! With their fun skull shape and gooey cheese, kids will love helping to assemble their own Halloween Pizza Skulls. You can let them choose their toppings for a fun and interactive cooking session that they’ll enjoy!
What should I do if my pizza skulls stick to the pan?
To prevent sticking, make sure to thoroughly grease your baking tin with cooking spray before adding the dough. If they’re already stuck, use a flat spatula to gently loosen the edges and carefully lift them out. Patience is key!
Halloween Pizza Skulls: Gooey, Fun Treats for a Spooky Bash
Ingredients
Equipment
Method
- Preheat your oven to 400°F (200°C). Prepare your skull-shaped baking tin with cooking spray.
- Roll out your pizza dough on a floured surface to about 1/4 inch thick and cut into rectangles.
- Press each dough rectangle into the skull cavities of the baking tin, add pizza sauce, cheese, and toppings.
- Seal the edges of the dough to create pockets and chill in the refrigerator for 10–15 minutes.
- Bake in the preheated oven for 16 to 20 minutes until golden brown and bubbly.
- Remove from the oven, cool for 5 minutes, then unmold and serve.
Leave a Reply