
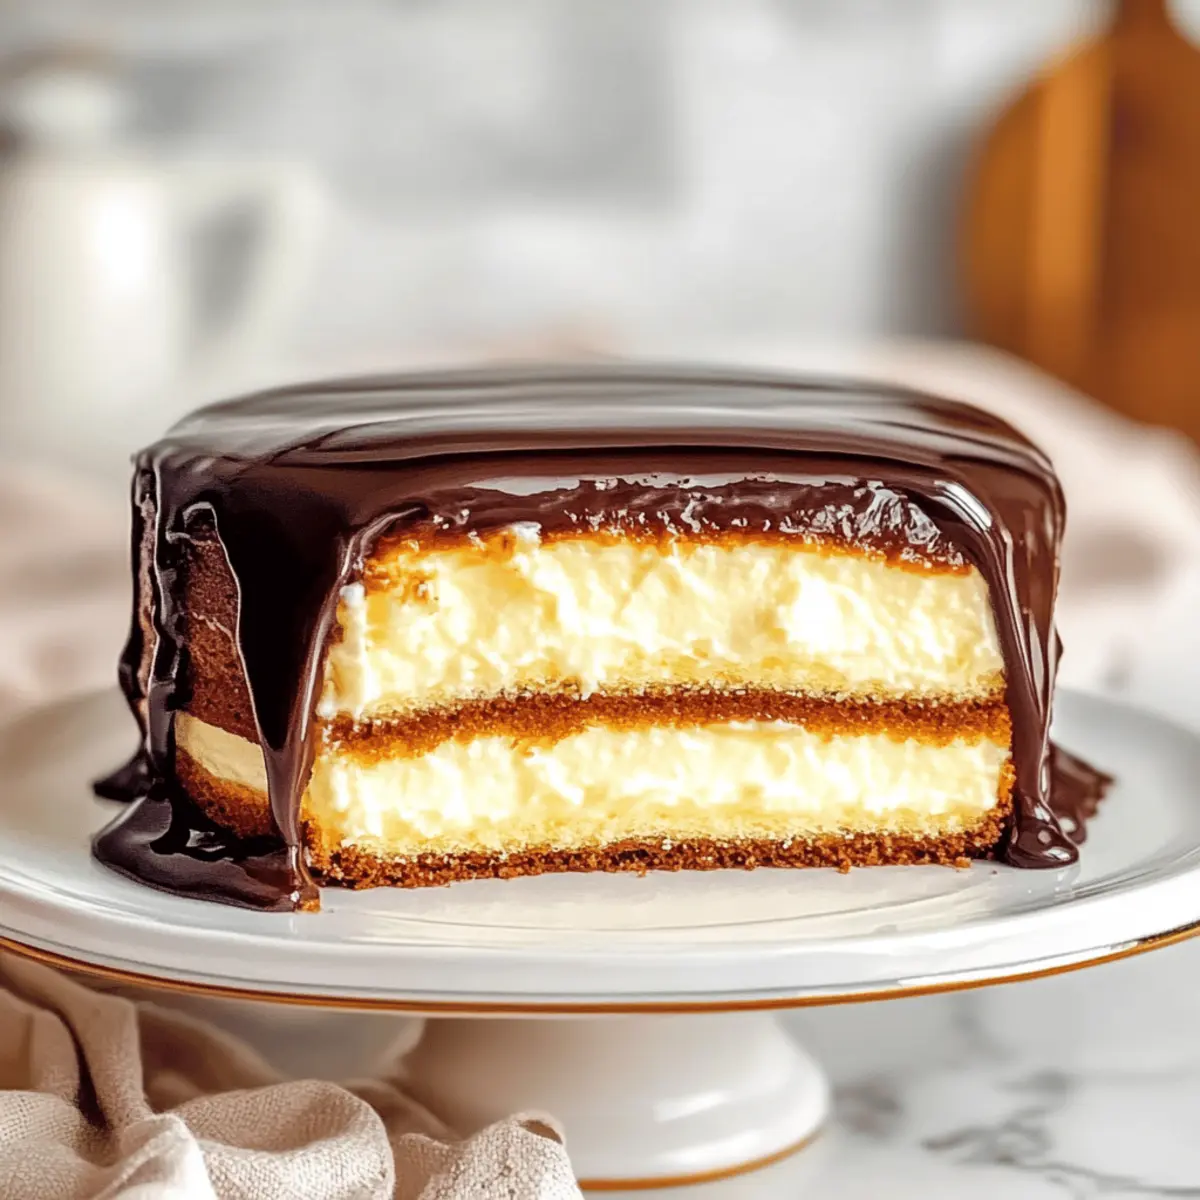
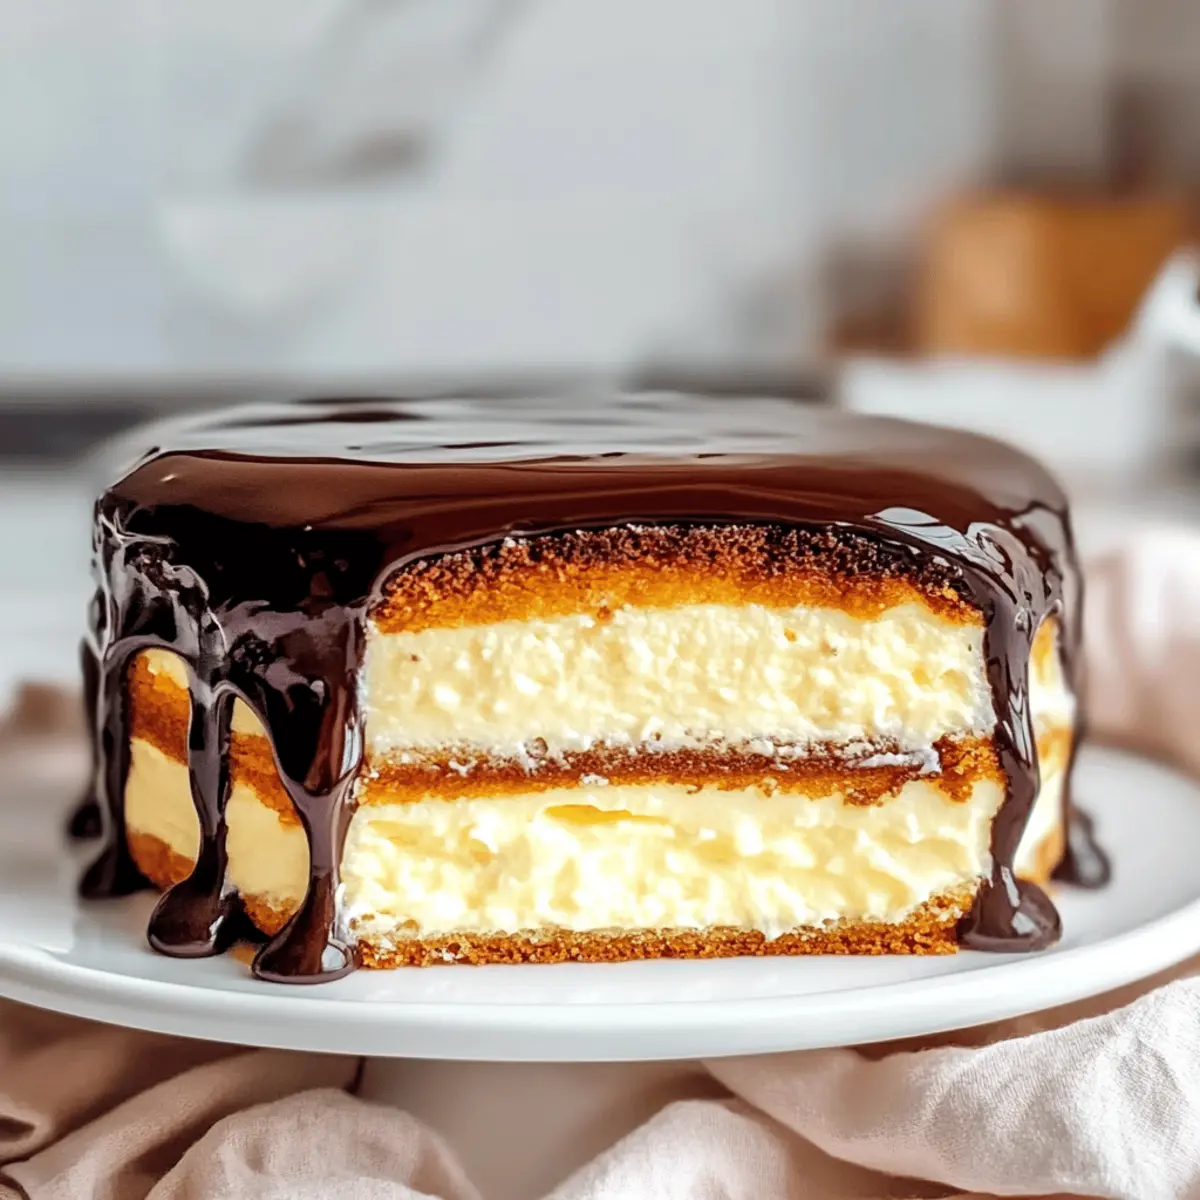
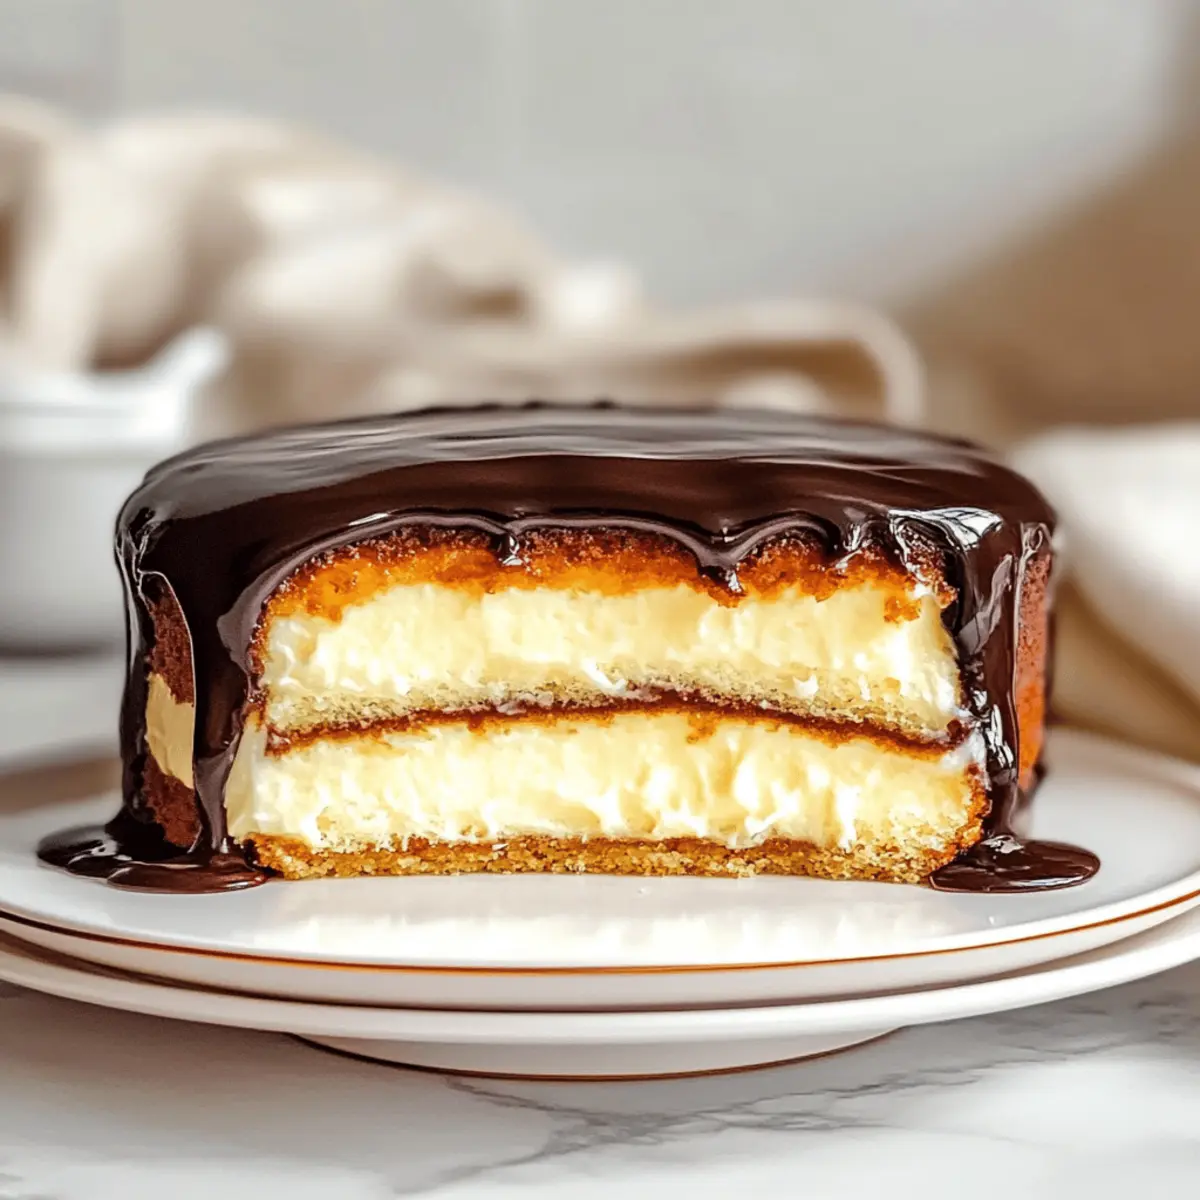
The aroma of freshly baked cake wafting through the kitchen transports me straight back to family gatherings, where laughter and stories flowed as freely as dessert. That’s the magic of a Classic Boston Cream Pie! This beloved dessert is a delightful surprise, with its tender vanilla cake layers cradling a creamy vanilla custard and a glossy blanket of rich chocolate ganache. Not only does it resonate with nostalgia, but it also boasts irresistible perks: it’s surprisingly easy to whip up and makes for a show-stopping centerpiece at any event. Whether it’s a special occasion or a cozy night in, this Boston Cream Pie will turn a simple dessert moment into a cherished memory. Are you ready to indulge in this sweet slice of nostalgia?
Why is Boston Cream Pie a Classic?
Nostalgia: This dessert brings back fond memories of family dinners and celebrations, making it a heartwarming treat.
Easy to Prepare: With straightforward steps, this pie is a breeze to create, perfect for home cooks of any skill level.
Deliciously Balanced: The combination of soft cake, creamy custard, and rich chocolate is a crowd-pleaser that everyone will love.
Versatile: Whether served as a birthday cake or a cozy dessert, it fits any occasion beautifully. Check out my Cucumber Salad Bacon for an ideal side dish to complement your main course!
Make Ahead: You can easily prepare it in advance, allowing the flavors to meld perfectly—ideal for hosting guests!
Boston Cream Pie Ingredients
For the Cake Layers
• Flour – Provides structure and body to the cake; for a lighter texture, use cake flour.
• Baking Powder – Acts as a leavening agent to help the cake rise; always check for freshness.
• Salt – Enhances flavor and balances sweetness, an essential ingredient for overall taste.
• Sugar – Sweetens both the cake and custard, contributing to moisture; standard granulated sugar works well.
• Eggs – Provides richness and acts as a binder; use large eggs at room temperature for best results.
• Milk – Adds moisture to the batter; whole milk enhances creaminess, but feel free to substitute with non-dairy milk if desired.
• Vanilla Extract – Imparts a warm flavor to the cake; quality matters, so opt for pure extract when possible.
For the Custard Filling
• Milk – The base for your vanilla custard; heating until steaming is key for proper texture.
• Egg Yolks – Essential for creating a rich custard; whisk until pale for the best result.
• Sugar – Sweetens the custard; consider using a touch less if you prefer a less sweet filling.
For the Chocolate Ganache
• Heavy Cream – Provides richness and a silky texture; heat it just until bubbling for the perfect consistency.
• Chocolate (chopped) – Forms the luxurious ganache topping; opt for high-quality chocolate for the best flavor and smoothness.
Step‑by‑Step Instructions for Boston Cream Pie
Step 1: Prepare the Cake Layers
Begin by preheating your oven to 350°F (175°C). In a mixing bowl, whisk together the dry ingredients: flour, baking powder, and salt. In a separate bowl, beat the wet ingredients, including sugar, eggs, milk, and vanilla extract, until smooth. Gradually combine the wet and dry mixtures, blending until just combined. Divide the batter evenly between two greased 9-inch round cake pans and bake for 25–30 minutes, or until the cakes are golden and a toothpick inserted comes out clean. Let cool completely on wire racks.
Step 2: Make the Vanilla Custard
While the cakes are cooling, turn your attention to the custard. In a saucepan, heat the milk over medium heat until steaming, but not boiling. In a bowl, whisk the egg yolks and sugar until pale and thick. Gradually temper this mixture by adding the hot milk, whisking continuously to avoid curdling. Return the mixture to the saucepan and cook over low heat, stirring constantly, until it thickens to a custard-like consistency—about 8–10 minutes. Allow the custard to cool completely in the refrigerator.
Step 3: Prepare the Chocolate Ganache
For the ganache, heat the heavy cream in a small saucepan over medium heat until it begins to bubble gently. Remove from the heat and pour the hot cream over the chopped chocolate in a heatproof bowl. Let it sit for about a minute to melt the chocolate, then stir until the mixture is smooth and glossy. Set aside to cool slightly; this will ensure the ganache thickens properly when poured over the cake.
Step 4: Assemble the Pie
Once the cake layers and custard have cooled, it’s time to assemble your Boston Cream Pie. Place one cake layer on a serving plate and spread an even layer of the cooled vanilla custard on top. Carefully place the second cake layer over the custard, ensuring it’s centered. Pour the luscious chocolate ganache over the top layer, allowing it to drape elegantly down the sides.
Step 5: Chill and Serve
Refrigerate the assembled Boston Cream Pie for at least 1 hour to set the ganache properly. This chilling period helps meld the flavors and allows for easier slicing. Once set, slice into generous pieces and serve chilled, where the combination of fluffy cake, creamy custard, and rich chocolate will truly shine. Enjoy this delightful classic with family and friends!
Make Ahead Options
These Classic Boston Cream Pies are perfect for busy home cooks who love to meal prep! You can prepare the cake layers up to 24 hours in advance; just wrap them tightly in plastic wrap to keep them moist and fresh. The vanilla custard can also be made up to 3 days ahead—store it in an airtight container in the refrigerator to maintain its silky texture. When it’s time to assemble, simply layer the custard between the cooled cake layers and pour the chocolate ganache on top. Allow the assembled pie to chill in the fridge for at least 1 hour before serving, ensuring every bite is just as delicious as if it were freshly made. Enjoy the benefits of this delicious dessert while saving valuable time!
How to Store and Freeze Boston Cream Pie
Fridge: Store your Boston Cream Pie in the refrigerator, covered with plastic wrap or a cake dome, to maintain its moisture for up to 3 days.
Freezer: For longer storage, you can freeze the pie. Wrap individual slices tightly in plastic wrap and then in aluminum foil to avoid freezer burn; they can last up to 2 months.
Reheating: When ready to enjoy, thaw in the refrigerator overnight. For a fresh touch, consider lightly dusting with powdered sugar before serving.
Holding Goodness: To enjoy the best quality while preserving flavor and texture, consume frozen slices within a month; the Boston Cream Pie stays delicious but may lose some creaminess over time.
Boston Cream Pie Variations & Substitutions
Let your creativity flow and explore these delightful twists on the Classic Boston Cream Pie!
-
Chocolate Cake: Swap vanilla cake layers for rich chocolate cake to deepen the flavor and create a decadent twist.
-
Flavored Custards: Try using flavored custards like chocolate or coffee. The chocolate will intensify the dessert, while coffee adds a unique, aromatic touch that coffee lovers will adore!
-
Fruit Additions: Add layers of fresh fruit, such as strawberries, bananas, or raspberries, between the cake and custard. The fruits provide a refreshing contrast to the creamy textures, bringing a burst of flavor and color.
-
Lemon Infusion: For a seasonal zest, incorporate lemon zest into the custard for a bright and vibrant flavor. It perfectly balances the richness of the cake and chocolate.
-
Dairy-Free Option: Use almond or coconut milk and a dairy-free cream for your ganache to create a delightful vegan-friendly version. Your friends with dietary restrictions will appreciate this thoughtful touch!
-
Nutty Layers: Fold in crushed almonds or hazelnuts into the chocolate ganache for an added layer of texture and flavor. The nutty crunch offers a delightful contrast to the creamy layered pie.
-
Coffee Kick: Infuse your custard with a splash of brewed coffee or espresso for a delightful mocha flavor that pairs wonderfully with the chocolate ganache.
-
Mini Pies: Transform this classic recipe into individual mini Boston Cream Pies. Bake smaller cake layers and stack them with custard and ganache for an adorable presentation that’s perfect for sharing!
For a delicious side, consider serving this alongside a light salad like my Cucumber Salad Bacon, creating a balanced meal that delights all. Enjoy experimenting with these variations!
What to Serve with Classic Boston Cream Pie?
Indulging in a slice of this delightful dessert isn’t complete without the perfect pairings to elevate your dining experience.
-
Whipped Cream: A dollop of light and fluffy whipped cream adds a silky texture that complements the richness of the cake.
-
Fresh Berries: Bright, juicy berries like strawberries and raspberries provide a refreshing contrast to the sweet layers, adding a burst of color and flavor.
-
Vanilla Ice Cream: The creaminess of vanilla ice cream enhances the nostalgia, creating a blissful mouthful when layered with the cake’s flavors.
-
Coffee or Espresso: A steaming cup of coffee or a shot of rich espresso provides a warm, bitter counterpoint, making each bite of the pie even more delightful.
-
Chocolate-Covered Almonds: Crunchy chocolate-covered almonds offer an irresistible texture contrast and echo the chocolate ganache, harmonizing flavors beautifully.
-
Sparkling Wine: A glass of bubbly or prosecco lightens up the dessert mood, providing a festive touch that celebrates the sweetness of your classic recipe.
-
Caramel Sauce: A drizzle of caramel sauce adds richness and complexity, enhancing the flavors of both custard and chocolate for an indulgent twist.
-
Chocolate Milkshake: The creamy, chocolatey goodness of a milkshake is a nostalgic pairing that perfectly complements the pie’s flavors.
Enjoy a delicious dinner with your loved ones powered by these ideas, each one crafted to make your Boston Cream Pie experience truly unforgettable!
Expert Tips for Boston Cream Pie
-
Cool Completely: Make sure your cake layers are entirely cool before assembling. Warm layers can lead to a gooey mess with custard oozing out.
-
Whisk Away: When cooking the custard, whisk continuously. This prevents lumps from forming and avoids burning. Patience is key for a smooth texture!
-
Ganache Consistency: For the perfect chocolate ganache, let the heavy cream warm gently and only pour it over chopped chocolate after it’s bubbling. This ensures a silky finish.
-
Flavor Infusion: Consider adding a splash of your favorite liqueur to the ganache for an adult twist. Just make sure it doesn’t overpower the classic Boston Cream Pie flavors.
-
Storage Matters: Store leftover pie in the fridge, tightly covered, for up to three days. For best flavor, consume fresh but it can last up to a week when properly handled.

Boston Cream Pie Recipe FAQs
How do I choose the right ripeness of ingredients, especially eggs?
Absolutely! For the best flavor and texture in your Boston Cream Pie, use large eggs at room temperature. Fresh eggs will whip better, creating a lighter cake. If you can, check the sell-by date on the carton to ensure freshness.
What is the best way to store Boston Cream Pie?
To maintain its moisture and freshness, cover your Boston Cream Pie with plastic wrap or a cake dome and store it in the refrigerator. This way, it can stay delicious for up to 3 days. If handled properly, it can last up to a week!
Can I freeze Boston Cream Pie for later enjoyment?
Very! You can freeze your Boston Cream Pie by wrapping individual slices tightly in plastic wrap and then in aluminum foil. They can last up to 2 months in the freezer. When you’re ready to indulge again, simply thaw them in the refrigerator overnight for the best texture.
What should I do if my custard is too runny?
If your custard is too runny, don’t worry! Simply return it to the saucepan, and cook over low heat, stirring constantly until it thickens. A good cooking time is about 8-10 minutes. Make sure to whisk continuously to avoid lumps, ensuring it achieves that creamy custard consistency.
Are there any dietary considerations for Boston Cream Pie, like allergies?
Absolutely, it’s important to consider allergies! This recipe contains gluten from the flour, dairy from milk and cream, and eggs. For a gluten-free option, you can use a gluten-free flour blend. Substituting non-dairy milk and cream can also cater to lactose intolerance. Always verify ingredients for your guests’ specific dietary needs.
Can I make this recipe in advance?
You sure can! Making the Boston Cream Pie ahead of time not only allows the flavors to develop but also provides stress-free entertaining. Just prepare and assemble the pie a day ahead, and refrigerate it overnight. It will taste even better the next day!
Irresistible Boston Cream Pie: Dive into Sweet Comfort Today
Ingredients
Equipment
Method
- Preheat your oven to 350°F (175°C). In a mixing bowl, whisk together flour, baking powder, and salt. In another bowl, mix sugar, eggs, milk, and vanilla until smooth. Combine wet and dry ingredients, divide into pans, and bake for 25-30 minutes. Cool completely.
- For the custard, heat milk until steaming. Whisk together egg yolks and sugar until pale. Temper the egg mixture with hot milk, then cook until thickened, about 8-10 minutes. Cool in the refrigerator.
- Heat heavy cream until bubbling, pour over chopped chocolate, let sit a minute, then stir until smooth. Cool slightly.
- Layer one cake on a plate, spread custard on top, place second layer over it, and pour ganache on top, allowing it to drape down the sides.
- Refrigerate for at least 1 hour to set ganache. Serve chilled for the best flavor.
Leave a Reply