
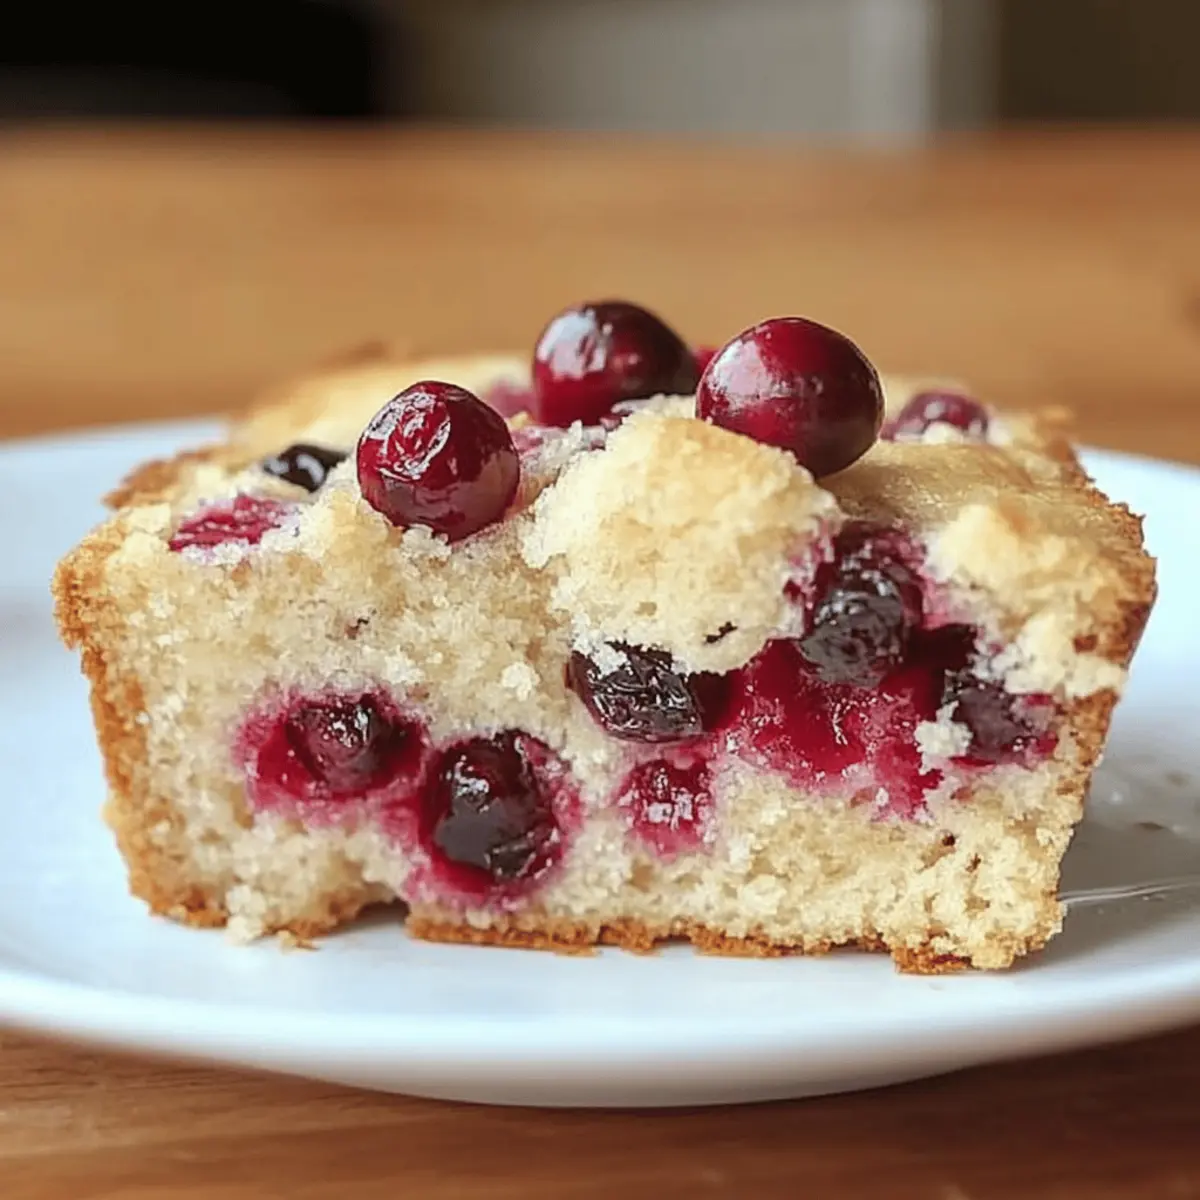
The holiday aromas envelop me as I pull out my cherished recipe for Cranberry Christmas Cake, a delightful blend of tart cranberries and buttery goodness. This cake is a staple on my festive table, and it’s no wonder—it’s not only simple to prepare but also a gluten-free option that caters to everyone. As I mix the ingredients, the anticipation builds for that first slice, with tender, moist cake satisfying both the sweet tooth and the desire for something uniquely seasonal. Whether enjoyed with afternoon coffee or as a stunning dessert at gatherings, this cake never fails to impress. Ready to impress your guests or spark joy in your own holiday celebrations? Let’s dive into this easy-to-make recipe that will leave everyone asking for seconds!
Why is Cranberry Christmas Cake a Must-Try?
Festive Flavors: The delightful balance of tart cranberries and sweet buttery cake brings the holiday spirit to life, making each bite a celebration of flavor.
Simple Preparation: With just a few straightforward steps, this recipe allows even novice bakers to shine during the festive season.
Gluten-Free Option: Adaptable for gluten-free diets, everyone can indulge in this holiday treat without worry.
Versatile Serving: Perfect as a cozy snack with coffee or a stunning dessert at parties, this cake meets every occasion with style.
Storage-Friendly: Easily store or freeze for last-minute gatherings, ensuring that deliciousness is always on hand.
For more comforting treats, check out my Cinnamon Apple Cake or the warm, inviting flavors of Pumpkin Coffee Cake.
Cranberry Christmas Cake Ingredients
For the Batter
• Eggs – essential for structure and leavening, be sure to beat until thick and pale for a light texture.
• Sugar – adds sweetness and moisture; feel free to reduce by ½ cup if you prefer a less sweet cake.
• Butter (softened) – lends a rich, buttery flavor and moisture; using high-quality butter will enhance the taste significantly.
• Vanilla Extract – boosts the flavor profile; almond extract can be used as an aromatic substitution for a unique twist.
• All-Purpose Flour – provides the cake’s structure; for a gluten-free option, a blend of brown rice flour, potato starch, and xanthan gum works beautifully.
• Fresh Cranberries (12 oz) – these give a wonderful tartness and moisture; if using frozen cranberries, slightly thaw them for easier mixing.
Step‑by‑Step Instructions for Cranberry Christmas Cake
Step 1: Preheat the Oven
Begin by preheating your oven to 350°F (175°C). Gather your baking equipment, including a 9×13 inch baking dish, and generously butter it to prevent the cake from sticking. This is an essential step to ensure your Cranberry Christmas Cake comes out with a lovely golden crust.
Step 2: Beat the Eggs and Sugar
In a stand mixer, beat together the eggs and sugar on medium-high speed for 5-7 minutes. The mixture should become thick and pale, forming a ribbon when you lift the beaters. This crucial step adds lightness to your cake, setting the base for a fluffy texture that holiday guests will love.
Step 3: Incorporate Butter and Vanilla
Now, add in the softened butter and vanilla extract to your egg mixture. Continue mixing at medium speed for an additional 2 minutes. The consistency should become creamy and well-blended, filling your kitchen with a delightful buttery aroma that signals that your Cranberry Christmas Cake is well on its way.
Step 4: Add Flour and Cranberries
Gradually stir in the all-purpose flour until just combined; be careful not to overmix. Once the flour is incorporated, gently fold in the fresh cranberries. The vibrant red berries should be evenly distributed throughout the batter, adding wonderful pops of tartness against the sweet cake.
Step 5: Transfer Batter to Baking Dish
Carefully pour the thick batter into your prepared baking dish, spreading it evenly. Using a spatula, ensure a smooth top, which resembles cookie dough in thickness. This even distribution is key to achieving a perfectly baked Cranberry Christmas Cake with a consistent texture throughout the loaf.
Step 6: Bake Until Golden
Place the baking dish in the preheated oven and bake for 40-50 minutes. Keep an eye on your cake during the last few minutes; it should be lightly browned on top, and a toothpick inserted into the center should come out clean. This golden crust indicates that your Cranberry Christmas Cake is nearly ready to enjoy!
Step 7: Cool and Slice
Once baked, remove the cake from the oven and allow it to cool completely in the pan on a wire rack. Patience is key here; letting it cool fully ensures that it slices cleanly without crumbling. After it has cooled, cut the cake into small squares, ready for you to serve at festive gatherings.
What to Serve with Cranberry Christmas Cake?
Indulging in a slice of this tart-yet-sweet cake evokes the essence of festive gatherings, promising warmth and joy with every bite.
-
Creamy Mashed Potatoes: The velvety texture contrasts beautifully with the cake, creating a comforting balance on your holiday table.
-
Roasted Brussels Sprouts: Their nutty flavor and crisp exterior enhance the cake’s sweetness, offering a delightful combination of tastes.
-
Homemade Cranberry Sauce: Serve alongside for an extra punch of tartness that echoes the cake’s cranberry flavor while adding freshness.
-
Spiced Mulled Wine: Warm and aromatic, it complements the holiday spirit of the cake while warming your guests from the inside out.
-
Vanilla Ice Cream: A scoop per slice elevates the dessert experience, offering a creamy counterpart to the tart cranberries in the cake.
-
White Chocolate Bark: The sweetness of the bark provides a luxurious addition, and they pair beautifully for a sweet finale to your festive meal.
-
Gingerbread Cookies: Bring in another seasonal favorite with their warm spices, creating a wonderful harmony of holiday flavors.
-
Chai Tea: Serve this spiced beverage to enhance the cake’s warm notes, making for a cozy, inviting treat for your guests.
Expert Tips for Cranberry Christmas Cake
- Beat Eggs Properly: Ensure you beat the eggs and sugar for the full 5-7 minutes; this creates a light texture essential for your Cranberry Christmas Cake.
- Use Quality Ingredients: Opt for high-quality butter; it makes a noticeable difference in flavor and moisture. Don’t skimp here!
- Don’t Overmix: When adding flour, mix until just combined to avoid a dense cake. Gently fold in cranberries to keep their tartness intact.
- Cool Completely: Allow the cake to cool fully before slicing; this helps maintain its moist crumb and prevents crumbling.
- Storage Tips: Store the cake loosely covered at room temperature to retain texture, avoiding airtight containers that may make the crust soggy.
How to Store and Freeze Cranberry Christmas Cake
-
Room Temperature: Store slices at room temperature, loosely covered with a cloth, for up to 3 days to maintain the delightful texture of your Cranberry Christmas Cake.
-
Fridge: If you need to keep it longer, refrigerate pieces in an airtight container for up to a week. Just be aware that this may slightly alter the texture.
-
Freezer: For longer storage, freeze individual slices wrapped in plastic wrap and then aluminum foil for up to 3 months. Thaw at room temperature before enjoying.
-
Reheating: To enjoy your cake warm, reheat slices gently in a microwave for 10-15 seconds. This will refresh its flavor and texture, making it irresistible!
Cranberry Christmas Cake Variations
Feel free to get creative with this recipe and make it your own with these delightful twists!
-
Dairy-Free: Substitute butter with coconut oil or vegan butter for a plant-based version that still retains great flavor.
-
Easy Citrus Zest: Add the zest of one orange to the batter for a bright, zesty flavor that complements the cranberries wonderfully.
-
Nutty Crunch: Incorporate ½ cup of chopped walnuts or pecans into the batter for added texture and a delightful crunch in each bite.
-
Frozen Cranberries: If fresh cranberries aren’t available, swap them out for frozen cranberries. Just toss them in a bit of flour before adding to avoid sinking.
-
Mini Cakes: Pour the batter into a muffin tin for adorable mini cranberry cakes. Just adjust baking time to 20-25 minutes for perfect bite-sized treats!
-
Cinnamon Swirl: Mix in a teaspoon of cinnamon and half a teaspoon of nutmeg for a warm, spiced version that’s perfect for cozy gatherings.
-
Layered Delight: Split the batter into two cake pans, bake, and stack with a layer of whipped cream or dairy-free alternative for a showstopper dessert.
-
Gifting Option: Bake in disposable cake pans and decorate with festive ribbon for an easy gift that friends and family will love.
For more delicious ideas, don’t forget to check out my Cinnamon Apple Cake and Pumpkin Coffee Cake recipes!
Make Ahead Options
These Cranberry Christmas Cakes are perfect for meal prep enthusiasts! You can prepare the batter up to 24 hours in advance; just mix all your ingredients and refrigerate it in an airtight container to maintain freshness. For an even easier option, bake the cake a day ahead of time, then allow it to cool completely and store it loosely covered at room temperature. This method keeps it just as delicious as fresh-baked. When you’re ready to serve, simply slice and enjoy, or warm individual pieces in the microwave for a cozy, inviting treat that’s perfect for busy holiday gatherings!
Cranberry Christmas Cake Recipe FAQs
What is the best way to select fresh cranberries for the recipe?
When choosing fresh cranberries, look for firm berries that are bright red in color. Avoid any with dark spots or blemishes, as this may indicate overripeness. If possible, check the cranberries for a bounce; the more bouncy they are, the fresher they will be!
How should I store the Cranberry Christmas Cake?
To store your Cranberry Christmas Cake, keep it at room temperature loosely covered with a cloth for up to 3 days. This allows the cake to breathe and maintains its moist texture. If you prefer a longer storage method, place it in an airtight container in the refrigerator for up to a week, though be mindful that this might alter the cake’s texture slightly.
Can I freeze the Cranberry Christmas Cake, and if so, how?
Absolutely! To freeze your Cranberry Christmas Cake, first slice it into individual portions. Wrap each slice tightly in plastic wrap, then cover with aluminum foil to prevent freezer burn. This method keeps the cake fresh for up to 3 months. When you’re ready to enjoy a slice, simply thaw it at room temperature, and you can even reheat it gently in the microwave for 10-15 seconds!
What should I do if my cake doesn’t rise properly?
If your Cranberry Christmas Cake doesn’t rise, it’s often due to not beating the eggs and sugar long enough. For the best rise, ensure you mix them until the mixture is thick and pale, which usually takes about 5-7 minutes. Additionally, double-check that your baking powder hasn’t expired, as old leavening agents can affect how well the cake rises.
Are there any dietary considerations I should keep in mind?
This Cranberry Christmas Cake is adaptable for various dietary needs. For a gluten-free option, substitute all-purpose flour with a mixture of gluten-free flours like brown rice flour, potato starch, and xanthan gum. Additionally, always check ingredients for any potential allergens, especially if you’re baking for someone with a food allergy.
Can I use frozen cranberries instead of fresh ones?
Yes, you can use frozen cranberries! Just make sure to let them thaw slightly before mixing them into your batter. There’s no need to drain them; just fold them in gently to maintain their tartness within the cake. This flexibility allows for year-round baking, regardless of cranberry season!
Cranberry Christmas Cake
Ingredients
Equipment
Method
- Preheat your oven to 350°F (175°C) and butter the 9x13 inch baking dish.
- In a stand mixer, beat the eggs and sugar on medium-high speed for 5-7 minutes until thick and pale.
- Add softened butter and vanilla extract, mix at medium speed for another 2 minutes until creamy.
- Gradually stir in the all-purpose flour until just combined, then fold in the fresh cranberries.
- Pour the thick batter into the prepared baking dish, spreading it evenly.
- Bake for 40-50 minutes, until lightly browned on top and a toothpick comes out clean.
- Allow the cake to cool completely in the pan on a wire rack before slicing.
Leave a Reply