
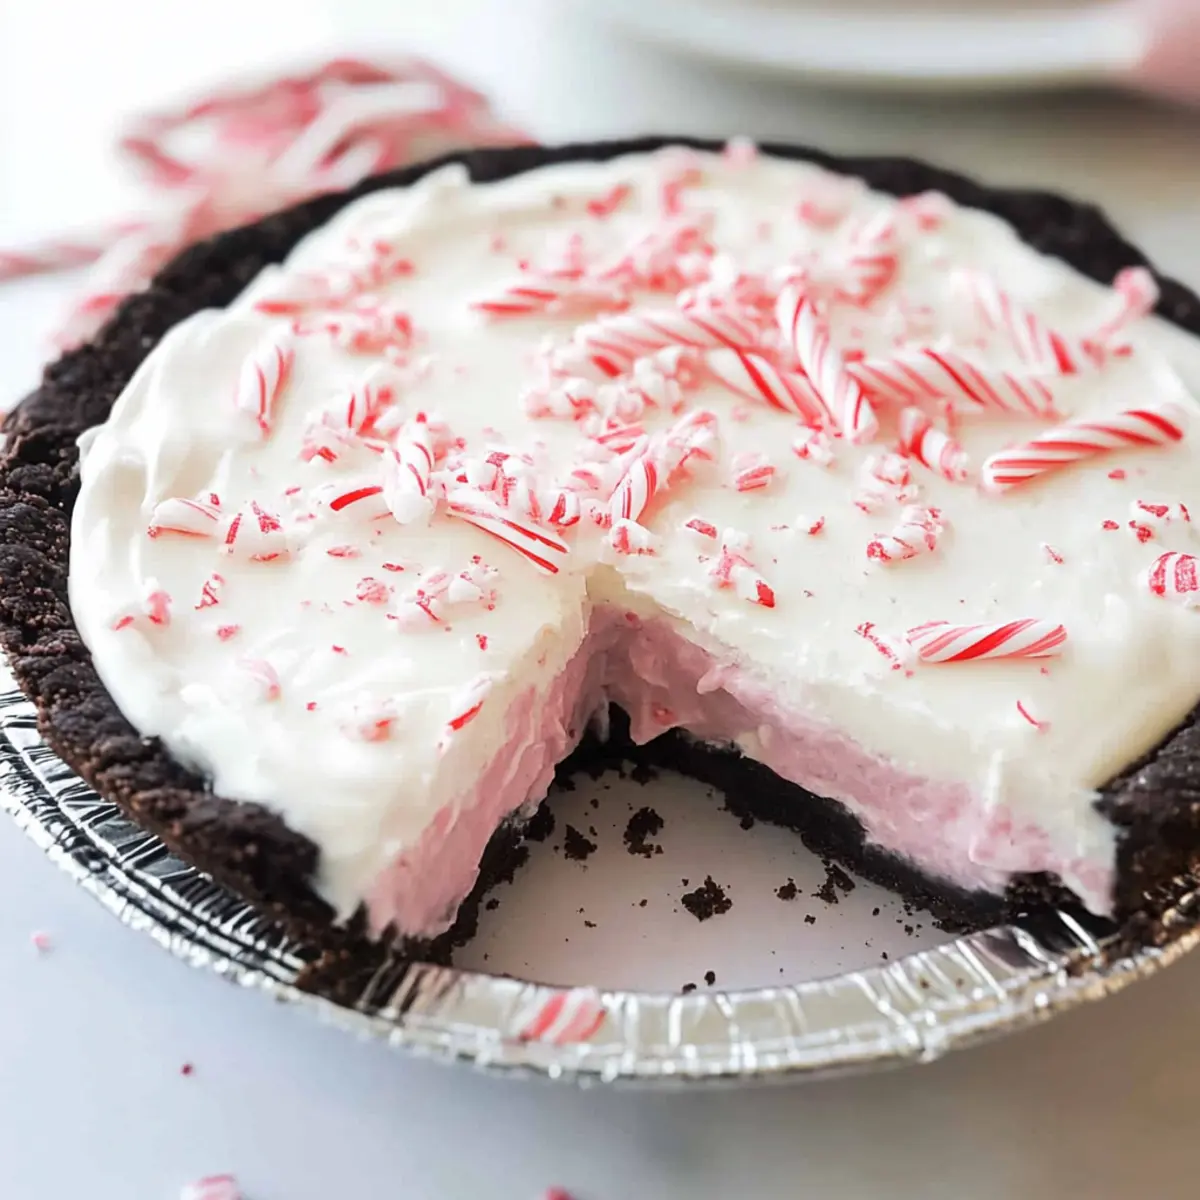
As I stood in the kitchen, the aroma of peppermint wafting through the air, I couldn’t help but smile at the magic unfolding. This Easy No-Bake Candy Cane Pie is my go-to holiday dessert that takes minimal effort yet brings maximum delight to any celebration. The luscious, creamy filling pairs beautifully with a rich chocolate Oreo crust, creating a mouthwatering balance that makes it a real crowd-pleaser. Plus, this no-bake recipe allows you to whip up a stunning treat without any fuss—perfect for those busy holiday weeks! Whether you’re hosting a festive gathering or just want to indulge in a sweet treat at home, this Candy Cane Pie is sure to become a cherished addition to your holiday spread. Curious about how to make this delightful dessert? Let’s dive in!

Why is Candy Cane Pie So Special?
Irresistible Flavor: The combination of cool peppermint and rich chocolate creates a flavor explosion that captures the essence of the holidays.
Effortless Preparation: This no-bake dessert saves you time, letting you focus on other festivities.
Festive Presentation: A gorgeous pie topped with crushed candy canes makes for a stunning centerpiece at any gathering.
Family Favorite: This treat is perfect for kids and adults alike, sparking smiles around the table.
Versatile Variations: Feel free to swap ingredients, like using almond extract for a different twist or adding more candy canes for extra crunch.
If you’re looking for more holiday recipes that are simple yet impressive, consider checking out our guide on easy holiday desserts. Make this Candy Cane Pie, and watch it steal the show!
Candy Cane Pie Ingredients
For the Crust
• Oreo Cookies – Base of the pie crust for a rich chocolate flavor. Substitution: You can use any chocolate cookie if Oreos are unavailable.
• Butter – Binds the Oreo crumbs together for the crust. Use unsalted butter for better flavor control.
For the Filling
• Cream Cheese – Adds creaminess and structure to the filling. Note: Ensure cream cheese is softened for easy mixing.
• Sweetened Condensed Milk – Sweetens the filling and contributes to a smooth texture. Substitution: For lower sugar, you could use unsweetened condensed milk with additional sweetener (adjust to taste).
• Red Food Coloring – Optional coloring for aesthetic appeal. Skip if not desired.
• Peppermint Extract – Enhances the peppermint flavor of the filling. Optional substitution: Use vanilla extract for a different flavor.
• Cool Whip – Provides a light and airy texture to the filling. Substitution: Homemade whipped cream can be used as an alternative.
For the Topping
• Candy Canes – Crushed for topping, imparting a festive crunch and flavor. Substitution: Pre-crushed peppermint candies or “peppermint snow” can be used too.
This Easy No-Bake Candy Cane Pie is packed with festive spirit and sure to charm your holiday gatherings!
Step‑by‑Step Instructions for Candy Cane Pie
Step 1: Prepare the Crust
Begin by greasing a 9-inch pie pan to prevent sticking. In a food processor, crush 24 Oreo cookies until they reach a fine crumb texture. Melt ½ cup of unsalted butter and mix it with the Oreo crumbs until well combined. Press the mixture firmly into the bottom and up the sides of the prepared pie pan, creating a solid crust. Refrigerate for 30 minutes to set.
Step 2: Make the Filling
In a large mixing bowl, beat 8 ounces of softened cream cheese with an electric mixer until smooth and fluffy, about 2 minutes. Gradually add in 1 cup of sweetened condensed milk, mixing until fully incorporated. Then, add a few drops of red food coloring and 1 teaspoon of peppermint extract, blending until you achieve a uniform color and flavor throughout the mixture.
Step 3: Incorporate Cool Whip
Once the filling ingredients are smoothly combined, gently fold in 8 ounces of thawed Cool Whip using a spatula. This will add a light, airy texture to your Candy Cane Pie. Be careful not to over-mix; you want to maintain the fluffiness of the whipped topping while ensuring all components are well integrated.
Step 4: Assemble Pie
Take the chilled Oreo crust from the refrigerator and pour the creamy filling into it, spreading it evenly to fill all corners. Use a spatula to smooth the top for an appealing finish. Next, top the pie with the remaining Cool Whip, spreading it gently to cover the filling and create a beautifully frosted look.
Step 5: Add Toppings
To finish your Candy Cane Pie, sprinkle a generous amount of crushed candy canes over the whipped topping, adding a festive crunch and delightful peppermint flavor. Make sure to distribute the candy cane pieces evenly for an eye-catching presentation.
Step 6: Chill
Place the assembled pie in the freezer for at least 2 hours, allowing it to set perfectly before serving. If you prefer a firmer pie, feel free to freeze it longer. When ready to serve, remove the pie from the freezer and let it sit at room temperature for 15 minutes before slicing to ensure clean cuts.

Candy Cane Pie Variations & Substitutions
Feel free to put your personal spin on this delightful dessert! Let your creativity flow and make this Candy Cane Pie uniquely yours.
- Gluten-Free: Use gluten-free chocolate cookies for the crust to keep it suitable for everyone.
- Dairy-Free: Swap cream cheese with a dairy-free alternative like cashew cream or coconut cream for a lactose-free option.
- Minty Crunch: Incorporate crushed mint chocolate candies mixed into the filling for an exciting texture and additional minty flavor.
- Sugar-Free: For a healthier version, replace sweetened condensed milk with a sugar-free alternative and sweeten to taste.
- Nutty Flavor: Add a tablespoon of almond extract to the filling for a nutty twist that complements the chocolate.
- Extra Frosting: Top the pie with a drizzle of chocolate sauce or homemade whipped cream to elevate it visually and taste-wise.
- Layered Delight: Make mini dessert cups by layering the crust, filling, and toppings in individual cups for an eye-catching treat.
- Chocolate Lovers: Fold in mini chocolate chips into the filling for a burst of chocolatey goodness throughout.
Whichever variation you choose, this Candy Cane Pie will undoubtedly spread joy and delight during the holiday season!
Make Ahead Options
This Easy No-Bake Candy Cane Pie is a fantastic choice for busy home cooks looking to save time during the festive season! You can prepare the Oreo crust up to 24 hours in advance and store it in the refrigerator, ensuring it remains fresh. Additionally, the creamy filling can be mixed and refrigerated for up to 3 days before assembling. Just remember to keep it covered to maintain its creamy texture. When you’re ready to enjoy the pie, spread the filling into the crust, add the whipped topping and crushed candy canes, then chill for at least 2 hours before serving. With these make-ahead steps, you’ll have a delicious, show-stopping dessert with minimal stress!
What to Serve with Easy No-Bake Candy Cane Pie
Delight your senses by creating a festive meal that beautifully complements this creamy, minty treat.
- Hot Chocolate Bar: A warm, velvety drink topped with whipped cream and marshmallows offers a cozy pairing with the pie.
- Peppermint Meringues: Light and airy, these delightful little bites enhance the minty flavor and add an elegant touch to your dessert table.
- Gingerbread Cookies: The spiced flavor of gingerbread cookies contrasts wonderfully with the cool, creamy pie, creating a festive flavor explosion.
- Christmas Fruit Salad: A colorful medley of fresh fruits brings a refreshing brightness, balancing the sweetness of the Candy Cane Pie beautifully.
- Roasted Nuts: A bowl of spiced or candied nuts introduces a satisfying crunch, providing a delightful textural contrast to the creamy dessert.
- Sparkling Apple Cider: A bubbly, non-alcoholic drink matches the playful holiday vibe, enhancing the festive atmosphere at your gathering.
- Chocolate Mint Brownies: Indulge in the rich, fudgy texture of brownies layered with minty goodness, perfect for those who crave chocolate with their mint.
- Eggnog Cheesecake: For a festive overload, serve slices of this rich dessert alongside the Candy Cane Pie to create a holiday dessert extravaganza.
- Cranberry Sauce: A tangy cranberry sauce gives a bright pop of flavor, cutting through the richness of the dessert while keeping it seasonal.
How to Store and Freeze Candy Cane Pie
Fridge: Store your Candy Cane Pie covered with plastic wrap in the refrigerator for up to 4-5 days. This keeps the crust crisp and the filling fresh.
Freezer: For longer storage, freeze the pie for up to 3 months. Make sure it’s wrapped tightly in plastic wrap or aluminum foil before placing it in an airtight container.
Thawing: When ready to serve, transfer the pie from the freezer to the refrigerator and let it thaw overnight for the best texture.
Reheating: This dessert is best served chilled. Avoid heating as it may alter the creamy texture of the Candy Cane Pie.
Expert Tips for Candy Cane Pie
-
Soften Cream Cheese: Make sure your cream cheese is fully softened at room temperature to prevent lumps in the filling and achieve a smooth texture.
-
Chill Time Matters: For a firmer Candy Cane Pie, freeze for a longer duration. This dessert can even be made in advance and frozen for up to 3 months!
-
Thawing Technique: If you freeze the pie, remember to allow it to thaw in the refrigerator overnight before serving for the best texture and flavor.
-
Mixing Cool Whip: When folding in Cool Whip, do it gently to preserve the light, airy texture of the filling—this is key for a delightful dessert!
-
Decoration Delight: Sprinkle crushed candy canes right before serving to keep them crunchy and vibrant – a festive touch that enhances the presentation!
Candy Cane Pie Recipe FAQs
What type of Oreo cookies should I use for the crust?
Absolutely! An original Oreo works best for this Candy Cane Pie, as it provides that classic chocolate flavor. However, if you’re in need of alternatives, feel free to use any chocolate-flavored cookie you have on hand, like chocolate grahams or even chocolate-filled sandwich cookies.
How do I store Candy Cane Pie properly?
To keep your Candy Cane Pie fresh, cover it tightly with plastic wrap and store it in the refrigerator for up to 4-5 days. This helps maintain the crispness of the crust while keeping the filling creamy and delectable. If you plan to enjoy it later, freezing is a great option!
Can I freeze Candy Cane Pie?
Yes, you can freeze it! Wrap your Candy Cane Pie tightly in plastic wrap or aluminum foil and place it in an airtight container. It can be stored in the freezer for up to 3 months. When you’re ready to indulge, just transfer it to the refrigerator the night before to thaw properly.
What should I do if my filling isn’t mixing smoothly?
No worries! If you find lumps in your mixture, it is likely due to the cream cheese not being softened enough. To remedy this, remove the bowl from the mixer and use a spatula to break down the lumps. If needed, you can re-mix it with the electric mixer until the filling is smooth and fluffy again.
Are there any allergy considerations with this recipe?
Very! The Candy Cane Pie contains dairy (cream cheese, Cool Whip) and gluten (Oreo cookies) among others. If you’re catering to guests with allergies, consider using gluten-free cookies and dairy alternatives like vegan cream cheese and whipped topping. Always check labels to ensure safety!
What can I substitute for candy canes on top?
If you’ve run out of candy canes or prefer a different topping, consider using crushed peppermint candies, chocolate mint candies, or even holiday-themed sprinkles. These alternatives can provide a visually appealing and tasty finish to your Candy Cane Pie, making it unique for your celebration!

Decadent Candy Cane Pie for a Festive No-Bake Treat
Ingredients
Equipment
Method
- Begin by greasing a 9-inch pie pan to prevent sticking. In a food processor, crush 24 Oreo cookies until they reach a fine crumb texture. Melt ½ cup of unsalted butter and mix with Oreo crumbs until well combined. Press into the pie pan and refrigerate for 30 minutes to set.
- In a large mixing bowl, beat 8 ounces of softened cream cheese with an electric mixer until smooth. Gradually add in 1 cup of sweetened condensed milk, mixing until fully incorporated. Add red food coloring and peppermint extract, blending until uniform.
- Gently fold in 8 ounces of thawed Cool Whip using a spatula to maintain an airy texture.
- Pour the creamy filling into the chilled Oreo crust, smoothing the top. Top with remaining Cool Whip.
- Sprinkle crushed candy canes over the whipped topping for a festive finish.
- Place in the freezer for at least 2 hours. Let sit at room temperature for 15 minutes before slicing and serving.
Leave a Reply