
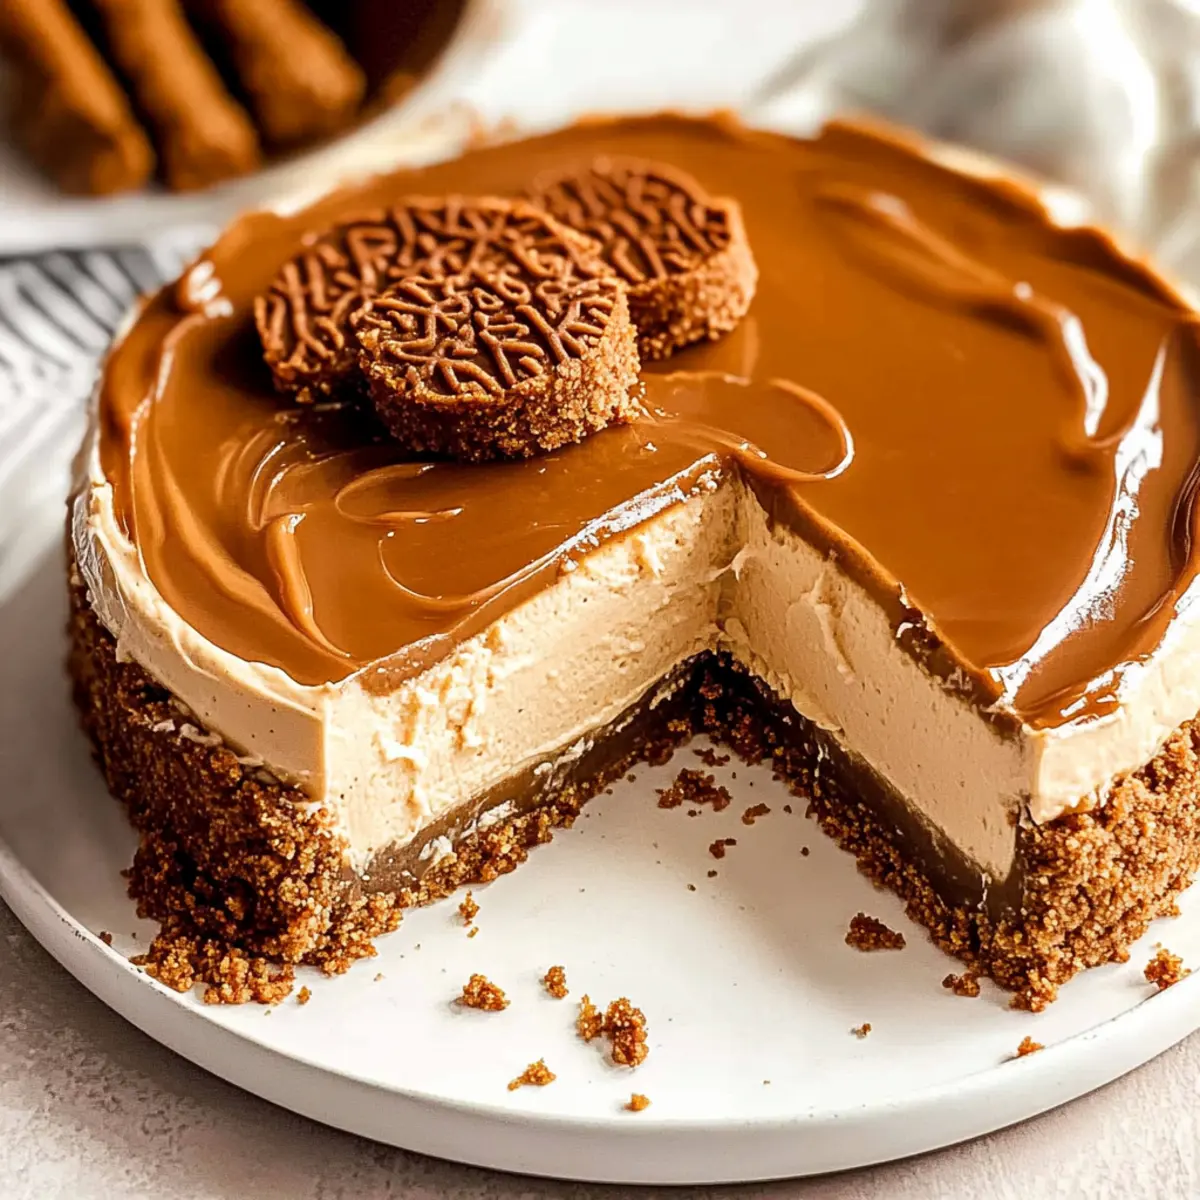
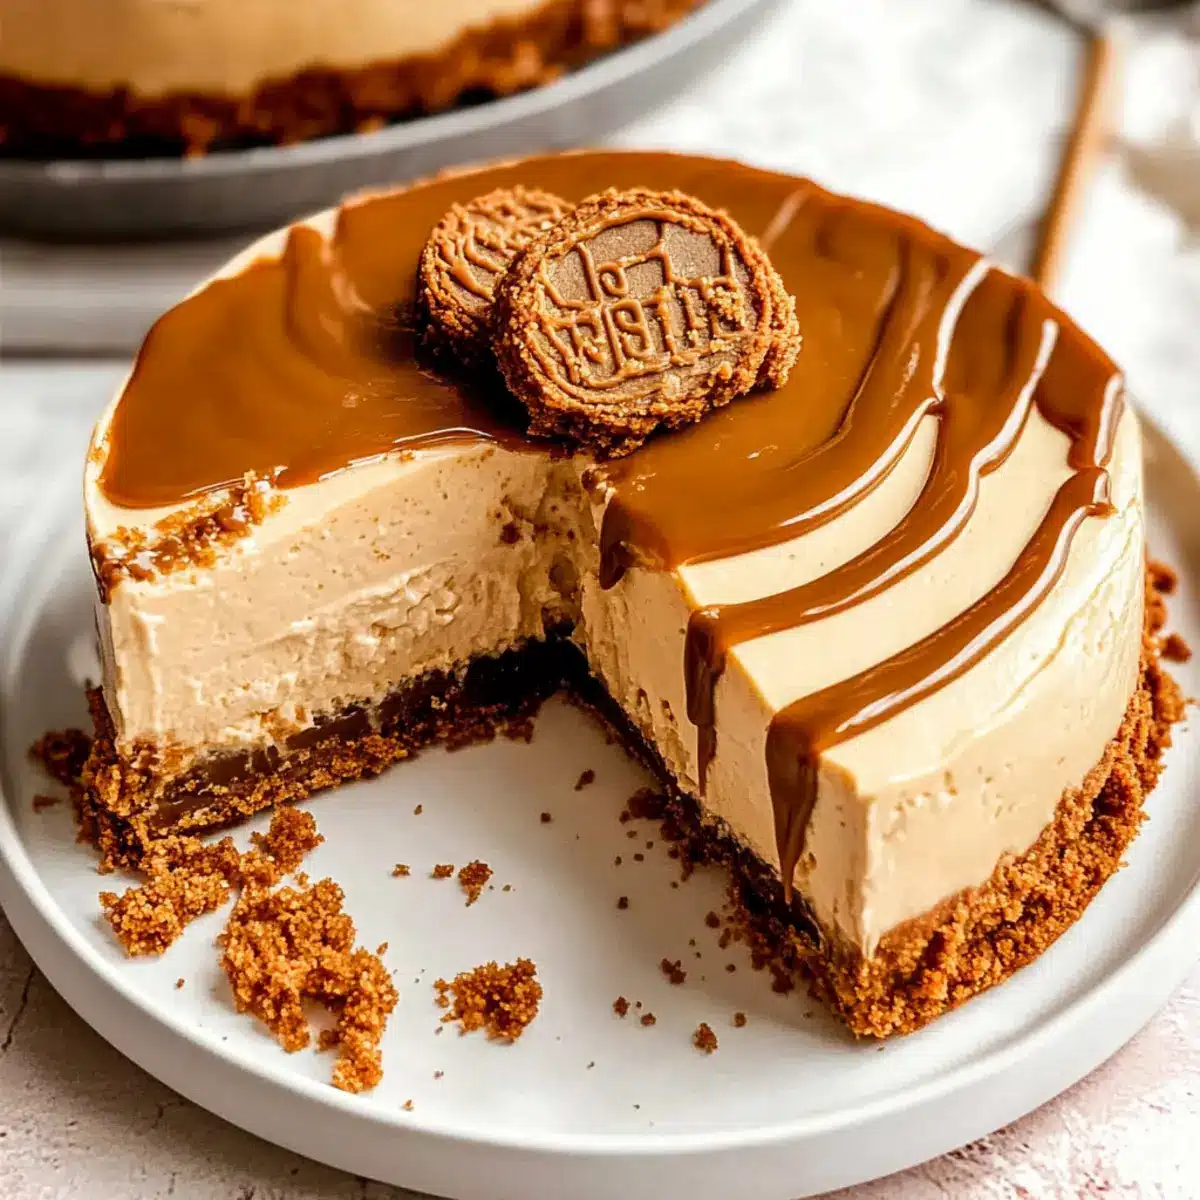
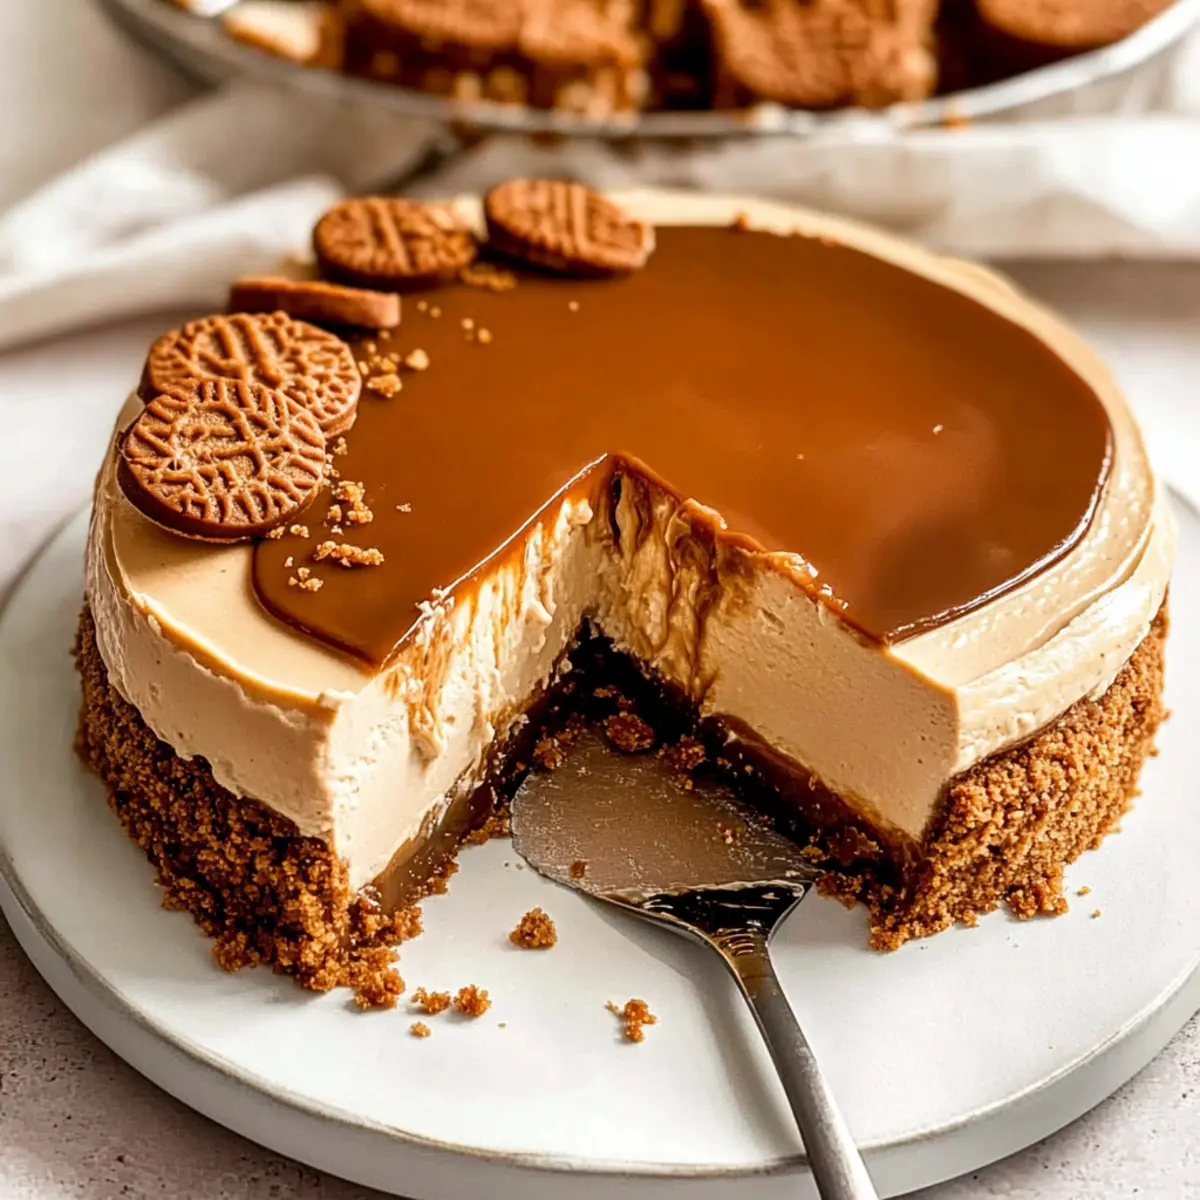
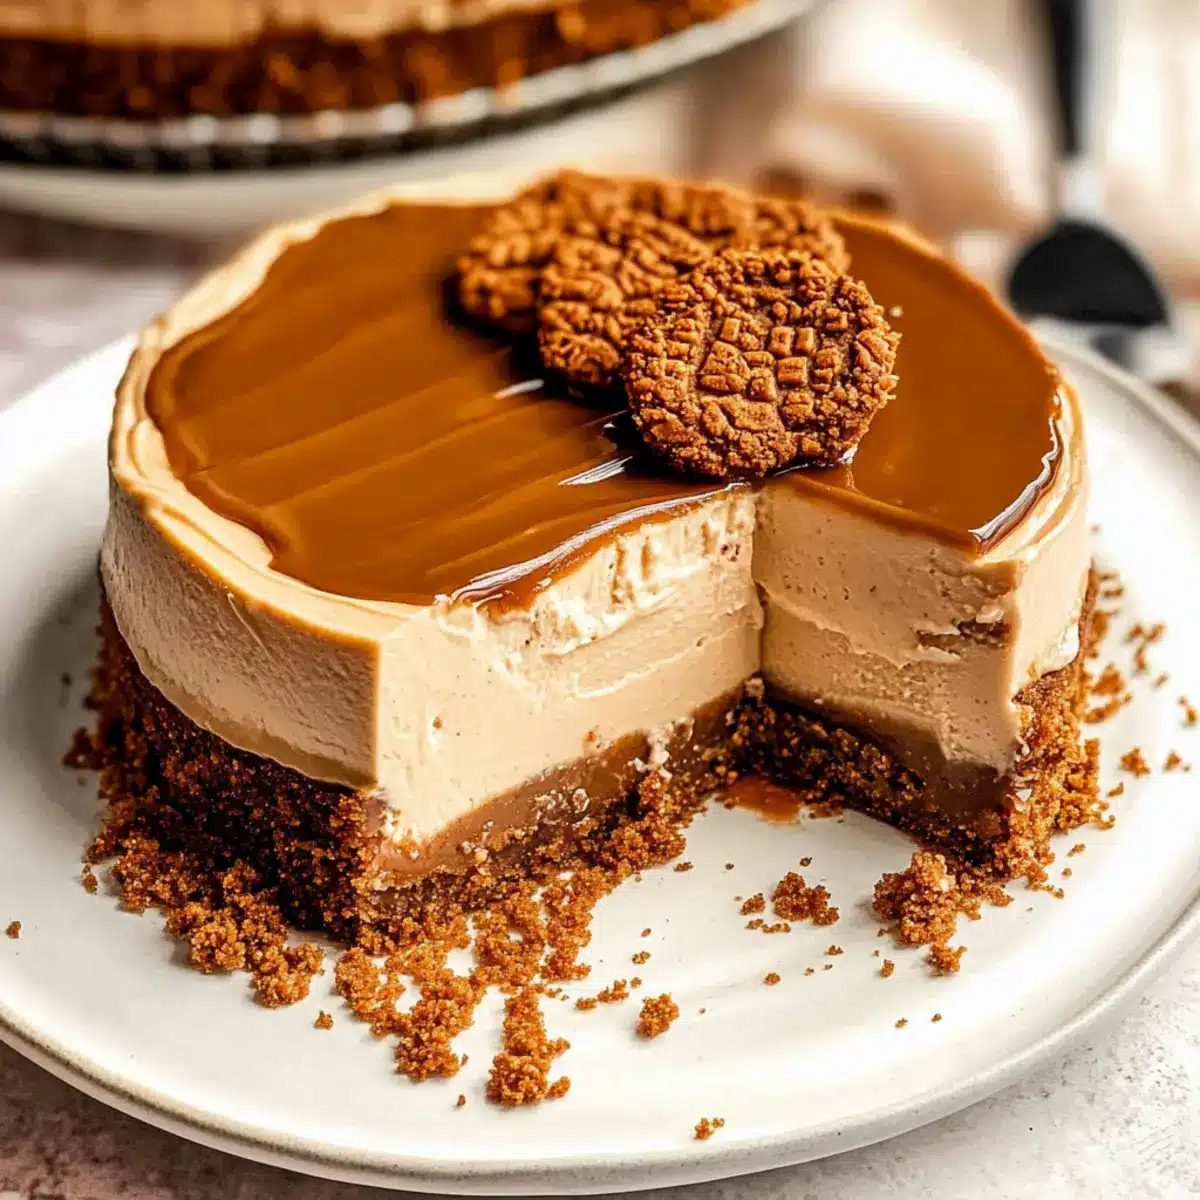
As I stood in my kitchen, the sweet scent of Biscoff cookies wafted through the air, transporting me to a cozy café corner where desserts are savored slowly. I couldn’t resist crafting a No-Bake Biscoff Cheesecake that captures that very essence—decadently easy and oh-so-creamy. This delightful dessert boasts a crumbly crust made from crushed Biscoff biscuits, layered with a rich filling infused with luscious Biscoff spread, and topped with a glossy drizzle of melted cookie butter. The best part? It’s a no-bake recipe that makes it accessible for anyone craving a treat without the fuss. Plus, it’s vegetarian-friendly and a guaranteed crowd-pleaser, perfect for gatherings or a simple family dessert. Ready to indulge in a slice of bliss? Let’s dive in!
Why is this cheesecake so irresistible?
Decadent Creaminess: The combination of cream cheese and Biscoff spread creates an incredibly rich filling that melts in your mouth.
No-Bake Convenience: Perfect for busy days, this easy recipe requires no baking, saving you time and energy.
Unique Flavor: The spiced notes of the Biscoff biscuits bring an unparalleled taste that delights cookie lovers everywhere.
Crowd-Pleasing Dessert: Impress friends and family with a striking dessert that’s as beautiful as it is delicious—an instant favorite at any gathering!
Versatile Toppings: Drizzle with melted cookie butter or your choice of toppings, like fruit compote, for endless customization.
Your friends will be talking about this No-Bake Biscoff Cheesecake long after the last slice has been devoured!
No-Bake Biscoff Cheesecake Ingredients
For the Crust
- Biscoff Biscuits – Gives the crust its unique caramelized and spiced flavor; you can use gluten-free speculoos cookies for a gluten-free option.
- Butter (melted) – Binds the crumbs to form a sturdy crust; unsalted butter is best for flavor balance.
For the Filling
- Cream Cheese (softened) – Provides the cheesecake with its luscious creaminess; make sure it’s at room temperature for easy mixing.
- Powdered Sugar – Sweetens and smoothens the cheesecake filling; you may substitute with granulated sugar, though it could affect texture.
- Biscoff Spread – Infuses the filling with an intense cookie flavor; substitute with other flavored spreads like cookie butter or Nutella for a twist.
- Vanilla Extract – Enhances the overall flavor profile; opt for pure vanilla extract for the best results.
- Heavy Cream – Adds a light, airy texture once whipped; using light cream can result in a less rich filling.
For the Topping
- Melted Biscoff Spread – A glossy finish that amplifies the cookie flavor; drizzle it on top for a decadent feel.
- Crushed Biscoff Biscuits (optional) – Use these as a garnish for added texture and visual appeal.
Get ready to whip up your delightful No-Bake Biscoff Cheesecake—a dessert that captures the love of homemade cooking in every creamy bite!
Step‑by‑Step Instructions for No-Bake Biscoff Cheesecake
Step 1: Prepare the Crust
Begin by crushing about 250 grams of Biscoff biscuits into fine crumbs using a food processor or rolling pin. In a mixing bowl, combine the crumbs with 100 grams of melted unsalted butter, mixing until well combined. Firmly press the mixture into the bottom of a 9-inch springform pan to create an even layer. Refrigerate for at least 30 minutes to let the crust set while you prepare the filling.
Step 2: Make the Filling
In a large bowl, beat 450 grams of softened cream cheese and 100 grams of powdered sugar together until smooth and creamy using an electric mixer. Gradually add 200 grams of Biscoff spread and 1 teaspoon of pure vanilla extract, mixing on medium speed until fully combined and luscious. Scrape down the sides of the bowl to ensure everything is blended perfectly, creating a delightful filling for your No-Bake Biscoff Cheesecake.
Step 3: Whip the Cream
In a separate bowl, pour 250 milliliters of heavy cream and whip it using an electric mixer until soft peaks form, about 3-4 minutes. Be careful not to overwhip, as you want a light and airy texture. Gently fold the whipped cream into the Biscoff cream cheese mixture, using a spatula to incorporate it without deflating the cream. This step is key to achieving the cheesecake’s dreamy fluffiness.
Step 4: Assemble the Cheesecake
Carefully pour the creamy filling over the chilled Biscoff crust in the springform pan. Use a spatula to spread the filling evenly and smooth the top for a polished look. Cover the cheesecake with plastic wrap and refrigerate for at least 6 hours—overnight is ideal—to allow it to set fully and develop its rich flavors.
Step 5: Finish and Serve
Once the cheesecake is set, gently remove it from the springform pan. For the finishing touch, heat 100 grams of Biscoff spread until melted and drizzle it on top of the cheesecake, creating an inviting glossy finish. Optionally, sprinkle crushed Biscoff biscuits over the top for added texture. Slice the cake chilled and enjoy this indulgent No-Bake Biscoff Cheesecake with family and friends!
How to Store and Freeze No-Bake Biscoff Cheesecake
Fridge: Store your cheesecake covered in the refrigerator for up to 4 days. Use plastic wrap or an airtight container to keep it fresh and prevent any odors from affecting its flavor.
Freezer: For longer storage, wrap the cheesecake tightly in plastic wrap and aluminum foil before freezing it for up to 3 months. This helps prevent freezer burn and keeps the creamy texture intact.
Thawing: To enjoy your frozen No-Bake Biscoff Cheesecake, transfer it to the fridge and let it thaw overnight. This gradual thawing helps maintain its delicious consistency.
Reheating: There’s no need to reheat this cheesecake; simply serve chilled straight from the refrigerator for the best experience!
Make Ahead Options
These No-Bake Biscoff Cheesecakes are perfect for meal prep enthusiasts! You can prepare the crust and filling up to 24 hours in advance, allowing for a stress-free dessert experience. Just make the crust and refrigerate it, then whip up the filling and store it in the fridge until you’re ready to assemble. This ensures that the dessert remains fresh and just as delicious! When you’re ready to serve, simply pour the filling over the crust, refrigerating the assembled cheesecake for at least 6 hours (preferably overnight) to set. Finish by drizzling melted Biscoff spread on top before bringing it to the table, creating a stunning visual that impresses with minimal effort.
What to Serve with No-Bake Biscoff Cheesecake
Imagine indulging in a rich, creamy dessert while surrounding it with flavors and textures that enhance the experience to new heights.
-
Fresh Berries: The tartness of strawberries or raspberries cuts through the richness of the cheesecake, adding a refreshing contrast. Their vibrant colors also bring a pop of visual appeal to your dessert plate.
-
Chocolate Drizzle: A warm, dark chocolate ganache adds richness and depth, inviting an extra decadent layer that balances the spiced flavors of the cheesecake beautifully.
-
Coffee or Espresso: A hot cup of coffee complements the creamy filling while enhancing the dessert’s sweet notes, making each bite irresistibly satisfying. The warmth of the drink contrasts perfectly with the chilled cheesecake.
-
Whipped Cream: Light, fluffy whipped cream adds an airy texture that perfectly complements the denser cheesecake. A dollop on top not only looks inviting but also provides a creamy contrast with each forkful.
-
Ginger Cookies: The spice from ginger cookies echoes the flavors of Biscoff, creating a delightful harmony. Serve them on the side for an extra crunch and flavor dimension.
-
Coconut Macaroons: These chewy cookies offer a subtly sweet and texture-rich addition. Their tropical flavor can transport your senses and add variety to your dessert ensemble.
-
Mint Tea: A refreshing cup of mint tea serves as a soothing accompaniment that helps cleanse the palate while completing the dessert experience. It brings a lightness that balances the cheesecake’s richness.
-
Vanilla Ice Cream: Creamy vanilla ice cream offers a classic pairing, as its coldness further enhances the cheesecake’s texture while adding a layer of sweetness. It also creates a comforting balance with the spiced notes.
Making your meal complete with these pairing ideas will turn your No-Bake Biscoff Cheesecake into a memorable dessert experience loved by everyone around the table.
Expert Tips for No-Bake Biscoff Cheesecake
-
Room Temperature Cream Cheese: Make sure to let the cream cheese soften at room temperature to avoid lumps and achieve a perfectly creamy filling.
-
Chill Overnight: For the best flavor and texture, refrigerate the cheesecake overnight. This allows the ingredients to meld together beautifully.
-
Gentle Folding: When combining whipped cream with the cheesecake mixture, fold gently to maintain that airy texture. Avoid overmixing, as it can deflate the whipped cream.
-
Full-Fat Cream Cheese: Opt for full-fat cream cheese for a richer, creamier filling. Low-fat options can lead to a less satisfying texture.
-
Clean Cuts: When slicing, clean your knife between cuts for neat, unobstructed pieces. This keeps the presentation beautiful and inviting.
Your No-Bake Biscoff Cheesecake will be a showstopper with these expert tips!
No-Bake Biscoff Cheesecake Variations
Feel free to let your creativity shine by customizing this delicious cheesecake to suit your taste!
- Nut-Free: Swap out Biscoff cookies for crushed digestive biscuits or graham crackers to avoid nuts while keeping the base delicious.
- Gluten-Free: Use gluten-free Biscoff or speculoos cookies to create a crust that everyone can enjoy without compromising flavor.
- Chocolate Twist: Fold in mini chocolate chips into the cheesecake filling for a delightful surprise in every bite.
- Add Fruit: Top with fresh berries or a fruit compote for a burst of natural sweetness and a beautiful color contrast. Think strawberries or raspberries for a fresh, tangy kick.
- Spiced Flavor: Incorporate a pinch of cinnamon or nutmeg into the filling for an extra layer of warmth and spice. It complements the Biscoff flavor beautifully.
- Lower Sugar: Reduce the powdered sugar by half, or use a sugar substitute like stevia to create a lighter version that still tastes amazing.
- Extra Creamy: For an ultra-luxurious filling, mix in a bit of mascarpone cheese along with the cream cheese. This will enhance the creaminess and richness.
- Biscoff Infusion: Mix a tablespoon of Biscoff spread into the whipped cream for a consistent flavor throughout the cheesecake, making each bite even more delightful.
Embrace the versatility of this No-Bake Biscoff Cheesecake and make it truly yours!
No-Bake Biscoff Cheesecake Recipe FAQs
What type of Biscoff biscuits should I use for the crust?
Absolutely! The ideal choice is the classic Biscoff biscuits, renowned for their caramelized and spiced flavor. If you’re aiming for a gluten-free dessert, you can substitute them with gluten-free speculoos cookies, which will provide a similar taste and texture.
How long can I store the cheesecake in the fridge?
Your No-Bake Biscoff Cheesecake can be stored in the refrigerator for up to 4 days. It’s best to cover it with plastic wrap or keep it in an airtight container to maintain its creamy texture and prevent it from absorbing any odors from other foods.
Can I freeze No-Bake Biscoff Cheesecake? How?
Of course! To freeze your cheesecake, wrap it tightly in plastic wrap, followed by aluminum foil to prevent freezer burn. It will stay fresh for up to 3 months in the freezer. When you’re ready to indulge, move it to the refrigerator to thaw overnight for the best texture and flavor.
What should I do if my cream cheese filling is lumpy?
Very! If you find lumps in your cream cheese filling, the likely culprit is that it was too cold. To fix this, make sure to let your cream cheese come to room temperature before mixing. If it’s already mixed and lumpy, you can blend it again with an electric mixer or food processor until smooth, taking care to incorporate it thoroughly.
Is this cheesecake suitable for vegetarians and those with allergies?
Yes, indeed! The No-Bake Biscoff Cheesecake is vegetarian-friendly. However, for those with allergies, check that your Biscoff biscuits don’t contain any allergens such as nuts. Additionally, ensure the cream cheese and heavy cream you use are free from additives that might trigger allergies.
Can I add additional toppings to the cheesecake?
The more the merrier! Feel free to get creative and personalize your No-Bake Biscoff Cheesecake. You can drench it in melted chocolate, sprinkle with fresh fruit or nuts, or even add a dollop of whipped cream on top for extra indulgence. The possibilities are endless!
Dreamy No-Bake Biscoff Cheesecake You'll Love to Devour
Ingredients
Equipment
Method
- Crush Biscoff biscuits into fine crumbs and mix with melted butter. Press into a springform pan and refrigerate for 30 minutes.
- Beat softened cream cheese and powdered sugar until smooth. Add Biscoff spread and vanilla; mix until combined.
- Whip heavy cream until soft peaks form, then gently fold into the Biscoff mixture.
- Pour the filling over the crust in the springform pan, smooth the top, and refrigerate for at least 6 hours.
- Remove from pan, drizzle melted Biscoff spread on top, garnish with crushed biscuits if desired, and serve chilled.
Leave a Reply