
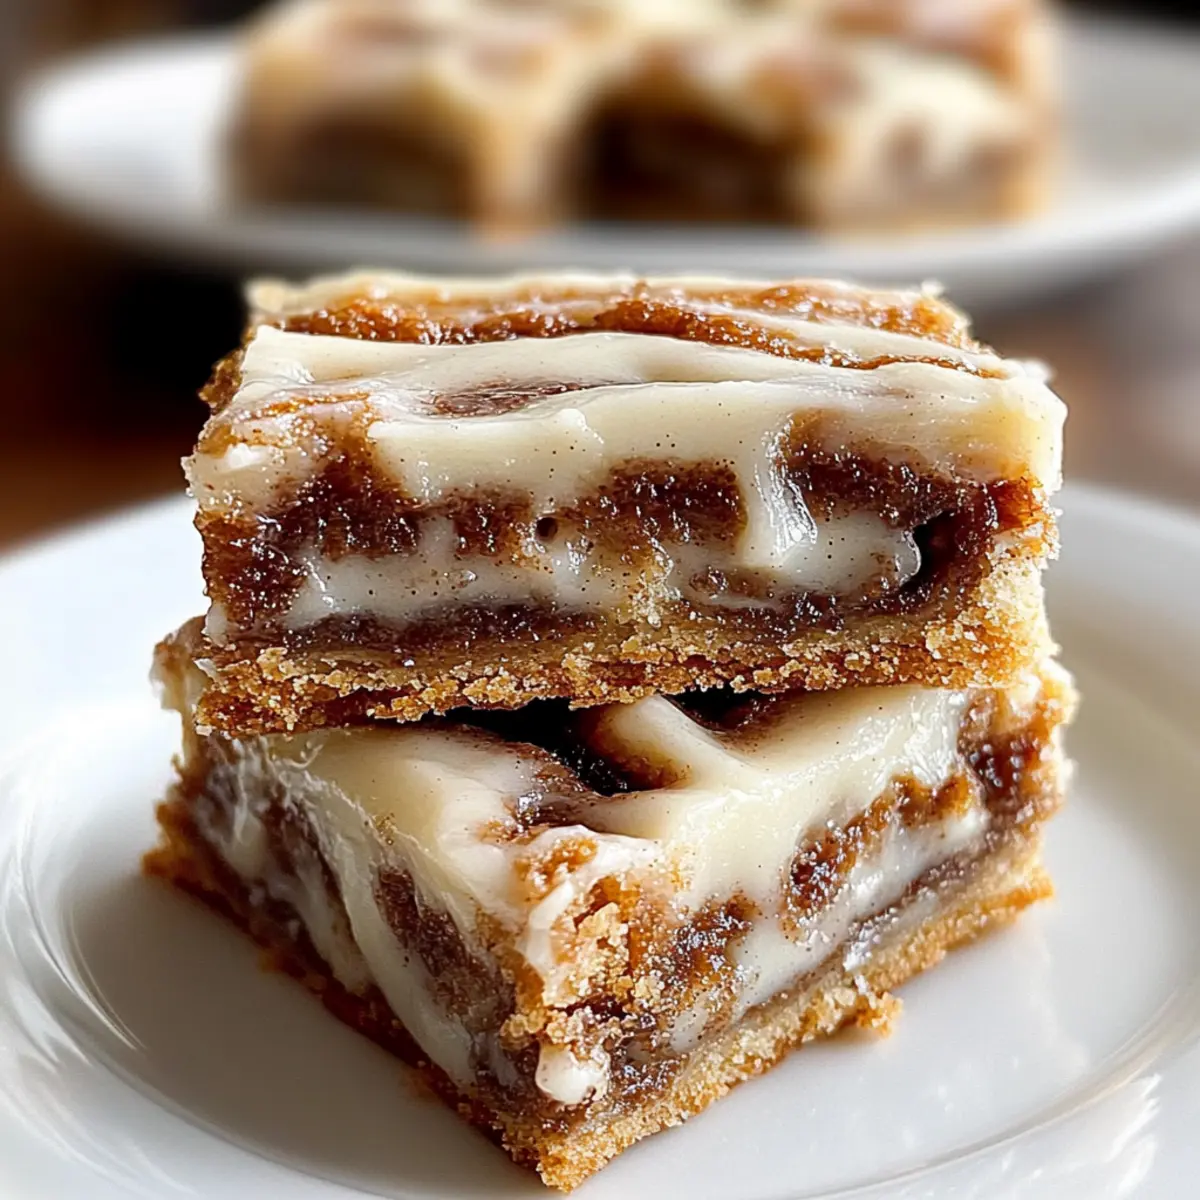
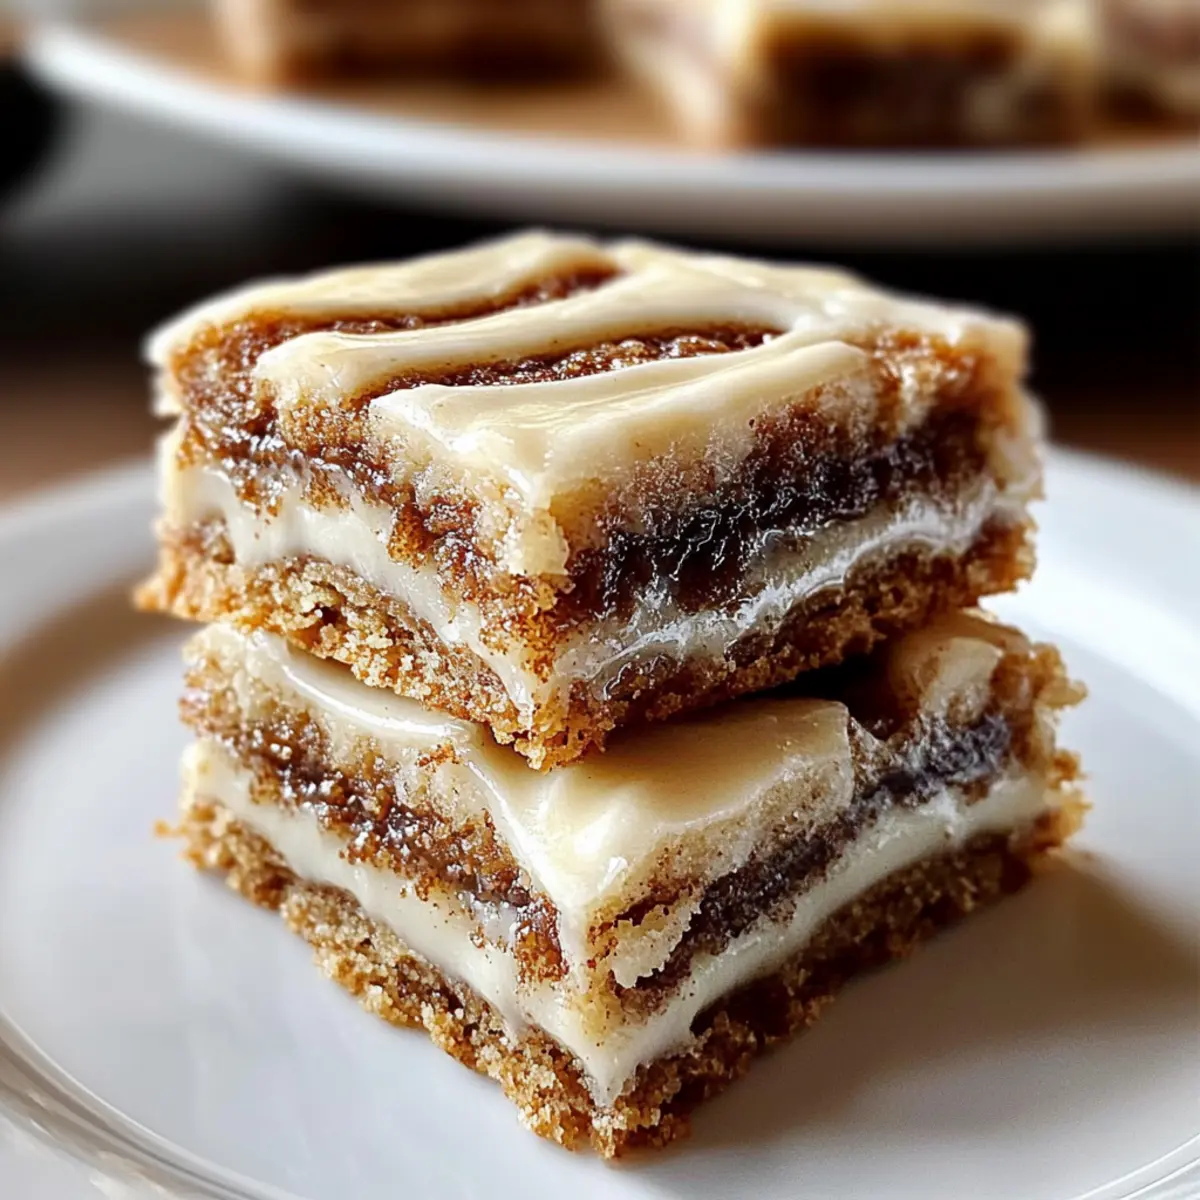
The aroma of cinnamon and brown sugar wafting through my kitchen takes me back to cozy mornings filled with sweet surprises. If you’re like me and believe that dessert should be both delightful and easy to make, then these Cinnamon Roll Bliss Bars are about to become your new go-to treat. With a simple, yeast-free recipe, you’ll whip up these bars in no time, making them perfect for those last-minute cravings or laid-back brunches. The buttery base is topped with a gooey spiced filling, all crowned with a luscious cream cheese frosting that’s hard to resist. Treat yourself to a homemade dessert that spells comfort without the fuss—what’s better than that? Are you ready to indulge in a slice of bliss?
Why are these Cinnamon Roll Bliss Bars special?
Quick and Easy: You’ll love how these bars come together in just a fraction of the time it takes to make traditional cinnamon rolls. No yeast means no waiting!
Gooey Goodness: Imagine a tender, buttery base topped with a rich filling that oozes warmth and spice, perfectly complemented by smooth cream cheese frosting.
Versatile for Any Occasion: Whether it’s a cozy night in or a festive brunch, these bars shine as a delightful treat, sure to please family and friends.
Crowd-Pleaser: Watch your guests rave over these gooey delights—a nostalgic dessert that appeals to everyone, from kids to adults.
Ready to elevate your dessert game? These bars certainly won’t last long! For more delicious options, be sure to check out my Cinnamon Swirl Banana or Apple Cinnamon Cottage recipes for more heavenly flavors!
Cinnamon Roll Bliss Bars Ingredients
For the Base
- All-purpose Flour – Provides structure for the base; substitute with a gluten-free flour blend for a gluten-free version.
- Granulated Sugar – Sweetens the base; feel free to reduce it slightly for less sweetness.
- Brown Sugar – Adds depth and moisture to the filling; dark brown sugar enhances the flavor further.
- Unsalted Butter – Essential for moisture and flavor in both the base and filling; ensure it’s softened, not melted.
- Eggs – Bind the ingredients and contribute to the structure; use a flax egg for a vegan alternative.
- Baking Powder – Provides lift in the absence of yeast; do not substitute with baking soda directly.
- Salt – Enhances all flavors.
For the Filling
- Cinnamon – Core spice for the traditional cinnamon roll flavor; essential for that warm, comforting aroma.
- Ground Cardamom – Elevates the flavor profile of the filling; can omit but recommended for depth.
- Heavy Cream – Adds richness to the filling; milk can be used in a pinch but may alter texture.
For the Frosting
- Cream Cheese – Base for the frosting, providing tanginess; can use a vegan cream cheese for a non-dairy option.
- Powdered Sugar – Sweetens and thickens the frosting; ensure it is sifted for a smooth glaze.
- Alcohol-free Vanilla Extract – Enhances flavors; switch it with almond extract for a unique twist.
Dive into making these Cinnamon Roll Bliss Bars and savor the delightful flavors all around!
Step‑by‑Step Instructions for Cinnamon Roll Bliss Bars
Step 1: Preheat and Prepare the Pan
Start by preheating your oven to 350°F (175°C). While it heats, line a 9×13 inch baking pan with parchment paper, letting the edges overhang for easy removal later. This simple step ensures your Cinnamon Roll Bliss Bars won’t stick, making for easy slicing and serving once they’re baked to perfection.
Step 2: Cream Together the Butters and Sugar
In a large mixing bowl, use a hand mixer to cream together ½ cup of softened unsalted butter, ½ cup of granulated sugar, and ½ cup of brown sugar until the mixture is fluffy and light—about 2-3 minutes. The warm tones of the sugars should blend perfectly with the butter, creating a delightful aroma that sets the stage for your bars.
Step 3: Add the Eggs and Vanilla
Add in 2 large eggs one at a time, mixing well after each addition to ensure everything is fully incorporated. Then, pour in 1 teaspoon of alcohol-free vanilla extract and blend until the mixture is smooth. This step adds a rich flavor profile to your Cinnamon Roll Bliss Bars, enhancing the overall taste experience.
Step 4: Mix Dry Ingredients
In a separate bowl, whisk together 2 cups of all-purpose flour, 2 teaspoons of baking powder, and ½ teaspoon of salt. Gradually add this dry mixture to the wet ingredients, mixing until just combined. Be careful not to overmix; you want a tender base for your bars that will rise beautifully in the oven.
Step 5: Assemble the Dough Base
Reserve 1 cup of the dough and press the remaining mixture evenly into the bottom of the lined baking pan. The dough should be smooth and cover the entire bottom, providing a solid base for the delicious filling that will follow in these Cinnamon Roll Bliss Bars.
Step 6: Create the Gooey Filling
In a medium bowl, whisk together ½ cup of melted butter, 1 cup of brown sugar, 2 teaspoons of cinnamon, ½ teaspoon of ground cardamom, and ¼ cup of heavy cream until the mixture is thick and well combined. This flavorful filling is what makes your bars irresistibly gooey and fragrant!
Step 7: Spread the Filling
Carefully spread the thick filling over the dough base in the pan, making sure to leave a small border around the edges. This allows the filling to bubble slightly as the bars bake, creating that rich, cinnamon roll treat experience in every bite of your Cinnamon Roll Bliss Bars.
Step 8: Add the Reserved Dough
Drop the reserved cup of dough in clumps over the filling, then use a knife to swirl gently, creating a marbled effect. This step not only looks appealing but also helps integrate the flavors beautifully, ensuring each bar has a bit of that classic cinnamon roll goodness.
Step 9: Bake to Perfection
Transfer the pan to the preheated oven and bake for 28 to 32 minutes. Keep an eye on the edges, which should be set and golden brown, while the center remains slightly jiggly. This balance ensures your Cinnamon Roll Bliss Bars come out soft and gooey, just as they should be.
Step 10: Cool Before Frosting
Once baked, remove the pan from the oven and allow the bars to cool completely in the pan on a wire rack. This crucial step ensures that the frosting doesn’t melt when you spread it on, allowing for a beautiful finish on your Cinnamon Roll Bliss Bars.
Step 11: Make the Cream Cheese Frosting
In a mixing bowl, beat together 4 ounces of softened cream cheese and ¼ cup of softened unsalted butter until the mixture is creamy and smooth. Gradually add in 1-2 cups of sifted powdered sugar and a splash of milk until you reach your desired frosting consistency, perfect for spreading over the cooled bars.
Step 12: Frost and Serve
Spread the cream cheese frosting evenly over the top of the cooled Cinnamon Roll Bliss Bars. Once frosted, slice into squares and enjoy the irresistible combination of flavors and textures. These bars are sure to impress anyone lucky enough to indulge in them!

Cinnamon Roll Bliss Bars Variations
Feel free to get creative and customize your Cinnamon Roll Bliss Bars for a personal touch that excites your taste buds!
-
Nutty Crunch: Add chopped walnuts or pecans to the filling for a delightful crunch. These nuts will bring an extra textural element that contrasts beautifully with the gooey filling.
-
Almond Flavor: Use almond extract in place of vanilla for a unique flavor that elevates your bars. This subtle twist introduces a wonderful nuttiness that will surprise and delight.
-
Richer Filling: For a richer experience, substitute dark brown sugar for light brown in the filling. The deep molasses flavor will provide a warmth that takes these bars to another level of indulgence.
-
Spice it Up: Swap the cinnamon and cardamom for nutmeg or ginger for a unique twist. Utilizing different spices can give your bars a refreshing change while maintaining that comforting essence.
-
Fruit Addition: Fold in diced apples or pears into the filling for a fruity spin. This not only adds moisture but also infuses the bars with fresh flavors of sun-kissed fruit that dance on your palate.
Enhance your dessert repertoire and try out variations! For instance, if you’re in the mood for something truly special, why not pair these bars with my delicious Cinnamon Swirl Banana for a memorable dessert spread? Perfect for any occasion!
Storage Tips for Cinnamon Roll Bliss Bars
Room Temperature: Store your Cinnamon Roll Bliss Bars in an airtight container at room temperature for up to 3 days to maintain their soft texture and flavor.
Fridge: If you plan to keep them longer, refrigerate the bars for up to 5 days; the coolness enhances the frosting’s firmness while keeping the bars fresh.
Freezer: For extended storage, freeze frosted bars in an airtight container or wrap tightly; they’ll last up to 2 months. Thaw overnight in the fridge before serving to regain their deliciously gooey texture.
Reheating: If enjoyed warm, gently reheat individual pieces in the microwave for about 10-15 seconds—the perfect way to bring back that freshly-baked feel!
What to Serve with Cinnamon Roll Bliss Bars
Indulging in sweet, gooey bites is just the beginning; let’s create a delightful spread to elevate your experience.
-
Hot Coffee: A rich, dark roast complements the sweet flavors beautifully and enhances those comforting notes of cinnamon.
-
Fresh Fruit Salad: Brighter, juicy fruits provide a refreshing contrast to the bars’ richness—think berries, oranges, and apples for flavorful variety.
-
Creamy Vanilla Ice Cream: The cold creaminess takes the warmth of the bars to another level, creating a delightful melting experience with every bite.
-
Caramel Sauce Drizzle: A warm drizzle adds an indulgent touch that pairs perfectly with the cinnamon sweetness, making each square feel like a gourmet treat.
-
Whipped Cream: Light and fluffy, it adds airy texture and balances out the richness of the bars, transforming them into a mini dessert wonderland.
-
Chai Tea: Aromatic and spicy, this drink harmonizes with the bars’ flavor profile, making for a cozy, warming combination that soothes the spirit.
-
Nutty Granola: A sprinkle on top provides an unexpected crunch and nutty flavor that plays with the soft, gooey texture of the bars for a satisfying mix.
-
Milkshake: Blend with vanilla ice cream for a decadent pairing, taking comfort food to a whole new creamy delight!
-
Chocolate Drizzle: Top your bars for an extra layer of sweetness; this rich addition can elevate the overall flavor in surprising ways.
Make Ahead Options
These Cinnamon Roll Bliss Bars are a fantastic option for meal prep enthusiasts looking to save time on busy days! You can prepare the dough base and filling up to 24 hours in advance. Simply follow the steps until the filling is ready, then store both separately in the refrigerator. When it’s time to bake, bring the dough and filling to room temperature before assembling and baking as directed. This ensures the bars maintain their gooey richness and delicious flavor. Just remember to let them cool completely before adding the cream cheese frosting for the best texture. Enjoy the convenience of homemade treats with minimal effort!
Expert Tips for Cinnamon Roll Bliss Bars
-
Butter Temperature: Ensure your butter is softened to room temperature; cold butter won’t cream well, resulting in a dense base.
-
Don’t Overmix: When incorporating dry ingredients, mix just until combined. Overmixing can lead to tough bars rather than soft and tender Cinnamon Roll Bliss Bars.
-
Frost After Cooling: Always allow the bars to cool completely before frosting; warm bars will melt the cream cheese frosting and create a gooey mess.
-
Check Doneness: Keep an eye on baking time; the center should be slightly jiggly. Slight underbaking will enhance the gooey texture.
-
Experiment with Add-ins: Feel free to customize your bars by adding chopped nuts or using different spices to create your unique version of Cinnamon Roll Bliss Bars!

Cinnamon Roll Bliss Bars Recipe FAQs
How should I select ingredients for my Cinnamon Roll Bliss Bars?
Absolutely! When selecting ingredients, make sure your butter is softened to room temperature for the best creaming effect. For flour, all-purpose is typical, but you can substitute a gluten-free blend if needed. Don’t overlook the importance of using fresh spices; for cinnamon, look for vibrant color and a fragrant aroma to ensure maximum flavor!
How should I store leftover Cinnamon Roll Bliss Bars?
Store your Cinnamon Roll Bliss Bars in an airtight container at room temperature for up to 3 days. If you’d like them to last longer, refrigerate them for up to 5 days. Just remember, the chocolatey goodness and lush frosting might firm up a bit in the fridge, so bring them to room temperature before enjoying!
Can I freeze my Cinnamon Roll Bliss Bars?
Yes, indeed! To freeze your frosted Cinnamon Roll Bliss Bars, place them in an airtight container or wrap tightly with plastic wrap. They can be kept frozen for up to 2 months. When you’re ready to indulge, simply thaw overnight in the fridge. If you enjoy them warm, reheat individual squares for about 10-15 seconds in the microwave—oh so cozy!
What should I do if my Cinnamon Roll Bliss Bars are too dry?
If your bars turn out a bit dry, it might be due to overbaking. For best results, keep an eye on them, as they should be slightly jiggly in the center. If you find that you’ve overbaked them, serve with extra cream cheese frosting or a dollop of ice cream to bring back the moisture and elevate that gooey texture!
Are there any dietary considerations for pets or allergies with this recipe?
Absolutely! Keep in mind that this recipe contains ingredients like butter and cream cheese which can be harmful to pets, particularly dogs. If you or someone you know has a dairy allergy, consider using plant-based alternatives for the butter and cream cheese. There’s always a way to enjoy homemade desserts while being mindful of dietary needs!
Cinnamon Roll Bliss Bars: No-Yeast Delight in Every Bite
Ingredients
Equipment
Method
- Preheat your oven to 350°F (175°C). Line a 9x13 inch baking pan with parchment paper, letting the edges overhang for easy removal.
- Cream together ½ cup of softened unsalted butter, ½ cup of granulated sugar, and ½ cup of brown sugar until fluffy.
- Add in 2 large eggs one at a time, mixing well after each addition. Then, pour in 1 teaspoon of alcohol-free vanilla extract.
- In a separate bowl, whisk together 2 cups of all-purpose flour, 2 teaspoons of baking powder, and ½ teaspoon of salt. Gradually add this dry mixture to the wet ingredients.
- Reserve 1 cup of the dough and press the remaining mixture evenly into the bottom of the lined baking pan.
- In a medium bowl, whisk together ½ cup of melted butter, 1 cup of brown sugar, 2 teaspoons of cinnamon, ½ teaspoon of ground cardamom, and ¼ cup of heavy cream.
- Spread the thick filling over the dough base in the pan, leaving a small border around the edges.
- Drop the reserved cup of dough in clumps over the filling, then use a knife to swirl gently.
- Transfer the pan to the preheated oven and bake for 28 to 32 minutes.
- Once baked, remove the pan from the oven and allow the bars to cool completely.
- Beat together 4 ounces of softened cream cheese and ¼ cup of softened unsalted butter until creamy. Gradually add in 1-2 cups of sifted powdered sugar.
- Spread the cream cheese frosting evenly over the top of the cooled bars.
Leave a Reply