
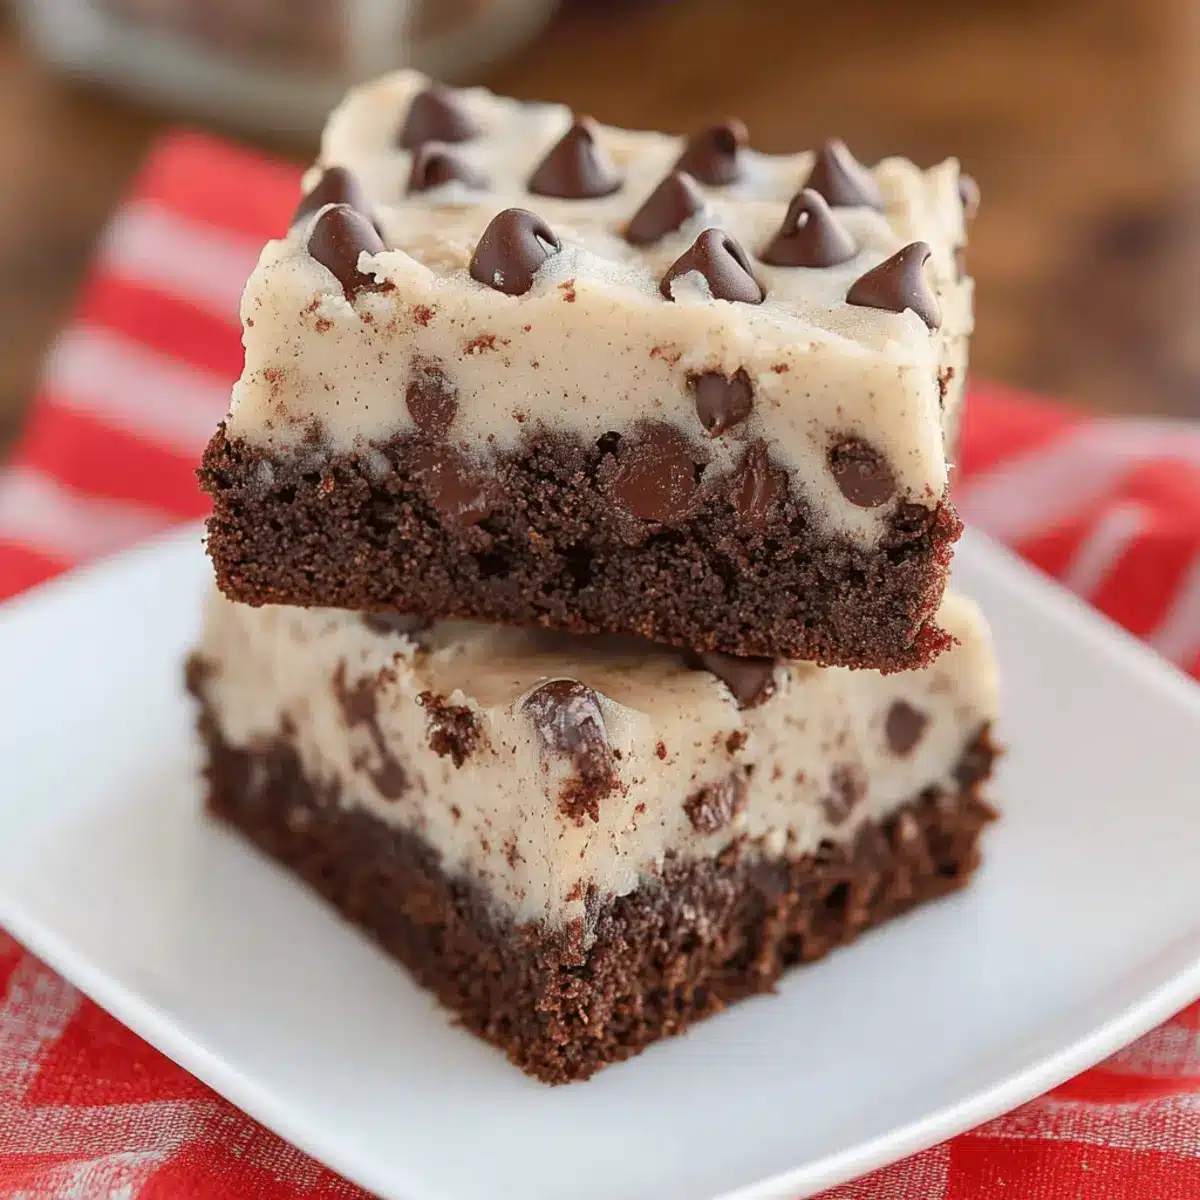
As I rummaged through my pantry, I stumbled upon a jar of chocolate protein powder, and the idea struck me—what if I combined the heavenly taste of cookie dough with the rich, fudgy texture of brownies? That’s how my Protein Packed Cookie Dough Brownies were born! These delights aren’t just about indulgence; they come together quickly and require no baking, making them perfect for those busy days when you crave something sweet yet wholesome. Imagine sinking your teeth into a creamy cookie dough layer sitting atop a dark chocolate brownie base, all without any added sugar or gluten! Not only are they a protein-packed treat, but they’re also a great guilt-free option that won’t derail your healthy eating goals. Ready to whip up a batch and discover a new favorite snack? Let’s dive into the delicious world of these irresistible brownies!
Why Are These Cookie Dough Brownies Irresistible?
Decadent Texture: These brownies boast a rich, fudgy base paired with a creamy cookie dough layer, creating a dessert that’s both indulgent and satisfying.
No-Bake Ease: Enjoy the convenience of a no-bake recipe; just mix, freeze, and savor!
Nutritious Twist: With protein-packed ingredients, these brownies are guilt-free and fit seamlessly into any health-conscious diet.
Customizable Flavors: Feel free to experiment with flavors by swapping in different protein powders or add-ins like nuts for a personal touch. Check out more ideas like our Chewy Pumpkin Cookies for additional versatile baking inspiration!
Crowd Pleaser: Everyone loves a dessert that pleases the palate without compromising on health – perfect for gatherings or a sweet snack!
Quick Prep: In just a handful of steps, you can whip these up and have a delightful treat ready in no time!
Cookie Dough Brownies Ingredients
For the Brownie Base
• Almond Flour – Adds structure and a nutty flavor; substituting with oat flour may require adjusting the liquid due to its drier nature.
• Chocolate Protein Powder – Provides protein and a delightful chocolatey taste; feel free to use cocoa powder instead if you prefer a richer chocolate flavor.
• Dates – Serve as a natural sweetener and binding agent; soak hard dates in hot water for 5 minutes to soften for easier blending.
• Coconut Oil – A binding agent with a hint of coconut flavor; make sure it’s melted before mixing for the best consistency.
For the Cookie Dough Layer
• Almond Flour – Helps create that cookie dough texture; you can swap it with any nut flour you like for a unique flavor.
• Chocolate Chips – Add richness and an irresistible chocolatey burst; optional for those who want a lighter version of these cookie dough brownies.
Enjoy experimenting with these protein-packed ingredients and discover your new favorite way to indulge!
Step‑by‑Step Instructions for Protein Packed Cookie Dough Brownies
Step 1: Prepare the Brownie Base
In a food processor, combine almond flour, chocolate protein powder, and softened dates. Blend these ingredients on high for about 1-2 minutes until a smooth, dough-like consistency forms, resembling a thick cookie batter. You may need to pause and scrape down the sides of the bowl to ensure everything is well mixed together.
Step 2: Form into the Base
Line a 9×5 loaf tin with parchment paper for easy removal. Press the brownie mixture into the bottom of the tin, ensuring an even layer. Use your fingers or a spatula to smooth it out, creating a compact base. Place the tin in the freezer for about 10 minutes to allow the brownie base to set.
Step 3: Make the Cookie Dough Layer
Rinse the food processor and now add almond flour, melted coconut oil, and chocolate chips for the cookie dough layer. Blend these ingredients until smooth and creamy, which should take about 1-2 minutes. The mixture should have a thick, spreadable consistency, ready to be layered on top of your brownie base.
Step 4: Assemble the Layers
Carefully remove the brownie base from the freezer. Spread the cookie dough mixture evenly over the top of the brownie layer using a spatula, ensuring it is well distributed. Smooth the surface until it is as level as possible, creating an inviting look for your Protein Packed Cookie Dough Brownies.
Step 5: Chill
Return the assembled brownies to the freezer for about 1 hour. This chilling time is crucial as it will help the layers firm up and hold their shape when it comes time to slice. Monitor the chilling process to ensure the dessert is fully set.
Step 6: Slice and Serve
Once the brownies are firm, take them out of the freezer and lift them from the tin using the parchment paper. Use a sharp knife to cut them into squares or rectangles. Store any leftovers in the fridge or freezer; these delicious Cookie Dough Brownies are best enjoyed chilled!
Make Ahead Options
These Protein Packed Cookie Dough Brownies are fantastic for busy home cooks looking to save time! You can prepare the brownie base up to 24 hours in advance by following the first two steps of the recipe, then refrigerating or freezing it to maintain its texture. The cookie dough layer can also be made a day ahead; simply store it in an airtight container in the refrigerator to keep it fresh. When you’re ready to enjoy, spread the cookie dough mixture over the brownie base and freeze the assembled dessert for about an hour. This way, you’ll have a delicious, nutritious treat waiting for you, ready to serve with minimal effort!
Storage Tips for Cookie Dough Brownies
Fridge: Keep these brownies in an airtight container in the fridge for up to 7 days, ensuring they remain moist and delicious.
Freezer: For longer storage, freeze the brownies in a single-layer airtight container for up to 3 months. This way, you can enjoy them anytime!
Thawing: When ready to enjoy, thaw the Cookie Dough Brownies in the fridge overnight for the best texture or at room temperature for about 30 minutes.
Reheating: If you like them a bit melty, warm them in the microwave for 10-15 seconds. Enjoy that fudgy goodness!
Cookie Dough Brownies Variations
Ready to make these Cookie Dough Brownies your own? Discover exciting ways to customize your treats with enticing twists!
- Gluten-Free: Use almond flour or substitute with a gluten-free flour blend to keep these brownies safe for gluten-sensitive eaters.
- Nut-Free: Swap almond flour for sunflower seed flour or oat flour to create a deliciously nut-free version.
- Vegan Option: Replace honey or non-vegan ingredients with maple syrup and use dairy-free chocolate chips for a plant-based delight.
- Flavor Boost: Add a teaspoon of vanilla extract or a pinch of sea salt to the brownie base for extra depth of flavor.
- Texture Twist: Fold in shredded coconut or chopped nuts for a crunchy contrast to the soft brownie and cookie dough layers.
- No Added Sugar: For a sugar-free treat, use unsweetened applesauce or mashed bananas as a natural sweetener instead of dates.
- Protein Punch: Experiment with different flavors of protein powder, like vanilla or peanut butter, to elevate the taste even further.
- Fruit Fusion: Add dried fruits like cranberries or apricots instead of chocolate chips for a fruity medley that pairs beautifully with chocolatey goodness.
For more delicious variations, check out our delicious Chewy Pumpkin Cookies or try adding some unique flavors with our Pumpkin Smores Cookies!
What to Serve with Protein Packed Cookie Dough Brownies
Imagine a delightful spread that complements the rich, chocolatey bliss of these brownies, adding balance and variety to your indulgence.
-
Creamy Greek Yogurt: A dollop of Greek yogurt adds a refreshing tang and creaminess, enhancing the brownie experience. Pairing them together creates a delicious contrast of textures.
-
Fresh Berries: A handful of vibrant raspberries or strawberries offers a burst of freshness that cuts through the sweetness, making every bite feel decadent yet light.
-
Nutty Smoothie: A protein-packed smoothie made with almond milk, banana, and a scoop of nut butter provides a creamy, nutritious drink that complements the brownies beautifully.
-
Chilled Almond Milk: Enjoying these brownies with a glass of chilled almond milk adds a nutty flavor and keeps the indulgent experience healthier and balanced.
-
Coconut Ice Cream: Serve these brownies alongside a scoop of coconut ice cream for a luscious dessert that marries the fudgy goodness with a tropical twist.
-
Dark Chocolate Drizzle: Elevate your brownie experience by drizzling melted dark chocolate or nut butter on top for that extra touch of richness and flavor.
-
Caramel Sauce: A light drizzle of homemade or store-bought caramel sauce brings a luscious sweetness that harmonizes beautifully with the rich brownie base.
Be creative and mix and match these pairings to elevate your brownie experience to new heights!
Expert Tips for Cookie Dough Brownies
- Soak Dates Properly: Ensure dates are fully soaked for at least 5 minutes in hot water to achieve a smooth blending consistency.
- Mind Your Measurements: When substituting almond flour with oat flour, start with slightly less, as oat flour tends to absorb more moisture.
- Melt Coconut Oil: Always melt the coconut oil before mixing; it helps bind the ingredients effectively and improves the texture of the brownies.
- Layer with Care: When spreading the cookie dough layer, use a spatula sprayed with non-stick spray for smoother application and easier handling.
- Storage Matters: Keep these Cookie Dough Brownies in an airtight container in the fridge for up to a week, or freeze for longer-lasting indulgence.
- Get Creative: Feel free to experiment with different protein powders or nut butters to make these brownies truly your own!
Cookie Dough Brownies Recipe FAQs
How do I choose the best dates for my brownie mixture?
Absolutely! Choose soft, plump Medjool dates for the best results. If your dates are too hard, soak them in hot water for 5 minutes to soften before blending. This ensures a smooth dough consistency.
How should I store leftover Cookie Dough Brownies?
I recommend storing your brownies in an airtight container in the fridge for up to 7 days. This keeps them moist and ready to enjoy! For longer storage, freeze them in a single-layer airtight container for up to 3 months.
Can I freeze these Cookie Dough Brownies? How?
Yes, you can definitely freeze them! Cut the brownies into squares and layer them with parchment paper in an airtight container. They will stay fresh for up to 3 months. When you’re ready to indulge, thaw them in the fridge overnight or at room temperature for about 30 minutes.
What if my brownie base is too crumbly?
Very well! If your brownie base turns out too crumbly, it might need more moisture. Try adding a splash of water or a bit more melted coconut oil. Blend again until the mixture holds together better. A little extra blending can help achieve that perfect dough-like consistency!
Are these Cookie Dough Brownies suitable for special diets?
Definitely! These brownies are gluten-free, sugar-free, and packed with protein, making them a delightful option for health-conscious eaters. Just make sure to use a gluten-free certified protein powder and check any additional ingredients for allergens if you’re serving them to others.
Can I replace almond flour in this recipe?
The more the merrier! You can substitute almond flour with oat flour or even peanut flour for a different nutty flavor. Just remember, oat flour may require reducing the liquid slightly due to its higher absorption rate. Adjust accordingly until you reach that perfect doughy consistency!
Decadent Cookie Dough Brownies: Guilt-Free Indulgence Awaits
Ingredients
Equipment
Method
- In a food processor, combine almond flour, chocolate protein powder, and softened dates. Blend these ingredients on high for about 1-2 minutes until a smooth, dough-like consistency forms.
- Line a 9x5 loaf tin with parchment paper for easy removal. Press the brownie mixture into the bottom of the tin, ensuring an even layer. Place the tin in the freezer for about 10 minutes.
- Rinse the food processor and add almond flour, melted coconut oil, and chocolate chips for the cookie dough layer. Blend until smooth and creamy.
- Carefully remove the brownie base from the freezer. Spread the cookie dough mixture evenly over the brownie layer using a spatula, ensuring it is well distributed.
- Return the assembled brownies to the freezer for about 1 hour to allow the layers to firm up.
- Once firm, lift them from the tin using the parchment paper and slice into squares or rectangles.
Leave a Reply