
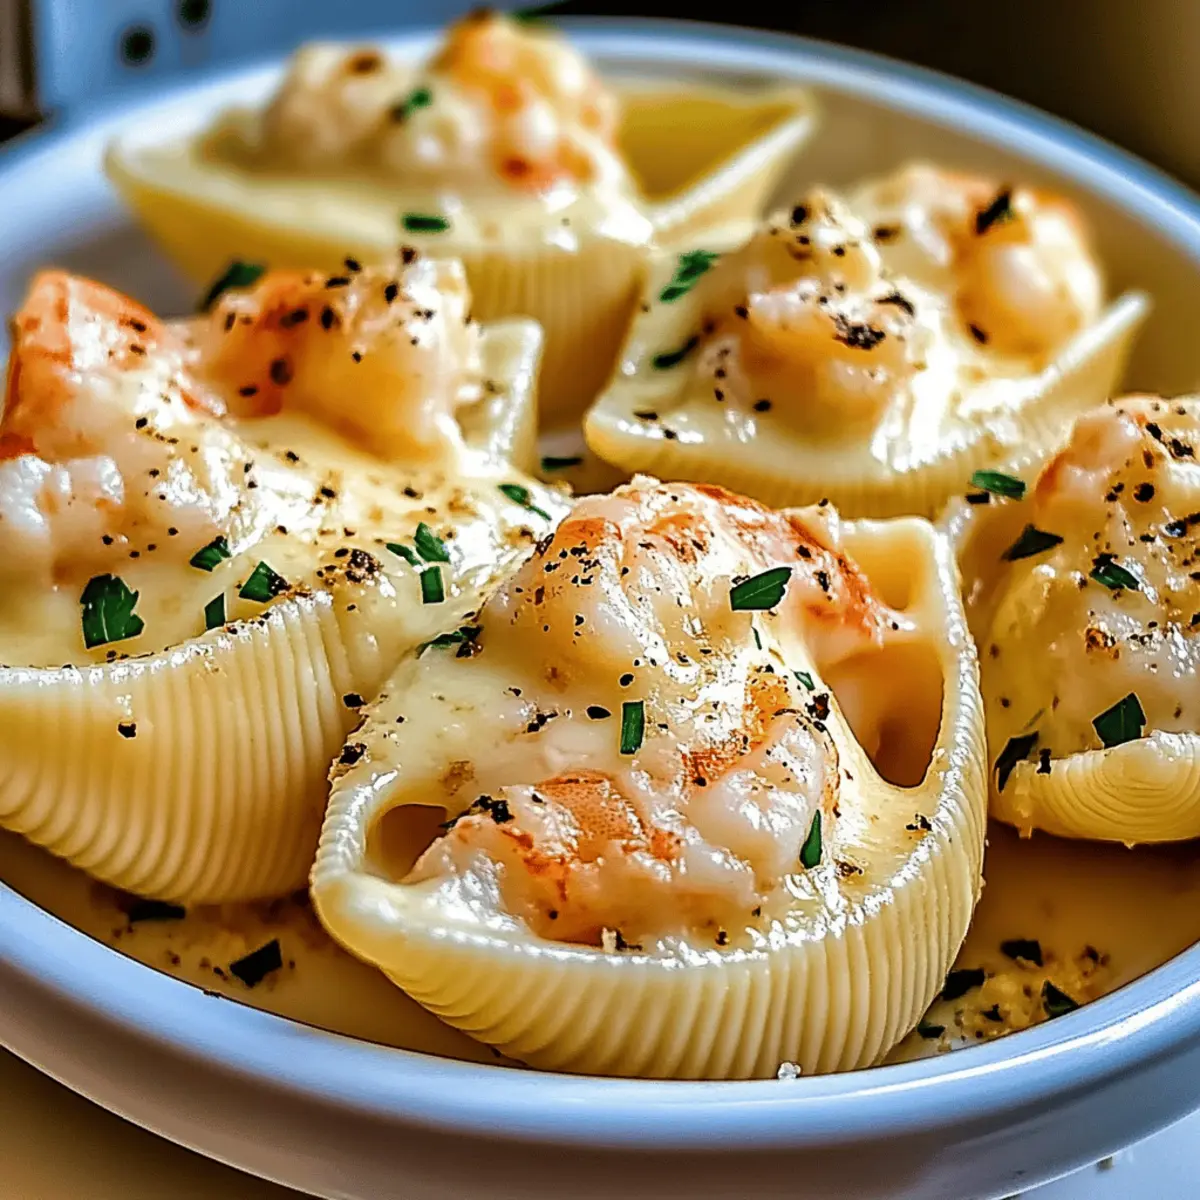
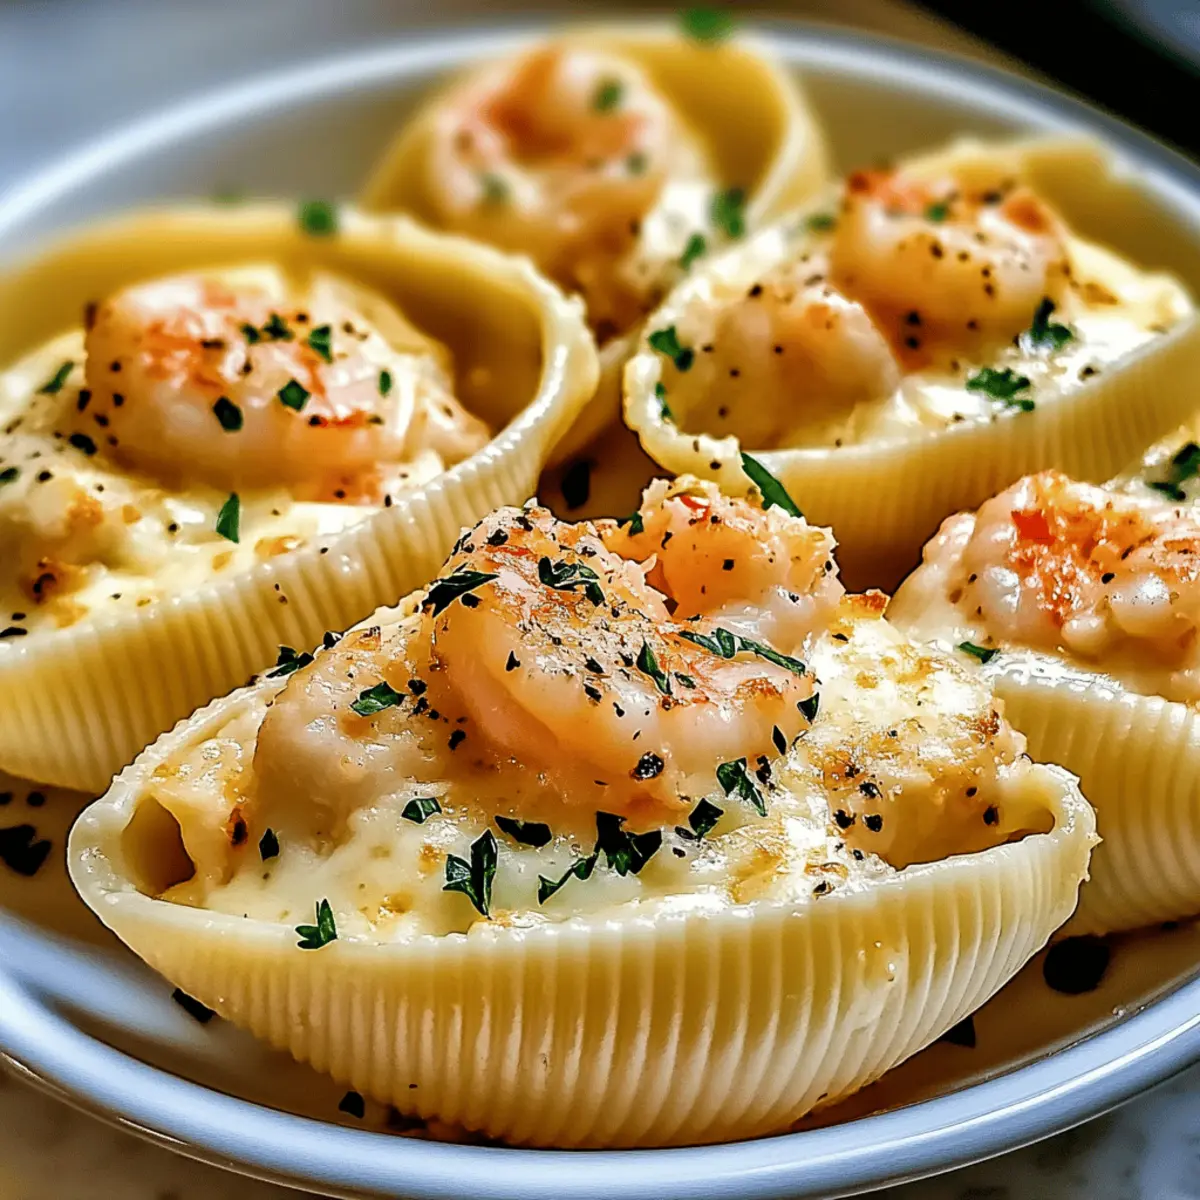
As I watched my friend plate up a steaming dish, the sweet aroma of sautéed garlic mingled with the salty scent of fresh seafood, it instantly transported me to a cozy Italian eatery by the sea. This is the magic behind my Creamy Seafood Stuffed Shells—a recipe that effortlessly combines luxury with comfort food. Each tender pasta shell cradles a rich filling of succulent lobster, crab, and shrimp, all drizzled with a velvety cheese sauce that will make your taste buds dance. Perfect for dinner parties or a cozy night in, these shells are not only a delightful crowd-pleaser, but they can also be prepped ahead of time for stress-free serving. Intrigued? Let’s dive into how to create this comforting dish that’s sure to impress!
Why Will You Crave This Dish?
Irresistible Flavor: Each bite of these stuffed shells bursts with rich seafood goodness, combining lobster, crab, and shrimp in a delightful dance of flavors.
Effortless Preparation: The recipe is easy to follow, making it perfect for both novice cooks and seasoned chefs who appreciate a comforting meal without too much hassle.
Make-Ahead Convenience: Prepare these creamy seafood stuffed shells a day ahead and simply pop them in the oven when you’re ready to impress guests or enjoy a cozy family dinner.
Versatile Adaptations: Whether you want to switch up the seafood or play with different cheeses, this recipe invites creativity, allowing you to customize it to your taste.
Crowd-Pleasing Appeal: Ideal for date nights or gatherings, this dish ensures everyone at the table will be asking for seconds. If you love comfort food like my other favorites, Tuscan Ravioli Soup and Creamy Steak Pasta Cozy, this one will not disappoint!
Creamy Seafood Stuffed Shells Ingredients
For the Filling
• Jumbo Pasta Shells – The perfect shape to hold all that creamy goodness; you can swap them for pipe pasta if you’re in a pinch.
• Lobster Meat – Adds a touch of luxury and rich flavor; fresh is best for that melt-in-your-mouth experience.
• Crab Meat – Enhances the seafood ensemble; fresh lump crab is ideal, but imitation crab will work if you’re on a budget.
• Shrimp – Provides a succulent contribution to the filling; feel free to use scallops for a delightful twist.
• Cream Cheese – Binds everything together while giving a luscious creaminess; light cream cheese works for a healthier option.
• Shredded Mozzarella – A classic for stretch and richness; opt for low-fat mozzarella if you’re watching your calories.
• Grated Parmesan Cheese – Elevates the sauce’s flavor with a savory kick.
For the Sauce
• Butter – Key for sautéing the garlic and creating that silky sauce; olive oil can be a great substitute for a dairy-free version.
• Garlic – Infuses the dish with an aromatic essence; fresh garlic is best for a potent flavor.
• Heavy Cream – Creates a luxurious sauce; substitute with half-and-half for a lighter option.
• Flour – Essential for thickening the sauce, ensuring it stays creamy without being too runny.
Feel free to gather your ingredients and get ready to whip up these Creamy Seafood Stuffed Shells that are guaranteed to become a comforting favorite in your home!
Step‑by‑Step Instructions for Creamy Seafood Stuffed Shells
Step 1: Prepare the Seafood
Begin by heating a medium skillet over medium heat and melting 2 tablespoons of butter. Once the butter is sizzling, add 2-3 minced garlic cloves and sauté until fragrant, about 1 minute. Next, incorporate the lobster and crab meat, cooking for an additional 2-3 minutes until heated through and fragrant, then remove from heat to cool slightly.
Step 2: Make the Filling
In a large mixing bowl, combine the sautéed seafood mixture with 8 ounces of cream cheese and 1 cup of shredded mozzarella cheese. Stir until smooth and fully blended. Season the filling with salt and pepper to taste, ensuring every bite of the creamy seafood stuffed shells is bursting with flavor.
Step 3: Cook the Pasta Shells
Bring a large pot of salted water to a boil. Add 12-15 jumbo pasta shells and cook according to the package instructions until al dente, usually about 9-11 minutes. Once done, drain the shells and rinse them under cold water to stop the cooking. Set the shells aside to cool completely while you prepare the sauce.
Step 4: Prepare the Sauce
In the same skillet used for the seafood, melt another 2 tablespoons of butter over medium heat. Whisk in 2 tablespoons of flour and cook for about 1 minute until lightly golden. Gradually pour in 1 cup of heavy cream, continuously whisking to eliminate lumps. Stir in ½ cup of grated Parmesan cheese until the sauce is creamy and smooth, about 3-4 minutes.
Step 5: Assemble the Dish
Preheat your oven to 375°F (190°C). Pour a thin layer of the cheese sauce into the bottom of a 9×13-inch baking dish to prevent sticking. Carefully stuff each cooled shell with the seafood filling and place them seam-side up in the baking dish. Pour the remaining sauce generously over the stuffed shells, ensuring they are well coated.
Step 6: Bake
Cover the baking dish with aluminum foil and bake the creamy seafood stuffed shells in the preheated oven for 20 minutes. After this time, remove the foil and bake for an additional 10 minutes, allowing the top to become golden and bubbly. Keep an eye on them until they reach a delicious golden-brown hue.
Step 7: Serve
Remove the baking dish from the oven and let the creamy seafood stuffed shells cool for a few minutes. For an extra touch, sprinkle with additional cheese or fresh herbs before serving warm. This decadent dish is perfect for a cozy dinner, ensuring a delightful meal for everyone at the table.

Expert Tips for Creamy Seafood Stuffed Shells
-
Gentle Touch: Handle the jumbo pasta shells carefully when stuffing to prevent breaking. A soft touch will keep your shells intact and beautiful.
-
Flavor Boost: For an even richer filling, consider adding a splash of lemon juice or Old Bay seasoning to highlight the seafood flavors in your creamy seafood stuffed shells.
-
Cheese Choice: If you prefer a lighter sauce, opt for low-fat mozzarella and half-and-half instead of heavy cream, which maintains creaminess without overwhelming richness.
-
Sautéing Secrets: Ensure the garlic is sautéed just until fragrant to unlock its aromatic flavor, but be cautious not to burn it—burnt garlic can ruin the dish.
-
Make-Ahead Magic: You can prepare your creamy seafood stuffed shells a day in advance—just assemble them and refrigerate. Bake when ready to serve for easy entertaining.
-
Leftover Love: If you have any leftovers, store them in an airtight container in the refrigerator for up to 2 days; they reheat beautifully in the oven!
Creamy Seafood Stuffed Shells Variations
Feel free to get creative with this recipe—these tender shells are deliciously versatile and can be customized to suit your preferences!
-
Seafood Medley: Incorporate scallops or your favorite seafood mix for an exciting twist in flavor and texture. A mix of textures elevates your dish delightfully!
-
Cheesy Variation: Swap the mozzarella for Gruyère or a cheddar blend for a distinct and bold cheese flavor that’ll make your taste buds sing. Try experimenting until you find your favorite combo!
-
Herb Infusion: Add fresh herbs like dill or parsley to the filling for a freshness that complements the seafood beautifully. A sprinkle of herbs can brighten up the rich filling!
-
Spicy Kick: Mix in some red pepper flakes or diced jalapeños for spice lovers who crave a bit of heat. Just a touch can transform the flavor profile into something exciting!
-
Vegetarian Twist: Substitute seafood with sautéed mushrooms and spinach for a delightful vegetarian option that still delivers creamy and comforting vibes. Every bite will have its own unique charm!
-
Whole Wheat Option: Use whole wheat pasta shells for a healthier twist without sacrificing flavor. It’s a hearty option that can bring a nutritious boost to your dish!
-
Lighter Cream: For a lighter version, swap heavy cream for half-and-half or whole milk to reduce calories while still maintaining that creamy goodness. You won’t even miss the richness!
-
Garlic Spin: Add roasted garlic instead of sautéed for a milder, sweeter, yet still aromatic garlic flavor. This adjustment adds depth to your sauce that’s simply irresistible!
These variations not only make this dish your own but allow you to continue enjoying it with fresh twists. If you’re in the mood for more delightful pasta recipes, check out Creamy Street Corn Pasta or dive into the comforting experience of Beef Pasta Makes. Enjoy your cooking adventure!
Make Ahead Options
These Creamy Seafood Stuffed Shells are ideal for meal prep and can save you valuable time during busy weeknights! You can prepare the filling and stuff the shells up to 24 hours in advance—just place them in the refrigerator, covered tightly to maintain their freshness. If you want to store them longer, you can freeze the stuffed shells for up to 3 months. When ready to bake, simply thaw in the fridge overnight if frozen, then follow the baking instructions as usual. For the best results, add a bit of extra sauce before baking to ensure the filled shells stay moist and flavorful. With these make ahead tips, dinner will be effortless and just as delicious!
How to Store and Freeze Creamy Seafood Stuffed Shells
Fridge: Store leftovers in an airtight container for up to 2 days. Reheat in the oven covered with foil at 350°F (175°C) until warmed through.
Freezer: If you’ve prepared a batch to freeze, wrap the unbaked shells tightly in plastic wrap and aluminum foil before freezing for up to 3 months.
Thawing: For best results, transfer frozen stuffed shells to the fridge to thaw overnight before baking.
Reheating: When ready to enjoy, bake from thawed at 375°F (190°C) for 30-35 minutes, or until hot and bubbly to savor that creamy seafood goodness!
What to Serve with Creamy Seafood Stuffed Shells
Elevate your dining experience by pairing these rich, comforting pasta shells with delightful side dishes and drinks that enhance their flavors.
-
Garlic Bread: Warm, buttery slices lend a crunchy contrast to the creamy filling, making every bite a decadent adventure.
-
Fresh Garden Salad: A crisp salad with mixed greens, tomatoes, and a light vinaigrette offers a refreshing balance to the seafood richness.
-
Steamed Asparagus: The tender-crisp texture and slight earthiness of asparagus harmonize beautifully with the creamy seafood stuffing—a true match made in culinary heaven.
-
Roasted Vegetables: A medley of seasonal veggies, caramelized to perfection, adds warmth and depth to your meal, bringing a pop of color to the table as well.
-
Chardonnay Wine: This crisp white wine’s fruity notes and acidity perfectly complement the seafood flavors while cutting through the richness of the cheese sauce.
-
Lemon Sorbet: For dessert, a light and zesty lemon sorbet refreshes the palate after the indulgent main dish, rounding off the meal with a bright finish.
Each of these pairings adds a unique touch, creating a well-rounded dining experience that will linger in your memory long after the last bite.

Creamy Seafood Stuffed Shells Recipe FAQs
What type of seafood is best for stuffing?
Absolutely! For a luxurious filling, fresh lobster meat is preferred for its rich flavor. However, fresh lump crab adds a delightful sweetness, and shrimp provides a wonderful texture. If you can’t find these, you can use imitation crab or even scallops for a different taste—it’s all about making it your own!
How should I store leftovers?
Very! Simply place any leftover creamy seafood stuffed shells in an airtight container in the fridge. They can be stored for up to 2 days. When you’re ready to enjoy, just reheat them in the oven at 350°F (175°C), covered with foil, until warmed through—about 20-25 minutes should do the trick!
Can I prepare the dish ahead of time?
Definitely! You can assemble your creamy seafood stuffed shells a day before. Just complete the filling and stuff the shells, then cover them tightly with plastic wrap and refrigerate. When it’s mealtime, pop them in the oven—no additional prep is required!
How do I freeze unbaked seafood stuffed shells?
I often make a double batch to freeze—it’s such a time-saver! To freeze, wrap the unbaked stuffed shells tightly in plastic wrap and then in aluminum foil. They can be frozen for up to 3 months. When you’re ready to bake, simply transfer them to the fridge to thaw overnight and then bake as usual.
What if my sauce is too thick?
If your sauce turns out thicker than desired, fear not! You can thin it by adding a little more heavy cream or milk, whisking continuously over low heat until you achieve the desired consistency. If you need to add more cream, do so gradually to keep the sauce smooth and creamy without losing flavor.
Are there any dietary considerations for this recipe?
Absolutely! If you’re serving guests who have dietary restrictions, feel free to substitute with gluten-free pasta shells for those avoiding gluten. For a dairy-free option, use vegan cream cheese and plant-based cheese alternatives instead of traditional dairy products. This way, everyone can indulge in these comforting shells!
Irresistible Creamy Seafood Stuffed Shells for Cozy Nights
Ingredients
Equipment
Method
- Prepare the Seafood: Heat a medium skillet over medium heat and melt 2 tablespoons of butter. Add minced garlic and sauté until fragrant. Incorporate lobster and crab meat, cooking for 2-3 minutes, then remove from heat to cool slightly.
- Make the Filling: In a large mixing bowl, combine sautéed seafood with cream cheese and shredded mozzarella. Stir until smooth and season with salt and pepper.
- Cook the Pasta Shells: Boil a large pot of salted water, add pasta shells, and cook until al dente. Drain and rinse under cold water. Set aside to cool.
- Prepare the Sauce: In the same skillet, melt 2 tablespoons of butter. Whisk in flour and cook for 1 minute. Gradually add heavy cream while whisking, then stir in grated Parmesan cheese until smooth.
- Assemble the Dish: Preheat oven to 375°F. Pour a thin layer of cheese sauce into a baking dish. Stuff each shell with seafood filling and place in dish. Pour remaining sauce over shells.
- Bake: Cover with aluminum foil and bake for 20 minutes. Remove foil and bake for an additional 10 minutes until golden and bubbly.
- Serve: Let cool for a few minutes before serving. Optionally, sprinkle with additional cheese or fresh herbs.
Leave a Reply