
When I first tasted Biscoff cookies, it felt like a sweet little vacation in my mouth—eco-friendly and oh-so-delicious! That joy has inspired me to create a decadent No Bake Biscoff Cheesecake that transforms those beloved flavors into a creamy dessert dream. Not only is this cheesecake a showstopper for gatherings, but it also requires zero baking, making it the perfect easy dessert to whip up when you’re short on time. Imagine serving a silky, luscious slice, topped with a drizzle of rich cookie butter and a sprinkle of crushed cookies—they won’t be able to resist going for seconds! Whether you’re hosting a summer soirée or simply indulging in a cozy night in, this make-ahead delight has you covered. Curious about how to bring this dreamy creation to your table? Let’s dive in!
Why is This Cheesecake So Irresistible?
Effortless Indulgence: This No Bake Biscoff Cheesecake is perfect for those who want to savor high-end dessert flavors without the hassle of baking.
Creamy Bliss: With a rich filling featuring smooth cream cheese and dreamy Biscoff cookie butter, every bite is a velvety experience.
Make Ahead Magic: Prep it in advance! Just chill for 6 hours or overnight, allowing you to enjoy your gathering without last-minute stress.
Crowd Pleaser: Impress your guests with this show-stopping dessert that’s sure to spark joy and leave them craving more—perfect for parties!
Versatile Options: Want a chocolate twist? Swirl in some melted chocolate or try mini versions for individual servings!
For an easy and delightful addition to your dessert repertoire, check out my Baked Pumpkin Donuts for another make-ahead treat!
No Bake Biscoff Cheesecake Ingredients
-
For the Crust
• Biscoff Cookies – Provides flavor and structure for the crust; substitute with speculoos cookies if desired.
• Melted Butter – Binds the cookie crumbs for a cohesive crust; use unsalted butter for the best taste. -
For the Filling
• Cream Cheese (16 oz) – The main filling ingredient that adds creaminess; ensure it’s softened at room temperature.
• Biscoff Cookie Butter (¾ cup) – Adds rich, spiced flavor to the filling; can substitute with a different nut butter if needed.
• Powdered Sugar (½ cup) – Sweetens the filling and helps stabilize it; adjust amount for your desired sweetness.
• Vanilla Extract (1 tsp) – Enhances flavor depth; use pure vanilla extract for the best results. -
For the Topping
• Heavy Whipping Cream (1 cup, cold) – Creates a light, airy texture for the cheesecake; it must be cold before whipping.
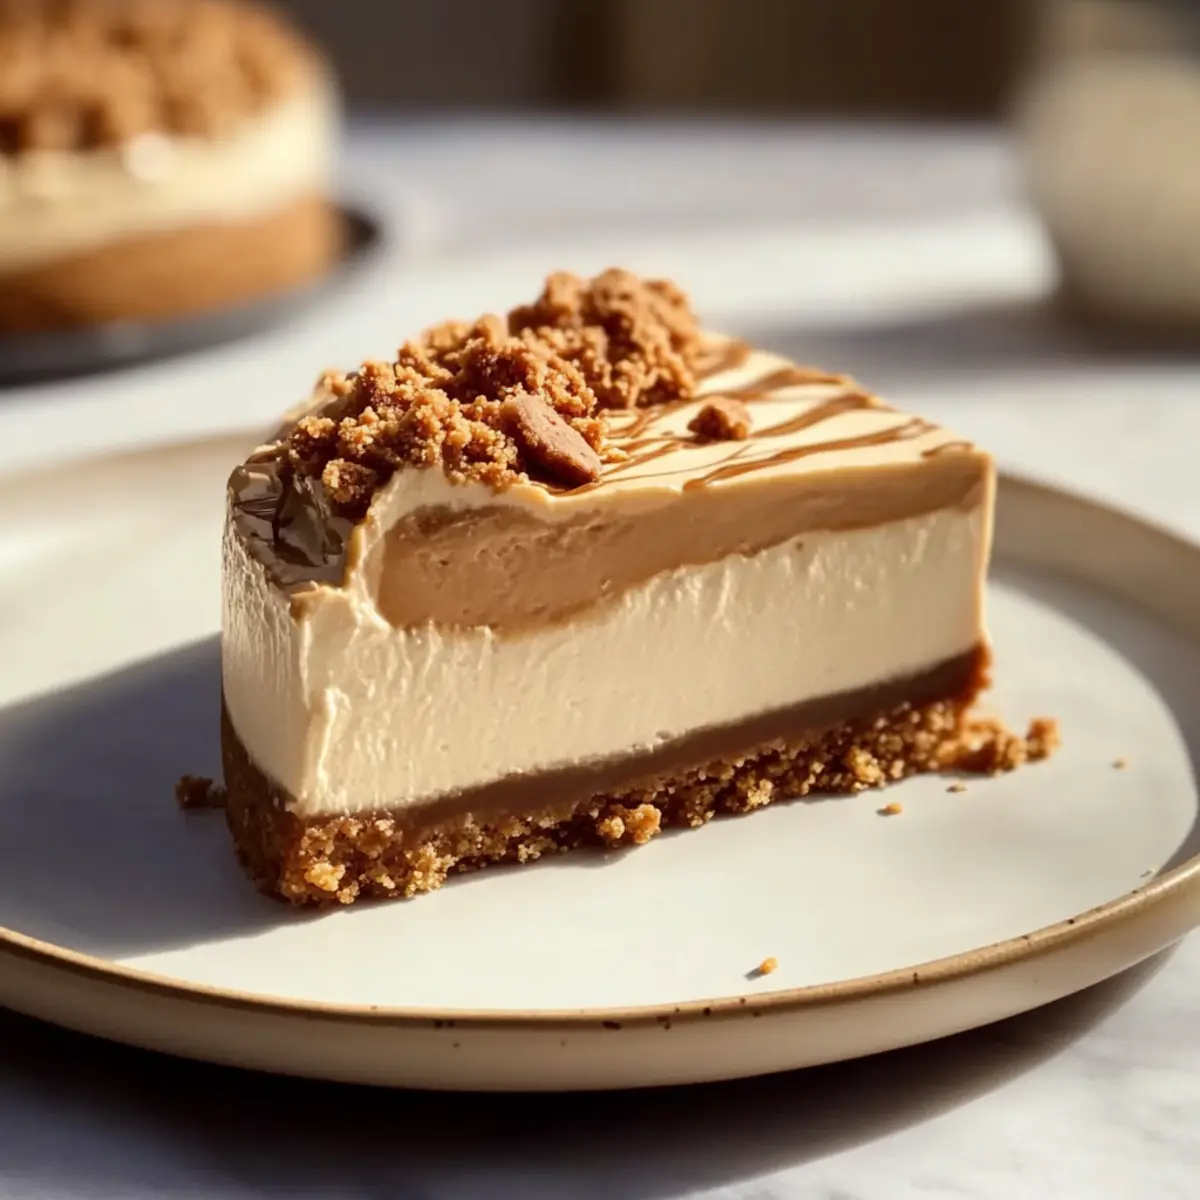
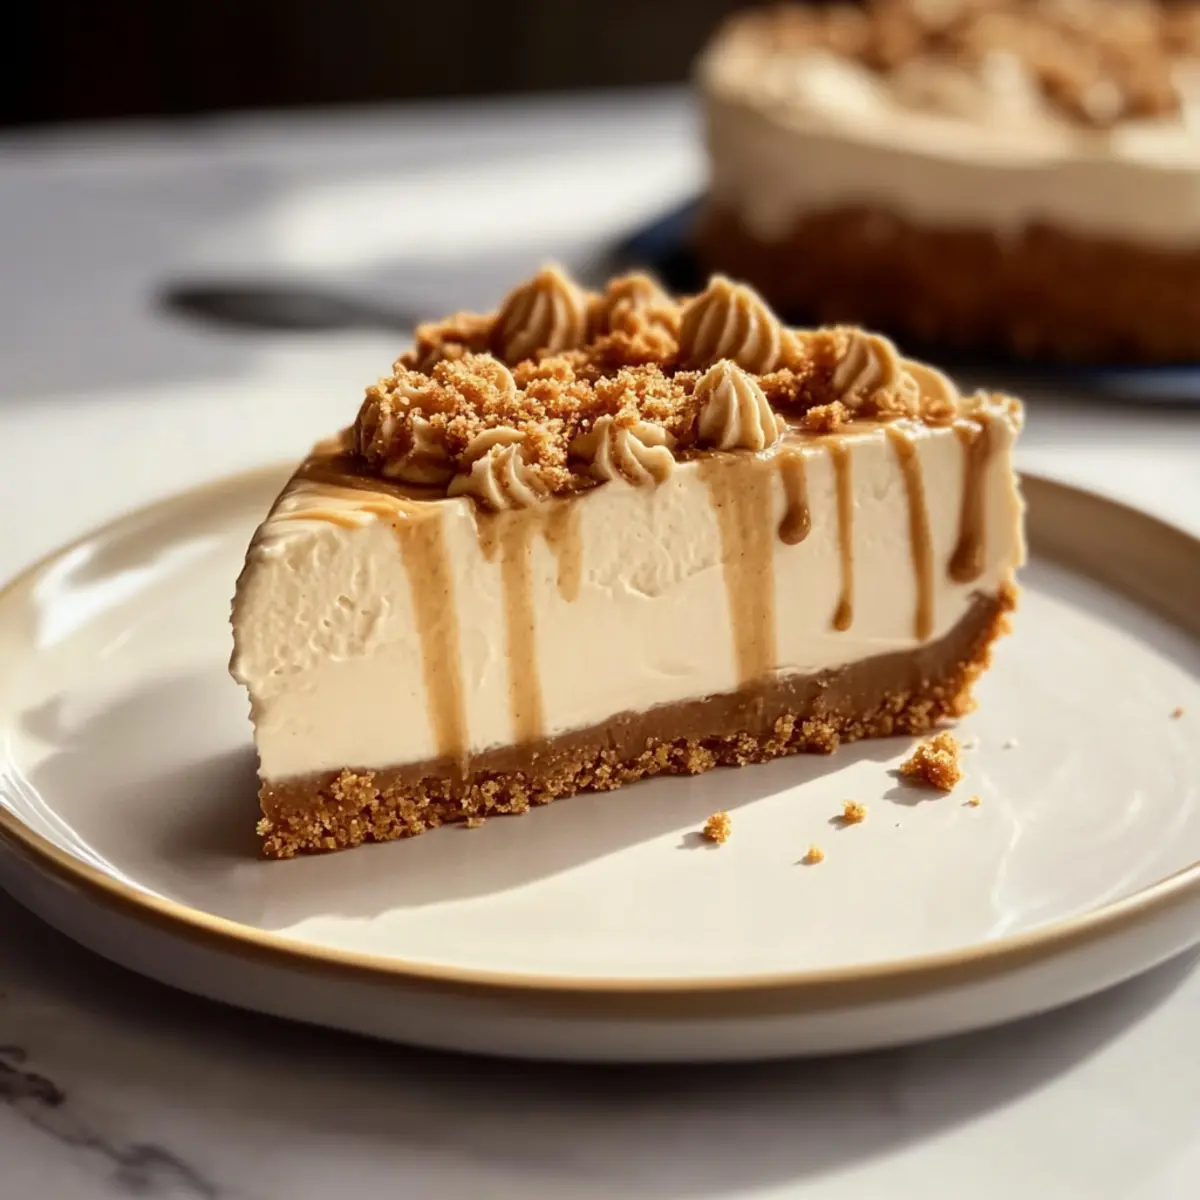
• Melted Biscoff Cookie Butter (¼ cup) – For drizzling on top; adjust thickness by microwaving slightly if needed.
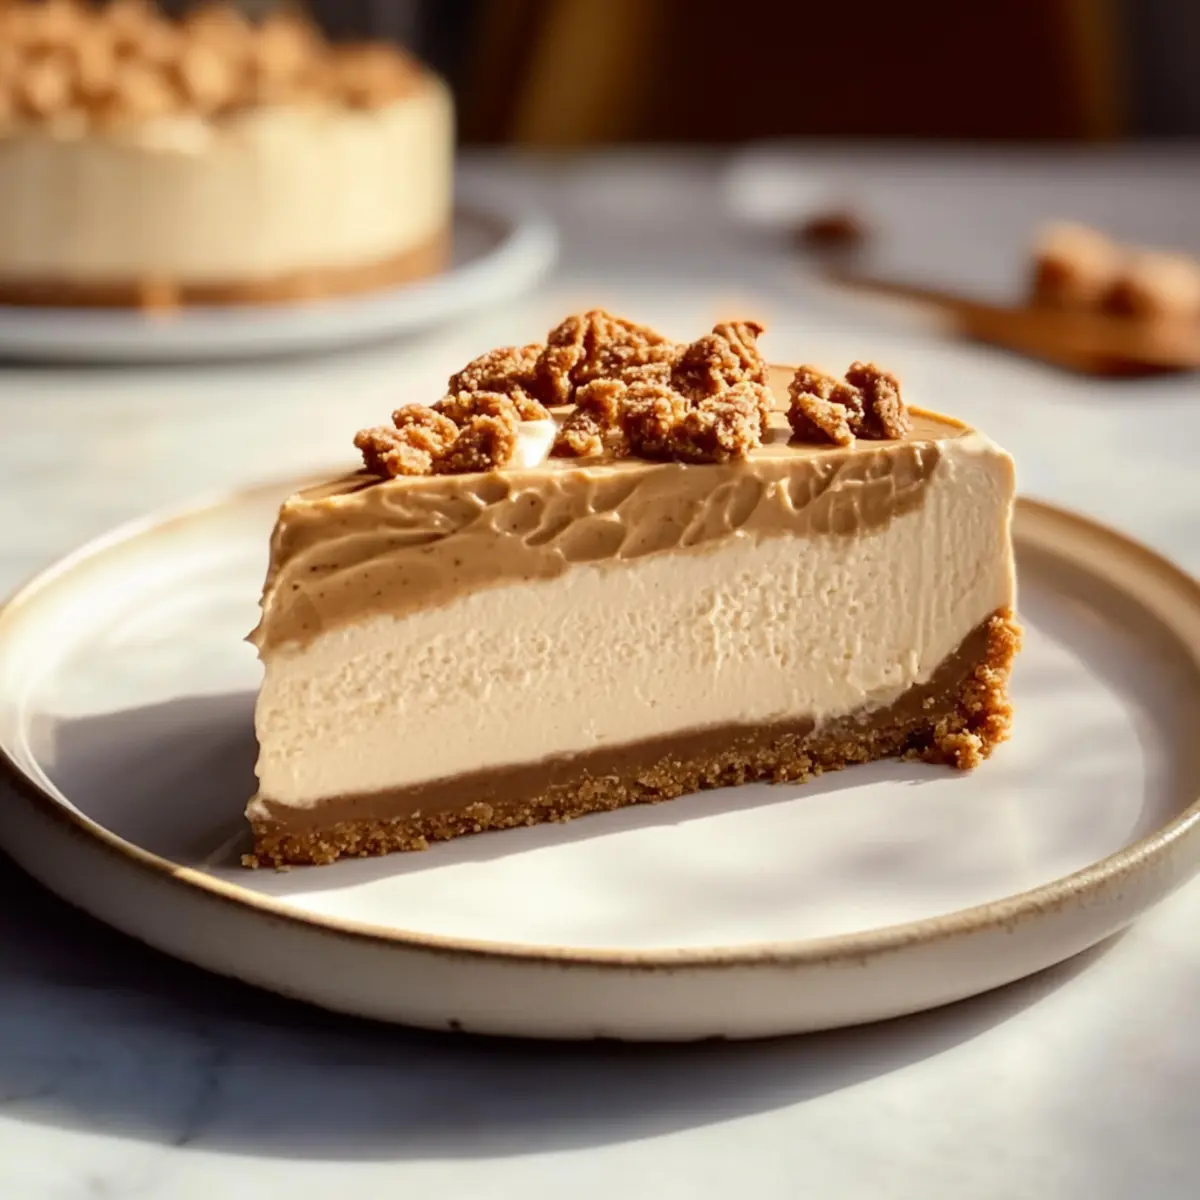
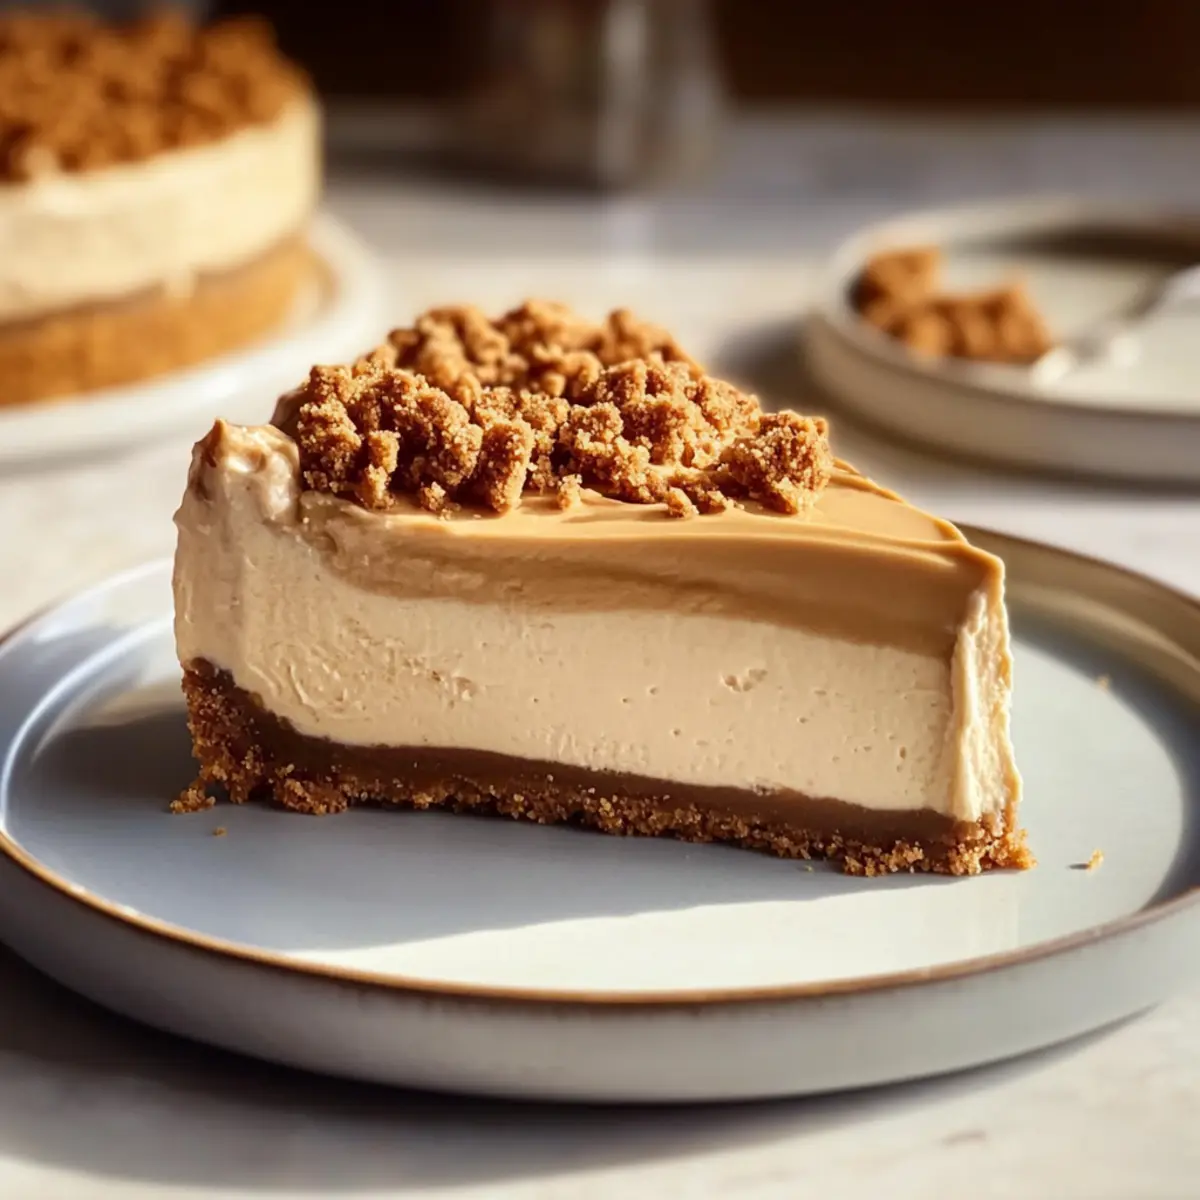
• Crushed Biscoff Cookies – For garnish, adding crunch and visual appeal; they make each slice extra delightful!
Step‑by‑Step Instructions for No Bake Biscoff Cheesecake
Step 1: Prepare the Crust
Start by crushing 20 Biscoff cookies in a food processor until fine crumbs form, then transfer to a mixing bowl. Pour in 6 tablespoons of melted unsalted butter and stir until the mixture resembles wet sand. Press the cookie crumb mixture firmly into the bottom of a 9-inch springform pan, creating an even layer. Refrigerate for 30 minutes to set while you prepare the filling.
Step 2: Make the Filling
In a large mixing bowl, use a hand mixer to beat 16 ounces of softened cream cheese on medium speed until smooth and creamy, about 2-3 minutes. Gradually add ¾ cup of Biscoff cookie butter, ½ cup of powdered sugar, and 1 teaspoon of vanilla extract, mixing until the mixture is light and fluffy. This creamy filling will form the delicious heart of your No Bake Biscoff Cheesecake.
Step 3: Whip the Cream
In a separate chilled bowl, pour in 1 cup of cold heavy whipping cream. Using a hand mixer, whip the cream on medium-high speed until it reaches stiff peaks, which should take about 3-5 minutes. The cold cream is essential for achieving a light and airy texture that balances out the rich filling, giving your cheesecake a fluffy finish.
Step 4: Combine Mixtures
Gently fold the whipped cream into the cream cheese mixture using a spatula, being careful not to deflate the air you’ve created. Continue folding until there are no visible streaks, and the filling is well combined. This step is crucial for ensuring that your No Bake Biscoff Cheesecake is wonderfully creamy and not dense.
Step 5: Assemble
Pour the luscious filling over the chilled crust in the springform pan, smoothing the top with a spatula to create an even surface. Now it’s time to refrigerate! Cover the pan with plastic wrap and allow the cheesecake to chill in the refrigerator for at least 6 hours or preferably overnight. This chilling time helps the flavors meld beautifully!
Step 6: Decorate
Once the cheesecake has set, carefully remove it from the springform pan. Drizzle ¼ cup of gently melted Biscoff cookie butter over the top for an enticing finish. Finally, sprinkle a generous amount of crushed Biscoff cookies on top for that extra crunch and visual appeal before slicing into this delectable No Bake Biscoff Cheesecake!
Make Ahead Options
These No Bake Biscoff Cheesecakes are perfect for busy home cooks looking to save time! You can prepare the crust up to 24 hours in advance by crushing the Biscoff cookies and mixing them with melted butter, then refrigerating it to set. The filling can also be made a day early; simply whip the cream cheese mixture, fold in whipped cream, and refrigerate it until you’re ready to assemble. When it’s time to enjoy, just pour the filling over the crust and chill for at least 6 hours or overnight for the best flavor. This way, you’ll serve a deliciously creamy cheesecake effortlessly, freeing up your time for other joys!
What to Serve with No Bake Biscoff Cheesecake
Bring your gatherings to life by pairing this delightful cheesecake with vibrant accompaniments that will tantalize your taste buds!
-
Fresh Berries: The tartness of strawberries, raspberries, or blueberries adds a refreshing contrast to the creamy cheesecake and brings vibrant color to your plate.
-
Whipped Cream: A dollop of light, fluffy whipped cream enhances the dessert’s rich flavors while adding a dreamy texture, making each bite purely indulgent.
-
Coffee or Espresso: A warm cup of coffee or a shot of espresso provides a rich, bold contrast that perfectly complements the sweet flavors of the cheesecake—ideal for an afternoon treat or after dinner!
-
Dark Chocolate Shavings: Add a touch of elegance with dark chocolate shavings on top, offering a bittersweet touch that balances the richness of the cheesecake and elevates its presentation.
-
Caramel Sauce: Drizzle some warm caramel sauce over the cheesecake for an extra layer of sweet, buttery goodness that pairs seamlessly with the spiced notes of Biscoff cookies.
Let your creativity shine and watch as your guests fall in love with the harmonious flavors of your complete dessert experience!
Expert Tips for No Bake Biscoff Cheesecake
- Room Temperature Cream Cheese: Ensure your cream cheese is at room temperature to avoid lumps in your filling; cold cream cheese can lead to a gritty texture.
- Gentle Folding: When combining the whipped cream and filling, fold gently with a spatula to maintain that delightful lightness in your No Bake Biscoff Cheesecake.
- Chill Time: Don’t rush the chilling process! For the best flavor and texture, refrigerate for at least 6 hours, though overnight is ideal.
- Easy Slicing: For clean slices, consider freezing the cheesecake for about 1 hour before cutting; this makes it easier to handle.
- Springform Pan: Use a springform pan for easy removal and to create beautiful, professional-looking edges on your cheesecake.
Storage Tips for No Bake Biscoff Cheesecake
- Fridge: Keep the cheesecake covered in the refrigerator for up to 4 days. Make sure to use either plastic wrap or an airtight container for optimal freshness.
- Freezer: If you want to store the cheesecake longer, it can be frozen for up to 1 month. Wrap it tightly in plastic wrap and then in aluminum foil to prevent freezer burn.
- Thawing: When ready to enjoy, thaw the No Bake Biscoff Cheesecake in the refrigerator for several hours or overnight for the best texture and flavor.
- Serving After Storing: For a delightful serving experience, let the cheesecake sit at room temperature for about 15 minutes after thawing before slicing. This helps soften the creamy texture!
No Bake Biscoff Cheesecake Variations
Feel free to get creative with these delightful variations to make your No Bake Biscoff Cheesecake even more unique!
-
Chocolate Lover’s Twist:
Swirl in melted chocolate before chilling for an extra indulgent flavor. The combination of chocolate and Biscoff creates a heavenly treat that’s hard to resist! -
Mini Cheesecakes:
Divide the crust and filling into muffin tins lined with paper cups. These mini versions are perfect for parties and make for easy serving—everyone loves their own little slice! -
Nutty Delight:
Add a layer of chopped nuts, such as pecans or walnuts, in the filling or as a topping for added texture and flavor. The crunch complements the creaminess beautifully! -
Spiced Pumpkin Touch:
For a seasonal burst, fold in ½ cup of pumpkin puree and a teaspoon of pumpkin pie spice into the filling. This will transform your cheesecake into a festive fall dessert everyone will adore. -
Fruity Flavor:
Top the cheesecake with fresh fruit like raspberries or blueberries prior to serving. The fresh, tart flavors of the fruit will balance out the richness of the cheesecake perfectly. -
Dairy-Free Version:
Substitute cream cheese with a dairy-free cream cheese and use coconut cream instead of heavy whipping cream. This way, you can enjoy a creamy dessert without dairy! -
Caramel Drizzle:
Drizzle caramel sauce on top for a sweet and salty contrast that pairs beautifully with the Biscoff flavor—perfect for those who love that extra sweetness!
For more make-ahead recipes, consider exploring my High Protein Bake or the delightful Apple Cinnamon Bake. Enjoy customizing your desserts!
No Bake Biscoff Cheesecake Recipe FAQs
What type of Biscoff cookies should I use?
Absolutely! It’s best to use the traditional Biscoff cookies for the crust since they provide that iconic caramelized flavor. If you can’t find them, speculoos cookies work wonderfully as a substitute, offering a similar taste.
How should I store leftovers of the No Bake Biscoff Cheesecake?
Keep your cheesecake covered in the refrigerator for up to 4 days to enjoy its freshness. A good tip is to use plastic wrap or an airtight container to maintain its creamy texture and flavor.
Can I freeze the No Bake Biscoff Cheesecake?
Very! You can freeze the cheesecake for up to 1 month. Make sure to wrap it tightly in plastic wrap and then in aluminum foil to prevent freezer burn. When you’re ready to indulge, thaw it in the refrigerator overnight for the best results.
I’m having trouble with lumps in my filling. What can I do?
This is a common issue! To avoid lumps, ensure your cream cheese is at room temperature before mixing it. If you’re still finding lumps, you can beat the mixture longer using your hand mixer until it becomes smooth. Remember, a smooth filling is key to that velvety texture!
Is this cheesecake suitable for people with nut allergies?
Be cautious! The Biscoff cookie butter does contain nuts, as it’s made from ground cookies and may include traces of various nuts. I recommend checking with your guests regarding allergies or opting for a nut-free cookie butter alternative if needed.
Can I make this cheesecake in advance?
Absolutely! This No Bake Biscoff Cheesecake is perfect for make-ahead desserts. Simply prepare it up to 2 days ahead of your event, refrigerate it, and enjoy stress-free entertaining, knowing that your dessert is ready to impress!
Creamy No Bake Biscoff Cheesecake That Will Wow Everyone
Ingredients
Equipment
Method
- Crush 20 Biscoff cookies in a food processor until fine crumbs form, then transfer to a mixing bowl. Pour in 6 tablespoons of melted unsalted butter and stir until it resembles wet sand. Press into the bottom of a 9-inch springform pan, and refrigerate for 30 minutes to set.
- In a large mixing bowl, beat 16 ounces of softened cream cheese until smooth, then add ¾ cup of Biscoff cookie butter, ½ cup of powdered sugar, and 1 teaspoon of vanilla extract, mixing until light and fluffy.
- In a separate chilled bowl, whip 1 cup of cold heavy whipping cream until stiff peaks form, about 3-5 minutes.
- Gently fold the whipped cream into the cream cheese mixture until no visible streaks remain.
- Pour the filling over the crust and smooth the top. Cover with plastic wrap and refrigerate for at least 6 hours or preferably overnight.
- Once set, drizzle ¼ cup of melted Biscoff cookie butter on top and sprinkle with crushed Biscoff cookies before serving.
Leave a Reply