
At a recent autumn gathering, I caught a glimpse of the delight on my friends’ faces as they reached for my Pumpkin Patch Deviled Eggs. These festive little bites do more than just catch the eye; they’re packed with creamy goodness and a hint of tang that brings the spirit of fall right to the table. Easy to whip up, they transform the classic deviled egg into a charming centerpiece that’s sure to impress your guests. With their playful pumpkin design, these appetizers not only bring joy but are also a delicious way to savor the season. Ready to create smiles at your next gathering? Let’s dive into this simple yet magical recipe that’s perfect for all your autumn festivities!
Why Are These Deviled Eggs a Must-Try?
Unique Design: These Pumpkin Patch Deviled Eggs bring a whimsical twist to a classic appetizer, making them the centerpiece of your fall gatherings.
Easy to Prepare: With just a few ingredients and straightforward steps, creating these festive treats is a breeze—even for novice cooks!
Delicious Flavor: The blend of creamy mayonnaise and tangy mustard creates a delightful filling that will keep everyone coming back for more.
Perfect for Any Occasion: Whether it’s a Thanksgiving feast or a Halloween party, these eggs add a touch of seasonal charm.
Versatile Options: Want a little more spice? Add cayenne to the filling for a kick, or serve them alongside my Chewy Pumpkin Cookies for a full fall-themed spread.
Elevate your autumn menu with these delightful bites that are sure to impress and satisfy!
Pumpkin Patch Deviled Eggs Ingredients
• For the Filling
- Eggs – The star of this dish; use large eggs for a perfect filling.
- Mayonnaise – Adds that creamy richness; substitute with Greek yogurt for a lighter twist.
- Yellow Mustard – Offers a tangy balance; essential for enhancing flavor.
- Salt & Black Pepper – Don’t skip these— they’re key for bringing the taste to life.
- Paprika – This adds earthy warmth and a pop of color; use it generously for dusting.
- Orange Food Coloring (optional) – For that pumpkin color; a little goes a long way!
• For the Decoration
- Fresh Chives – Cut into small pieces to create the pumpkin “stems”; parsley works too if you’re out.
Transform your gatherings with these playful and flavorful Pumpkin Patch Deviled Eggs that capture the essence of fall!
Step‑by‑Step Instructions for Pumpkin Patch Deviled Eggs
Step 1: Boiling Eggs
Begin by arranging your large eggs in a single layer at the bottom of a pot. Cover them with cold water, about an inch above the eggs, and bring to a rapid boil over medium-high heat. Once boiling, remove the pot from the heat, cover it with a lid, and let the eggs sit for 10 minutes to ensure a perfectly cooked center.
Step 2: Cooling Eggs
While the eggs sit, prepare an ice bath by filling a large bowl with ice and cold water. After the 10 minutes are up, use a slotted spoon to transfer the eggs into the ice bath. Let them chill for at least 5 minutes, which will not only stop the cooking process but also make peeling much easier.
Step 3: Peeling Eggs
Gently tap each cooled egg on a hard surface and roll it to crack the shell. Begin peeling under cool running water, which helps to remove any stubborn bits of shell while keeping the egg white intact. Continue peeling until all the eggs are smooth and ready for the next step in creating your delightful Pumpkin Patch Deviled Eggs.
Step 4: Preparing Filling
Once peeled, slice the eggs in half lengthwise and gently scoop out the yolks into a mixing bowl. Add mayonnaise, yellow mustard, salt, black pepper, and a sprinkle of paprika to the yolks. Using a fork, mash and mix these ingredients together until smooth and creamy, achieving a vibrant filling that is both flavorful and visually appealing.
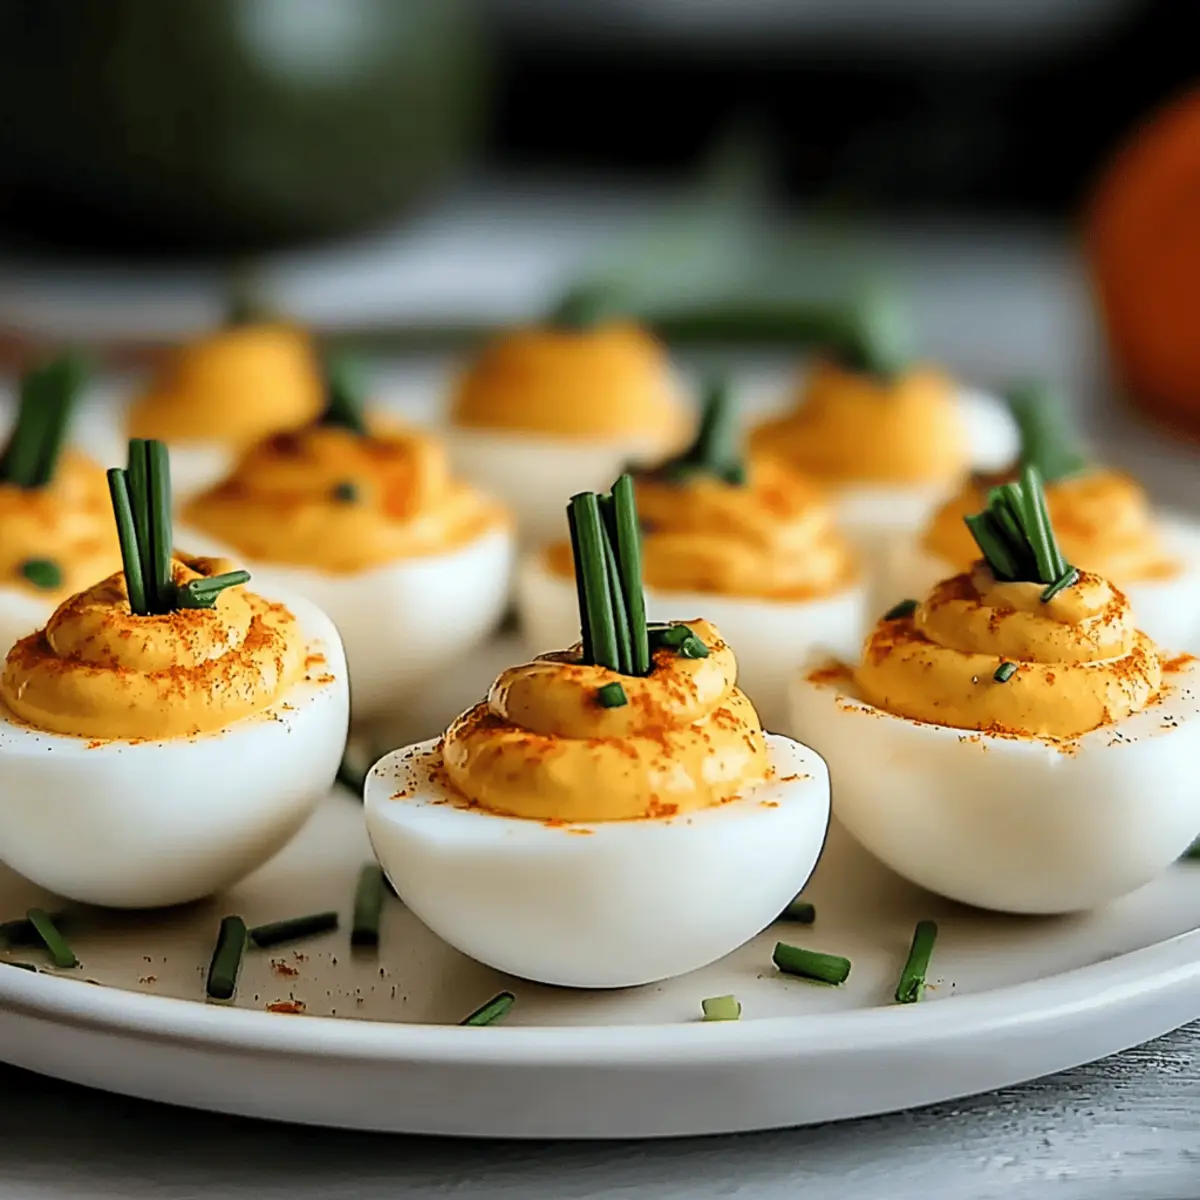
Step 5: Piping Filling
Now it’s time to fill your egg whites! Transfer the smooth yolk mixture into a piping bag or a zip-top bag with a corner snipped off. Pipe the filling generously into each egg white half, creating a rounded mound that resembles a charming little pumpkin. Aim for consistent portions to ensure beautiful presentation.
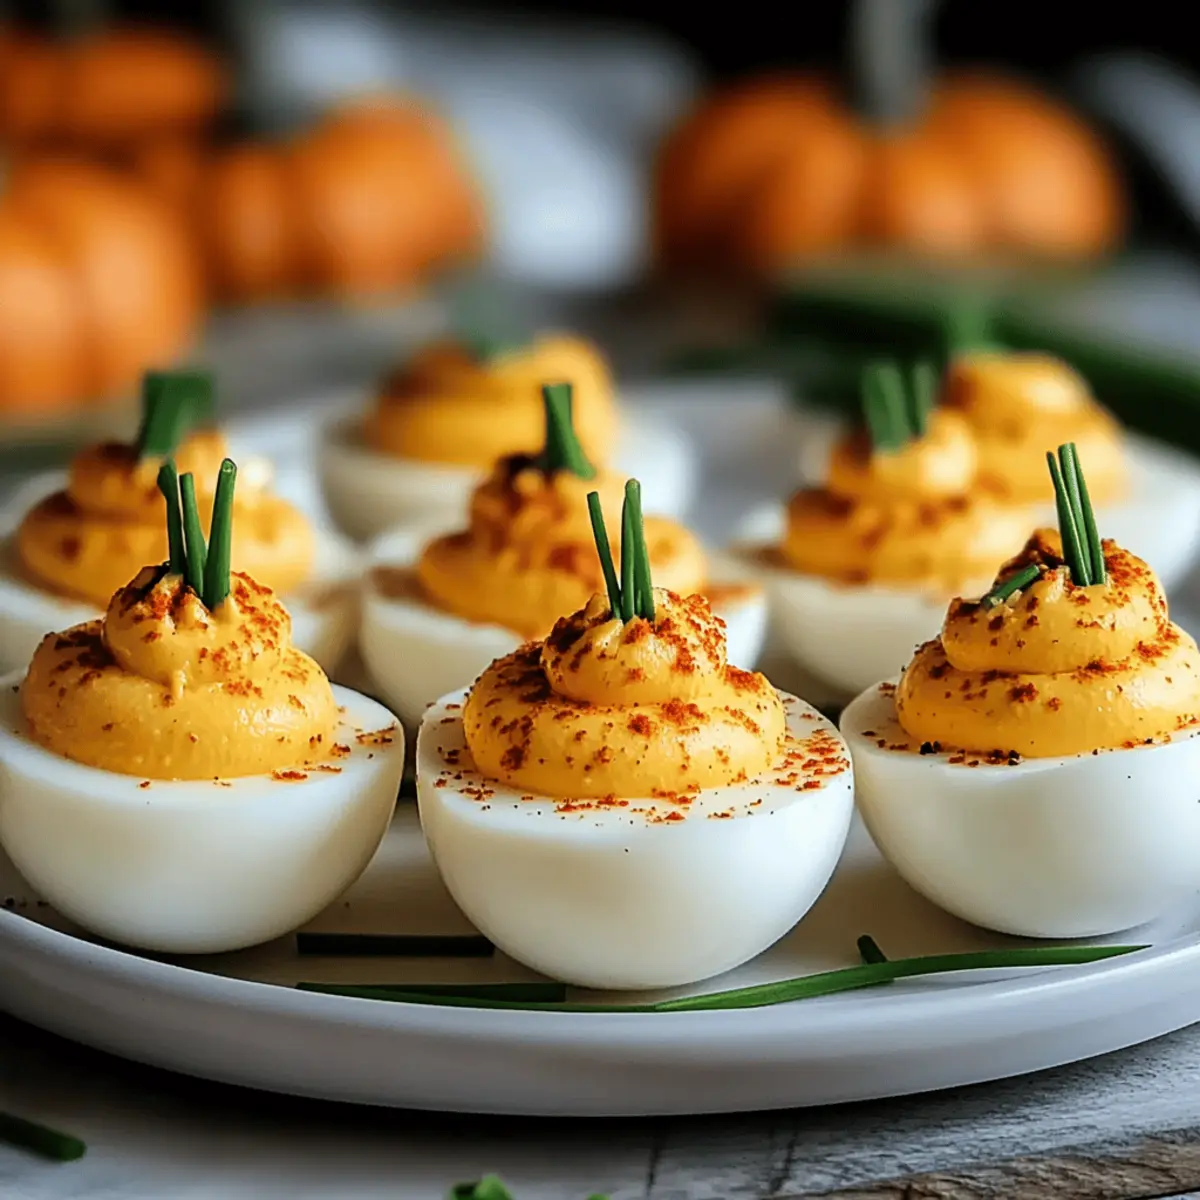
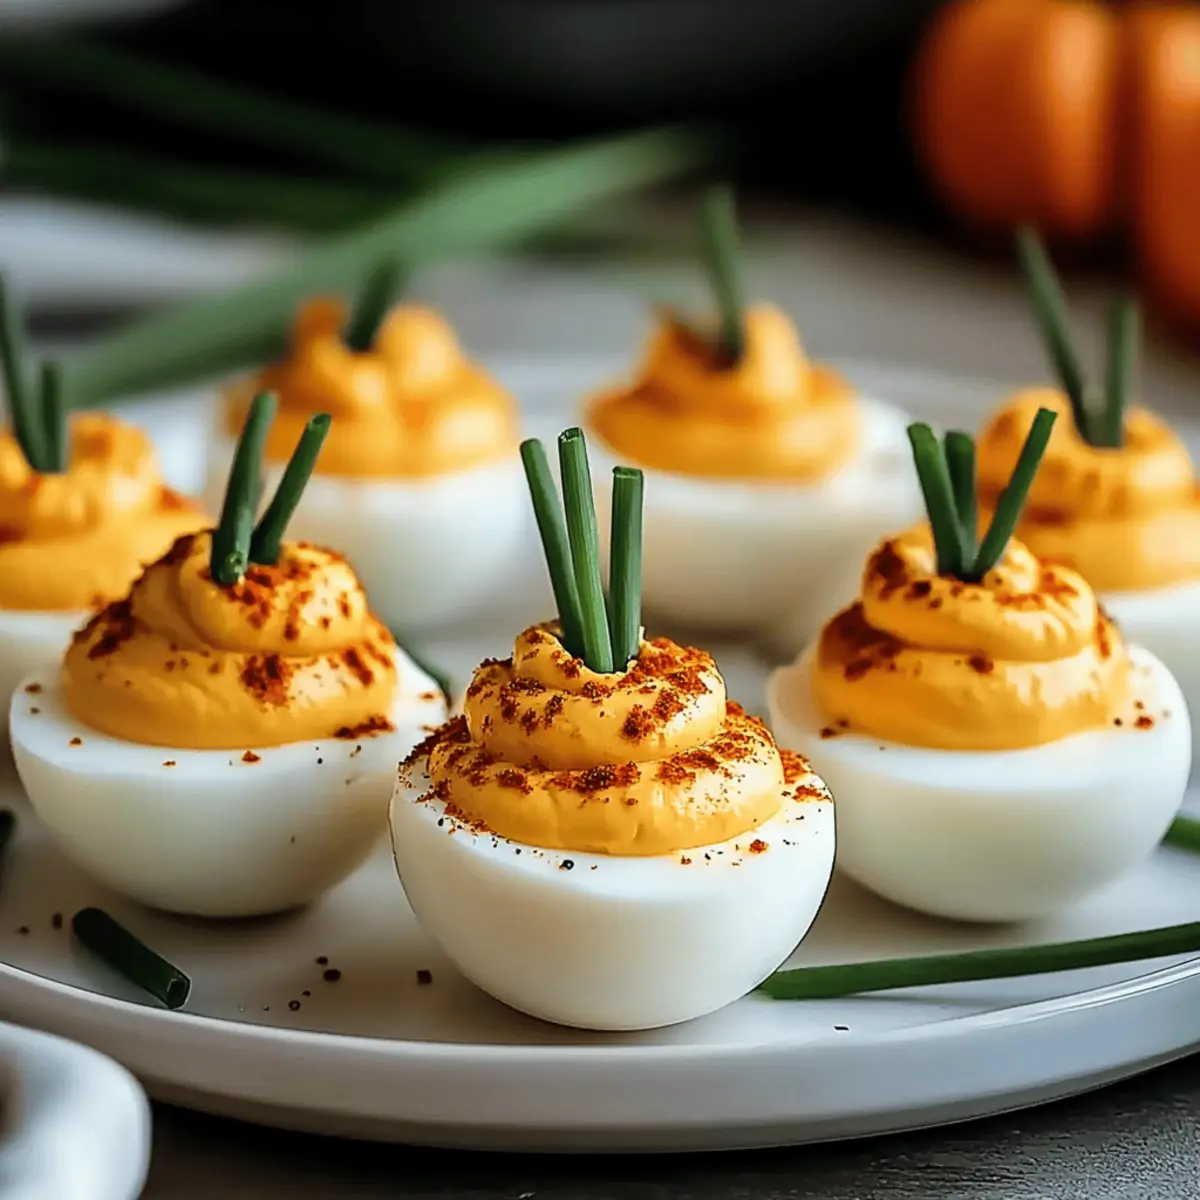
Step 6: Creating Pumpkin Design
To give your deviled eggs their festive pumpkin appearance, use a dull knife or toothpick to carefully create vertical ridges on the piped filling, mimicking the lines of a pumpkin. Then, cut small pieces of fresh chives and insert them into the center of each filled egg to serve as the cute pumpkin stems, completing the whimsical look.
Step 7: Chilling
Finally, place the finished Pumpkin Patch Deviled Eggs on a serving platter and refrigerate them for at least 30 minutes before serving. This chilling period allows the flavors to meld beautifully and the filling to firm up, enhancing the overall taste and texture for your lovely autumn gatherings.
What to Serve with Pumpkin Patch Deviled Eggs
Picture a cozy fall gathering filled with laughter, the aroma of seasonal spices in the air, and a beautiful display of flavors that perfectly complements your festive Pumpkin Patch Deviled Eggs.
-
Roasted Chicken: This juicy, herb-infused protein pairs beautifully with the creamy tang of the deviled eggs, creating a delightful contrast.
-
Hearty Autumn Stew: A warm, savory stew filled with root vegetables provides a comforting backdrop to the playful flavors of your deviled eggs.
-
Crispy Leafy Salad: A fresh salad with mixed greens and crunchy nuts adds a refreshing break from the richness of the deviled eggs, enhancing each bite!
-
Homemade Apple Cider: Enjoy this sweet, spiced drink that resonates perfectly with the season, offering a delightful sip alongside each creamy morsel.
-
Mini Pumpkin Pies: For a sweet finish, these bite-sized desserts echo the autumn spirit, rounding out your gathering with a comforting, familiar flavor.
-
Cheesy Garlic Breadsticks: The warm, cheesy goodness of these soft sticks offers a delightful texture contrast, making your guests avert their eyes from the table’s centerpiece to dip and nibble.
-
Spiced Cranberry Fizz: A bubbly cranberry drink will add a zingy twist, amplifying the festive feel and providing a refreshing palate cleanser with each bite!
These top choices create a well-rounded meal and make your Pumpkin Patch Deviled Eggs the star of your fall feast, ensuring memories and flavors linger long after the last bite.
How to Store and Freeze Pumpkin Patch Deviled Eggs
Fridge: Store leftover Pumpkin Patch Deviled Eggs in an airtight container for up to 2 days to maintain freshness and flavor.
Make-Ahead: If you need to prepare ahead, boiled eggs can be stored in the fridge for 2-3 days, while the filling can be made a day in advance for hassle-free assembly.
Freezer: Freezing is not recommended for these deviled eggs, as the texture of the egg whites and filling may become compromised upon thawing.
Reheating: These eggs are best enjoyed cold or at room temperature, so no reheating is necessary! Just assemble and refrigerate them for optimal taste.
Pumpkin Patch Deviled Eggs Variations
Feel free to get creative with these delightful bites and customize your Pumpkin Patch Deviled Eggs to suit your taste and occasion!
-
Spicy Kick: Add a pinch of cayenne or a dash of hot sauce for a fiery twist that will wake up your taste buds. The extra heat complements the creaminess perfectly!
-
Herbaceous Twist: Swap chives for fresh dill or basil to add a different flavor profile. Each herb has its unique charm, giving your eggs a refreshing scent and taste.
-
Bacon Lover’s Delight: Incorporate crispy bacon bits into the filling for an irresistible crunch. This savory addition adds an unexpected twist that bacon enthusiasts will adore.
-
Smoky Flavor: Try using smoked paprika instead of regular paprika for a smoky depth. It adds an extra layer of flavor that will leave your guests guessing the secret ingredient.
-
Veggie Boost: Mix in finely chopped cooked spinach or bell peppers for added texture and nutrients. It’s a delicious way to sneak in some veggies to your appetizers!
-
Cheesy Goodness: Fold in shredded cheese—like cheddar or pepper jack—into the yolk mixture for delightful creaminess. Cheese lovers will savor every bite of this cheesy variation!
-
Festive Colors: Use natural food dyes from beet juice or spinach puree instead of orange food coloring for vibrant hues. It’s a fun and healthy way to enhance the visual appeal!
-
Texture Adventure: Consider topping with crushed nuts or seeds for a delightful crunch. Almonds or pumpkin seeds work beautifully, making each bite a little more exciting!
As you explore these variations, don’t forget that these Pumpkin Patch Deviled Eggs can be served alongside my delightful Baked Pumpkin Donuts or enjoyed at a cozy fall gathering featuring my Pumpkin Smores Cookies. Happy cooking!
Make Ahead Options
These Pumpkin Patch Deviled Eggs are perfect for those busy days when you need to streamline meal prep! You can boil the eggs up to 3 days in advance and store them in the refrigerator, making the peeling process easier when it comes time to assemble. The filling can also be prepared up to 24 hours ahead; just mix the yolks with mayonnaise, mustard, and seasonings, and store it in an airtight container. When you’re ready to serve, simply pipe the filling into the egg whites and create the pumpkin design right before your gathering to ensure the best texture. This way, you’ll save time while still presenting a delightful and festive appetizer!
Expert Tips for Pumpkin Patch Deviled Eggs
-
Perfect Boiling: Ensure your eggs are boiled precisely for 10 minutes off heat. This technique helps avoid gray rings around the yolks.
-
Smooth Filling: Use a fine-mesh sieve to sift the yolks after mashing. This step ensures your Pumpkin Patch Deviled Eggs have an ultra-smooth texture that your guests will love.
-
Gentle Designing: When creating ridges for the pumpkin effect, use light pressure. Being too forceful may lead to a messy filling instead of the delightful design you desire.
-
Age Matters: Opt for eggs that are a week or two old. Slightly older eggs have larger air pockets, making peeling much easier and reducing frustration.
-
Don’t Rush the Chill: Refrigerate your eggs for at least 30 minutes before serving. This waiting time enhances flavor melding while giving the filling a firmer texture.

Pumpkin Patch Deviled Eggs Recipe FAQs
What type of eggs should I use for Pumpkin Patch Deviled Eggs?
I recommend using large eggs for a more generous filling surface. If you’re having trouble peeling, opt for eggs that are about a week old, as they tend to be easier to peel due to larger air pockets.
How can I store leftover Pumpkin Patch Deviled Eggs?
Leftover Pumpkin Patch Deviled Eggs can be stored in an airtight container in the refrigerator for up to 2 days. This helps maintain their freshness and flavor, keeping them delicious for your next snack!
Can I prepare the eggs or filling ahead of time?
Absolutely! You can boil the eggs and store them in the fridge for 2-3 days. The filling can be made a day in advance, then simply assemble the deviled eggs when you’re ready. This makes your gathering stress-free!
Is it possible to freeze Pumpkin Patch Deviled Eggs?
No, freezing these deviled eggs is not recommended. The texture of the egg whites and the creamy filling may change once thawed, leading to a less enjoyable experience. They’re best enjoyed fresh or chilled from the fridge.
What should I do if my filling is too thick?
If your filling turns out too thick, it can be easily adjusted! Simply add a bit more mayonnaise or a splash of milk to loosen it up until it reaches your desired consistency. Mix thoroughly until smooth, and it’ll be ready to pipe into the egg whites!
Can I make any substitutions for dietary restrictions?
Certainly! If you have dietary concerns, you can substitute mayonnaise with Greek yogurt for a healthier option. Additionally, if you’re allergic to eggs or looking for a vegan version, consider using silken tofu as a base for your filling. Just blend it smooth with mustard and spices!
Delicious Pumpkin Patch Deviled Eggs for Fall Festivities
Ingredients
Equipment
Method
- Arrange large eggs in a single layer in a pot, cover with cold water, and bring to a boil. Once boiling, remove from heat and let sit for 10 minutes.
- Prepare an ice bath and transfer boiled eggs into it to cool for at least 5 minutes.
- Gently crack and peel the cooled eggs under running water.
- Slice the eggs in half, scoop out yolks into a bowl, and mix with mayonnaise, mustard, salt, pepper, and paprika until smooth.
- Transfer filling to a piping bag and fill egg whites to create a rounded mound.
- Use a knife or toothpick to create vertical ridges in the filling and insert chives for stems.
- Refrigerate the filled eggs for at least 30 minutes before serving.
Leave a Reply