
As the sizzling sound of shrimp hitting a hot skillet fills the air, I can’t help but feel a rush of anticipation. This 20-Minute Blackened Shrimp recipe transforms weeknight dinners into a culinary adventure, proving that gourmet meals can be quick and effortless. With a zesty, peppery crust that celebrates the essence of Cajun cooking, this dish is a savory sensation your taste buds won’t forget. Not only is it keto-friendly and gluten-free, making it a perfect choice for various dietary needs, but it also comes together in just one pan, ensuring cleanup is a breeze. Pair it with a fresh salad or over a bed of zoodles for a satisfying meal that doesn’t skimp on flavor. What exciting twist will you add to your plate?
Why Is Blackened Shrimp So Amazing?
Bold, Flavorful Experience: This recipe brings a delightful kick with a charred peppery crust, making every bite an adventure.
Quick & Easy: Perfect for busy nights, it comes together in just 20 minutes, proving gourmet meals can fit into a hectic schedule.
Versatile Pairing: Enjoy it over rice, zoodles, or alongside fresh vegetables for a customized plate that suits your taste.
Crowd-Pleaser: Impress family or guests with this dish—its rich flavors and stunning presentation are sure to win hearts!
Healthy & Wholesome: Keto-friendly and gluten-free, it fits a variety of dietary needs without compromising satisfaction; check out my other recipes like Garlic Shrimp Mofongo for more delicious seafood options.
Blackened Shrimp Ingredients
For the Spice Blend
• Smoked Paprika – Provides a sweet, smoky flavor that enhances the seasoning blend. Note: Regular paprika can be substituted for a milder flavor.
• Chili Powder – Adds heat and depth to the seasoning; key for achieving that spicy kick. Substitution: Cayenne pepper can be used for additional spice.
• Italian Seasoning – A blend of herbs that adds complexity to the flavor. Note: You can substitute with fresh herbs if preferred.
• Garlic Powder – Offers an effortless way to infuse garlic flavor throughout the dish. Substitution: Fresh minced garlic can be used in the same quantity.
• Red Pepper Flakes – Provides heat and a slight crunch. Optional: Adjust to taste for spice level.
• Salt – Enhances all flavors in the seasoning mix. Note: Use kosher salt for the best texture and flavor.
For the Shrimp
• Raw Shrimp (1.5 lb) – Vital for the protein content; use large shrimp, peeled and deveined for convenience. Note: Avoid using pre-cooked shrimp for best results.
• Olive Oil (2 tablespoons) – For cooking the shrimp, adds flavor and prevents sticking. Substitution: Canola or avocado oil could be used.
For the Garnish
• Lemon Slices – For garnish, adds a fresh, zesty element to the finished dish. Substitution: Lime slices can be used for a different citrus flavor.
• Fresh Basil or Parsley (chopped) – Adds color and freshness as a garnish. Note: Both herbs complement the shrimp well but can be swapped for cilantro if desired.
Step‑by‑Step Instructions for Blackened Shrimp
Step 1: Prepare the Spice Mix
In a large mixing bowl, combine the smoked paprika, chili powder, Italian seasoning, garlic powder, red pepper flakes, and salt. Whisk the spices together until they are well blended, creating a vibrant mixture that will give the Blackened Shrimp its signature flavor. Make sure to do this while your skillet heats up, so everything’s ready to go.
Step 2: Season the Shrimp
Add the peeled and deveined raw shrimp to your spice mix, along with 1 tablespoon of olive oil. Gently toss the shrimp until they are evenly coated in the seasoning, ensuring every morsel is packed with flavor. This will take about a minute, and you’ll want to see a beautiful sheen on the shrimp from the oil and spices.
Step 3: Heat the Skillet
Place a 12-inch cast-iron skillet over medium heat and allow it to warm for 3–4 minutes. Once it’s preheated, turn the heat up to medium-high, adding the remaining tablespoon of olive oil. Wait until the oil shimmers and starts to smoke slightly, signaling it’s ready for the shrimp.
Step 4: Cook the Shrimp
Carefully add the seasoned shrimp to the hot skillet in a single layer, ensuring you don’t overcrowd the pan. Cook for about 2 minutes without stirring, allowing a mesmerizing blackened crust to form. You’ll know they’re ready to flip when the underside is dark and aromatic.
Step 5: Finish Cooking the Shrimp
After the first side has developed a beautiful blackened appearance, flip the shrimp over using tongs. Cook for another 2 minutes, or until they turn fully opaque and cooked through. Keep an eye out for that gorgeous char, which means the Blackened Shrimp is achieving perfect flavor!
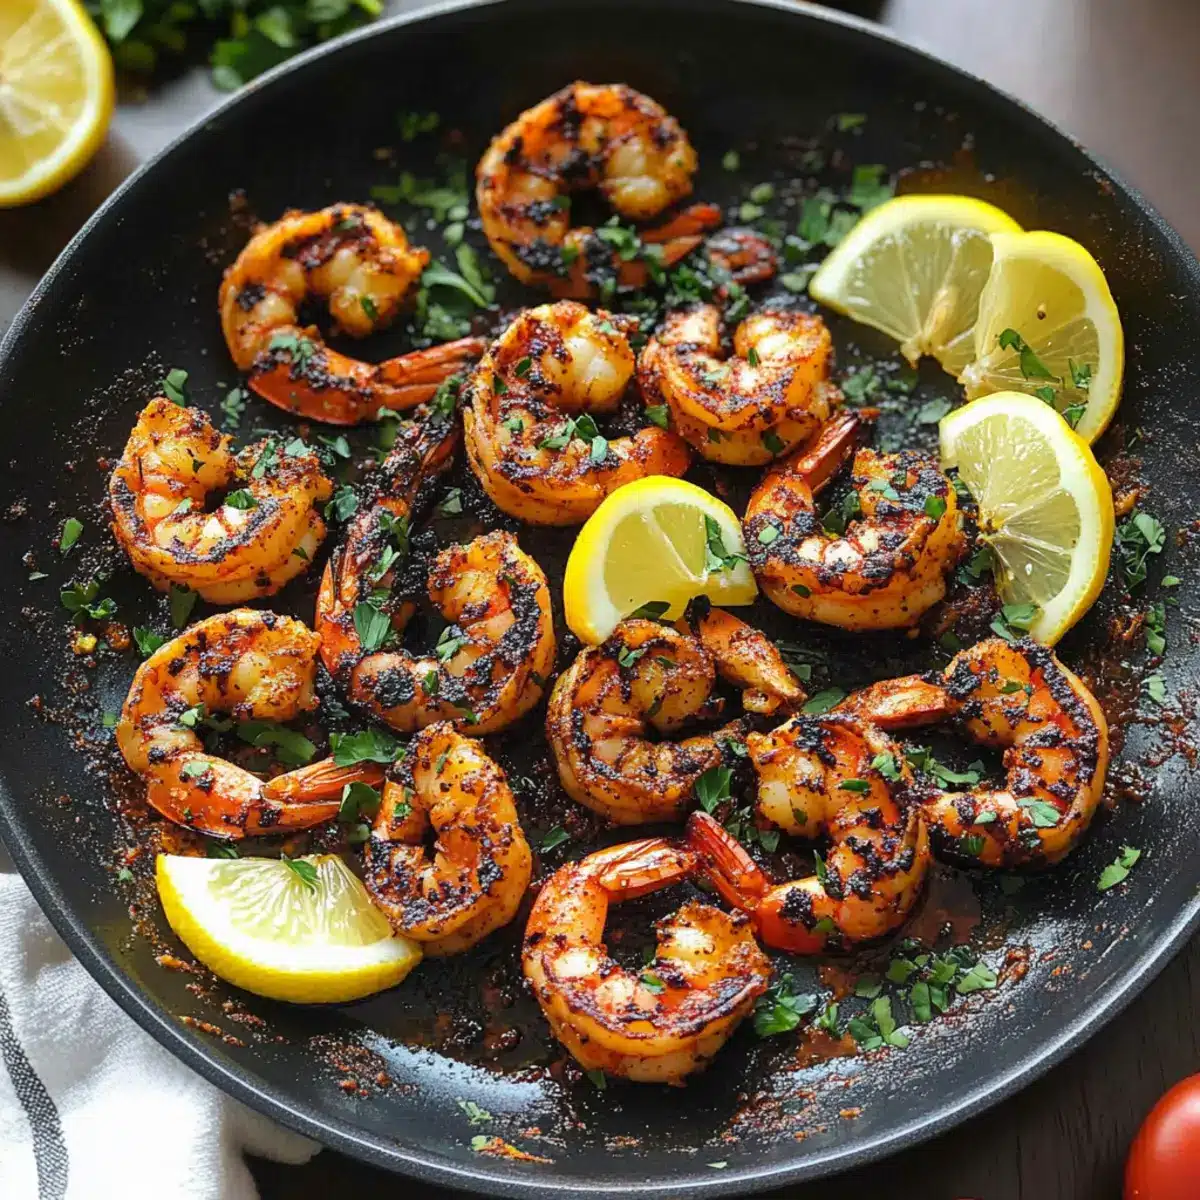
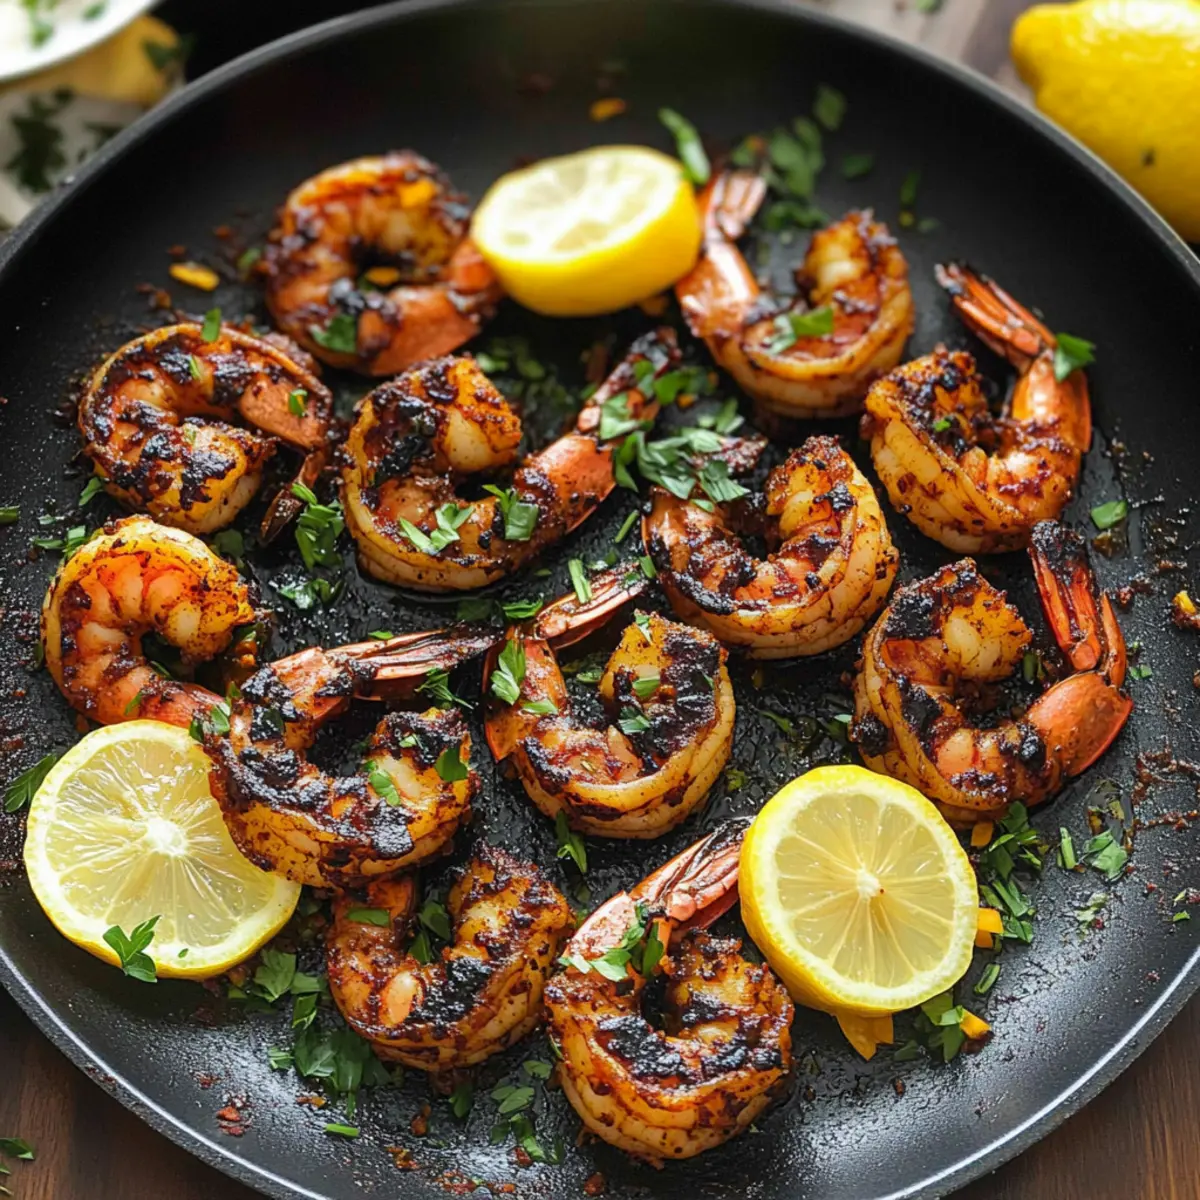
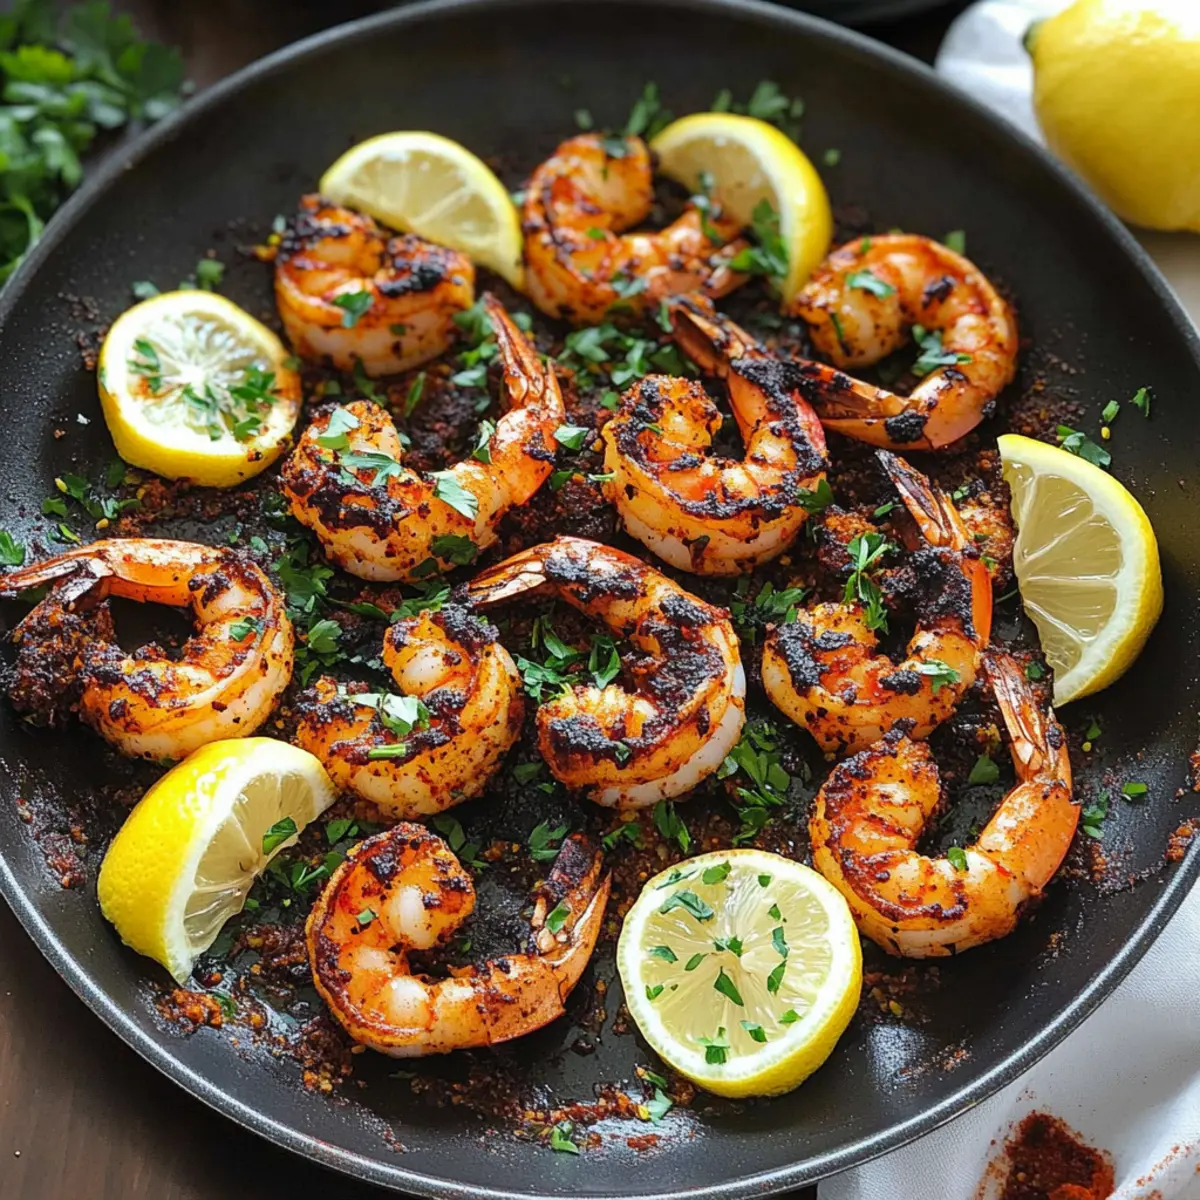
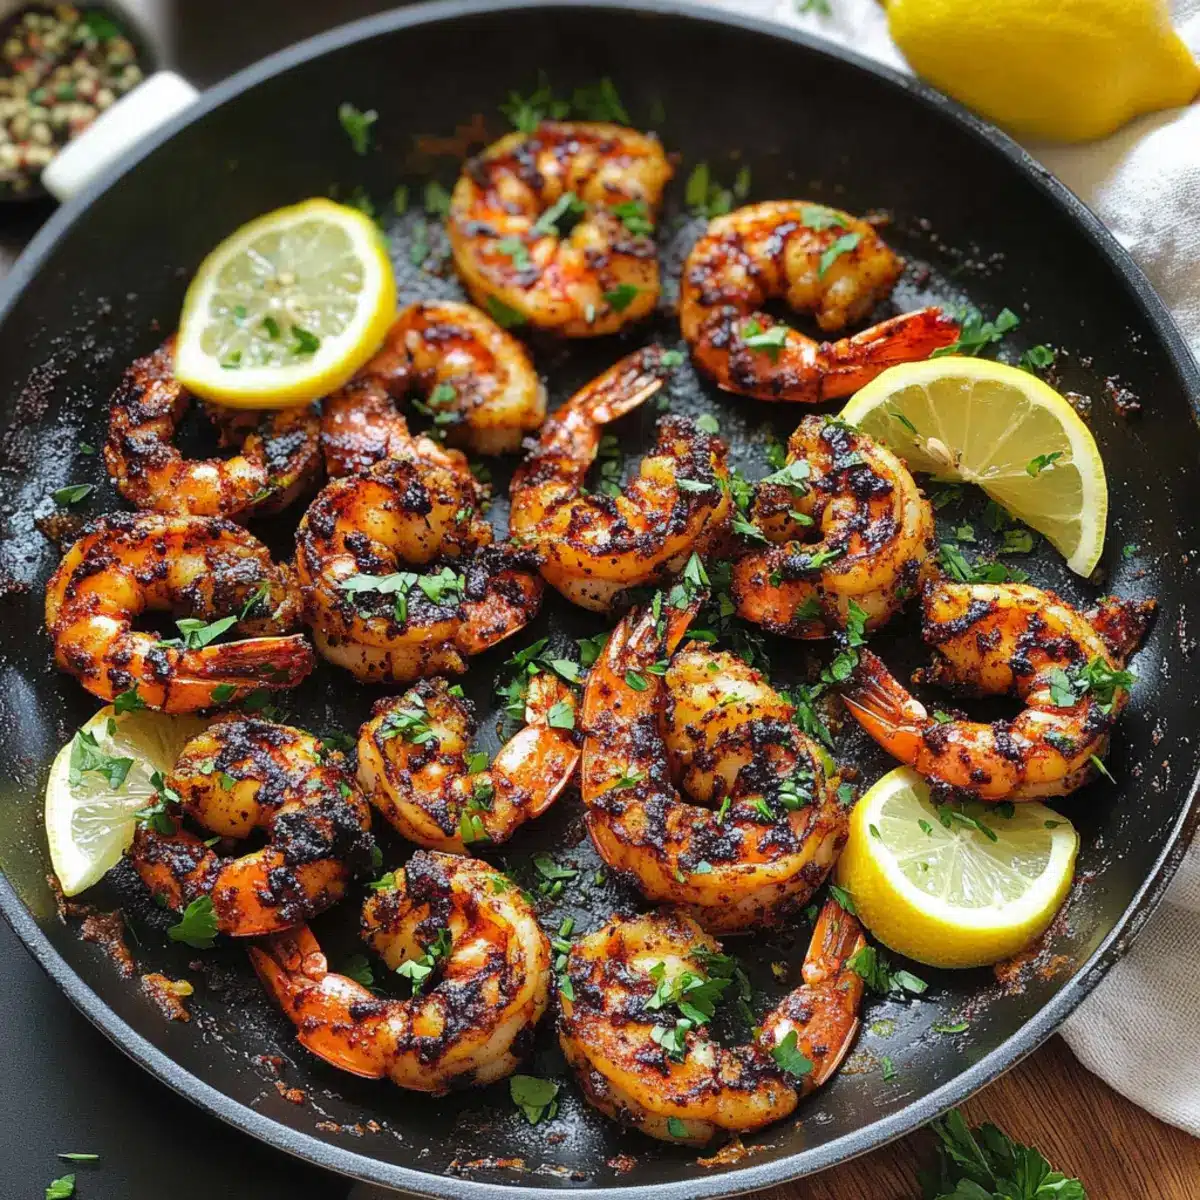
Step 6: Garnish and Serve
Once cooked, remove the skillet from heat and transfer the shrimp to a serving dish. Garnish with fresh lemon slices and a sprinkle of chopped basil or parsley. The vibrant colors and zesty aroma will invite everyone to the table, ready to savor this fantastic Blackened Shrimp feast!
Storage Tips for Blackened Shrimp
Fridge: Store leftover Blackened Shrimp in an airtight container for up to 2 days. This prevents moisture loss and keeps that delicious flavor intact.
Freezer: If you need to keep it longer, freeze the shrimp by laying them in a single layer on a parchment-lined baking sheet until solid. Transfer to a freezer-safe bag for up to 3 months.
Reheating: Reheat in a skillet over low heat to maintain the texture. Avoid microwaving, as it can make the shrimp rubbery. Enjoy your warm, savory delight!
Room Temperature: For food safety, do not leave cooked shrimp out at room temperature for more than 2 hours.
Expert Tips for Blackened Shrimp
Hot Skillet Needed: Ensure your skillet is hot enough before adding shrimp; this helps create that irresistible blackened crust without burning the spices.
Avoid Overcrowding: Cook shrimp in a single layer to prevent steaming; overcrowding leads to uneven cooking and less flavor. If necessary, work in batches.
Pat Dry For Crispiness: If using frozen shrimp, fully thaw and pat them dry before seasoning. This step ensures you achieve a wonderfully crispy exterior on your Blackened Shrimp.
Mind the Time: Cooking shrimp quickly is key; keep an eye on them as they only need a few minutes. Overcooking can lead to rubbery shrimp.
Custom Seasoning: Don’t be afraid to adjust the spice blend to suit your taste! Using more or less chili powder or red pepper flakes can tailor the heat level specifically to you.
Make Ahead Options
These Blackened Shrimp are perfect for busy home cooks looking to save time during the week! You can season the shrimp and refrigerate them for up to 24 hours before cooking. Just mix the spice blend, coat the raw shrimp in the seasoning and olive oil, and place them in an airtight container. This not only deepens the flavors but ensures a quick prep – simply heat the skillet and cook when you’re ready to serve. For optimal quality, keep the shrimp chilled right until you’re ready to add them to the hot skillet; they’ll be just as delicious and bursting with flavor! Enjoy a gourmet experience with minimal effort!
Blackened Shrimp Variations & Substitutions
Feel free to explore these tasty twists that will make your Blackened Shrimp uniquely yours!
-
Chicken Swap: Use chicken breast instead of shrimp for a heartier main dish that remains flavorful and delicious. Simply follow the same cooking instructions, adjusting the time to ensure it’s fully cooked through.
-
Vegetarian Option: Try using firm tofu or tempeh for a vegetarian alternative. Make sure to press and marinate the tofu in the spice blend before cooking for the best flavor.
-
Zoodles Base: Serve your blackened shrimp over zoodles (zucchini noodles) to keep it low-carb and add a fresh, veggie twist. They’ll soak up the shrimp’s flavorful juices beautifully!
-
Different Proteins: Vary the recipe by using fish, such as salmon or sea bass. Adjust the cooking time according to the thickness of the fillets for perfectly tender results.
-
Seasonal Vegetables: Sauté seasonal veggies like bell peppers or zucchini alongside the shrimp for added texture and nutrition. This adds a lovely crunch and brings the dish to life!
-
Heat Level Adjust: For a milder kick, reduce the chili powder and red pepper flakes, or simply replace them with smoked paprika. For extra heat, consider adding diced jalapeños or a splash of hot sauce!
-
Swaps for Oils: Feel free to substitute olive oil with avocado or coconut oil which can give a unique flavor profile and a higher smoke point for searing.
-
Fresh Herb Variety: Instead of basil or parsley, try using cilantro or dill. Each herb brings its own distinct taste, adding a different flair to your finished dish.
Feel inspired? Once you’ve mastered this recipe, dive into even more seafood goodness with options like Avocado Shrimp Ceviche or Coconut Shrimp Sweet for your next culinary adventure!
What to Serve with Blackened Shrimp
Elevate your Blackened Shrimp experience by pairing it with sides that enhance its bold flavors and complement its spicy kick.
-
Creamy Avocado Salad: This cool, creamy salad offers a refreshing contrast to the spiced shrimp, balancing flavors and adding creaminess.
-
Coconut Cauliflower Rice: Fluffy and aromatic, this low-carb side captures tropical notes that harmonize beautifully with the blackened spices, creating a delightful synergy.
-
Garlic Butter Zoodles: Tossed in a rich garlic butter sauce, these zucchini noodles provide a satisfying and guilt-free base for the shrimp without overshadowing it.
-
Crisp French Fries: Golden and crunchy, classic fries are a crowd-pleaser that soak up any extra seasoning, adding texture to your meal.
-
Roasted Asparagus: With its slight char and nutty flavor, roasted asparagus perfectly complements the smoky shrimp while adding a vibrant green element.
-
Tangy Coleslaw: This crunchy, tangy dish brightens the palette and brings a refreshing crunch to contrast with the tender shrimp.
-
Pineapple Salsa: Sweet and spicy, this fruity salsa adds a burst of freshness that lightens up the dish while enhancing its overall flavor profile.
-
Lemon Herb Quinoa: Light and fluffy, this nutritious grain infused with lemon and herbs acts as a zesty side that ties all the flavors together.
-
Chilled White Wine: A refreshing glass of Sauvignon Blanc or a crisp Pinot Grigio brings out the spice in the blackened shrimp, making it a delightful pairing for your meal.
Blackened Shrimp Recipe FAQs
What is the best way to choose ripe shrimp?
Absolutely! When selecting shrimp, look for those with a firm texture and a slightly salty smell, which indicates freshness. Avoid shrimp with dark spots all over or a strong, fishy odor, as these are signs they may not be at their best. Large shrimp, preferably peeled and deveined for convenience, work excellently in this Blackened Shrimp recipe.
How should I store leftovers of Blackened Shrimp?
Store any leftover Blackened Shrimp in an airtight container in the refrigerator for up to 2 days. It’s important to keep them sealed to prevent moisture loss. When you’re ready to enjoy them again, reheat in a skillet over low heat. This method will help maintain that lovely texture, ensuring your dish remains delicious!
Can I freeze Blackened Shrimp, and if so, how?
Yes! To freeze, start by laying the cooked Blackened Shrimp in a single layer on a parchment-lined baking sheet. Place the tray in the freezer until the shrimp are solid (about 2 hours). Then, transfer them to a freezer-safe bag. They can be stored in the freezer for up to 3 months. When ready to eat, thaw overnight in the refrigerator and reheat in a skillet for best results.
What should I do if my Blackened Shrimp turn out rubbery?
Very often, rubbery shrimp are a result of overcooking. To prevent this, cook the shrimp for just 2 minutes on each side until they turn opaque and have that delightful blackened crust. If using frozen shrimp, be sure they’re completely thawed and patted dry before seasoning. Following these steps will yield that tender, juicy shrimp every time!
Are there any dietary considerations I should be aware of?
Yes, this Blackened Shrimp recipe is wonderfully accommodating! It’s keto-friendly, gluten-free, and dairy-free, making it suitable for various dietary needs. If you’re cooking for pets, it’s best to keep shrimp as a treat, ensuring they don’t consume seasoning or excess oil. Always check for allergies if serving to guests, especially with seafood!
Can I substitute any of the spices or ingredients?
Absolutely! Feel free to customize your spice blend according to your taste. For instance, regular paprika can replace smoked paprika for a milder flavor, or cayenne can add extra heat in place of chili powder. You can also substitute fresh herbs for the Italian seasoning to elevate freshness in your dish. The more the merrier!
Savor the Flavor: Easy Blackened Shrimp in 20 Minutes
Ingredients
Equipment
Method
- In a large mixing bowl, combine the smoked paprika, chili powder, Italian seasoning, garlic powder, red pepper flakes, and salt. Whisk the spices together until well blended.
- Add the peeled and deveined raw shrimp to your spice mix, along with 1 tablespoon of olive oil. Gently toss until evenly coated.
- Place a 12-inch cast-iron skillet over medium heat and allow it to warm for 3-4 minutes. Then add the remaining tablespoon of olive oil.
- Carefully add the seasoned shrimp in a single layer to the hot skillet. Cook for about 2 minutes, allow a blackened crust to form.
- Flip the shrimp using tongs and cook for another 2 minutes, until fully opaque and cooked through.
- Remove from heat and garnish with fresh lemon slices and a sprinkle of chopped basil or parsley.
Leave a Reply