
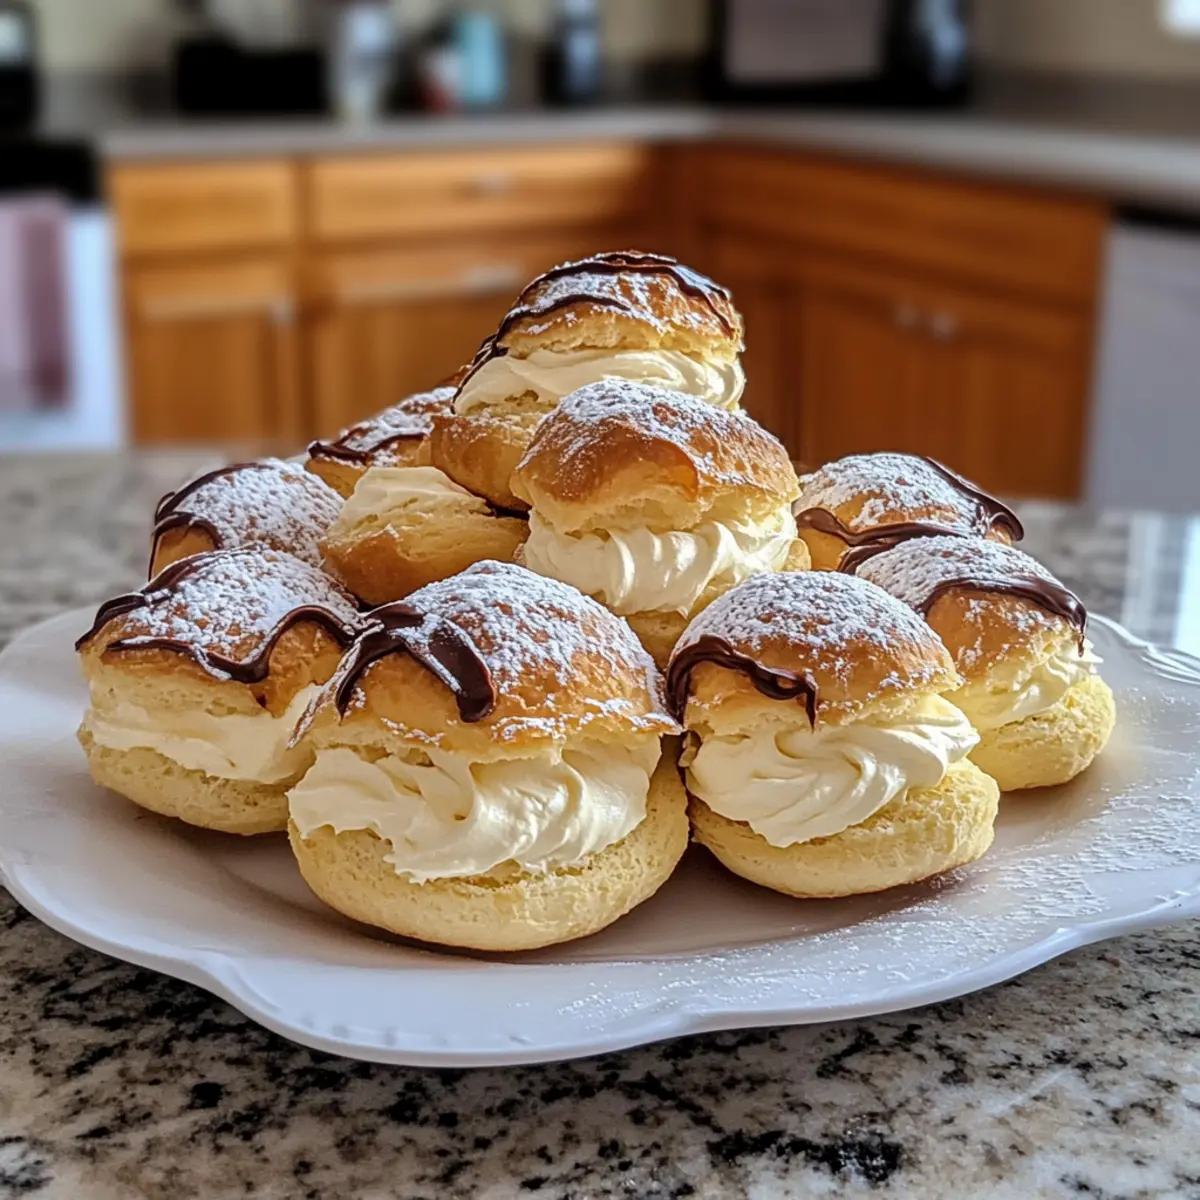
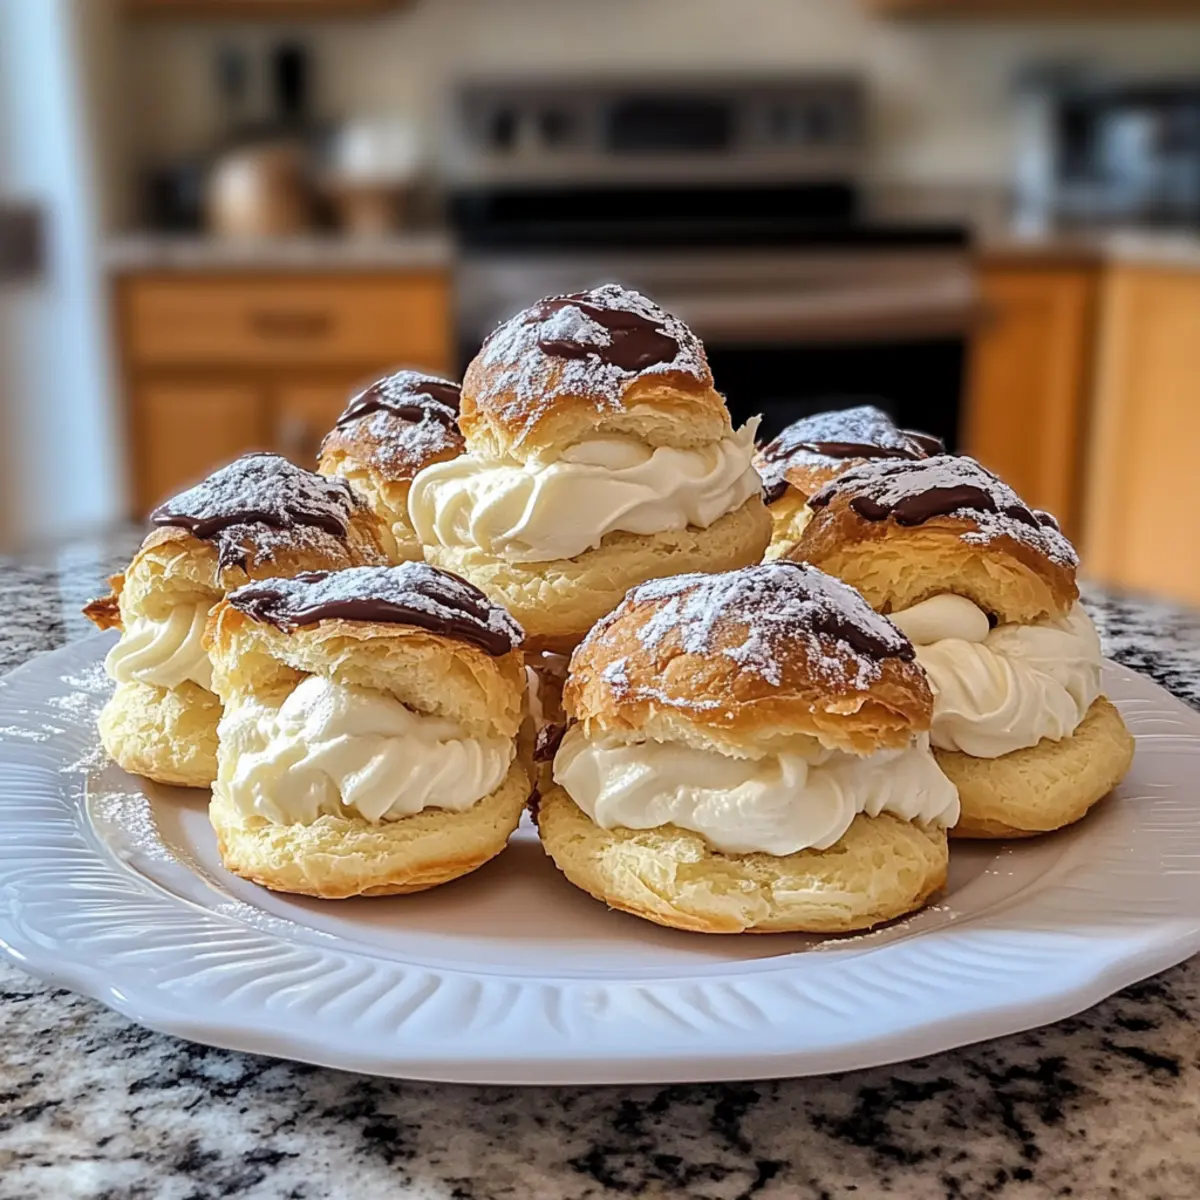
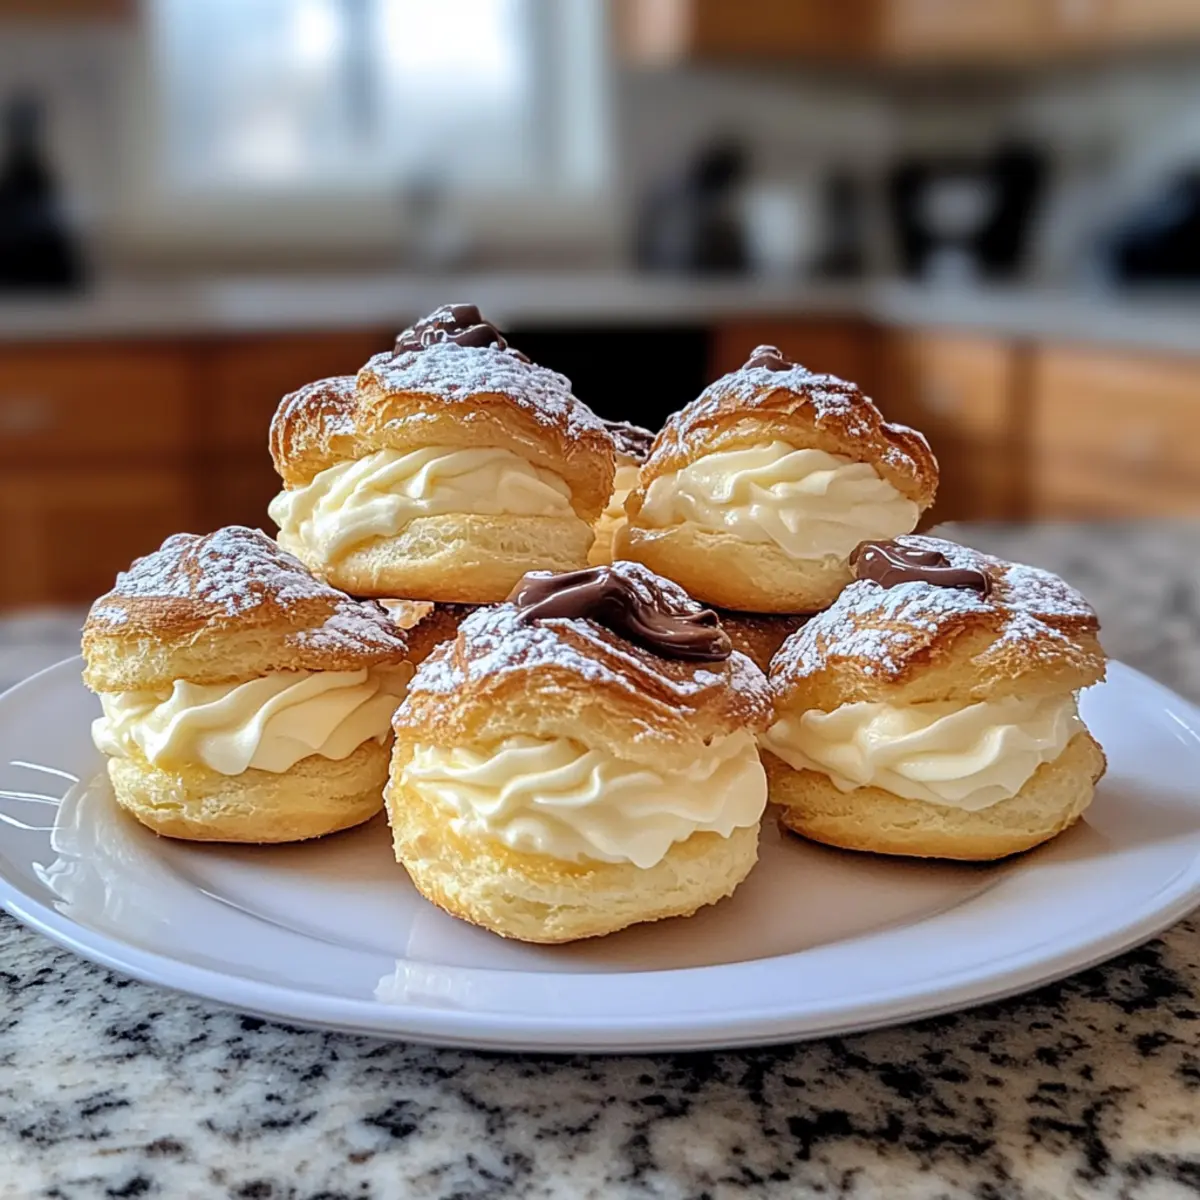
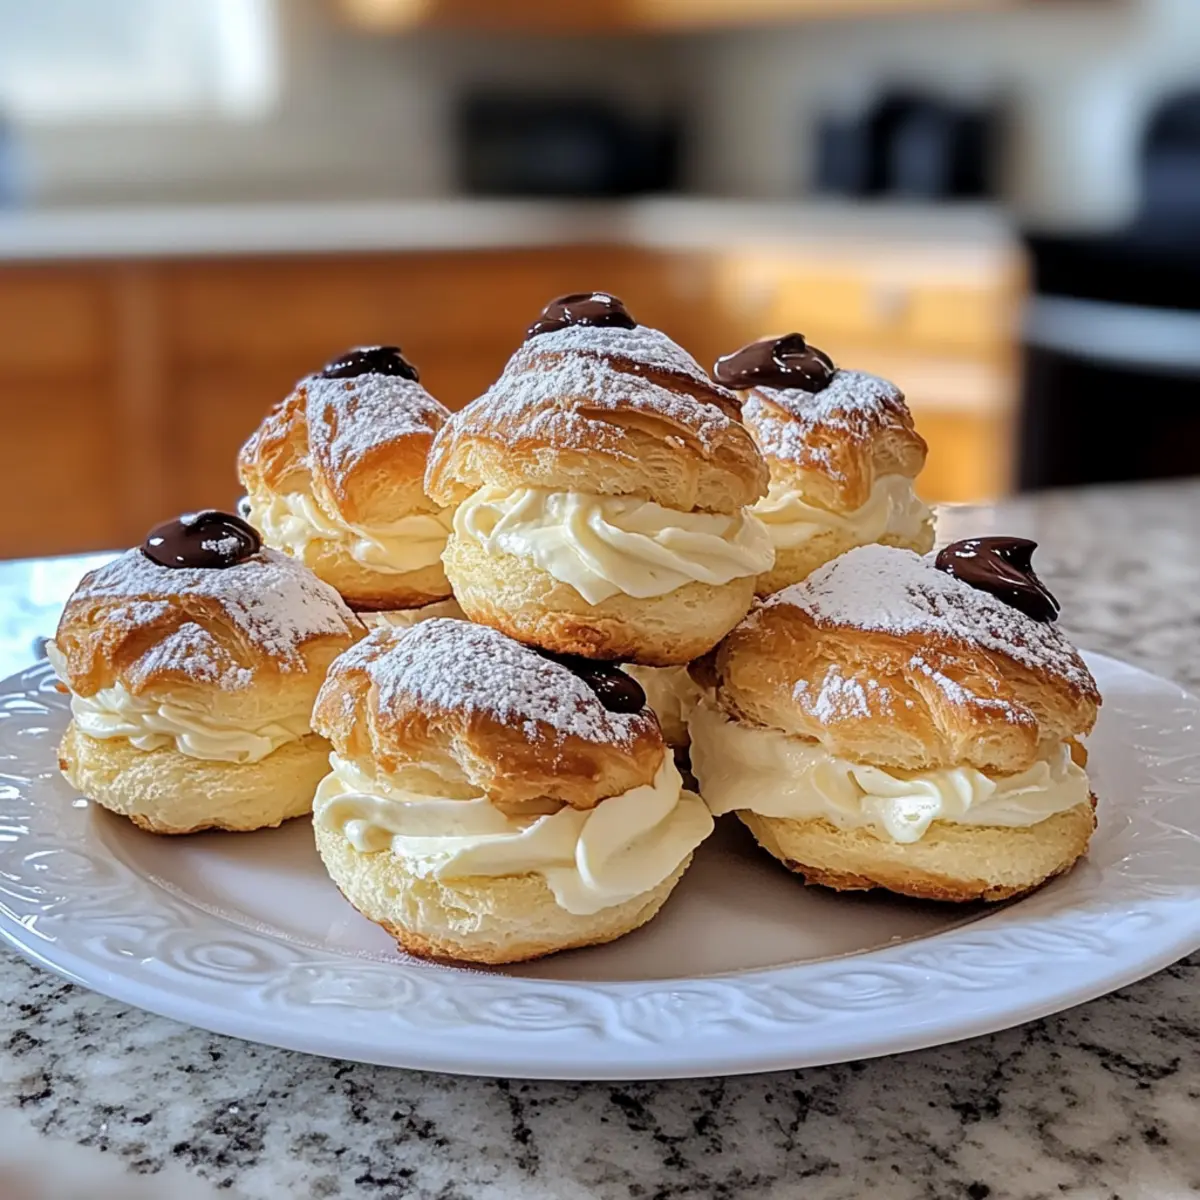
The kitchen filled with laughter and the sweet scent of baked goodness as I watched my mom prepare her renowned cream puffs. There’s something magical about these airy pastries that makes them everyone’s favorite. Mom’s Famous Cream Puffs are not just a dessert; they are a family tradition that brings loved ones together. With their light and fluffy texture and luscious vanilla cream filling, these treats are perfect for gatherings or cozy dinners. Not only are they simple to whip up, but they also allow you to impress guests with a homemade classic that feels special. Plus, they store well in the fridge, making them a great make-ahead option! Are you ready to bring the joy of cream puffs into your home? Let’s dive into the recipe!
Why are Cream Puffs a Must-Try?
Irresistible Taste: The combination of airy pastry and rich vanilla cream creates a flavor explosion that makes every bite a delightful experience.
Crowd-Pleasing Delight: Perfect for parties and family gatherings, these cream puffs are a guaranteed hit that will have everyone asking for seconds!
Quick & Easy: With just a few simple ingredients and steps, you can whip up these treats without breaking a sweat.
Versatile Indulgence: Whether you choose vanilla, chocolate, or coffee cream filling, there’s a flavor to suit everyone’s taste, making them ideal for any occasion.
Perfect for Make-Ahead: They store beautifully in the fridge, so you can prepare them in advance, just like my easy-to-make Tuscan Ravioli Soup or Creamy Street Corn Pasta Salad. Enjoy the warm glow of homemade desserts without the last-minute rush!
Cream Puff Ingredients
• Here’s what you need to create the perfect cream puffs filled with deliciousness!
For the Pastry
- Water – Provides moisture for the dough, essential for creating the structure of your cream puffs.
- Butter – Adds richness and flavor; margarine can be used for a dairy-free option.
- Flour – The main structure component; all-purpose flour is standard, but gluten-free flour works too.
- Eggs – Creates lift and structure; ensure they are at room temperature for the best results.
- Sugar – Adds a touch of sweetness to your puffs; feel free to reduce the amount for a less sweet treat.
- Vanilla Extract – Enhances the flavor of the pastry; almond extract is a lovely alternative for a twist.
For the Filling
- Heavy Cream – Whipped to create a rich and creamy texture; light cream can be used but will not hold up as well.
- Powdered Sugar – Sweetens the whipped cream and ensures it has a smooth texture; essential for that luscious filling.
Indulge in the joy of homemade cream puffs; they are not only a classic dessert but a cherished family favorite that’s sure to impress!
Step-by-Step Instructions for Mom’s Famous Cream Puffs
Step 1: Prepare the Dough
In a medium saucepan, combine 1 cup of water and ½ cup of butter. Bring this mixture to a rolling boil over medium heat. Once boiling, add 1 cup of all-purpose flour all at once, stirring vigorously with a wooden spoon until the dough forms a smooth ball that pulls away from the sides of the pan. Remove from heat and let cool for about 5 minutes.
Step 2: Incorporate Eggs
After cooling slightly, add 4 large eggs one at a time into the dough mixture. Beat each egg in thoroughly until the dough is smooth and glossy before adding the next. This step is crucial for airy cream puffs, as the eggs provide lift. Your final batter should be thick but pipeable.
Step 3: Pipe the Pastry
Transfer the dough into a piping bag fitted with a plain round tip. Line a baking sheet with parchment paper. Pipe small mounds, about 2 inches apart, onto the prepared baking sheet. Aim for uniform sizes to ensure even baking. Each mound should be about 1.5 inches wide for perfectly shaped cream puffs.
Step 4: Bake
Preheat your oven to 400°F (200°C). Once heated, place the baking sheet in the oven and bake for 20-25 minutes. Keep the oven door closed to prevent collapsing; your cream puffs should puff up and turn a beautiful golden-brown. They’ll be ready when they feel light and sound hollow when gently tapped.
Step 5: Cool
Once baked, remove the cream puffs from the oven. Allow them to cool completely on a wire rack. This cooling step is essential before filling them; otherwise, the heat could melt your filling. Enjoy the satisfaction of seeing your puffs hold their shape as they cool.
Step 6: Prepare the Filling
While the cream puffs cool, whip 1 cup of heavy cream with 2 tablespoons of powdered sugar and 1 teaspoon of vanilla extract in a medium bowl. Use an electric mixer to beat until soft peaks form, ensuring a light and cloud-like texture that pairs perfectly with your cream puffs.
Step 7: Assemble
To fill your cream puffs, carefully cut each puff in half horizontally or poke a small hole at the bottom. Use a piping bag or a spoon to fill each puff generously with the whipped cream. Replace the tops gently, and voilà! Your delicious Mom’s Famous Cream Puffs are ready to delight everyone at the table.
How to Store and Freeze Cream Puffs
Fridge: Store cream puffs in an airtight container in the refrigerator for up to 2 days. This helps maintain their texture, but they are best enjoyed fresh!
Freezer: You can freeze unfilled cream puffs for up to 1 month. Place them on a baking sheet until frozen solid, then transfer to an airtight container.
Filling: If you’ve filled your cream puffs, consume them within 2 days for the best flavor and texture. The filling can be made in advance and kept refrigerated.
Reheating: If stored in the fridge, enjoy them cold or let them sit at room temperature for about 30 minutes before serving. Avoid reheating in the oven to maintain their light and airy quality.
Expert Tips for Making Cream Puffs
Cool the Dough: Allow the dough to cool slightly before adding the eggs. This prevents them from cooking, ensuring a perfect puff.
Avoid Open Oven Door: Keep the oven door closed during baking to maintain consistent heat. Opening it may cause the cream puffs to collapse.
Use Piping Bags: For even-sized pastries, use a piping bag rather than a spoon. This ensures uniformity and better presentation for your cream puffs.
Room Temperature Eggs: Be sure your eggs are at room temperature for better incorporation, resulting in a fluffier texture.
Check Baking Time: Keep an eye on your cream puffs while they bake, as oven temperatures can vary. They should be golden brown and sound hollow when tapped.
What to Serve with Mom’s Famous Cream Puffs?
Creating an impressive meal is easy when you pair these delightful pastries with the right complements.
- Fresh Berries: A medley of strawberries, raspberries, and blueberries adds a burst of freshness and a touch of acidity, perfectly balancing the sweetness of cream puffs.
- Chocolate Sauce: Drizzle warm chocolate sauce over your cream puffs for an indulgent twist. This luscious addition enhances the dessert’s richness and creates a beautiful presentation.
- Vanilla Ice Cream: The creamy, smooth texture of vanilla ice cream contrasts beautifully with the airy cream puffs, making each bite delightful. A scoop beside the puffs delivers extra indulgence.
- Cafe au Lait: Pair your cream puffs with a warm cup of café au lait for a cozy treat. The coffee’s robust flavor complements the sweetness of the dessert, creating a comforting combination.
- Lemon Sorbet: The tartness of lemon sorbet provides a refreshing contrast to the rich cream filling, cleansing the palate between bites, and adding a zingy note to your dessert experience.
- Caramel Drizzle: A light drizzle of caramel adds a sweet, buttery flavor that takes your cream puffs to the next level. The sticky texture pairs well with the fluffy pastry.
- Pistachio Crumble: A sprinkle of crushed pistachios enhances the cream puffs with a delightful crunch and nutty flavor, making each bite more exciting. This adds an elegant touch to your presentation.
- Coffee or Tea: A steaming mug of your favorite coffee or herbal tea offers a comforting beverage option that complements the rich flavors of the cream puffs beautifully.
Cream Puffs Variations & Substitutions
Feel free to let your creativity shine as you explore delightful options for customizing your cream puffs, making them uniquely yours!
- Dairy-Free: Use coconut oil instead of butter and a dairy-free cream for a luscious filling without the dairy.
- Gluten-Free: Substitute all-purpose flour with a gluten-free blend and ensure the other ingredients are gluten-free for a safe treat.
- Flavor Variations: Swap vanilla extract for almond or lemon extract to give your cream puffs a refreshing twist. The possibilities are endless!
- Chocolate Lovers: Fill with chocolate ganache instead of cream for a decadent, rich flavor that satisfies any chocolate craving.
- Fruit Filling: Incorporate fresh fruit purées, like strawberry or raspberry, into the whipped cream for a fruity burst of flavor. It adds a lovely color and taste!
- Cinnamon Sugar: Dust the warm puffs with a mix of cinnamon and sugar right after baking for a sweet, cinnamon-sugar finish that’s irresistible.
- Double Chocolate: Mix cocoa powder into the cream filling for a rich chocolate cream puff that will satisfy any chocolate lover in the house.
No matter which option you choose, these variations transform your cream puffs into an exciting dessert that everyone will adore! If you’re feeling inspired, you could try out these variations alongside some other recipes, like my delicious Crispy Mashed Potato Cheese Puffs or a comforting Creamy Beef Pasta.
Make Ahead Options
These Mom’s Famous Cream Puffs are perfect for meal prep, allowing you to enjoy delicious homemade desserts without the last-minute hustle! You can prepare the pastry dough up to 24 hours in advance by piping the mounds onto a lined baking sheet and refrigerating them (to maintain their shape). Once you’re ready to bake, simply allow them to sit at room temperature for about 30 minutes and then bake as directed. While the cream puffs can be filled with the rich vanilla cream up to 2 hours before serving, to ensure they remain light and airy, it’s best to fill them just before serving. This way, you’ll savor every fluffy bite just as delicious as when fresh out of the oven!
Mom’s Famous Cream Puffs Recipe FAQs
How do I select the best eggs for making cream puffs?
When making cream puffs, it’s essential to use fresh eggs that are at room temperature. The fresher the eggs, the better the lift will be in the dough, creating that lovely airy texture. If you can, choose organic or free-range eggs; they tend to have richer flavors that will enhance your cream puffs.
What’s the best way to store cream puffs?
Store filled cream puffs in an airtight container in the refrigerator for up to 2 days. For unfilled puffs, keep them at room temperature in a cool, dry place or refrigerate them in an airtight container for up to 3 days. If you prefer to keep them longer, freezing is a great option as well.
Can I freeze cream puffs?
Absolutely! To freeze unfilled cream puffs, first, place them on a baking sheet to freeze until solid, about 1-2 hours. Once frozen, transfer the puffs into a freezer-safe airtight container. They can be stored for up to 3 months. When ready to enjoy, let them thaw in the fridge, then fill with whipped cream before serving.
What should I do if my cream puffs collapse after baking?
If your cream puffs collapse, it’s often due to opening the oven door during baking, which causes a drop in temperature. Another possibility is not allowing the dough to cool adequately before adding the eggs, resulting in a heavier batter that doesn’t rise. Ensure the oven remains closed, and give the batter time to cool before incorporating the eggs.
Are there any dietary considerations I should keep in mind when making cream puffs?
Yes, if you’re preparing these cream puffs for someone with allergies, you can opt for dairy-free options such as using margarine in place of butter and coconut or almond milk cream for the filling. It’s important to check the labels of your ingredients to avoid any hidden allergens. Always ask your guests about their dietary restrictions if you’re serving to a crowd!
What’s the difference between heavy cream and light cream for the filling?
Using heavy cream is key to achieving that luscious, thick texture for your cream puff filling. It whips up beautifully and holds its shape well. Light cream can also be used, but it won’t whip as successfully, resulting in a filling that may be too soft and runny. For the best results, stick with heavy cream for those cloud-like, decadent fillings!
Homemade Cream Puffs That Melt in Your Mouth
Ingredients
Equipment
Method
- In a medium saucepan, combine water and butter. Bring to a rolling boil over medium heat.
- Once boiling, add flour all at once, stirring vigorously until the dough forms a smooth ball.
- Remove from heat and let cool for about 5 minutes.
- Add eggs one at a time into the cooled dough mixture, beating until smooth after each addition.
- Transfer dough into a piping bag. Pipe small mounds onto a lined baking sheet.
- Preheat oven to 400°F (200°C). Bake for 20-25 minutes without opening the door.
- Remove from oven and let cool completely on a wire rack.
- Whip heavy cream with powdered sugar and vanilla until soft peaks form.
- Cut each puff in half or poke a hole, then fill with whipped cream.
Leave a Reply