
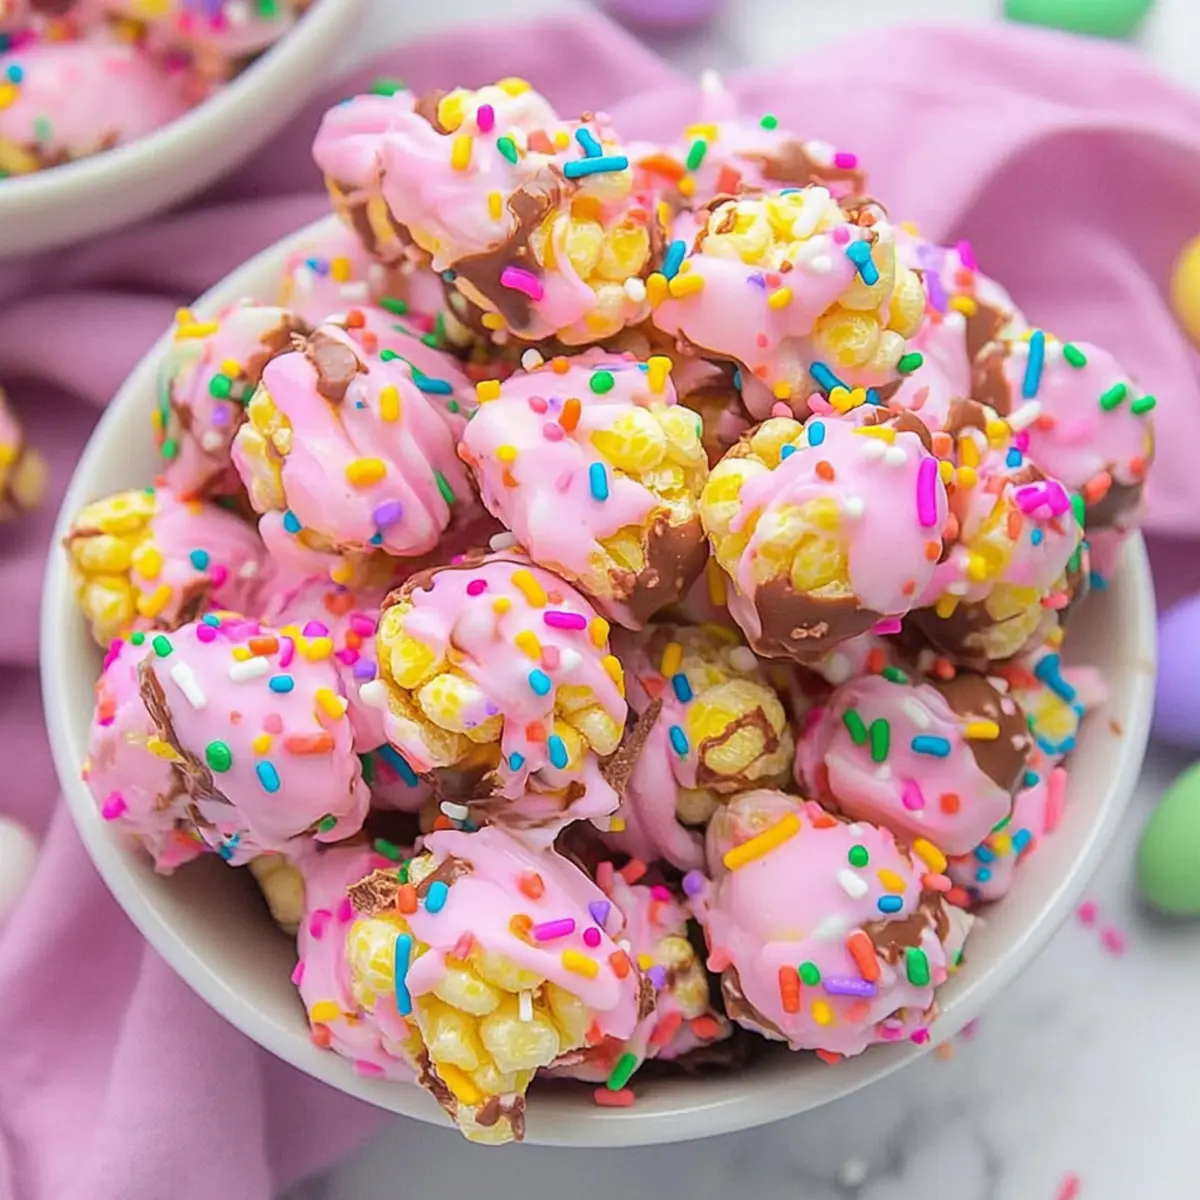
The aroma of melted chocolate wafting through the kitchen can be a little slice of heaven, especially as I prepare for the Easter festivities. In just a few simple steps, I create a delightful batch of 4-Ingredient Easter Puff Corn—a no-bake treat that embodies the joy of the season. With its airy crunch and playful pops of color from sprinkles, this quick dessert not only brightens up my holiday gatherings but also becomes a fun project for the kiddos to get involved in. Plus, it’s a perfect excuse to step away from fast food and indulge in something sweet and homemade. Are you ready to dive into this simple, kid-friendly recipe that’s sure to become a family favorite?

Why is Easter Puff Corn a must-try?
Irresistible Crunch: Each bite delivers a satisfying crunch that’s hard to resist, thanks to the light puff corn.
No-Bake Simplicity: Whip this delightful treat together in no time—perfect for those busy holiday schedules and quick dessert cravings.
Kid-Friendly Fun: Involve your little ones in the making process; they’ll love mixing and decorating their puff corn with sprinkles for a hands-on culinary experience.
Versatile Flavors: Customize it with different colored candy melts or themed sprinkles to match any occasion!
Crowd-Pleasing Delight: Serve it up at Easter brunch or parties, and watch as it disappears in a flash—everyone will want seconds!
Easter Puff Corn Ingredients
For the Puff Corn
• Puff Corn – This is the main ingredient providing light, airy crunch; can substitute with popcorn, but puff corn offers a unique texture.
For the Coating
• Candy Melts – Serves as the chocolate coating that hardens quickly; any color can be used based on preference, mixing colors creates delightful pastel shades.
• Butter Flavored Shortening – Enhances richness and helps chocolate set properly; may substitute with coconut oil for a lighter option.
For the Decoration
• Easter Sprinkles – Adds decorative color and festive flair; feel free to swap with different themed sprinkles for added creativity.
This Easter Puff Corn is not just a treat; it’s an experience to cherish!
Step‑by‑Step Instructions for Easter Puff Corn
Step 1: Prepare the Puff Corn
In a large mixing bowl, carefully add your puff corn, ensuring it is dry and free of any moisture. This step is crucial for achieving the perfect coating later on. Once ready, set the bowl aside while you prepare the chocolate mixture.
Step 2: Melt the Candy Coating
Using a microwave-safe bowl, combine the candy melts and butter-flavored shortening. Microwave in 30-second intervals, stirring well between each, until the mixture is smooth and fully melted—this should take about 1 to 2 minutes in total. The glossy consistency indicates it’s ready to use for coating the puff corn.
Step 3: Coat the Puff Corn
Carefully pour the melted chocolate mixture over the puff corn in the mixing bowl. Use a spatula to gently fold and mix everything together until each piece is evenly coated. Be sure to work quickly as the chocolate can begin to set. A visually appealing glossy sheen on the puff corn means you’re on the right track!
Step 4: Add Sprinkles and Set
Once coated, spread the puff corn mixture onto a sheet of wax paper in an even layer. While the coating is still warm, generously sprinkle your desired Easter sprinkles on top, allowing them to stick to the chocolate. This gives your Easter Puff Corn that fun, festive look we all love.
Step 5: Allow to Harden
Allow the coated puff corn to sit at room temperature undisturbed until completely hardened, which should take about 30 minutes. If you’re in a hurry, feel free to pop it in the refrigerator for quicker setting. Be patient, as this step ensures the delightful crunch of your finished Easter Puff Corn.
Step 6: Store and Enjoy
Once hardened, break apart any clusters and transfer your Easter Puff Corn to an airtight container. It can be stored at room temperature for up to a week. This easy-to-make treat is perfect for sharing during the Easter festivities or as a sweet snack for movie nights!
Expert Tips for Easter Puff Corn
-
Ensure Dry Puff Corn: Make sure your puff corn is completely dry before coating. Any moisture can lead to a soggy texture instead of the delightful crunch you want in your Easter Puff Corn.
-
Melt Gradually: Microwave the candy melts in 30-second intervals, stirring each time. This prevents overheating and helps maintain a smooth, glossy coating without lumps.
-
Spread Evenly: When spreading the mixture onto wax paper, do it in a single layer for even setting. Clusters may harden together, compromising the crunchy texture of your Easter Puff Corn.
-
Customize Creatively: Feel free to mix different colored candy melts for a fun design. Each batch can be unique and themed to match various occasions, adding a personal touch to your treats.
-
Add Extra Flavor: For a twist, consider adding in miniature marshmallows or nuts to the mixture before coating. This not only enhances the taste but also elevates the texture of your Easter Puff Corn.
How to Store and Freeze Easter Puff Corn
Room Temperature: Store your Easter Puff Corn in an airtight container at room temperature for up to a week. Keep it away from heat and humidity to preserve its crunchy texture.
Refrigerator: If you live in a humid area, consider storing the puff corn in the fridge to prevent melting, but note that this may affect its texture slightly.
Freezer: For long-term storage, you can freeze Easter Puff Corn for up to 3 months. Place it in a freezer-safe bag, ensuring all excess air is removed.
Thawing: When ready to enjoy, gently unwrap and let the puff corn come to room temperature before serving for the best taste and texture.
Easter Puff Corn Variations & Substitutions
Feel free to get creative with this delightful recipe and make it your own!
-
White Chocolate: Swap candy melts with white chocolate for a creamy, sweet version that’s equally delightful.
-
Nutty Crunch: Add chopped nuts, like almonds or pecans, for a delicious crunch. It provides an exciting textural contrast that will elevate your snack.
-
Marshmallow Twist: Incorporate mini marshmallows to add a chewy sweetness. This twist will make your puff corn even more fun and festive as they create little pockets of surprise!
-
Coconut Delight: Substitute butter-flavored shortening with coconut oil for a tropical essence. This coconut twist will offer a new layer of flavor, perfect for warm weather gatherings.
-
Spicy Kick: Drizzle a little bit of melted chili chocolate over the finished puff corn for a surprising heat. It adds an unexpected flair that will excite adventurous eaters!
-
Seasonal Sprinkles: Change the sprinkles with different themed ones to celebrate various occasions. From Halloween to birthdays, your puff corn can be festive all year round.
-
Creamy Yogurt Coating: Try using yogurt-covered melts instead of candy melts for a lighter, tart option that children will still love.
If you’re in the mood for other delectable treats, don’t miss out on crafting an inspired Street Corn Chicken Rice Bowl or a vibrant Creamy Street Corn Pasta Salad. These dishes are sure to please your family just like this Easter Puff Corn!
What to Serve with 4-Ingredient Easter Puff Corn?
Create a delightful spread with complementary treats that enhance your festive gatherings!
-
Fruit Kabobs: Colorful pieces of fresh pineapple, strawberries, and grapes offer a refreshing contrast to the sweet puff corn. Their juicy textures keep the snacking vibrant and fun.
-
Mini Chocolate Desserts: Bite-sized brownies or chocolate-covered strawberries bring a rich, delectable touch that pairs beautifully with the lightness of the Easter Puff Corn.
-
Savory Cheese Platter: A mix of creamy cheeses, crackers, and olives balances the sweetness, creating a well-rounded snack session. Invite friends to enjoy the contrasts of flavors.
-
Colorful Veggie Sticks: Crunchy carrots, cucumbers, and bell peppers served with a tangy dip provide a refreshing, healthy crunch that complements the sweet treats nicely.
-
Soda Float Station: Set up a DIY float bar with ice cream and various sodas. This fizzy delight pairs perfectly with the sweetness of puff corn, bringing festive cheer to your gatherings.
-
Coconut Macaroons: These chewy, sweet treats offer a tropical flair that harmonizes with the chocolate-coated puff corn, creating a blissful tasting adventure for everyone.
-
Lemonade or Iced Tea: Quench your thirst with refreshing beverages like lemonade or iced tea, which beautifully contrast the sweetness of the dessert while keeping everyone cool and revived.
Make Ahead Options
These 4-Ingredient Easter Puff Corn are perfect for busy home cooks looking to save time during the festive season! You can prepare the puff corn up to 24 hours in advance by simply measuring and storing it in an airtight container at room temperature. When you’re ready to make the treat, melt the candy melts and butter-flavored shortening as per the instructions, coat the puff corn, and add sprinkles before letting it set for about 30 minutes. To maintain the delightful crunch and chocolate coating, ensure the puff corn is completely dry before mixing and store any leftovers in an airtight container to keep them fresh and delicious!
Easter Puff Corn Recipe FAQs
What type of puff corn should I use?
I recommend using traditional puff corn for its light, airy crunch. While you can substitute it with popcorn, doing so changes the texture quite a bit—puff corn is really the star of this no-bake treat!
How should I store my Easter Puff Corn?
For the best results, keep your Easter Puff Corn in an airtight container at room temperature for up to a week. Remember to keep it away from heat and humidity to maintain its delightful crunch!
Can I freeze Easter Puff Corn?
Absolutely! To freeze your Easter Puff Corn, first, allow it to cool completely. Then, transfer it into a freezer-safe bag, ensuring all excess air is removed to prevent freezer burn. It can be stored for up to 3 months. When you’re ready to enjoy it, thaw it gently at room temperature.
What should I do if the chocolate coating is too thick?
If you find that the chocolate coating has become too thick while melting, don’t worry! Simply add an extra teaspoon of butter-flavored shortening to the bowl and return it to the microwave in 10-second intervals, stirring until you achieve a smoother consistency. This keeps your coating silky and easy to mix with the puff corn.
Are there any dietary considerations for pets?
It’s essential to note that chocolate can be toxic to dogs and other pets, so please keep your Easter Puff Corn out of their reach. If you’re looking to make a pet-friendly treat, consider replacing the candy melts with carob chips, which are safe for pets to enjoy!
How can I customize the sprinkles for different occasions?
The fun part about making Easter Puff Corn is the creative flexibility with sprinkles! For holidays beyond Easter, swap in themed sprinkles—red and green for Christmas, or even red, white, and blue for the Fourth of July! Just be sure to add them while the chocolate coating is still warm to ensure they stick perfectly.
Easter Puff Corn: Irresistibly Crunchy No-Bake Delight
Ingredients
Equipment
Method
- In a large mixing bowl, add puff corn, ensuring it is dry and free of moisture.
- Combine candy melts and butter-flavored shortening in a microwave-safe bowl. Microwave in 30-second intervals until melted.
- Pour the melted chocolate mixture over the puff corn and gently mix with a spatula until evenly coated.
- Spread the coated puff corn onto wax paper and sprinkle with Easter sprinkles.
- Allow to sit at room temperature until completely hardened, about 30 minutes.
- Once hardened, break apart clusters and transfer to an airtight container.
Leave a Reply