
As I rummaged through my pantry for a quick pick-me-up, I stumbled upon a tub of vanilla protein powder that sparked an irresistible idea. What if I satisfied my cookie dough cravings while staying healthy? Enter the No-Bake Chocolate Chip Cookie Dough Protein Balls. These delightful treats not only deliver the nostalgic taste of cookie dough but are also packed with protein and energy—perfect for busy days. Preparing these delicious bites takes mere minutes, allowing you to enjoy a nutritious snack without the hassle of baking. Plus, they’re versatile enough for anyone following a vegetarian or vegan lifestyle. Curious about how to whip up these protein-packed delights? Let’s dive in!
Why will you love these protein balls?
Irresistible Flavor: The combination of sweet cashew butter and rich chocolate offers a delightful taste that will satisfy any cookie dough craving.
Quick and Easy: With no baking required, these protein balls come together in just minutes, making them perfect for busy schedules.
Healthy Snack: Packed with protein and wholesome ingredients, they’re a guilt-free treat that provides lasting energy.
Customizable: Feel free to switch up the flavors! Substitute almond flour with oat flour or use peanut butter instead of cashew for new twists.
Perfect for Meal Prep: Make a batch ahead of time and enjoy them throughout the week as a quick snack or dessert option.
For more protein-rich snacks, check out our High Protein Triple Berry Bake and Easy Gluten-Free Chocolate Chip Cookies that will keep you fueled and satisfied!
Chocolate Chip Cookie Dough Protein Ingredients
-
For the Dough
-
Almond Flour – Provides structure and a soft texture; substitute with oat flour for a gluten-free option.
-
Vanilla Protein Powder – Adds protein and enhances the cookie dough flavor; use any flavor suitable for your dietary preference.
-
Cashew Butter – Acts as a binding agent and adds creaminess; substitute with almond or sunflower seed butter if preferred.
-
Milk (Dairy or Non-Dairy) – Adjusts the dough consistency to a manageable texture; use your choice of milk, adding more if needed.
-
Mini Chocolate Chips – Adds sweetness and chocolate flavor; use vegan chocolate chips for a plant-based version.
-
Honey or Maple Syrup – Sweetens the mixture; choose maple syrup for a vegan-friendly option.
-
Vanilla Extract – Enhances flavor depth; use pure vanilla extract for the best taste.
-
Salt – Balances sweetness and enhances flavor.
-
For the Coating
-
Chocolate Chips – Provides a rich outer layer; use dark chocolate for a less sweet alternative.
-
Coconut Oil – Helps to melt the chocolate smoothly; vegetable oil can be used as a substitute.
You’re all set to create these delicious Chocolate Chip Cookie Dough Protein Balls that will surely become your new favorite snack!
Step‑by‑Step Instructions for Chocolate Chip Cookie Dough Protein Balls
Step 1: Mix Dry Ingredients
In a large mixing bowl, whisk together 1 cup of almond flour, 1 scoop of vanilla protein powder, and a pinch of salt until fully combined. The mixture should be smooth without any clumps. This step sets the foundation for the rich flavor of your Chocolate Chip Cookie Dough Protein Balls, so take your time to ensure a thorough mix.
Step 2: Prepare Wet Mixture
In a separate bowl, combine ½ cup of cashew butter, 2 tablespoons of milk, ¼ cup of honey or maple syrup, and 1 teaspoon of pure vanilla extract. Whisk these ingredients together until the mixture is smooth and creamy, which will help bind the dry ingredients together beautifully.
Step 3: Combine Mixtures
Gradually fold the wet mixture into the dry ingredients, using a spatula to incorporate everything evenly. Mix until no dry bits remain visible and the dough starts to come together. The texture should be somewhat soft but not sticky, framing the delightful essence of cookie dough you’re aiming for.
Step 4: Fold in Chocolate Chips
Gently stir in ½ cup of mini chocolate chips, ensuring they are evenly distributed throughout the dough. This will enhance the cookie dough flavor in your Chocolate Chip Cookie Dough Protein Balls, giving each bite that sweet, chocolatey goodness to satisfy your cravings.
Step 5: Adjust Consistency
If the dough feels too dry and crumbly, add additional milk, a teaspoon at a time, and mix until the dough becomes slightly sticky, ensuring it can hold together when shaped. This is an essential step to achieve the perfect texture for your protein balls, so adjust carefully.
Step 6: Shape the Balls
Using your hands, roll the dough into 1-inch balls, placing them on a parchment-lined plate or baking sheet. Make sure to keep them evenly spaced to allow for easy handling later. This step creates the delightful, bite-sized treats to enjoy.
Step 7: Chill
Cover the plate with plastic wrap and refrigerate the protein balls for at least 30 minutes. Chilling helps them firm up, making them easy to handle and ensuring the rich flavors meld together nicely, boosting their deliciousness.
Step 8: Prepare Chocolate Coating
While the protein balls chill, melt 1 cup of chocolate chips and 1 tablespoon of coconut oil together in a microwave-safe bowl. Heat in 30-second intervals, stirring in between until the chocolate is smooth and glossy. This will create a delectable coating for your Chocolate Chip Cookie Dough Protein Balls.
Step 9: Dip the Balls
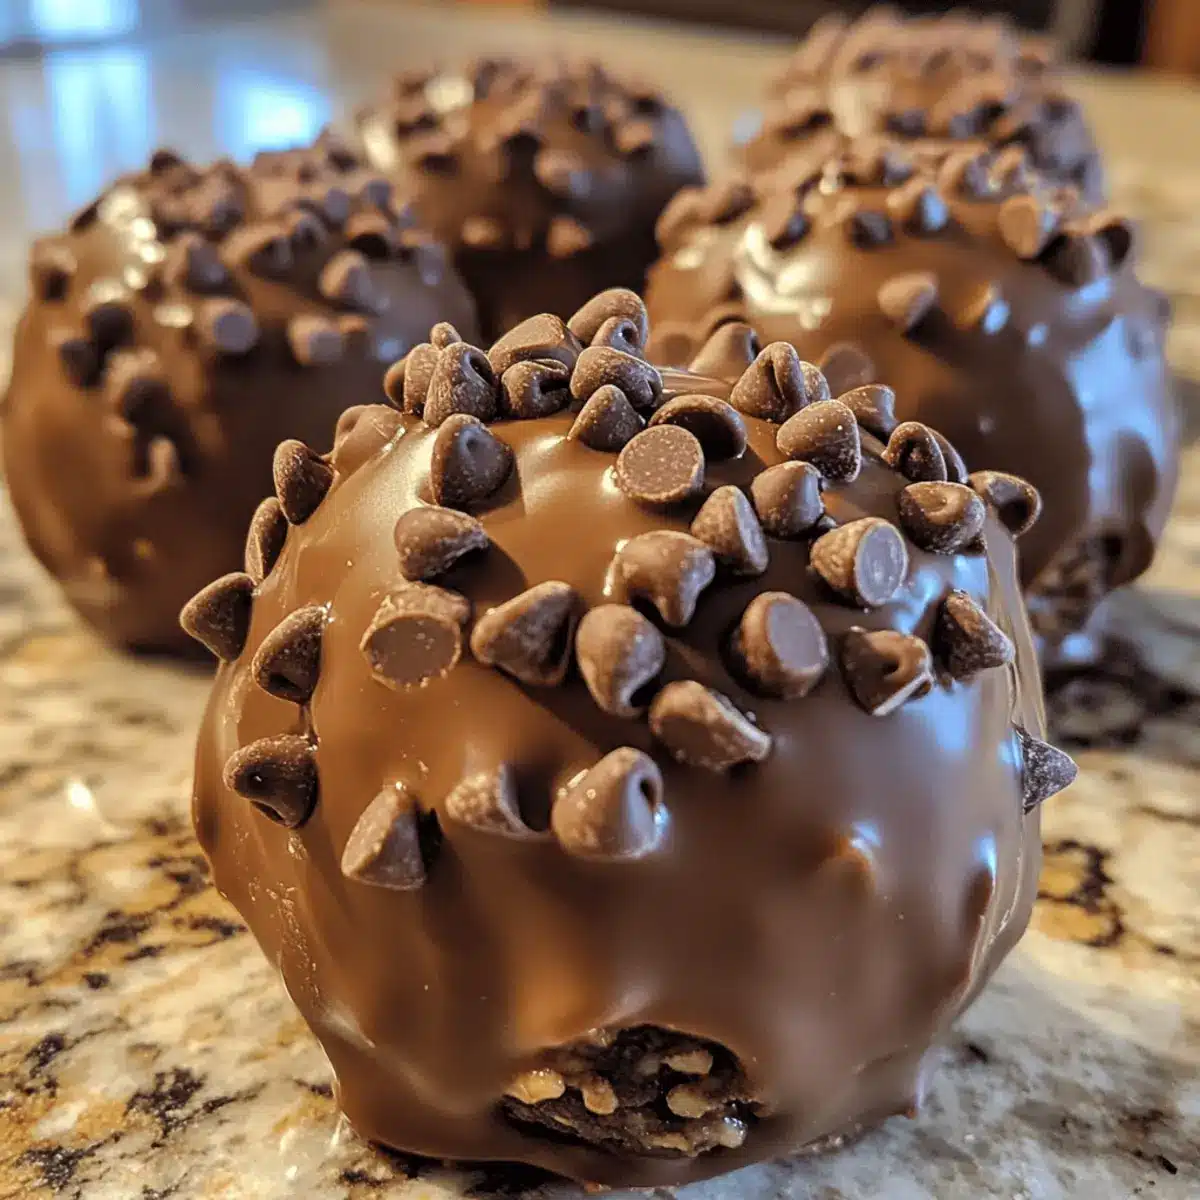
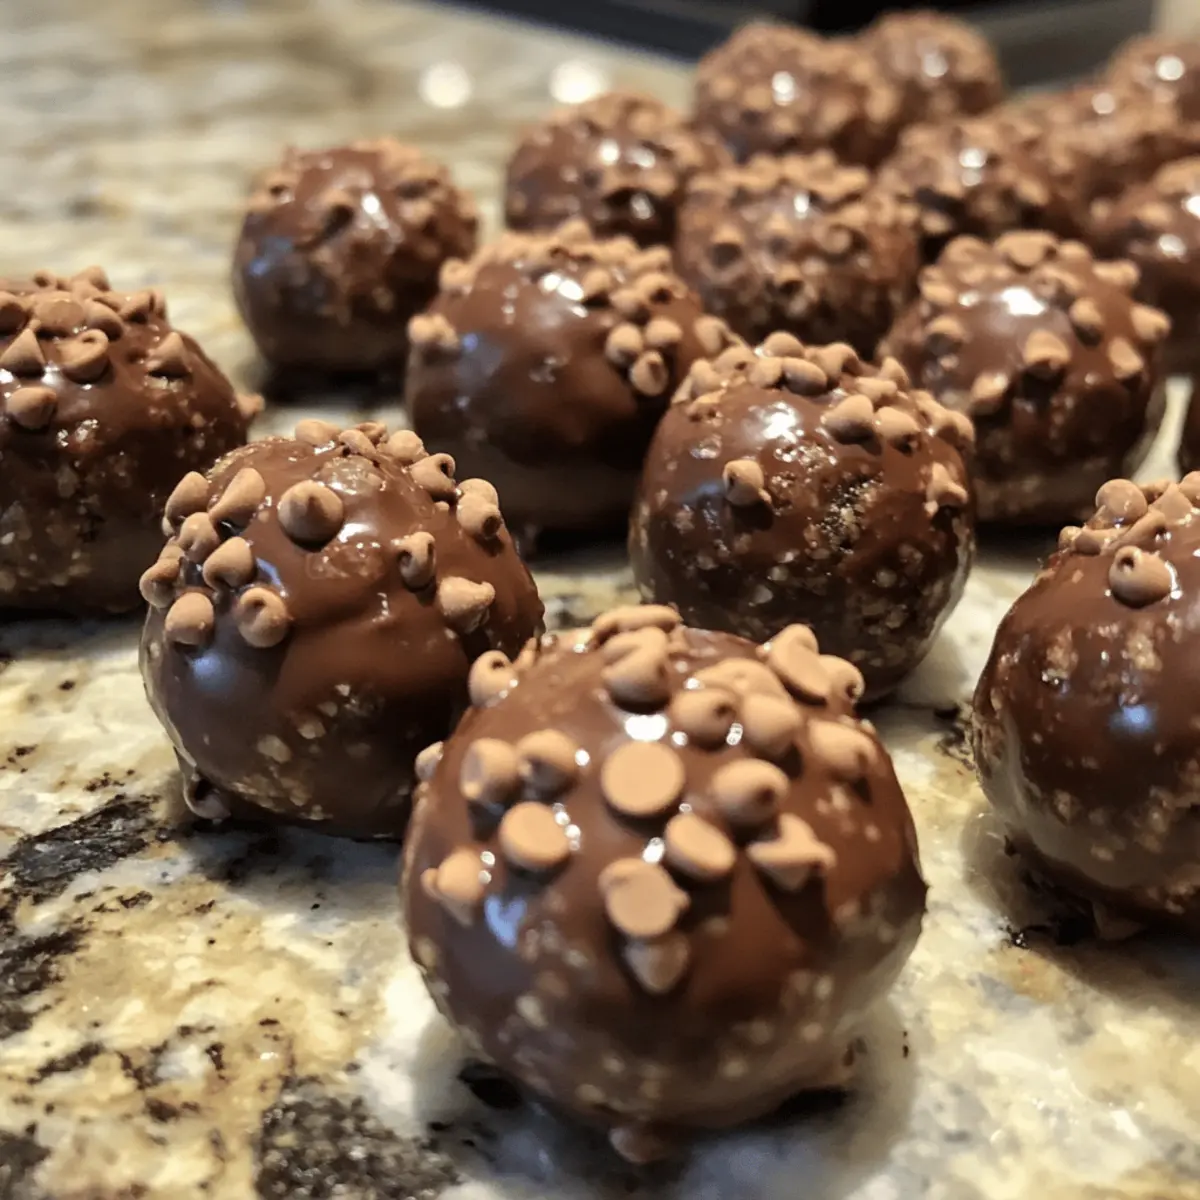
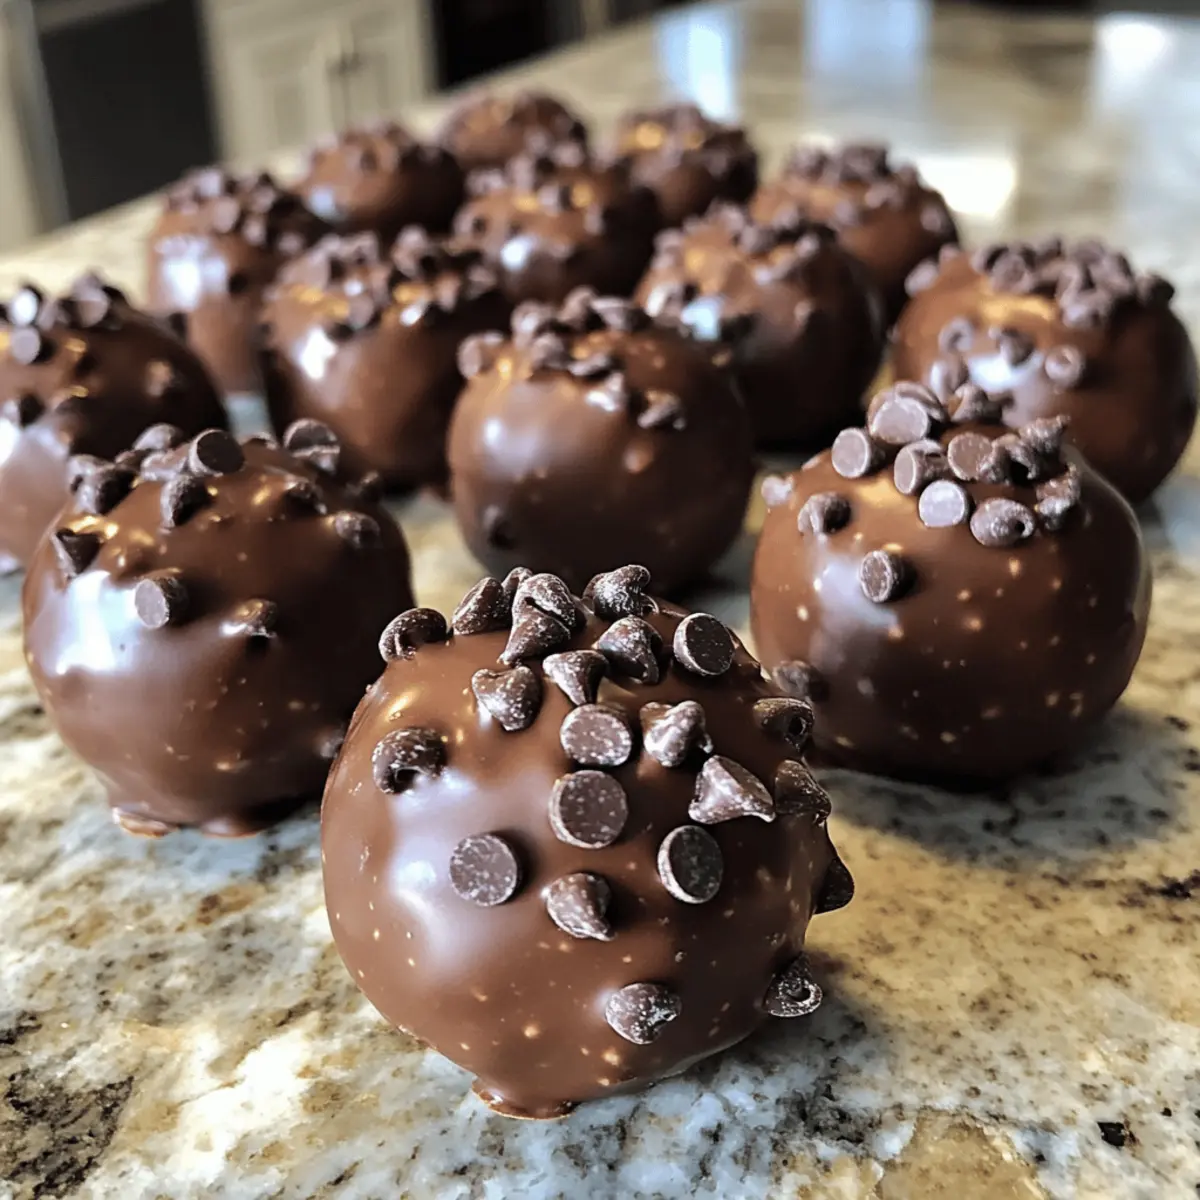
Remove the protein balls from the fridge and dip each one into the melted chocolate, ensuring they are evenly coated. Allow any excess chocolate to drip off, which should give them a beautifully smooth finish and enhance their visual appeal.
Step 10: Set
Sprinkle extra mini chocolate chips on top of the coated balls before placing them back on the parchment-lined plate. Refrigerate again until the chocolate sets, which will take about 15 to 20 minutes. This final step ensures a gorgeous look and satisfying bite.
Step 11: Serve and Store
Once the chocolate is set, your Chocolate Chip Cookie Dough Protein Balls are ready to enjoy! Keep them stored in an airtight container in the fridge for up to a week, making them a delicious, healthy snack whenever you need a quick energy boost.

Chocolate Chip Cookie Dough Protein Variations
Elevate your snacking experience by customizing these delightful protein balls with unique twists!
-
Gluten-Free: Substitute almond flour with oat flour or coconut flour to keep it gluten-free while maintaining that soft texture.
-
Nut-Free: Use sunflower seed butter in place of cashew butter for a delicious nut-free option that everyone can enjoy!
-
Vegan-Friendly: Replace honey with maple syrup and ensure you use a plant-based protein powder for all your vegan needs. You won’t miss out on any sweetness!
-
Extra Crunch: Incorporate chopped nuts, like walnuts or pecans, to add delightful crunch and enhance the texture of your protein balls.
-
Choco-Mint Delight: Add a few drops of peppermint extract to the wet mixture for a refreshing mint chocolate flavor that will invigorate your taste buds!
-
Fruit Explosion: Toss in mini dried fruits like cranberries or raisins for a burst of natural sweetness that pairs wonderfully with the chocolate undertones.
-
Spice It Up: Sprinkle a pinch of cinnamon into the dry ingredients for a warm, cozy flavor that brings unexpected depth and richness to your protein balls.
For even more delicious snacking options, consider checking out our Chocolate Chip Cookies or try these Crispy Chocolate Oat Cookies to add to your recipe repertoire!
Make Ahead Options
These Chocolate Chip Cookie Dough Protein Balls are fantastic for meal prep! You can prepare the dough and shape the balls up to 24 hours in advance. Simply follow the recipe up to Step 6, rolling the dough into balls, then place them in an airtight container in the refrigerator. When you’re ready to enjoy them, melt the chocolate coating (Step 8) and dip your protein balls. This ensures they’re just as delicious and fresh as if you made them right before serving. For even longer storage, freeze the uncoated protein balls for up to 3 months; just thaw and coat as needed for a quick snack or dessert!
What to Serve with No-Bake Chocolate Chip Cookie Dough Protein Balls
Elevate your snacking experience with delightful pairings that complement every chewy, chocolatey bite of these protein-packed treats.
-
Creamy Greek Yogurt: Its smooth, tangy texture pairs perfectly with the sweet protein balls, adding a rich creaminess to your snack time.
-
Fresh Berries: A medley of strawberries and blueberries brings a burst of freshness and acidity, balancing the sweetness of the cookie dough flavor.
-
Nutty Granola: Crunchy granola adds a satisfying crunch, making each bite a delightful mix of textures and flavors. You can sprinkle some over your protein balls for a fun twist!
-
Iced Herbal Tea: A refreshing iced herbal tea will cleanse your palate, enhancing the chocolatey richness of the protein balls while providing a soothing beverage.
-
Smoothie Bowl: Serve with a smoothie bowl topped with banana slices and seeds for a nourishing, colorful treat that complements the protein and sweetness of your snacks.
-
Dark Chocolate-Covered Almonds: The additional chocolate and nutty flavor from these treats bring out the delicious chocolate undertones of the protein balls, creating a decadent experience.
-
Oatmeal: A warm bowl of oatmeal topped with sliced bananas and drizzled honey pairs beautifully as a wholesome breakfast option alongside your protein bite.
-
Chia Seed Pudding: This silky, nutrient-dense pudding is a fantastic way to enjoy more plant-based power and adds an interesting contrast in flavor.
-
Coconut Water: Hydrating and naturally sweet, coconut water provides a light beverage option that complements the rich flavors of the protein balls without being overwhelming.
How to Store and Freeze Chocolate Chip Cookie Dough Protein Balls
Fridge: Store these protein balls in an airtight container for up to 1 week. Keeping them chilled helps maintain their delicious flavor and chewy texture.
Freezer: For longer storage, freeze the protein balls in a single layer, then transfer to a freezer-safe bag. They can last up to 3 months!
Thawing: When you’re ready to enjoy, simply remove them from the freezer and let them thaw at room temperature for about 15 minutes or overnight in the fridge.
Reheating: You can also microwave them for 10-15 seconds if you prefer a warm, melty treat; just be careful not to overheat!
Expert Tips for Chocolate Chip Cookie Dough Protein Balls
-
Fresh Ingredients: Always use fresh ingredients, especially your protein powder, to amplify flavor and ensure these protein balls are as nutritious as possible.
-
Dough Consistency: If your dough feels dry, gradually add milk until it achieves a slightly sticky texture. Avoid adding too much too fast to maintain the ideal consistency.
-
Vegan Alternatives: To make these Chocolate Chip Cookie Dough Protein Balls vegan, opt for plant-based protein powder, non-dairy milk, and vegan chocolate chips, ensuring everyone can enjoy them!
-
Proper Storage: Store your protein balls in an airtight container in the refrigerator to keep them fresh and tasty. They can even be frozen for longer shelf life!
-
Experiment Freely: Feel free to customize your batches by swapping almond flour with oat flour or peanut butter for a twist on flavor and texture!
Chocolate Chip Cookie Dough Protein Balls Recipe FAQs
How do I pick the right almond flour?
Absolutely! When selecting almond flour, look for finely ground varieties without added sugars or preservatives. It’s best to opt for blanched almond flour, which has a lighter texture. This choice will help achieve that soft, chewy consistency in your No-Bake Chocolate Chip Cookie Dough Protein Balls.
How should I store my protein balls?
Very! To store your protein balls, place them in an airtight container and keep them in the refrigerator for up to 1 week. This method helps maintain their freshness and texture. For longer-lasting storage, consider freezing them!
Can I freeze Chocolate Chip Cookie Dough Protein Balls?
Yes, you can freeze these tasty protein balls! After shaping them, lay the balls in a single layer on a parchment-lined plate and freeze until solid, about 1 to 2 hours. Once frozen, transfer them to a freezer-safe bag or container. They can last up to 3 months in the freezer!
What should I do if my dough is too sticky?
If your dough becomes too sticky, start by adding a tablespoon of almond flour until the desired consistency is achieved. Mix thoroughly and see if it meets your needs. You can also chill the dough for 15-30 minutes to help firm it up, making it easier to roll into balls.
Are there any common allergens in this recipe?
Yes, as this recipe contains almond flour and cashew butter, it’s not suitable for those with nut allergies. You can substitute these with sunflower seed butter and sunflower seed flour for a nut-free version. Always check ingredient labels for allergies, especially with protein powders and other add-ins!
How long do these protein balls last in the fridge?
These No-Bake Chocolate Chip Cookie Dough Protein Balls can be stored in the refrigerator for up to 1 week. Just make sure they’re in an airtight container to keep them fresh and chewy for longer!
Chocolate Chip Cookie Dough Protein Balls You’ll Crave Daily
Ingredients
Equipment
Method
- In a large mixing bowl, whisk together almond flour, vanilla protein powder, and salt until fully combined.
- In a separate bowl, combine cashew butter, milk, honey or maple syrup, and vanilla extract. Whisk until smooth.
- Gradually fold the wet mixture into the dry ingredients using a spatula. Mix until no dry bits remain.
- Gently stir in mini chocolate chips until evenly distributed.
- If the dough feels too dry, add additional milk gradually until it becomes slightly sticky.
- Roll the dough into 1-inch balls and place on a parchment-lined plate.
- Cover and refrigerate the protein balls for at least 30 minutes.
- Melt chocolate chips and coconut oil together in a microwave-safe bowl, heating in intervals until smooth.
- Dip each protein ball into the melted chocolate, ensuring an even coat.
- Sprinkle extra mini chocolate chips on top before placing them back on the parchment-lined plate.
- Refrigerate again until the chocolate sets.
- Store in an airtight container in the fridge for up to a week.
Leave a Reply