
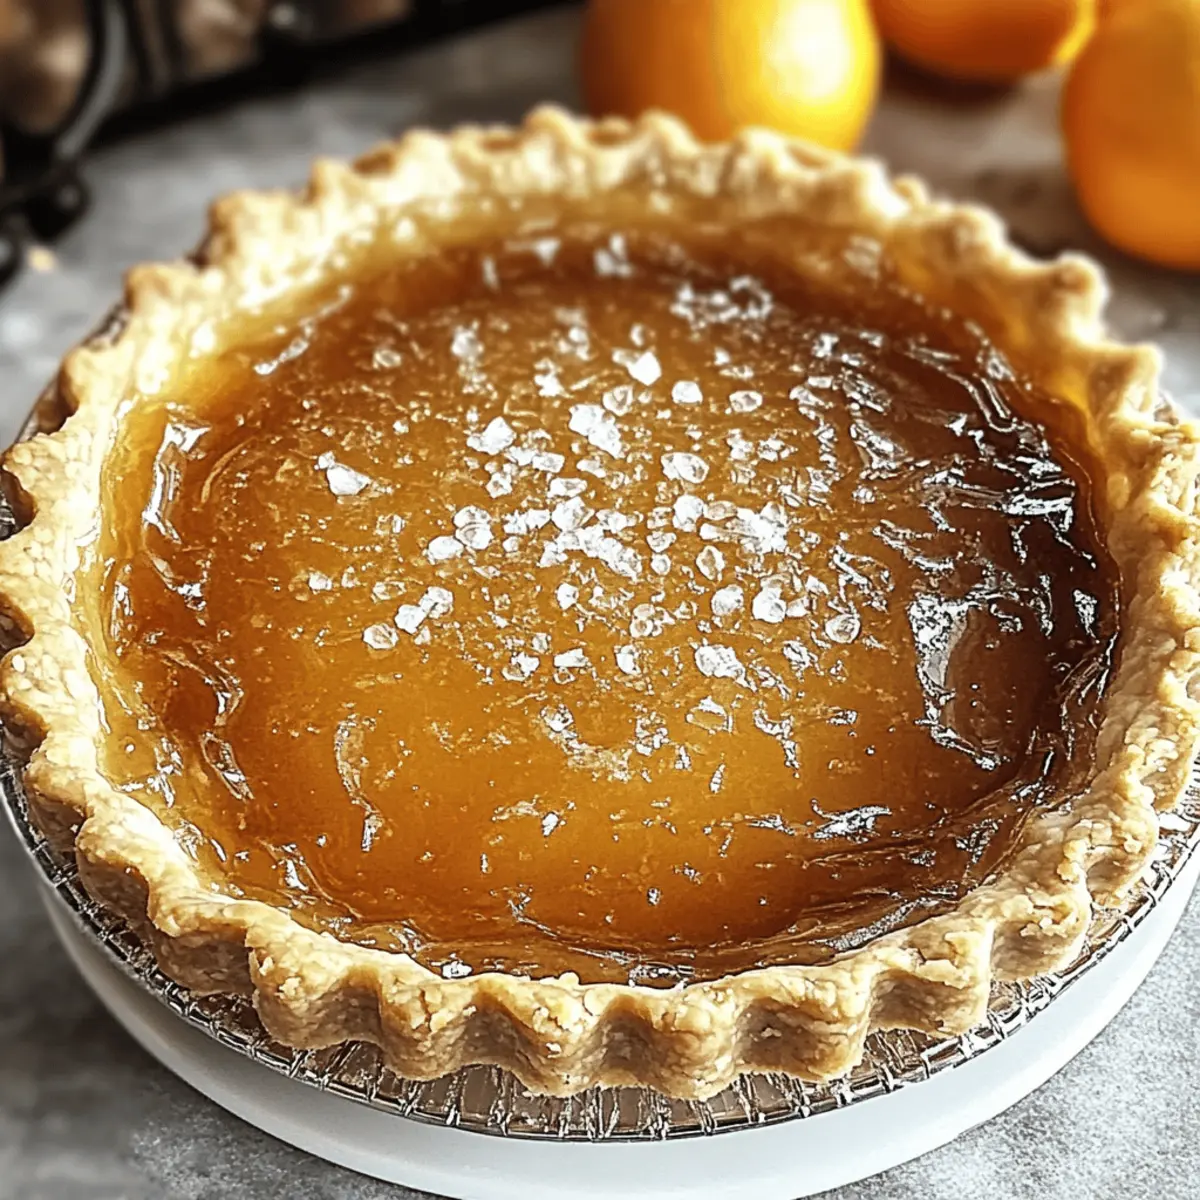
As I stood in my kitchen, the comforting aroma of honey wafted through the air, and I felt a wave of nostalgia wash over me. This Easy Salted Honey Pie is not just a dessert; it’s a sweet reminder of simpler times, brought to life with just a handful of basic ingredients. With a prep time of only ten minutes, this no-bake treat is perfect for those evenings when you crave something delightful without a fuss. Imagine a smooth, creamy filling beneath a flaky crust, where a dash of flaky salt elevates the natural sweetness of honey. It’s a dessert that pleases the palate and fits effortlessly into a busy lifestyle. Want to impress your family or friends with a quick yet stunning finale to dinner? Let’s dive into this incredibly easy recipe that’s guaranteed to have everyone asking for seconds! Ready to sweeten up your next gathering?

Why is Salted Honey Pie so special?
Simplicity: This recipe only takes ten minutes of preparation, making it a breeze for busy home cooks!
Decadent Flavor: The combination of honey and flaky salt creates a sweet and salty balance that tantalizes your taste buds with every bite.
Versatility: With a gluten-free option and the ability to tweak the ingredients, like using maple syrup or coconut cream, it caters to various dietary needs.
Crowd-Pleaser: Perfect for gatherings or weeknight dinners, this pie promises to become a favorite among family and friends.
No-Bake Delight: Whether you’re a novice or a seasoned chef, this dessert requires no complex techniques, making it ideal for anyone looking to impress—just like my Hot Honey Chicken dish!
Indulging in this Easy Salted Honey Pie will leave you feeling nostalgic while enjoying a modern take on a classic dessert.
Salted Honey Pie Ingredients
For the Pie Crust
- Pie Crust – Use a store-bought one for convenience, or make your own for a homemade touch; gluten-free options are available too.
For the Filling
- Honey – This star ingredient provides natural sweetness; maple syrup can be a fun twist if you’re feeling adventurous!
- Heavy Cream – Adds a rich, creamy texture; for a lighter version, substitute with coconut cream to keep it dairy-free.
- Unsalted Butter – Enhances the flavor; opt for coconut oil or vegan butter for a dairy-free alternative.
- Flaky Sea Salt – A sprinkle right before serving elevates the sweetness of the pie, making it a standout treat.
Enjoy whipping up this Easy Salted Honey Pie—it’s the perfect quick dessert to please everyone at the table!
Step‑by‑Step Instructions for Easy Salted Honey Pie
Step 1: Preheat Your Oven
Begin by preheating your oven to 350°F (175°C) to ensure even baking for your Easy Salted Honey Pie. This step is crucial for achieving that perfect crust texture. While the oven warms up, gather all your ingredients and equipment, including a mixing bowl, whisk, and a pie plate.
Step 2: Prepare the Pie Crust
Take your chosen pie crust, whether store-bought or homemade, and roll it out flat. Carefully press the crust into a 9-inch pie plate, crimping the edges if you desire a decorative look. This flaky base will hold your rich honey filling beautifully, so ensure it fits snugly in the plate.
Step 3: Whisk the Filling Together
In a medium bowl, combine the eggs, honey, heavy cream, melted butter, and a pinch of salt. Use a whisk to blend the ingredients thoroughly until the mixture is smooth and well-combined, roughly 2-3 minutes. If you like, you can add a splash of vanilla extract for an added layer of flavor before pouring it into the crust.
Step 4: Fill the Crust
Once your honey filling is smooth, gently pour it into the prepared pie crust. Take care not to overfill; you want just enough to reach the edge of the crust without spilling over. The warm honey mixture will create a beautiful, creamy texture as it bakes, so make sure it’s evenly distributed.
Step 5: Bake the Pie
Place your pie in the preheated oven and let it bake for 35-40 minutes. You’ll know it’s done when the filling is set with just a slight jiggle in the center, resembling a delicate custard. This visual cue indicates that the Easy Salted Honey Pie has reached the right consistency.
Step 6: Cool the Pie
After baking, carefully remove the pie from the oven and allow it to cool completely at room temperature. This cooling process is essential for the pie to set properly. Once cooled, transfer it to the refrigerator and chill for at least 2 hours, ensuring every bite is creamy and delicious.
Step 7: Serve and Enjoy
Just before serving your Easy Salted Honey Pie, sprinkle a touch of flaky sea salt on top to enhance the sweetness. Slice the pie into generous servings, and share it among friends and family, embracing the grateful smiles and delight this dessert brings!
Expert Tips for Salted Honey Pie
• Smooth Filling: Always whisk the filling thoroughly until completely smooth to avoid lumps that could affect the texture of your Salted Honey Pie.
• Don’t Overfill: Pour the filling carefully into the crust, stopping just below the edge. Overfilling can cause spillage during baking, ruining the pie’s look.
• Cool Time Matters: Allow the pie to cool to room temperature before chilling in the fridge. This step is essential for achieving the perfect set and developing flavor.
• Sprinkle Just Before Serving: Add the flaky sea salt right before serving. This enhances the flavor beautifully without losing its crunch and elevates the sweetness of the honey.
• Chill for Best Results: Refrigerate for at least 2 hours after cooling to achieve that creamy, luscious filling. This makes each bite exceptionally enjoyable!
Make Ahead Options
These Easy Salted Honey Pies are perfect for busy home cooks looking to save time! You can prepare the pie crust and filling up to 24 hours in advance. To do this, create your crust and fill it with the honey mixture, then cover it tightly with plastic wrap before refrigerating. This helps prevent any dryness while maintaining the pie’s creamy texture. When you’re ready to bake, just pop the assembled pie into a preheated oven and bake as directed. Remember to let it cool completely at room temperature, and chill in the fridge for at least 2 hours before serving. This way, you’ll enjoy a delicious dessert that’s just as delightful as if made fresh!
Salted Honey Pie Variations
Feel free to explore these delightful twists and substitutions for your Salted Honey Pie to truly make it your own!
-
Maple Syrup: Swap honey for maple syrup for a uniquely warm flavor, adding a delightful twist to the original recipe.
-
Coconut Cream: Use coconut cream instead of heavy cream for a dairy-free alternative, creating a luscious filling with a hint of tropical flavor.
-
Vegan Version: Replace the eggs with flax eggs and use vegan butter in place of unsalted butter to create a completely plant-based pie that everyone can enjoy!
-
Nutty Crust: Instead of a traditional pie crust, use crushed almonds or walnuts mixed with a little melted butter for a deliciously nutty base that complements the honey perfectly.
-
Flavor Boost: Add a teaspoon of cinnamon or nutmeg to the filling mixture for a warm, cozy flavor that elevates the pie to another level!
-
Whipped Cream Topping: Top your pie with a generous dollop of freshly whipped cream or a scoop of vanilla ice cream before serving for an extra touch of indulgence.
-
Spicy Kick: Sprinkle a pinch of cayenne pepper into the filling for an unexpected spicy note that enhances the sweetness of the honey beautifully!
-
Serving Suggestions: Pair your Salted Honey Pie with a cup of Hot Honey Chicken for a delightful meal or enjoy alongside a slice of Hot Honey Pepperoni Pizza for a fun flavor combination that will surprise your guests!
What to Serve with Easy Salted Honey Pie
Imagine unlocking a world of flavors that complement the creamy sweetness of your pie while creating a complete dining experience.
- Vanilla Ice Cream: A scoop of creamy vanilla ice cream adds a rich, cold contrast to the warm pie, enhancing its sweetness.
- Fresh Berries: Juicy raspberries or blueberries introduce a tartness that balances the honey’s sweetness, bringing freshness to each bite.
- Whipped Cream: A light dollop of sweetened whipped cream offers a soft texture and lightness, making each slice feel indulgent without being heavy.
- Coffee: A robust cup of coffee cuts through the dessert’s sweetness, creating a delightful pairing that’s energizing and satisfying.
- Chai Tea: The warm spices in chai tea complement the honey beautifully, adding complexity and a cozy touch to your dessert experience.
- Crushed Graham Crackers: Sprinkle some crushed graham crackers on top for a delightful crunch that enhances the pie’s flaky crust and adds texture.
- Mint Sprigs: Fresh mint adds a pop of color and a refreshing aroma, making this dessert feel elegant while lifting the flavor profile.
- Dark Chocolate Shavings: A sprinkle of dark chocolate adds richness and sophistication that pairs beautifully with the sweet honey filling.
- Lemon Sorbet: For a refreshing twist, a scoop of lemon sorbet cleanses the palate and adds a zesty contrast to the pie’s sweetness.
Storage Tips for Salted Honey Pie
Fridge: Store any leftover Salted Honey Pie in an airtight container in the refrigerator for up to 3-4 days. Covering it helps prevent the crust from becoming soggy.
Freezer: If you want to keep the pie longer, you can freeze it for up to 2 months. Wrap it tightly in plastic wrap and then in aluminum foil to protect against freezer burn.
Thawing: To enjoy frozen Salted Honey Pie, thaw it in the fridge overnight. Before serving, sprinkle with flaky sea salt for maximum flavor.
Reheating: If you prefer the pie warm, place it in a 350°F (175°C) oven for about 10-15 minutes, checking frequently to avoid overheating the filling.
Easy Salted Honey Pie Recipe FAQs
What kind of honey should I use for the pie?
I recommend using high-quality, pure honey for the best flavor in your Easy Salted Honey Pie. Organic or wildflower honey can bring unique notes to your dessert. Avoid processed honey, as it may alter the taste and texture you want to achieve.
How should I store leftovers?
Any leftover Salted Honey Pie should be stored in an airtight container in the refrigerator for up to 3-4 days. Make sure to cover it to prevent the crust from becoming soggy. The pie will keep its delicious flavor and texture longer if stored properly!
Can I freeze the pie?
Absolutely! To freeze your Easy Salted Honey Pie, wrap it tightly in plastic wrap or aluminum foil after it has cooled completely. It can be kept in the freezer for up to 2 months. When you’re ready to enjoy it, thaw the pie in the refrigerator overnight for the best results.
What if my filling didn’t set properly?
If your filling doesn’t set as expected, it may be due to underbaking. Be sure to bake your pie for the full 35-40 minutes until there is a slight jiggle in the center. If you find yourself with a runny filling, don’t worry! You can pour it back into a pot, gently reheat, and whisk in an additional egg to help thicken it before re-baking.
Is this pie safe for my gluten-free friends?
Yes! You can easily make this Easy Salted Honey Pie gluten-free by using a gluten-free pie crust or crushed graham cracker cookies as a base. Just be sure to check the labels on your ingredients to ensure they’re gluten-free, especially the honey and any alternative dairy products you might use.
Can I make the pie ahead of time?
Definitely! The pie can be made 1-2 days in advance. Just keep it covered in the fridge to maintain freshness. Remember to sprinkle the flaky sea salt just before serving to ensure it remains crispy and flavorful.
Irresistible Salted Honey Pie That Melts in Your Mouth
Ingredients
Equipment
Method
- Preheat your oven to 350°F (175°C). Gather all your ingredients and equipment.
- Prepare your pie crust by rolling it out flat and pressing it into a 9-inch pie plate.
- In a medium bowl, whisk together eggs, honey, heavy cream, melted butter, and a pinch of salt until smooth.
- Pour the smooth honey filling into the prepared pie crust without overfilling.
- Bake in the preheated oven for 35-40 minutes until the filling is set with a slight jiggle.
- Allow the pie to cool completely at room temperature.
- Refrigerate the cooled pie for at least 2 hours to set properly.
- Before serving, sprinkle flaky sea salt on top and slice into servings.
Leave a Reply