
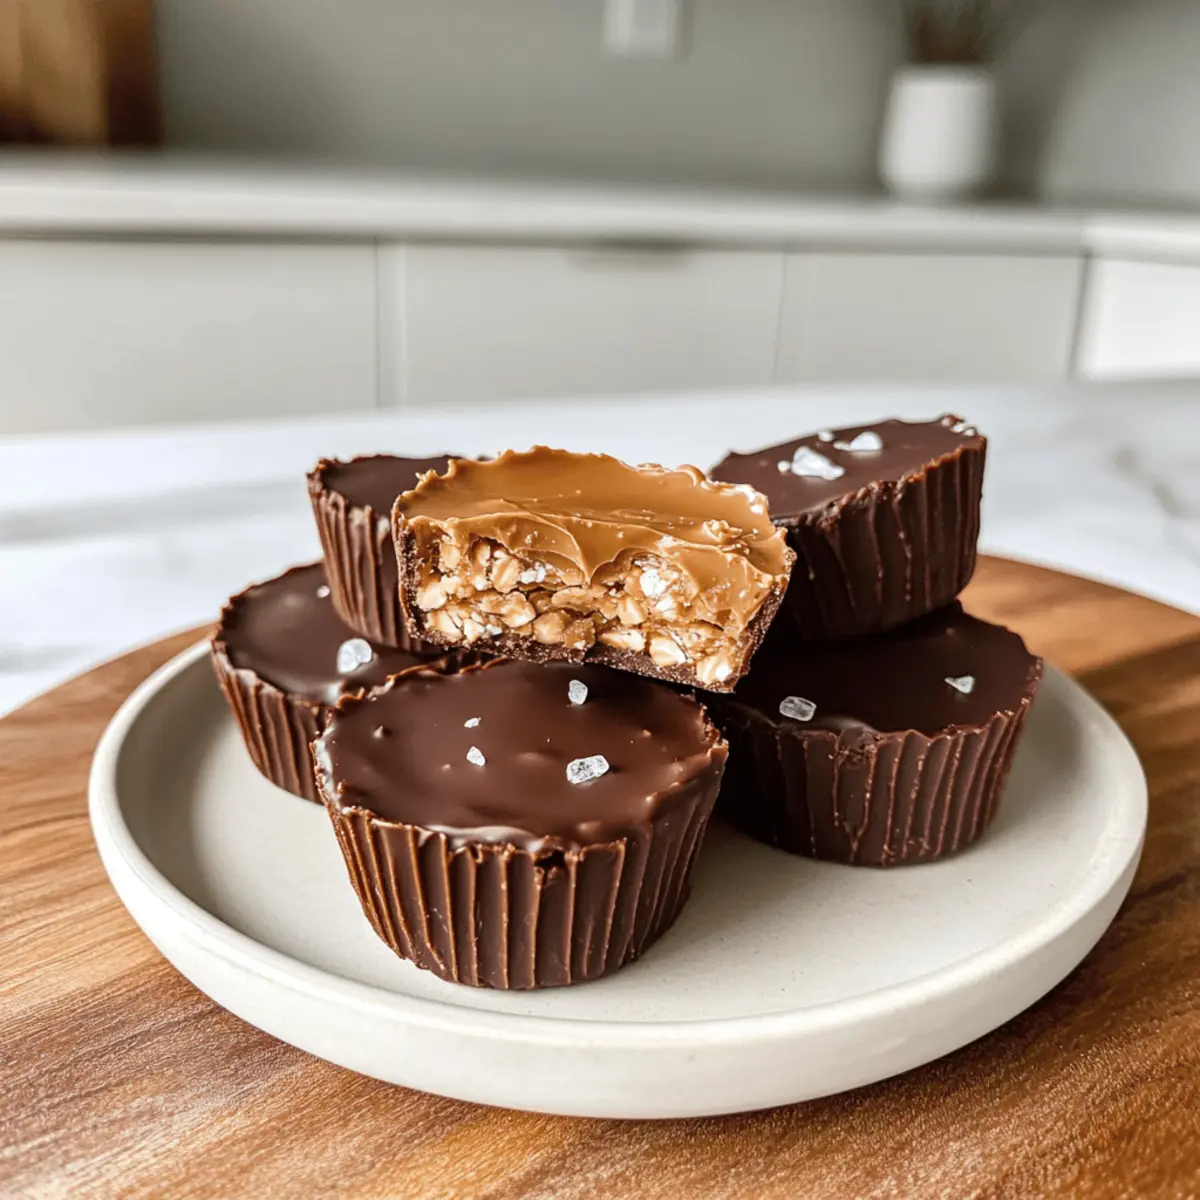
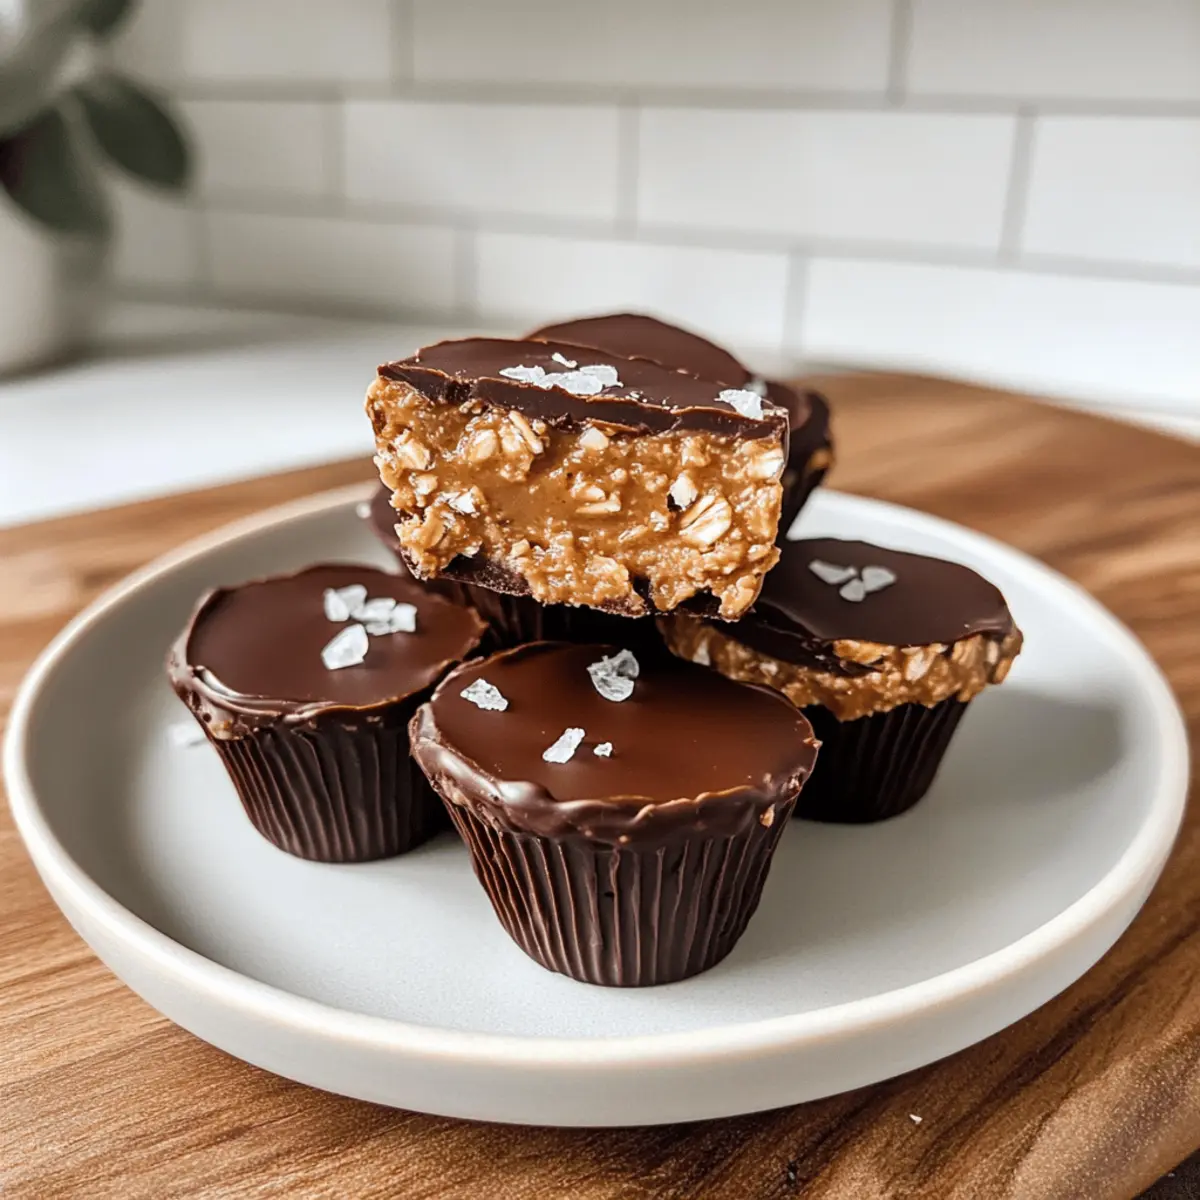
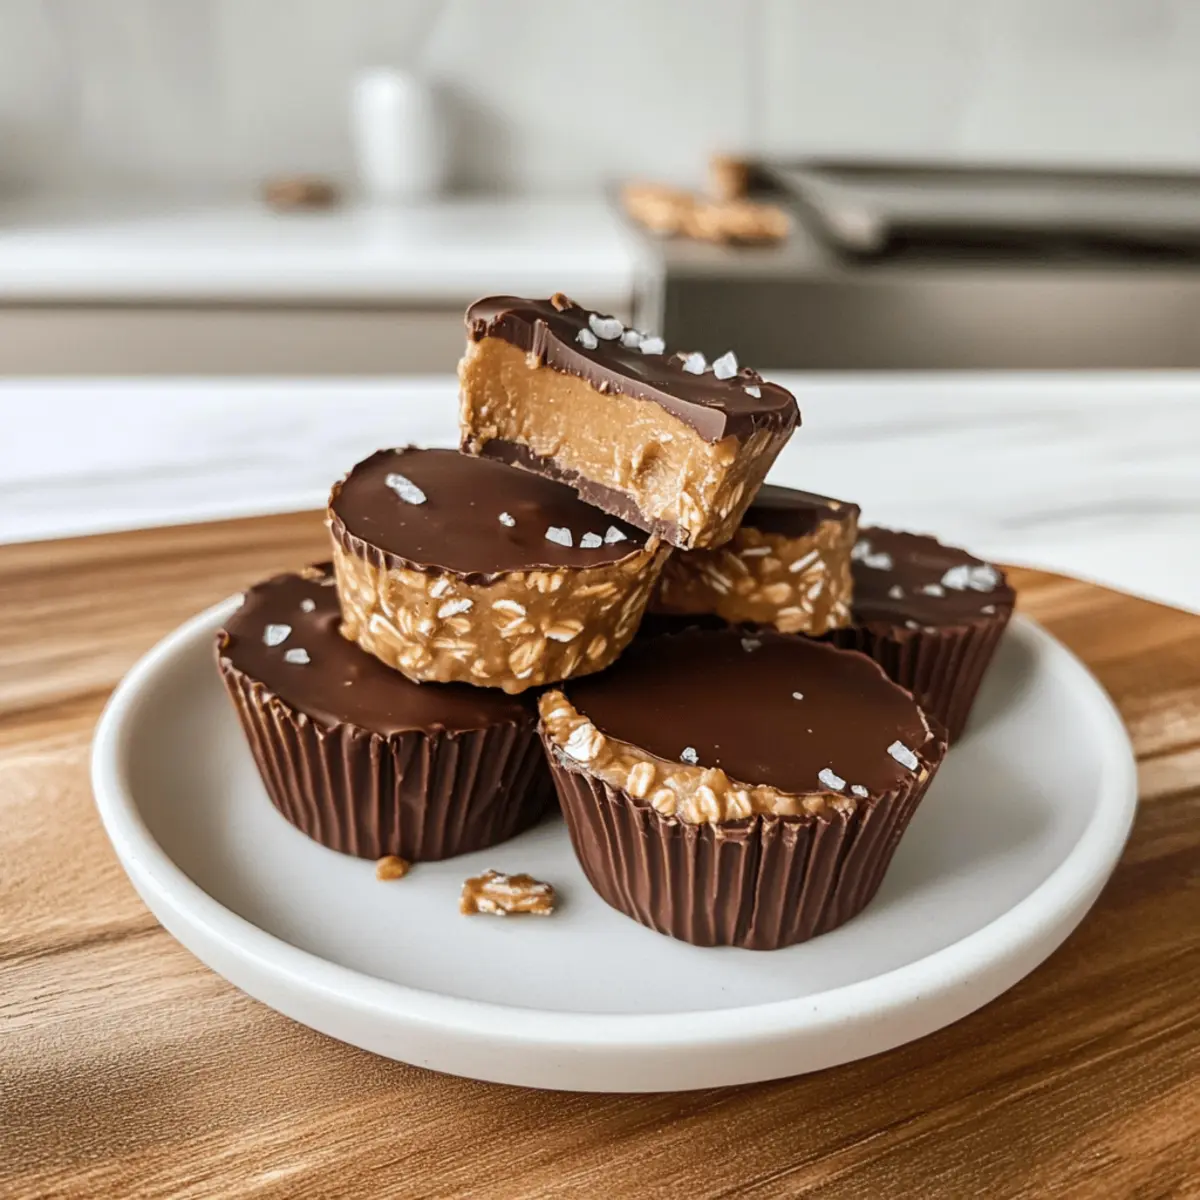
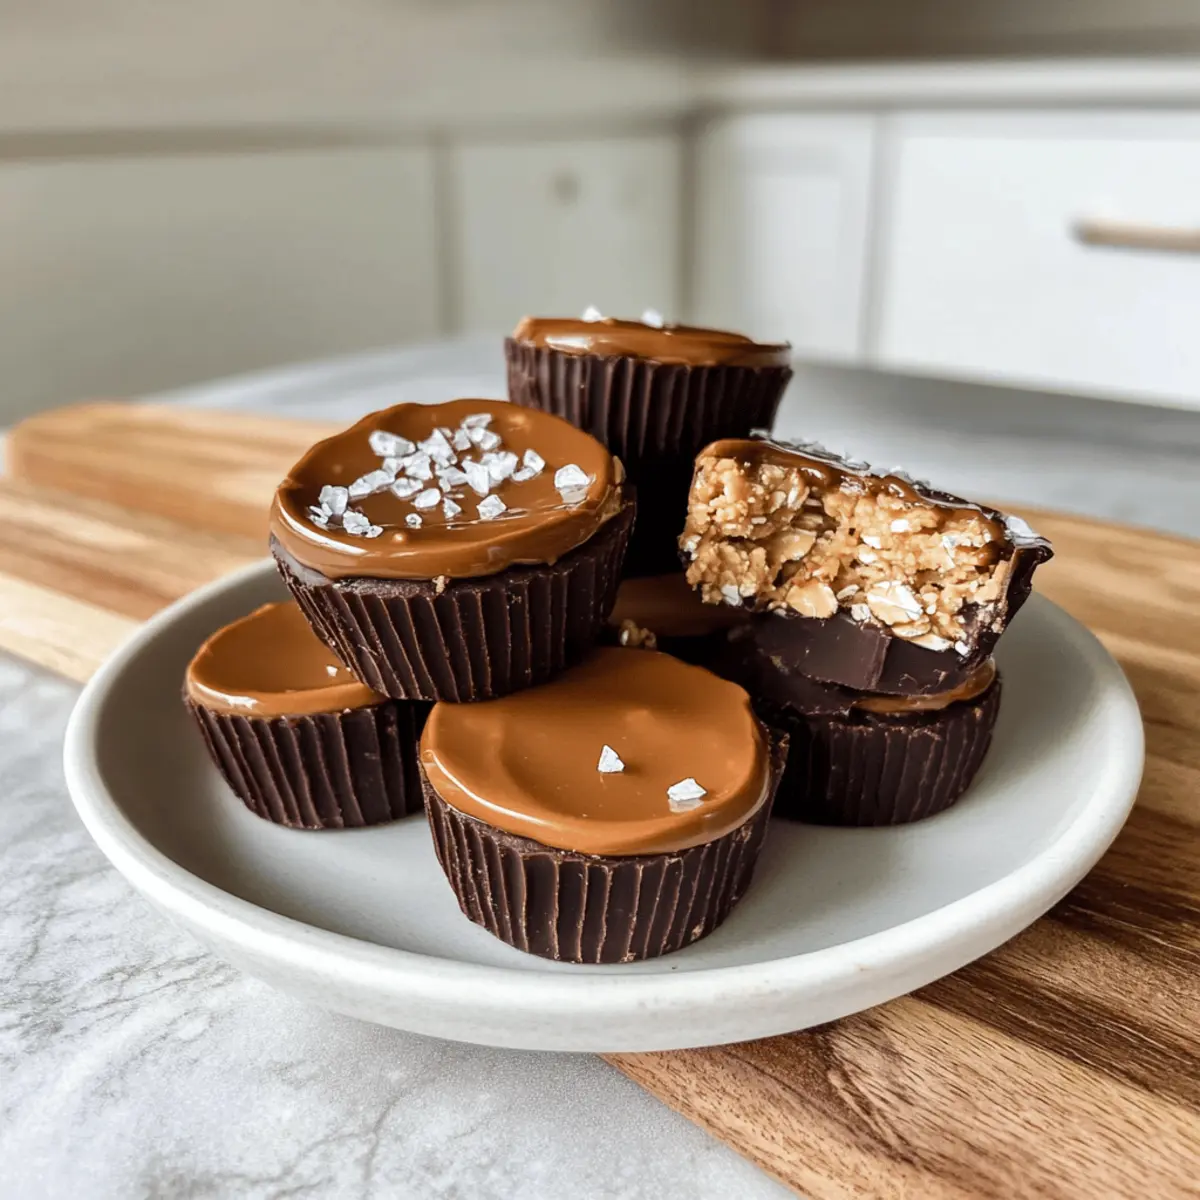
As I rummaged through my pantry, looking for a quick remedy to satisfy my sweet tooth, I stumbled upon a jar of creamy peanut butter and some old-fashioned rolled oats. That’s when it hit me—why not whip up some Peanut Butter Oat Cups? These delectable no-bake treats come together in under 20 minutes, making them a lifesaver for anyone in need of a speedy snack. Not only are they irresistible with their soft, chewy texture, but they’re also gluten-free and vegan, ensuring everyone can indulge without worries. The delightful combination of flavors topped with rich melted chocolate takes the classic peanut butter experience to a whole new level. Curious about how to make these easy and healthy snacks? Let’s dive into the recipe!
Why Are Peanut Butter Oat Cups Amazing?
Deliciously Indulgent: These Peanut Butter Oat Cups offer a creamy, dreamy texture paired with rich chocolate, satisfying even the most intense sweet cravings.
No-Bake Convenience: Ready in just 20 minutes, these treats are perfect for anyone looking to whip up a quick snack without turning on the oven.
Healthy Ingredients: Packed with wholesome ingredients like peanut butter and rolled oats, they’re not only delicious but also healthy, fitting into gluten-free and vegan diets beautifully.
Customizable Delight: Feel free to add nuts, dried fruits, or experiment with different nut butters for a unique twist! They’re versatile enough to cater to everyone’s taste buds.
Crowd-Pleasing Treat: Whether for kids or adults, these oat cups will be a hit at parties or casual gatherings—everyone will be coming back for more!
Peanut Butter Oat Cups Ingredients
For the Oat Mixture
• Peanut butter – Use natural peanut butter for the best flavor and creaminess.
• Old-fashioned rolled oats – Acts as the base; quick oats can be used but may alter the texture.
• Maple syrup – Adds sweetness; honey or agave can work as an excellent substitute.
For the Topping
• Dollop of peanut butter – Optional topping for extra richness on each oat cup.
• Chocolate chips (melted) – Use dairy-free chocolate for a vegan version; melts beautifully over the oat mixture.
• Flaky sea salt (optional) – Enhances sweetness and provides a delightful flavor contrast.
For Added Nutrition
• Protein powder – Optional ingredient for an extra protein boost; choose your preferred type.
Step‑by‑Step Instructions for Peanut Butter Oat Cups
Step 1: Mix Peanut Butter and Maple Syrup
In a medium mixing bowl, combine 1 cup of natural peanut butter with 1/2 cup of maple syrup. Use a spatula to thoroughly mix the ingredients until they form a smooth and creamy consistency. This should take about 2-3 minutes. The mixture will have a pleasant, glossy appearance, indicating it’s well-combined and ready for the oats.
Step 2: Add Rolled Oats
Next, incorporate 2 cups of old-fashioned rolled oats into the peanut butter mixture. Stir with your spatula, ensuring the oats are evenly coated and a thick dough starts to form. This should take about 2 minutes. The dough will be slightly sticky but should hold together well when pressed.
Step 3: Press Mixture into Molds
Prepare your silicone molds by ensuring they are clean and dry. Using a spoon or cookie scoop, portion out about 2 tablespoons of the oat mixture and press it firmly into each mold. Aim for a nice, even layer that fills the mold completely. This step will take around 5-7 minutes. You want each oat cup to be compact to hold its shape when set.
Step 4: Chill with Optional Topping
For an extra touch of creaminess, add a small dollop of peanut butter on top of each oat cup. If you’re using protein powder, mix it with a bit of peanut butter and spread that mixture on top instead. Place the molds in the freezer for about 20 minutes, allowing the cups to firm up and hold their shape.
Step 5: Melt Chocolate Chips
While the oat cups are chilling, it’s time to melt 1 cup of chocolate chips. In a microwave-safe bowl, add the chocolate chips along with a teaspoon of oil for smoothness. Heat in the microwave at 30-second intervals, stirring well between each interval until the chocolate is fully melted and silky, which should take about 1.5-2 minutes.
Step 6: Drizzle Chocolate Over Oat Cups
Once the oat cups have set in the freezer, remove them and carefully drizzle the melted chocolate over each one using a spoon. You can be generous here—let the chocolate cascade nicely over the edges. After this, return the molds to the freezer for another 20 minutes to allow the chocolate to harden completely.
Step 7: Release and Add Sea Salt
Once the chocolate has set and is firm to the touch, gently pop the Peanut Butter Oat Cups out of the silicone molds. If desired, sprinkle a pinch of flaky sea salt on top of each cup for a delicious contrast to the sweetness. Arrange them on a serving plate, and they are ready to enjoy!
How to Store and Freeze Peanut Butter Oat Cups
Fridge: Keep your Peanut Butter Oat Cups in an airtight container in the fridge for up to 1 week. This keeps them fresh and ready to enjoy anytime.
Freezer: For longer storage, freeze the oat cups in a single layer on a baking sheet before transferring to a freezer-safe container. They will stay good for up to 3 months.
Thawing: When ready to enjoy, simply remove from the freezer and let them thaw at room temperature for about 15 minutes for the best texture.
Reheating: If desired, you can gently warm them in the microwave for a few seconds, but be careful not to melt the chocolate too much.
Peanut Butter Oat Cups Variations
Feel free to get creative with these Peanut Butter Oat Cups and make them your own delicious experience!
-
Nut-Free Option: Substitute peanut butter with sunflower seed butter for a delightful nut-free treat everyone can enjoy!
-
Fruity Delight: Add 1/2 cup of dried cranberries or raisins into the oat mixture. It’ll give an unexpected chewy burst of flavor in every bite!
-
Chocolate Lovers: Mix in dark chocolate chunks or cocoa powder for an extra chocolaty twist. The rich chocolate flavor will take your treats to the next level!
-
Protein Boost: Incorporate a scoop of your favorite protein powder into the oat mixture. It’s a simple way to enhance nutrition and keep you fuller longer.
-
Coconut Bliss: Stir in shredded unsweetened coconut for a tropical touch that adds an enticing texture and subtle sweetness.
-
Change the Sweetener: Swap maple syrup with agave or honey for a different sweetness profile. Each will offer its unique flavor while still keeping the cups naturally sweet.
-
Nutty Crunch: Fold in a handful of chopped walnuts or almonds to the mixture for a satisfying crunch that complements the soft chewy texture beautifully.
-
Spicy Kick: For a hint of warmth, sprinkle a dash of cinnamon or a pinch of cayenne pepper into the mixture. It adds an adventurous twist that might just surprise your taste buds!
These variations make it easy to turn these healthy snacks into something uniquely yours, whether you’re looking for a fruity treat or a chocolaty delight! And if you’re looking for more inspiration, try these delicious recipes such as Texas Roadhouse Butter or Garlic Butter Brazilian to accompany your snacking bliss!
Make Ahead Options
These Peanut Butter Oat Cups are a fantastic choice for meal prep, making busy weeknights a breeze! You can prepare the oat mixture and press it into molds up to 24 hours in advance. Just keep them covered in the refrigerator to maintain freshness. If you have more time, the finished oat cups can be stored in an airtight container in the fridge for up to 3 days or frozen for longer storage. To enjoy them, simply drizzle with melted chocolate and set in the freezer for an additional 20 minutes before serving. This way, you’ll always have a delicious treat ready to satisfy those sweet cravings with minimal effort!
What to Serve with Peanut Butter Oat Cups
These delightful snacks are perfect on their own, but adding complementary dishes can create a memorable meal experience for everyone.
-
Fresh Fruit Salad: A refreshing mix of seasonal fruits balances the richness of the oat cups, adding a burst of natural sweetness.
-
Greek Yogurt Parfait: Layer creamy Greek yogurt with berries and a drizzle of honey for a delightful contrast in textures and flavors.
-
Crunchy Veggie Sticks: Carrots, celery, and bell peppers provide a crispy, refreshing side, making for a colorful and healthy snack pairing.
-
Nutty Granola: Sprinkle some homemade or store-bought granola on top of your oat cups for an added crunch and nutty flavor.
-
Herbal Iced Tea: Pair these treats with a glass of mint or lemon herbal iced tea, offering a refreshing contrast that enhances their sweetness.
-
Chia Seed Pudding: This creamy, nutrient-packed pudding provides a light and silky contrast to the chewy oat cups, creating a satisfying combination.
-
Dark Chocolate Drizzle: For an extra indulgence, drizzle some melted dark chocolate over fresh strawberries that will mimic the rich topping on the oat cups.
-
Almond Milk Smoothie: Blend your favorite fruits with almond milk for a creamy, nutritious beverage that complements the flavors of the oat cups beautifully.
Expert Tips for Peanut Butter Oat Cups
-
Use Natural Peanut Butter: Opt for natural peanut butter to enjoy the creamy texture and authentic flavor without added sugars and oils.
-
Don’t Overmix: When combining oats and peanut butter, mix until just combined. Overmixing can lead to a dense final product.
-
Properly Chill: Ensure to freeze the oat cups for the full 20 minutes to achieve the ideal firmness and texture for serving.
-
Melt Chocolate Carefully: Heat chocolate chips in short intervals to prevent burning. Stir frequently and remove when smooth.
-
Experiment with Add-ins: Feel free to enhance your Peanut Butter Oat Cups by adding chopped nuts or dried fruits for extra flavor and crunch!
-
Check the Molds: Use silicone molds for easy removal; metal molds may stick, making it challenging to pop out the oat cups.
Peanut Butter Oat Cups Recipe FAQs
What type of peanut butter should I use?
Absolutely, I recommend using natural peanut butter for the best flavor and texture in your Peanut Butter Oat Cups! It adds a rich creaminess without the added sugars and oils found in processed varieties. Look for ones that list only peanuts (and maybe salt) in the ingredients.
How long do Peanut Butter Oat Cups last in the fridge?
These delightful cups can be stored in an airtight container in the refrigerator for up to 1 week! Just make sure to keep them sealed tightly to maintain their freshness so you can enjoy them as a quick grab-and-go snack.
Can I freeze Peanut Butter Oat Cups, and how do I do it?
Yes, you can definitely freeze these cups! First, arrange them in a single layer on a baking sheet and freeze for about 1-2 hours until solid. Then, transfer the frozen cups to a freezer-safe container or zip-top bag, where they can stay good for up to 3 months. When you’re ready to enjoy, let them thaw at room temperature for 15 minutes for the best texture!
How can I make these cups nut-free?
To create nut-free Peanut Butter Oat Cups, you can substitute peanut butter with sunflower seed butter. It’s a fantastic alternative that provides a similar taste and texture, catering to those with nut allergies. Always double-check that your sunflower seed butter is purely made from seeds without added allergens.
What if I encounter a problem with the texture of my oat cups?
No worries! If your cups are too crumbly, it could be that you didn’t use enough peanut butter or syrup. Try adding another tablespoon of peanut butter or a splash more syrup until the mixture binds better. Conversely, if they’re too sticky, you may need to press them into the molds more firmly or chill them longer before serving.
Can I add other ingredients to my Peanut Butter Oat Cups?
Very! These oat cups are incredibly versatile. Feel free to mix in dried fruits, shredded coconut, or even chocolate chunks for extra flavor. Just remember that adding too many viscous ingredients may alter the cohesiveness, so adjust your wet ingredients accordingly. Enjoy experimenting!
Peanut Butter Oat Cups: A Guilt-Free Snack You’ll Love
Ingredients
Equipment
Method
- In a medium mixing bowl, combine peanut butter and maple syrup. Mix until smooth.
- Add rolled oats to the peanut butter mixture and stir until evenly coated.
- Press the oat mixture into silicone molds, aiming for an even layer.
- Add a dollop of peanut butter on top of each cup and freeze for 20 minutes.
- Melt chocolate chips with a teaspoon of oil until smooth.
- Drizzle melted chocolate over the oat cups and freeze for another 20 minutes.
- Remove cups from molds and sprinkle with flaky sea salt if desired.
Leave a Reply