
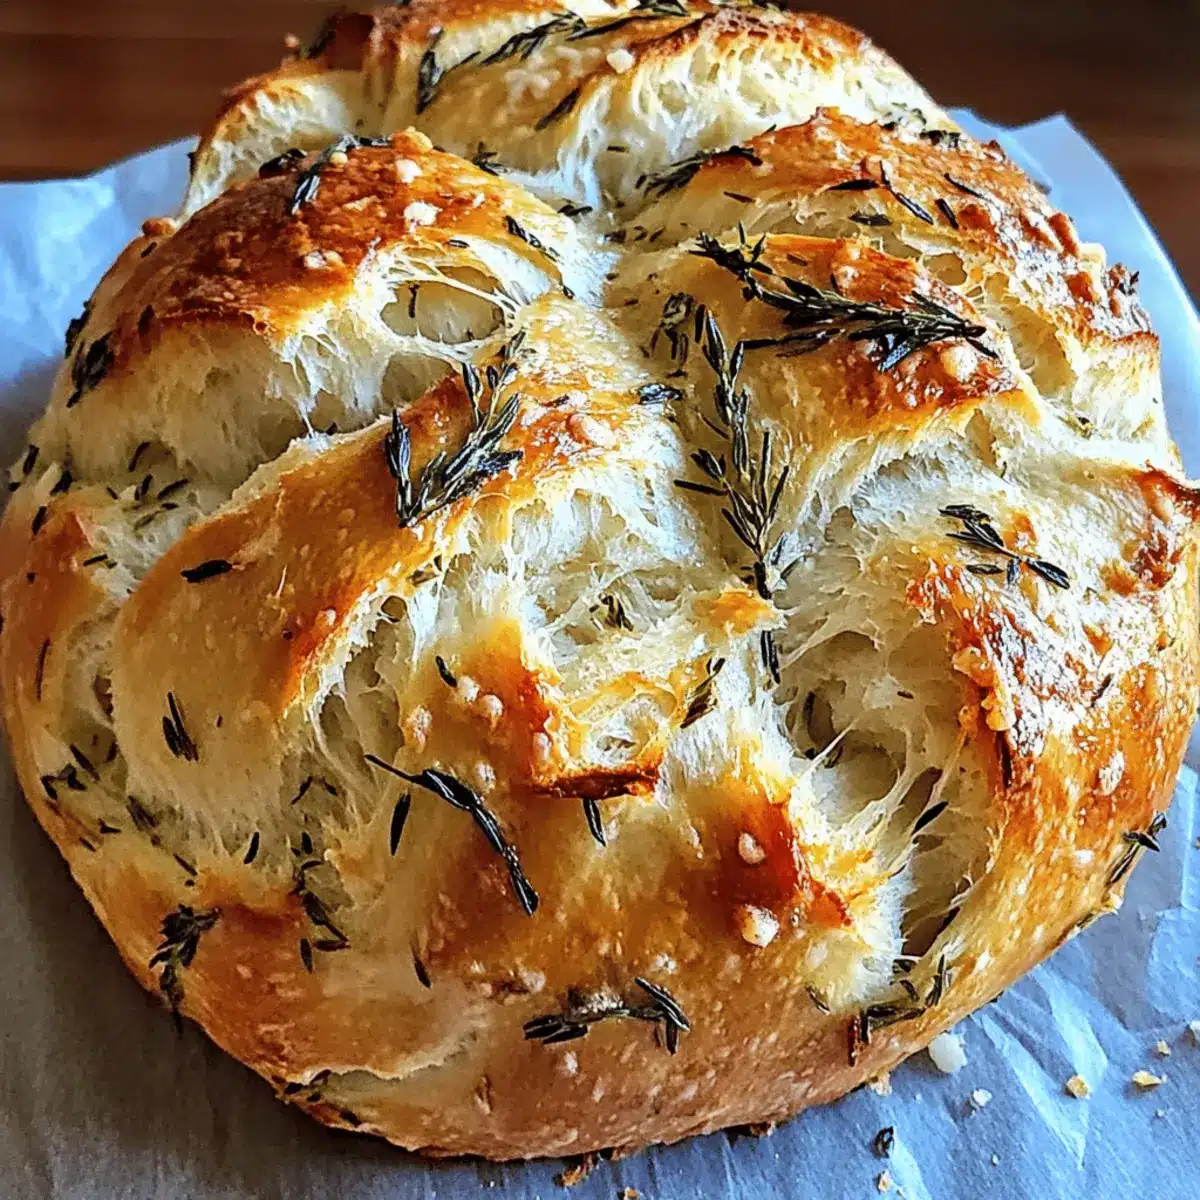
As I stood in my kitchen, the air heavy with fragrant notes of garlic and fresh herbs, I realized I had struck gold with my latest experiment: Garlic Herb Braided Bread. This stunning artisan loaf not only elevates any meal but also brings a homemade warmth that’s sorely missed in our fast-paced lives. What’s even better? It’s beginner-friendly, allowing you to impress family and friends with minimal effort. With a crispy, golden crust and a fluffy interior imbued with savory cheese, this bread is perfect for cozy dinners or as a showstopper at holiday gatherings. Are you ready to create a slice of heaven in your own kitchen?
Why is Garlic Herb Braided Bread a Must-Try?
Homemade Heaven: The aroma of freshly baked Garlic Herb Braided Bread fills your kitchen with warmth and charm, making it an instant favorite for any occasion.
Beginner-Friendly: With simple ingredients and straightforward steps, anyone can master this artisan loaf, impressing guests with minimal effort.
Versatile Pairing: Perfect alongside soups, pastas, or simply with butter, it complements a variety of dishes, just like my Healthy Garlic Parmesan Chicken Pasta.
Unique Texture: The combination of a crispy crust and fluffy interior ensures every bite is delightful, providing that artisan quality right at home.
Customizable Flavors: Feel free to experiment with different herbs or cheeses for a personalized twist – think of adding cheddar or fresh rosemary for zing! You’ll love how versatile this bread can be at family dinners or special gatherings.
Garlic Herb Braided Bread Ingredients
For the Dough
- All-Purpose or Bread Flour – Provides structure and chew; substitute with gluten-free blend for a different texture.
- Active Dry Yeast – The leavening agent that helps the bread rise; use instant yeast for quicker results.
- Warm Water (110°F) – Activates the yeast for proper fermentation.
- Olive Oil – Adds moisture and flavor; can swap with garlic butter for a richer taste.
- Salt – Enhances flavors while controlling the yeast activity.
- Sugar – Fuels the yeast for a better rise; honey can be a natural substitute.
- Garlic (minced or roasted) – Imparts that distinct garlic flavor; adjust the quantity for a milder taste.
- Dried Mixed Herbs (oregano, thyme, basil) – Introduces herby notes; feel free to use fresh herbs for an even brighter flavor.
- Grated Parmesan Cheese – Adds savory depth; mozzarella is a tasty alternative if you desire a change.
For the Topping
- Melted Butter (for brushing) – Creates a beautiful golden finish; skip it if you’re avoiding extra fat.
- Optional Add-ins (red pepper flakes, shredded mozzarella, fresh parsley) – Personalize your bread’s flavor and presentation according to your tastes.
This Garlic Herb Braided Bread captures the essence of homemade delight, beckoning everyone to the dinner table with its delightful aroma!
Step‑by‑Step Instructions for Garlic Herb Braided Bread
Step 1: Activate the Yeast
In a medium bowl, combine 1 cup of warm water heated to 110°F and 1 tablespoon of sugar. Sprinkle 2 teaspoons of active dry yeast on top and let it sit for 5-10 minutes until foamy, signaling that the yeast is activated. This key step is essential for achieving that soft, airy texture in your Garlic Herb Braided Bread.
Step 2: Mix the Dough
Once the yeast mixture is foamy, add 2 tablespoons of olive oil, 3 cloves of minced garlic, and your choice of dried mixed herbs, along with 1 teaspoon of salt. Gradually mix in 2.5 cups of all-purpose flour until a soft dough begins to form. Continue adding more flour, a little at a time, until the dough is no longer sticky, ensuring a perfect structure for your bread.
Step 3: Knead the Dough
Turn the dough out onto a floured surface and knead for 6-8 minutes until it’s smooth and elastic. You’ll know it’s ready when it springs back after a gentle poke. Halfway through, incorporate ½ cup of grated parmesan cheese, ensuring it’s evenly distributed. This step enhances the flavor and texture of your Garlic Herb Braided Bread.
Step 4: Let the Dough Rise
Place the kneaded dough into a greased bowl, cover it with a clean kitchen towel, and let it rise in a warm spot until it doubles in size, roughly 1 hour. This crucial step develops the bread’s volume and airy texture, filling your kitchen with an enticing aroma.
Step 5: Shape the Dough
After the dough has risen, punch it down gently to release the air. Divide it into three equal portions, rolling each into 14-16 inch ropes. Braid the ropes together carefully, pinching the ends to seal. Place the braided dough on a parchment-lined baking sheet, showcasing your artistic skills while shaping this Garlic Herb Braided Bread.
Step 6: Second Rise
Cover the braided loaf with a towel and let it rise again for 30-40 minutes, allowing it to puff up beautifully. This step is vital for achieving a light, fluffy interior. As it rests, preheat your oven to 375°F (190°C) for perfect baking conditions.
Step 7: Prepare for Baking
Once the bread has risen, brush the top generously with melted butter and sprinkle any optional toppings, like grated cheese or herbs, for added flavor. This step not only enhances the taste but also gives your Garlic Herb Braided Bread a golden, appetizing finish once baked.
Step 8: Bake the Bread
Place the braided bread in your preheated oven and bake for 25-30 minutes, or until the crust turns a golden brown and the bread sounds hollow when tapped. The delightful aroma wafting from the oven will surely entice everyone around! Let the bread cool on a wire rack before slicing, allowing the flavors to settle beautifully.
Make Ahead Options
These Garlic Herb Braided Bread loaves are perfect for meal prep enthusiasts! You can prepare the dough and let it rise up to 24 hours in advance by covering it tightly with plastic wrap and refrigerating it. When you’re ready to bake, simply remove the dough from the fridge, let it sit at room temperature for about 30 minutes, then shape it into braids and allow it to rise as instructed. This method not only saves time on busy weeknights but also keeps the bread just as delicious as if it were freshly made. Enjoy that warm, comforting aroma with ease – your homemade Garlic Herb Braided Bread will be the star of any table!
How to Store and Freeze Garlic Herb Braided Bread
Airtight Container: Store your Garlic Herb Braided Bread in an airtight container at room temperature for up to 3 days to maintain its freshness and flavor.
Freezer Storage: For longer preservation, wrap the bread tightly in plastic wrap and then in aluminum foil or a freezer bag, ensuring it’s sealed well. It can be frozen for up to 2 months.
Reheating: To enjoy it later, simply thaw the bread overnight in the fridge, then reheat in a preheated oven at 350°F (175°C) for about 10 minutes to restore its crusty texture.
Slicing Before Freezing: For added convenience, slice the bread before freezing. This way, you can take out just what you need without defrosting the entire loaf.
Garlic Herb Braided Bread Variations
Feel free to let your creativity shine and customize your Garlic Herb Braided Bread with the following ideas!
-
Cheese Swap: Substitute grated parmesan with feta or mozzarella for a creamy, tangy twist. Each option lends a unique flair to your bread!
-
Herb Infusion: Mix in fresh herbs, like rosemary or sage, instead of dried for a vibrant flavor boost. Fresh herbs add a garden-like freshness that will delight your senses!
-
Spicy Kick: Add red pepper flakes or a touch of cayenne pepper for some heat. This little change can transform the bread into a savory delight for spice lovers.
-
Sweet Variation: For a hint of sweetness, consider adding 2 tablespoons of honey or sugar to the dough. This subtle sweetness pairs perfectly with savory accompaniments.
-
Garlic Lovers: Want even more garlic flavor? Incorporate roasted garlic or increase the minced garlic amount for a stronger bite. You’ll love the aromatic explosion with each bite!
-
Dinner Rolls: Instead of braiding, shape the dough into individual dinner rolls. They’re perfect for family gatherings and easy to serve alongside your favorite dishes, just like my Crockpot Garlic Butter Beef Bites.
-
Texture Twist: For added texture, fold in nuts or seeds, like sunflower seeds or chopped walnuts. They provide a delightful crunch in every slice, enhancing your bread’s appeal.
-
Herb-Infused Oil: Brush the top with herb-infused garlic oil instead of plain melted butter before baking. This elevates the flavor while giving it an irresistible sheen and aroma.
Explore these variations and make your Garlic Herb Braided Bread uniquely yours! Whatever route you choose, you’ll be delivering warmth and flavor to your dining table.
Expert Tips for Garlic Herb Braided Bread
Perfect Yeast Activation: Ensure your warm water is around 110°F to avoid killing the yeast. This step is crucial for that perfect rise in your Garlic Herb Braided Bread.
Knead with Love: Knead the dough until smooth and elastic; this usually takes 6-8 minutes. Avoid adding too much flour, which could dry out your bread.
Braiding Technique: If braiding feels tricky, practice makes perfect! Start with just two pieces if needed. Alternatively, shape the dough into rolls for a simpler approach.
Double Check Rising Times: Be patient and let the dough rise until it has doubled in size. Rushing this step can lead to denser bread, which we want to avoid!
Storage Secrets: Keep your Garlic Herb Braided Bread in an airtight container at room temperature for up to three days, or freeze slices for later enjoyment without losing freshness.
What to Serve with Garlic Herb Braided Bread
Imagine the scent of warm, freshly baked bread wafting through your home, ready to elevate your next meal into something unforgettable.
- Creamy Tomato Soup: The acidity of the tomato balances perfectly with the rich garlic and herbs, creating a cozy comfort food experience.
- Fresh Garden Salad: Crisp greens and vinaigrette are refreshing against the bread’s density, adding a delightful crunch to your meal. Serve it with a sprinkle of feta for added flavor!
- Herbed Olive Oil Dip: A simple blend of olive oil and herbs offers a unique twist, perfectly complementing the garlic notes in the bread while enhancing its flavors.
- Savory Mushroom Risotto: The creamy texture and earthy flavors of a mushroom risotto harmonize beautifully with the fresh herbs in the bread, creating a filling, sophisticated dish.
- Grilled Chicken with Lemon: The bright, zesty marinade enhances the flavors of the bread, providing a lightness that contrasts beautifully with the bread’s richness. Enjoy with a side of steamed vegetables.
- Rich Beef Stew: The hearty, savory flavors of beef stew are made even better with a side of garlic herb bread, perfect for soaking up the delicious broth.
- Chilled White Wine: A cool glass of Sauvignon Blanc or Pinot Grigio can elevate your meal, offering a crisp balance to the richness of the bread.
- Classic Garlic Butter: Spread with softened garlic butter for an indulgent treat that plays up the bread’s savory flavors – a simple, yet irresistible pairing.
- Decadent Chocolate Cake: For dessert, a slice of rich chocolate cake creates a delightful contrast to the savory bread, making the meal truly memorable.
Garlic Herb Braided Bread Recipe FAQs
How do I know if my garlic is fresh enough?
Absolutely! Look for garlic bulbs that are firm and plump, avoiding any that feel soft or have dark spots. Fresh garlic will also have a vibrant white or purple skin. If you find any sprouting, it’s still usable, but the flavor may be milder.
How should I store my Garlic Herb Braided Bread?
To keep your Garlic Herb Braided Bread fresh, it’s best to store it in an airtight container at room temperature for up to 3 days. If you want to enjoy it later, wrapping it tightly in plastic wrap and then in aluminum foil can help preserve its texture in the freezer for up to 2 months.
Can I freeze my Garlic Herb Braided Bread?
Absolutely! After your bread has cooled completely, slice it and wrap individual pieces in plastic wrap. Place the wrapped slices in a freezer-safe bag, ensuring as much air is removed as possible. It will stay fresh for up to 2 months. When you’re ready to enjoy, thaw overnight in the fridge, then reheat in a preheated oven for about 10 minutes.
What can I do if my dough doesn’t rise properly?
Very! If your dough hasn’t risen, it could be due to inactive yeast. Ensure your yeast is fresh and check that your water temperature was around 110°F (measured with a thermometer). If it’s too hot, it could kill the yeast, while too cold won’t activate it. You can also place the dough in a warmer spot in your kitchen for better results.
Can my Garlic Herb Braided Bread be made vegan?
Yes, you can easily make this bread vegan! Substitute olive oil for melted coconut oil or a vegan butter stick. For the topping, skip the butter or brush with olive oil instead. There you have a delightful vegan version of this homemade bread!
Is Garlic Herb Braided Bread suitable for my dog?
While garlic can be harmful to dogs in large quantities, small amounts in baked goods are generally okay. However, I recommend avoiding giving any bread with onion or excessive garlic as a precaution, as the effects can vary per pet.
Garlic Herb Braided Bread: Your New Favorite Homemade Delight
Ingredients
Equipment
Method
- Activate the Yeast: In a medium bowl, combine 1 cup of warm water heated to 110°F and 1 tablespoon of sugar. Sprinkle 2 teaspoons of active dry yeast on top and let it sit for 5-10 minutes until foamy.
- Mix the Dough: Add 2 tablespoons of olive oil, 3 cloves of minced garlic, and your choice of dried mixed herbs, along with 1 teaspoon of salt. Gradually mix in 2.5 cups of all-purpose flour until a soft dough begins to form.
- Knead the Dough: Turn the dough out onto a floured surface and knead for 6-8 minutes until smooth and elastic. Incorporate ½ cup of grated parmesan cheese halfway through.
- Let the Dough Rise: Place the kneaded dough into a greased bowl, cover with a clean kitchen towel, and let it rise for about 1 hour.
- Shape the Dough: Punch down the risen dough gently, divide it into three equal portions, roll into 14-16 inch ropes, and braid together.
- Second Rise: Cover the braided loaf with a towel and let it rise again for 30-40 minutes.
- Prepare for Baking: Brush the top with melted butter and sprinkle any optional toppings.
- Bake the Bread: Place in the preheated oven and bake for 25-30 minutes, until the crust is golden brown.
Leave a Reply