
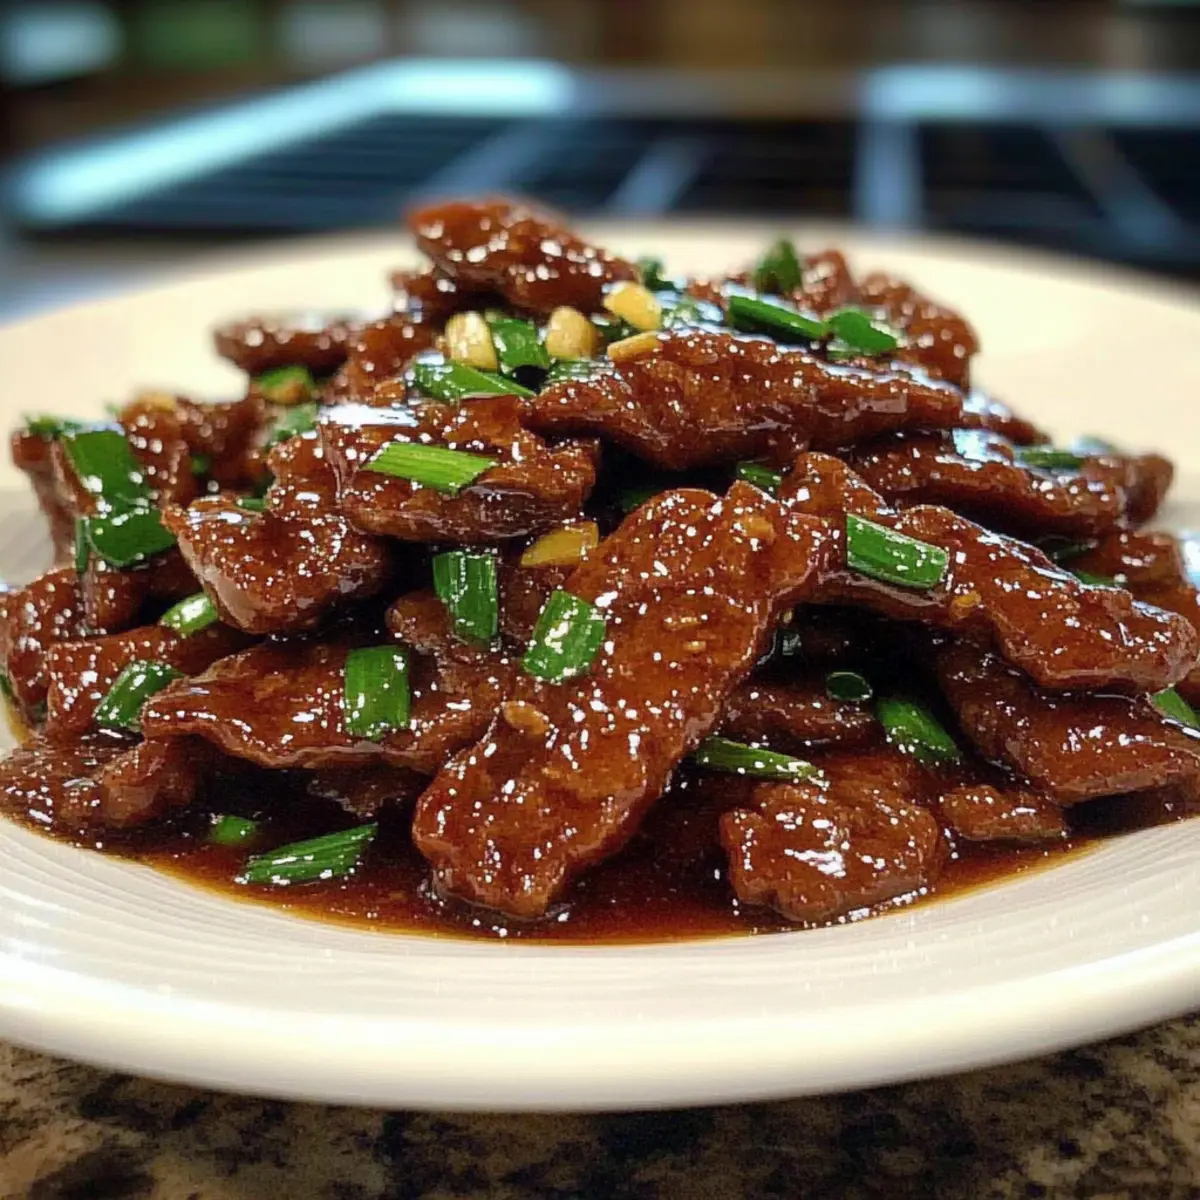
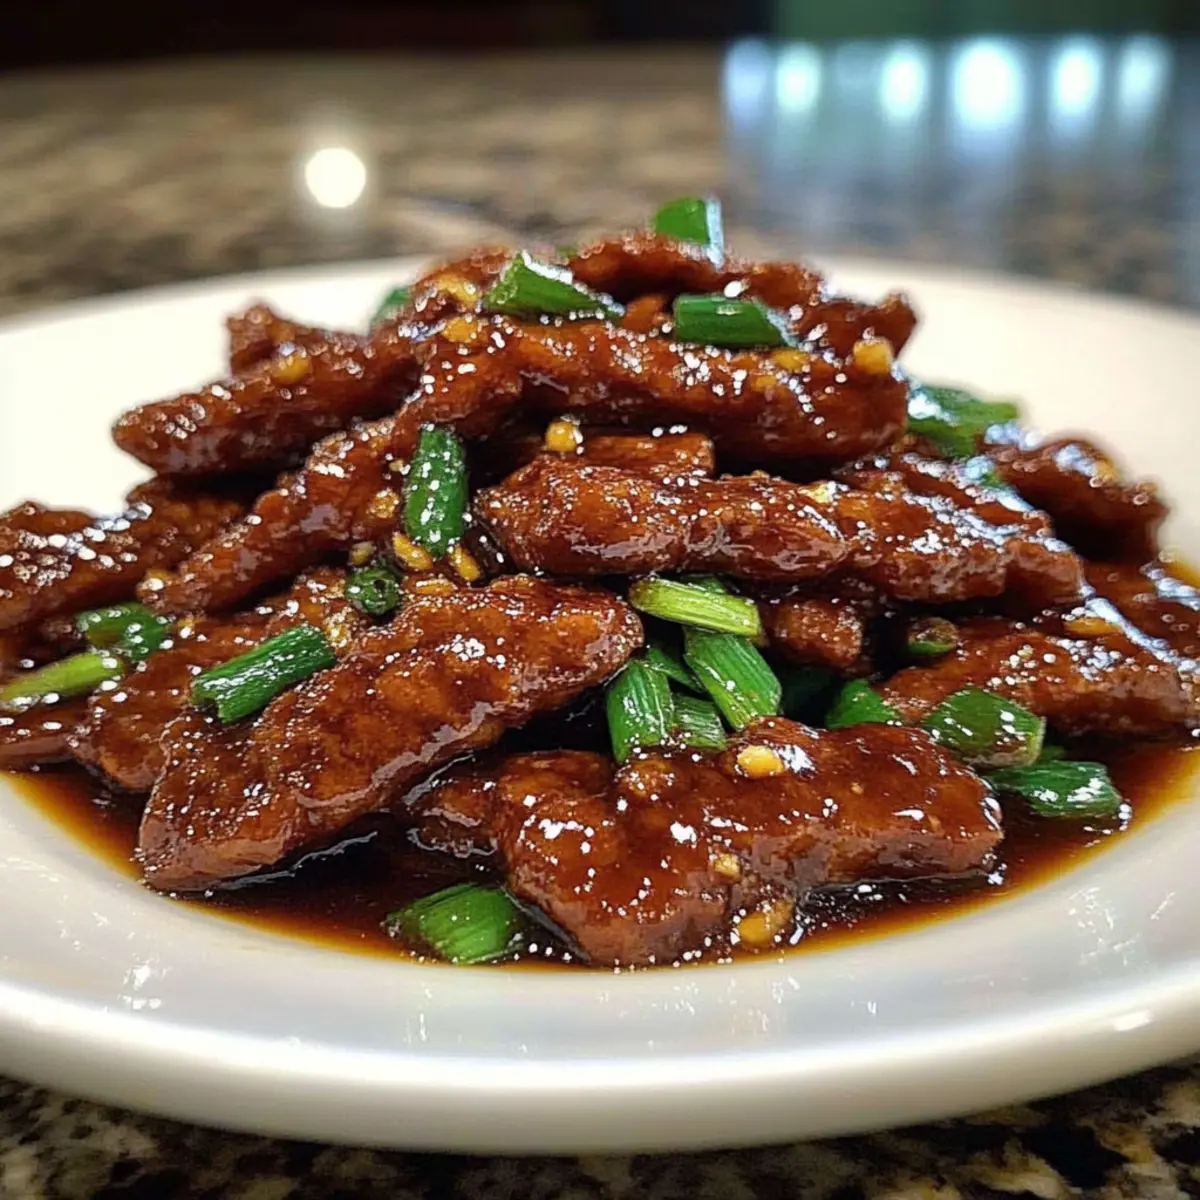
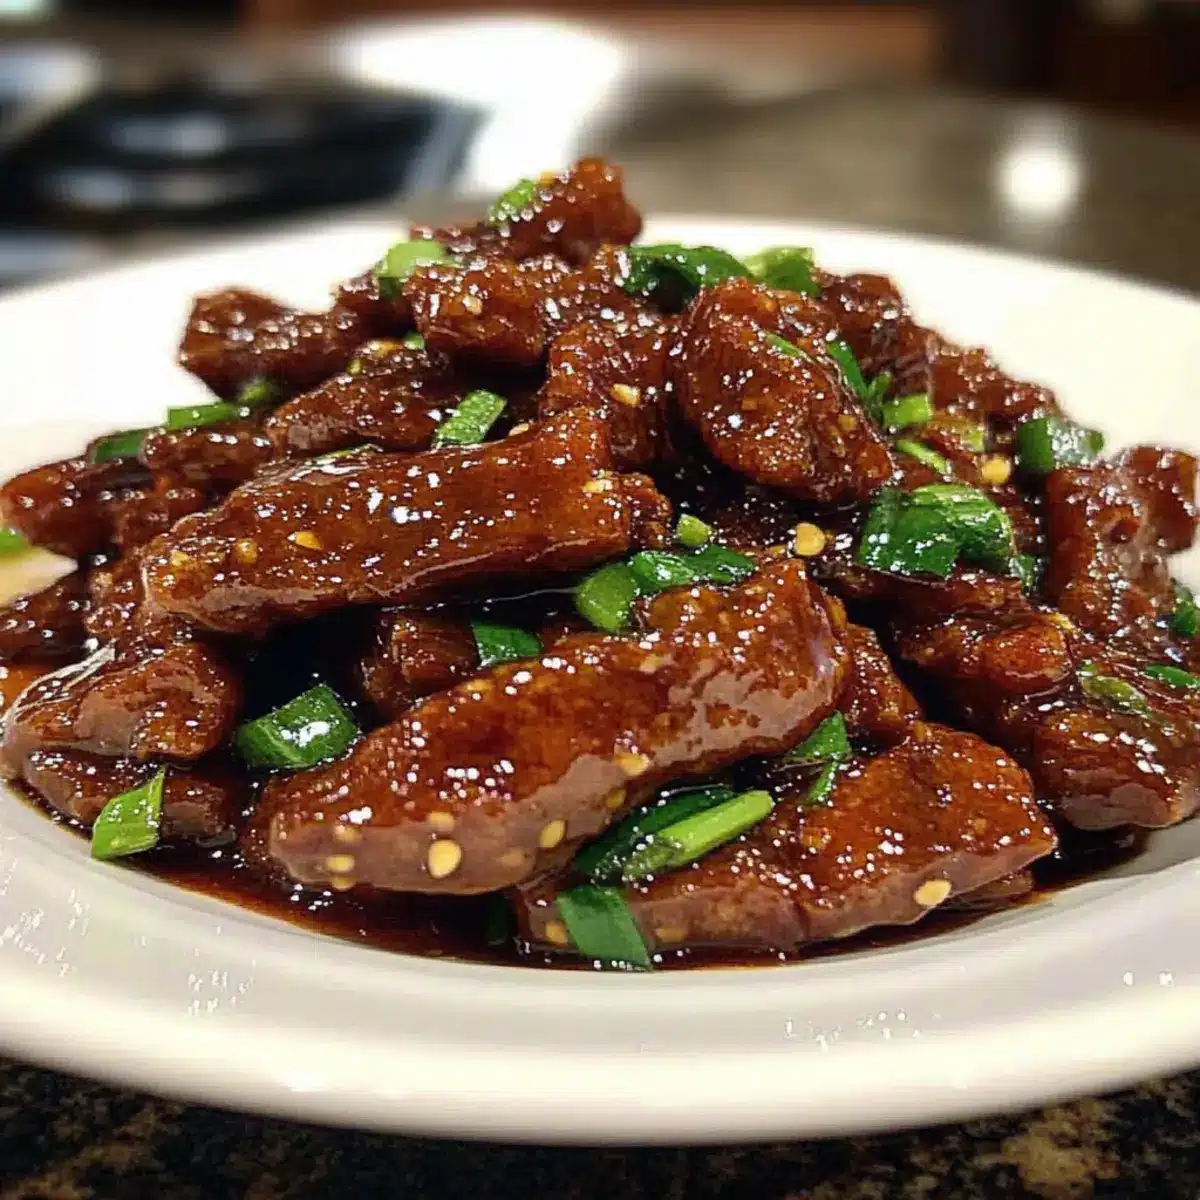
The sizzle of tender beef searing in hot oil transports me back to cozy dinners at P. F. Chang’s, where each bite of Mongolian Beef is a delightful indulgence. Today, I’m excited to share my quick and easy 15-Minute Mongolian Beef recipe that brings that same restaurant-worthy experience right to your home kitchen. This dish not only satisfies your comfort food cravings but also eliminates the need for takeout—perfect for busy evenings. With just a handful of ingredients and simple techniques, you’ll be whipping up crispy beef strips coated in a glossy sweet-savory sauce in no time. Ready to impress your taste buds and your dinner guests? Let’s dive into this mouthwatering journey together!
Why is Mongolian Beef a Must-Try?
Quick and Easy: In just 15 minutes, you can enjoy a homemade version of a beloved classic. Perfect for when you’re short on time yet crave something delicious!
Restaurant-Quality Taste: This recipe replicates that satisfying P. F. Chang’s experience right at your dining table. Your family will be asking for seconds!
Crispy and Tender: The beef is perfectly cooked, ensuring a delightful texture that stays crispy on the outside while tender on the inside.
Customizable Fun: Feel free to swap proteins or toss in some seasonal veggies like broccoli for added nutrition. You can easily tailor this dish to your family’s preferences!
Less Guilt, More Flavor: By making it at home, you control the ingredients, allowing for healthier choices while still savoring that sweet, savory goodness. Enjoy alongside fluffy rice or with stir-fried vegetables for a complete meal!
Mongolian Beef Ingredients
-
For the Beef
• Flank Steak – Perfectly tender for stir-frying; sirloin can be an excellent substitute if sliced thinly.
• Cornstarch – Coats the beef for that irresistible crispy texture; a key ingredient for achieving true Mongolian Beef magic. -
For the Sauce
• Low-Sodium Soy Sauce – Adds rich umami flavor while keeping saltiness in check; a healthier option for your taste buds.
• Brown Sugar – Offers a sweet balance to the savory sauce; light or dark brown sugar both work—dark gives a deeper flavor.
• Fresh Ginger – Brightens the dish with its zesty profile; always choose fresh for the best results.
• Garlic Cloves – Infuses the dish with aromatic goodness; freshly minced garlic is highly recommended for a burst of flavor. -
For Cooking
• Vegetable Oil – Essential for stir-frying; feel free to swap with other neutral oils based on what you have on hand.
Each bite of this Mongolian Beef brings cozy restaurant vibes right to your kitchen. With these simple ingredients, you’re just moments away from a delightful dinner!
Step‑by‑Step Instructions for Mongolian Beef
Step 1: Prep Ingredients
Start by slicing the flank steak against the grain into thin strips, making sure to create about 1/4-inch thick pieces for even cooking. In a separate bowl, whisk together cornstarch, low-sodium soy sauce, brown sugar, minced fresh ginger, and garlic. This flavorful sauce is the heart of your Mongolian Beef, so set it aside once mixed to allow the flavors to meld.
Step 2: Marinate Beef (Optional)
For an extra tender bite, consider marinating the sliced steak. In a bowl, combine the beef with additional soy sauce and a pinch of baking soda; allow it to sit for about 30 minutes. This step is optional but highly recommended for achieving that melt-in-the-mouth texture, enhancing your homemade Mongolian Beef’s quality.
Step 3: Heat Oil
In a large pan or wok, pour in a generous amount of vegetable oil and heat it over medium-high until shimmering, which should take about 2-3 minutes. Proper heating is key to achieving a delicious crisp on the beef. You want the oil hot enough that it sizzles when the first piece of meat hits the skillet—this is when the magic begins!
Step 4: Stir-Fry Beef
Carefully add the marinated beef slices in batches to the hot oil, ensuring not to overcrowd the pan. Fry each batch for about 2-3 minutes, or until the edges are golden brown and crispy, then remove and set aside. This technique prevents steaming and promotes that coveted texture we all love in classic Mongolian Beef.
Step 5: Make the Sauce
With the beef out, lower the heat slightly and pour the sauce mixture into the same pan. Let it simmer for 1-2 minutes, stirring frequently, until the sauce thickens slightly and becomes fragrant. This step allows the residual flavors in the pan to enhance the sauce, creating a rich base that will envelop your beef beautifully.
Step 6: Combine and Serve Immediately
Return the crispy beef to the pan, stirring gently to coat in the luscious sauce. Heat everything through for another minute or two, ensuring each piece of beef is nicely glazed. Serve your homemade Mongolian Beef hot, ideally over a bed of fluffy steamed rice and accompanied by a side of stir-fried vegetables for a complete, delicious meal.
Mongolian Beef Variations & Substitutions
Feel free to get creative and make this recipe your own, as there are many delightful twists you can explore!
- Protein Swap: Use Sirloin Steak instead of flank for a slightly different texture—it’s still wonderfully tender.
- Chicken Option: Replace beef with Chicken Breast for a lighter dish; just cook until fully done. It’s a great alternative, showcasing the same flavor profile.
- Vegetable Medley: Add Seasonal Veggies like bell peppers, carrots, or snow peas to enhance nutrition and color. Cooking them briefly adds both crunch and visual appeal.
- Spice it Up: Toss in Crushed Red Pepper Flakes or some sliced fresh chili for an exciting kick. It’s an easy way to turn up the heat without losing the dish’s essence!
- Sweetener Variation: Experiment with Honey or Maple Syrup instead of brown sugar for a unique sweetness. These alternatives will give a different flavor undertone while still being delicious.
- Soy Sauce Alternatives: For a gluten-free option, use Tamari; it provides the same umami flavor while making the dish suitable for gluten-sensitive diets.
- Vegetarian Delight: Swap beef for Tofu or Mushrooms for a plant-based version—both soak up the sauce beautifully, offering a satisfying bite.
- Thickening Agent: If cornstarch isn’t on hand, Arrowroot Powder is an excellent alternative to achieve that glossy sauce texture without gluten.
Each variation allows you to personalize this beloved dish and put your culinary stamp on it! If you love the vibrant taste of the sauce, consider serving this with steamed rice for a delightful balance and check out other inspirations like Crock Pot Beef or Garlic Butter Beef recipes for your next family meal!
What to Serve with 15-Minute P. F. Chang’s Mongolian Beef
Elevate your homemade Mongolian Beef with these delightful sides that bring balance and flavor to your meal.
-
Fluffy Steamed Rice: The perfect canvas for soaking up the sweet-savory sauce, adding a comforting, soft texture to your experience.
-
Stir-Fried Vegetables: A mix of vibrant bell peppers, snap peas, and broccoli adds fresh crunch and color while complementing the rich flavors of the beef.
-
Sesame Noodles: These slippery, nutty noodles provide a delightful contrast, enhancing the Asian vibe of your meal and making it heartier.
-
Crispy Spring Rolls: Crunchy and filled with fresh veggies, spring rolls add a fun appetizer element and lightness that balances the dish.
-
Cool Cucumber Salad: A refreshing side that cuts through the richness of the beef, with a tangy vinaigrette to brighten each bite.
-
Chilled Sake or Green Tea: These beverages provide a gentle pairing to cleanse the palate and enhance the overall dining experience with their subtle notes.
Make Ahead Options
These P. F. Chang’s Mongolian Beef are fantastic for meal prep lovers! You can slice the flank steak and prepare the sauce up to 24 hours in advance, allowing the flavors to meld beautifully. Just refrigerate the sliced beef and sauce separately in airtight containers. When you’re ready to cook, simply heat your oil in a skillet, stir-fry the beef until crispy, then add in your pre-made sauce and heat everything through for 1-2 minutes. This method keeps the beef just as delicious while saving you precious time on busy weeknights. A quick stir-fry, and you have a restaurant-quality meal on the table with minimal effort!
How to Store and Freeze Mongolian Beef
Fridge: Store leftover Mongolian Beef in an airtight container in the refrigerator for up to 3 days. This keeps your delicious dish fresh and ready for quick meals.
Freezer: For longer preservation, freeze Mongolian Beef in a freezer-safe bag for up to 3 months. Make sure to remove as much air as possible to prevent freezer burn.
Reheating: To reheat, gently warm the beef in a skillet over medium heat or microwave in short bursts with a splash of water to loosen the sauce. Enjoy your flavorsome meal once again!
Thawing: When ready to enjoy your frozen Mongolian Beef, thaw it overnight in the refrigerator before reheating for the best results.
Tips for the Best Mongolian Beef
-
Slice Against the Grain: Always cut the flank steak against the grain for maximum tenderness, ensuring each bite melts in your mouth.
-
Avoid Overcrowding: When stir-frying, cook the beef in batches to prevent steaming. This keeps the beef crispy and delicious, true to the Mongolian Beef experience.
-
Perfect Sauce Thickness: If the sauce isn’t thickening, simmer it a little longer while stirring. The right consistency will cling beautifully to the beef.
-
Marination Benefits: Consider marinating the beef with soy sauce and baking soda for at least 30 minutes. This extra step enhances tenderness, improving your dish overall.
-
Adjust Flavor to Taste: Feel free to tweak the soy sauce or sugar amounts based on your flavor preference—make this Mongolian Beef recipe truly yours!
P. F. Chang’s Mongolian Beef Recipe FAQs
What type of beef is best for Mongolian Beef?
Absolutely! Flank steak is ideal for Mongolian Beef because it’s tender and cooks quickly, but you can also use sirloin if you slice it thinly against the grain. For a different twist, you might even try chicken or tofu!
How should I store leftover Mongolian Beef?
To keep leftover Mongolian Beef fresh, store it in an airtight container in the refrigerator for up to 3 days. Using a container helps retain the flavors and moisture in the dish, making it easy to enjoy again. Just make sure it’s completely cooled before sealing!
Can I freeze Mongolian Beef?
Yes, you can! For optimal freezing, place the cooled Mongolian Beef in a freezer-safe bag, removing as much air as possible to prevent freezer burn. It can last in the freezer for up to 3 months. When you’re ready to eat, simply thaw it overnight in the fridge before reheating.
What if my sauce is too thin?
No problem! If your sauce isn’t thickening to your liking, just simmer it a little longer while stirring. This allows the flavors to concentrate and the sauce to reduce. If needed, you can also mix a teaspoon of cornstarch with a tablespoon of water to create a slurry and add it to the sauce, cooking until it’s thickened.
Can I make this recipe gluten-free?
Very! To make gluten-free Mongolian Beef, use tamari instead of soy sauce. Most brands of tamari are gluten-free and provide that rich, umami flavor you’re looking for. Also, ensure your cornstarch is certified gluten-free, and you’ll be all set to enjoy this dish worry-free!
What should I serve with Mongolian Beef?
You can’t go wrong with fluffy steamed rice or crispy stir-fried vegetables. I often toss in some vibrant broccoli or snap peas for added nutrition and color. Feel free to customize based on what your family loves— the more, the merrier!

Quick and Easy Mongolian Beef That's Better Than Takeout
Ingredients
Equipment
Method
- Slice the flank steak against the grain into thin strips (1/4-inch thick). In a bowl, whisk together cornstarch, soy sauce, brown sugar, ginger, and garlic. Set aside.
- For extra tenderness, marinate the beef with soy sauce and a pinch of baking soda for 30 minutes (optional).
- In a large pan, heat vegetable oil over medium-high until shimmering (2-3 minutes).
- Add marinated beef in batches, stir-fry for 2-3 minutes until crispy, then remove and set aside.
- Lower heat, add sauce mixture to pan, simmer for 1-2 minutes until slightly thickened.
- Return crispy beef to the pan, stir to coat, heat through for another minute, and serve hot over rice with vegetables.
Leave a Reply