
As the scent of warm cookies envelops your kitchen, it’s impossible not to feel a wave of nostalgia. There’s something truly magical about baking Classic Chewy Chocolate Chip Cookies, that rich balance between gooey chocolate chunks and soft, fluffy dough. It’s a simple recipe that comes together in just minutes, making it the perfect comfort food for busy days when you crave a little sweetness. And the best part? These cookies are a crowd-pleaser, so you can share them with friends and family—or keep them all to yourself (I won’t tell!). With soothing bites that remind you of home, this recipe will have everyone eagerly anticipating the next batch. What fun variations will you try to make them your own?
Why are these cookies irresistible?
Warm, Inviting Aroma: Baking these cookies fills your home with a delightful scent that’s simply irresistible.
Quick & Easy: The straightforward steps make this recipe accessible for bakers of all levels, allowing anyone to whip up a batch quickly.
Gooey Goodness: Each bite reveals soft, chewy textures combined with melty chocolate chunks—a true treat for chocolate lovers!
Crowd Favorite: Perfect for sharing at gatherings or cozy nights in, these cookies are sure to impress friends and family alike.
Versatile Variations: Customize your cookies by adding nuts or dried fruits, or swap the chocolate for your favorite candies. For a delightful meal follow up, check out One Pot Pasta for a savory pairing!
Chocolate Chip Cookie Ingredients
• Melt-in-your-mouth magic awaits!
For the Cookie Dough
- Butter – Provides moisture and helps create a chewy texture; substitute with margarine for a dairy-free version.
- Brown Sugar – Adds sweetness and a slight molasses flavor, enhancing chewiness; use white sugar for a lighter texture.
- Granulated Sugar – Increases sweetness and aids in browning the cookies.
- Eggs – Bind ingredients together and provide structure; use flax eggs for a vegan option.
- All-purpose Flour – Gives structure to the cookies; swap with gluten-free flour for a gluten-free version.
- Baking Soda – Acts as a leavening agent to help the cookies rise; baking powder can be used in a pinch, though results may vary.
- Salt – Balances sweetness and enhances flavor; sea salt adds a gourmet touch.
- Chocolate Chips – Provide rich chocolate flavor and texture; semi-sweet or dark chocolate are both excellent choices, ensuring every bite is heavenly.
Optional Mix-ins
- Nuts – Chopped walnuts or pecans add a crunchy element; if you prefer nut-free, simply leave them out.
- Dried Fruit – Swap half of the chocolate chips for dried fruit for a fruity twist, complementing the sweetness beautifully.
- Spices – Incorporate spices like cinnamon or espresso powder for a unique flavor profile that tantalizes the taste buds.
Your cookie cravings will thank you, and don’t forget to check out my One Pot Creamy Cajun Sausage Pasta for an easy-to-prepare savory dish that pairs perfectly with your sweet treats!
Step‑by‑Step Instructions for Classic Chewy Chocolate Chip Cookies
Step 1: Preheat the Oven
Begin by preheating your oven to 350°F (175°C). This temperature ensures that your cookies will bake evenly. While the oven is warming up, gather your mixing bowls, measuring cups, and baking sheets, and line the sheets with parchment paper for easy cleanup.
Step 2: Cream the Butters and Sugars
In a large mixing bowl, combine softened butter, brown sugar, and granulated sugar. Using an electric mixer, cream the mixture on medium speed until it becomes light and fluffy, about 2-3 minutes. The goal is to incorporate air for a perfect chewy texture in your classic chewy chocolate chip cookies.
Step 3: Add the Eggs
Once the butter and sugar are well combined, add the eggs one at a time. Mix on low speed after each addition until fully incorporated. This step is crucial as it helps bind the ingredients together and ensures your cookies have the right structure.
Step 4: Combine the Dry Ingredients
In a separate bowl, whisk together the all-purpose flour, baking soda, and salt. This ensures that the baking soda is evenly distributed throughout the flour. Gradually add this dry mixture to the wet ingredients, mixing until just combined; be careful not to overmix to keep your cookies tender.
Step 5: Fold in Chocolate Chips
Next, gently fold in the chocolate chips using a spatula or wooden spoon. The rich chocolate becoming part of your dough signifies that your cookie dough is almost ready. Feel free to mix in any optional nuts or spices at this point for added flavor and texture.
Step 6: Prepare for Baking
Using a spoon or cookie scoop, drop generous spoonfuls of dough onto your prepared baking sheets. Leave enough space between each cookie, as they will spread while baking. Aim to create uniform shapes to ensure even cooking, lining around 12 cookies per sheet.
Step 7: Bake the Cookies
Place the baking sheets in your preheated oven and bake for 10-12 minutes, or until the edges turn golden brown while the centers appear set but still soft. This is the sweet spot to achieve that delightful chewy texture in your classic chewy chocolate chip cookies.
Step 8: Cool and Enjoy
After baking, let the cookies cool on the baking sheet for about 5 minutes. This helps them firm up a bit before transferring them to a wire rack to cool completely. Enjoy warm, or store in an airtight container for later, sharing your delicious creations with family and friends!
Storage Tips for Classic Chewy Chocolate Chip Cookies
Room Temperature: Store cookies in an airtight container at room temperature for up to 1 week to maintain their delightful chewiness without drying out.
Freezer: For longer storage, freeze cookies by placing them in a single layer on a baking sheet, then transfer to a freezer-safe bag after solidification. They can last up to 3 months.
Reheating: To enjoy warm cookies, microwave them for about 10-15 seconds after thawing, ensuring that each bite of your classic chewy chocolate chip cookies is just like fresh out of the oven!
Layering: If stacking cookies in a container, place parchment paper between layers to prevent sticking, preserving every delicious chocolatey morsel.
What to Serve with Classic Chewy Chocolate Chip Cookies?
Imagine a cozy afternoon where the sweet aroma of freshly baked cookies fills your home, and you’re ready to create a delightful meal experience!
- Cold Glass of Milk: The classic pairing that brings out the chocolatey flavors while adding a creamy, refreshing contrast with every bite.
- Hot Coffee: A warm cup enhances the rich, sweet taste of the cookies, making it a perfect pick-me-up for any time of day.
- Vanilla Ice Cream: A scoop of creamy vanilla ice cream brings a delightful chill that perfectly complements the warm, gooey cookies—an absolute treat!
- Fruity Salad: A bright, fresh fruit salad adds a refreshing balance to the rich sweetness; think berries, melon, and a splash of citrus.
- Chocolate Milkshake: Indulge your sweet tooth further with a luscious chocolate milkshake—a creamy, dreamy companion to your homemade cookies.
- Caramel Sauce: Drizzling warm caramel over your cookies creates a deliciously sticky and sweet experience that feels indulgent and comforting.
- Spiked Hot Cocoa: For a cozy twist, serve your cookies with a spiked hot cocoa; the combination of chocolate flavors is simply heavenly.
- Wine Pairing: A fruity dessert wine can elevate the moment, offering a sophisticated twist to your cookie enjoyment.
With these pairing ideas, you’ll transform your delightful cookie experience into a full-fledged moment of joy!
Expert Tips for Classic Chewy Cookies
-
Avoid Overmixing: When combining the flour with the wet ingredients, mix just until incorporated to keep your cookies tender and avoid a tough texture.
-
Room Temperature Butter: Let your butter soften before creaming it with sugars. This step ensures a light and airy cookie consistency that’s to die for!
-
Chill for Thickness: For thicker cookies, chill the dough for 30 minutes before baking. This helps the cookies maintain their shape and prevents excessive spreading.
-
Watch Baking Time: Keep an eye on the cookies as they bake. They will continue cooking on the baking sheet after you remove them from the oven, so aim for soft centers.
-
Upgrade with Sea Salt: Sprinkling a little sea salt on top of the dough before baking can enhance the flavor of your Classic Chewy Chocolate Chip Cookies beautifully!
-
Storage Tips: Store your cookies in an airtight container at room temperature for up to a week, or freeze them for longer storage while preserving their delightful chewy texture.
Make Ahead Options
These Classic Chewy Chocolate Chip Cookies are perfect for meal prep enthusiasts! You can prepare the cookie dough up to 3 days in advance by mixing all the ingredients, then wrapping it tightly in plastic wrap and refrigerating. This method ensures that the dough stays fresh and ready to bake whenever a sweet craving strikes. Alternatively, you can scoop the dough into individual portions and freeze them for up to 3 months; simply place the frozen dough balls on a baking sheet and bake straight from the freezer, just adding a couple of extra minutes to the cooking time. When ready to serve, bake your cookies until golden, and you’ll enjoy that fresh-baked aroma filling your home without the fuss on busy days!
Variations & Substitutions for Classic Chewy Chocolate Chip Cookies
Feel free to get adventurous and put your own spin on these classic cookies! The possibilities are endless.
- Nutty Delight: Add chopped walnuts or pecans for an extra crunch and heartiness. The nuts enhance not only the texture but also the rich flavor of chocolate.
- Fruity Twist: Swap half of the chocolate chips for dried cranberries or raisins for a sweet and fruity flavor burst. It creates a delightful contrast, making each bite unique!
- Spice It Up: Incorporate a pinch of cinnamon or even a dash of espresso powder to elevate the cookie flavor profile. This combination adds warmth and a subtle richness that chocolate lovers will adore.
- Dark Chocolate Dreams: Use dark chocolate chips instead of semi-sweet for a deeper, more intense chocolate flavor. It’s a fantastic option for those who prefer less sweetness.
- Gluten-Free: Substitute all-purpose flour with a 1:1 gluten-free flour blend, ensuring that everyone can enjoy these treats without worry. Make sure to choose a blend that contains xanthan gum for that perfect chew!
- Vegan Choice: Replace eggs with flax eggs (1 tablespoon ground flaxseed mixed with 2.5 tablespoons water for each egg) and use vegan butter instead. You can make your favorite cookie recipe without compromise!
- Salted Topper: Sprinkle a pinch of flaky sea salt on top of each cookie dough ball before baking. This enhances sweetness and adds a beautiful, savory contrast. It’s the little things that make all the difference!
Don’t stop there; let your imagination run wild! And for a delicious meal to accompany your sweet treats, try my One Pot Pasta for a comforting flavor experience.
Classic Chewy Chocolate Chip Cookies Recipe FAQs
How do I choose the right ripeness for my ingredients?
Absolutely! When it comes to selecting butter, ensure it’s at room temperature—soft but not melted, for ideal creaminess. As for eggs, fresh is best; check dates on the carton and avoid any that are cracked. And remember, using brown sugar that’s soft (not hard or clumped) will enhance the chewiness of your cookies!
What are the best ways to store my cookies and how long will they last?
Very! Store your Classic Chewy Chocolate Chip Cookies in an airtight container at room temperature for up to 1 week. This helps to maintain their soft, chewy texture. If you want to keep them for longer, pop them into a freezer-safe bag and freeze for up to 3 months—just be sure to let the cookies cool completely first!
Can I freeze cookie dough for later? If so, how?
Absolutely! To freeze your cookie dough, scoop out individual portions onto a parchment-lined baking sheet and freeze until solid. Then transfer the frozen dough balls to a zip-top freezer bag or container. They can last up to 3 months in the freezer! When you’re ready to bake, simply bake them directly from frozen, adding an extra minute or two to the baking time.
What should I do if my cookies turn out flat?
Oh no! If your cookies spread too much, there are a few things you can check. Ensure your butter isn’t too soft—room temperature is ideal! Also, make sure not to skip chilling the dough for 30 minutes; this helps prevent spreading. Lastly, ensure your baking soda is fresh. It’s a leavening agent and crucial for creating that perfect lift!
Are there any dietary considerations, such as allergies?
Very! If you’re baking for someone with nut allergies, simply omit any nuts in the additions and use chocolate chips that are nut-free. For dairy-free options, substitute butter with a plant-based alternative like margarine, and use dairy-free chocolate chips. As always, double-check ingredient labels to ensure safety for those with allergies!
How can I make my cookies more chewy or more crispy?
Absolutely! For extra chewiness, consider adding an additional egg yolk to your mixture, as the fat adds moisture. You can also slightly underbake your cookies to keep the centers soft. On the flip side, for crispier cookies, use less brown sugar and more granulated sugar, plus ensure they bake a minute or two longer for that satisfying crunch on the edges.
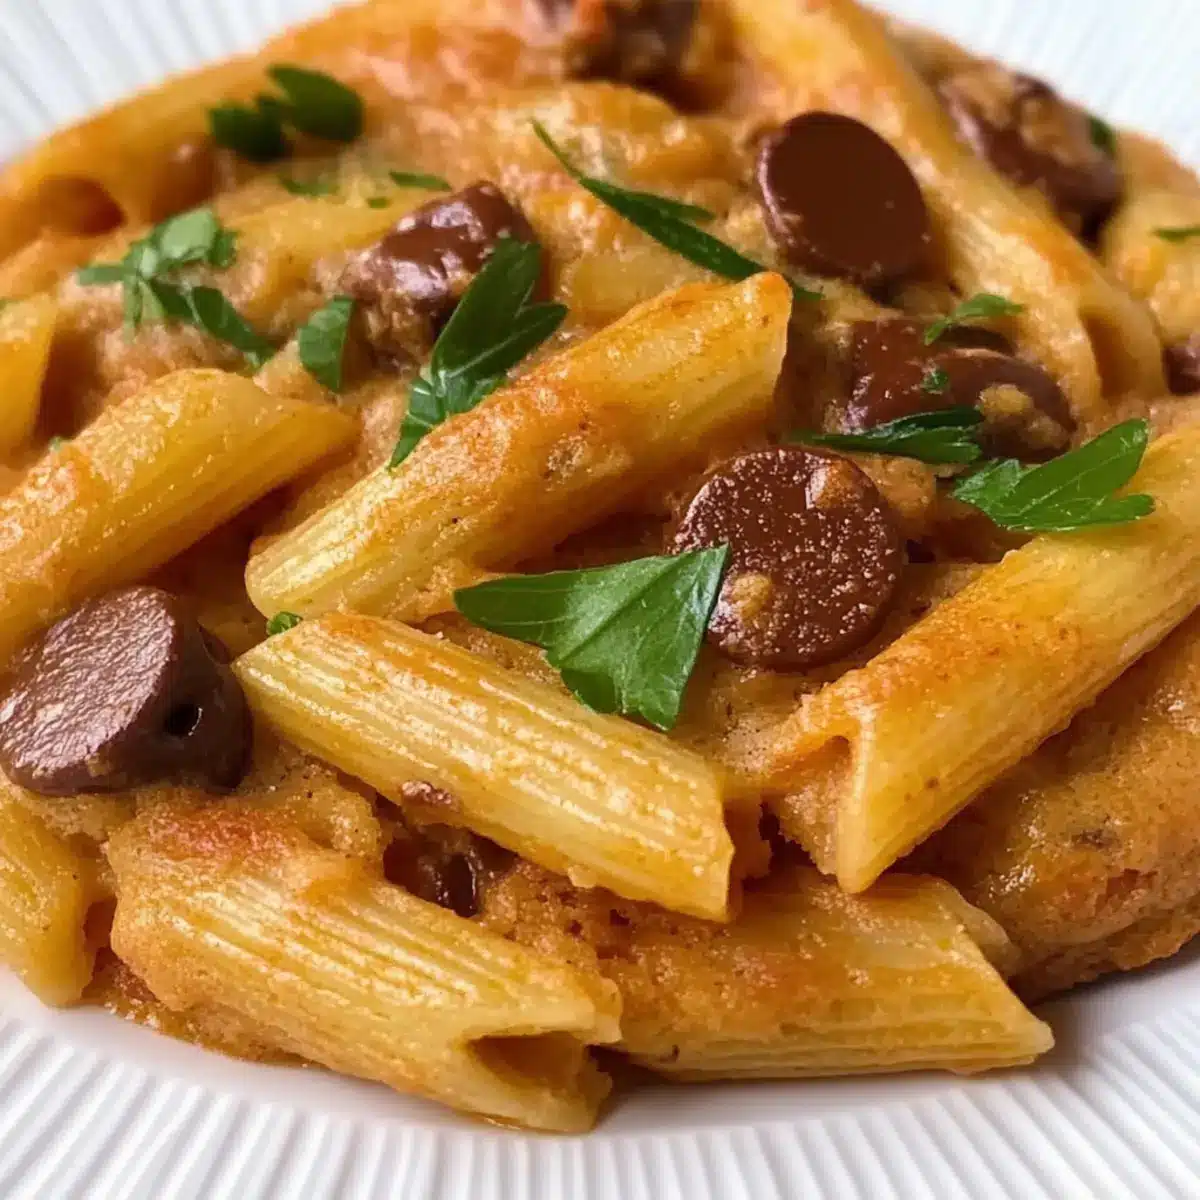
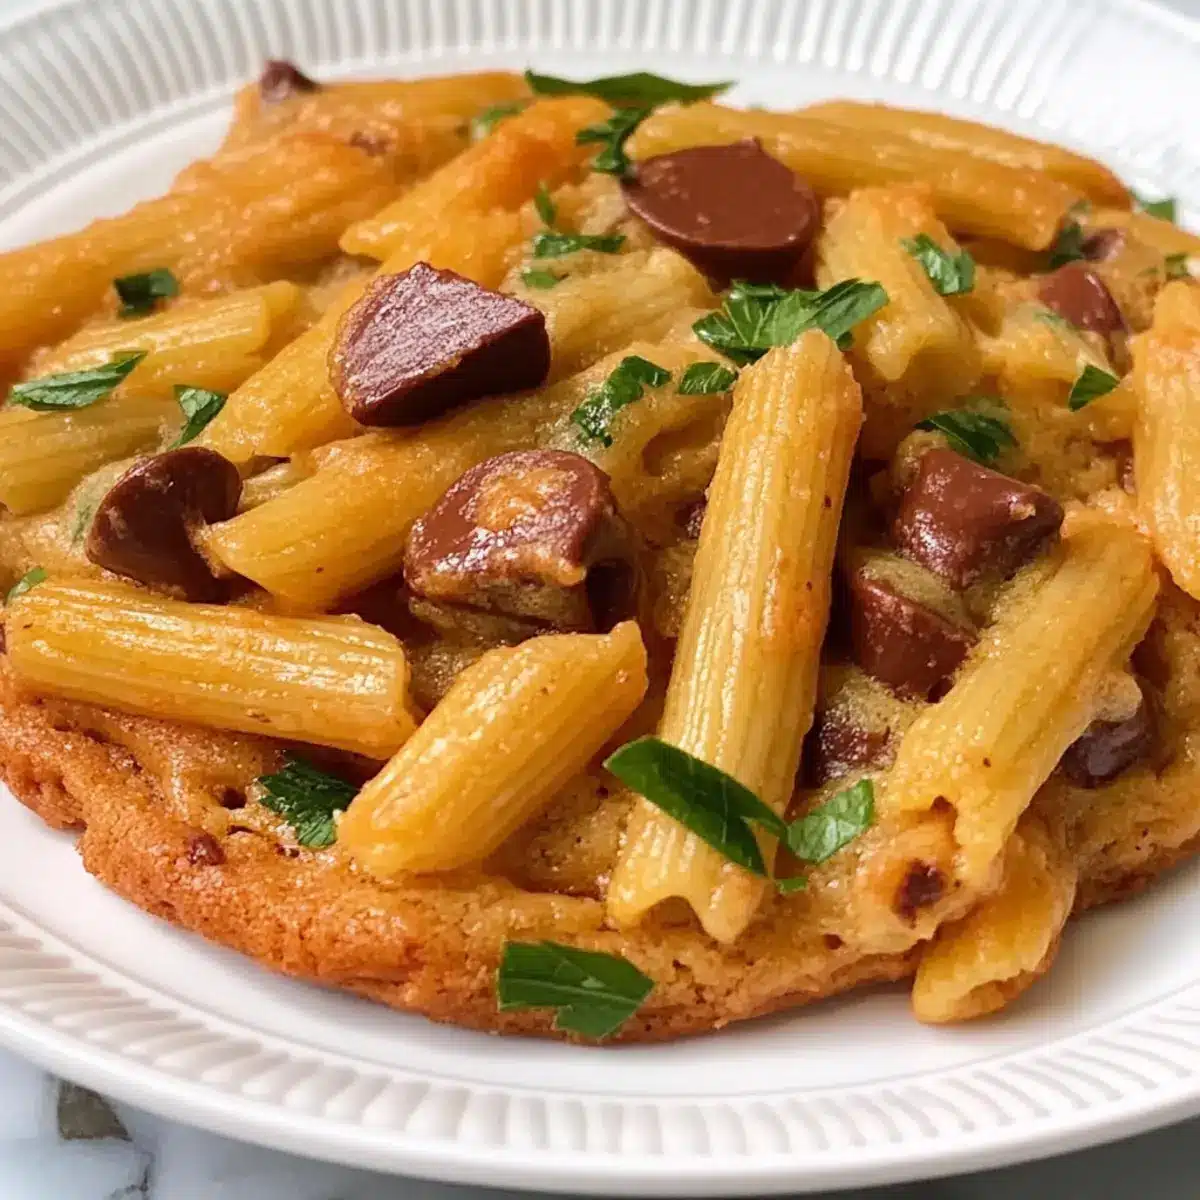
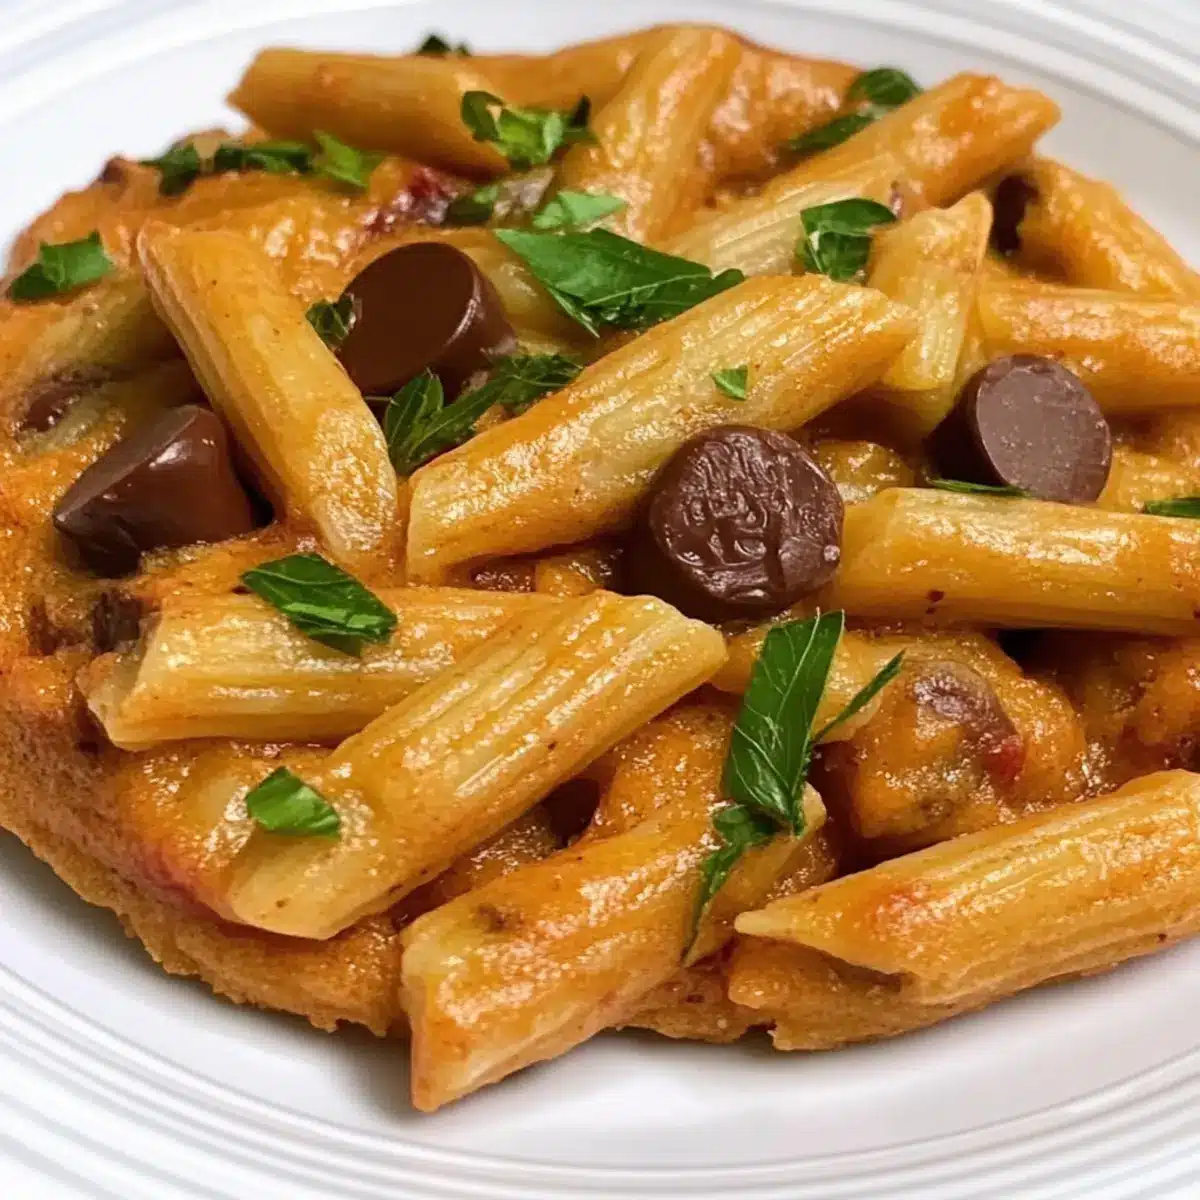
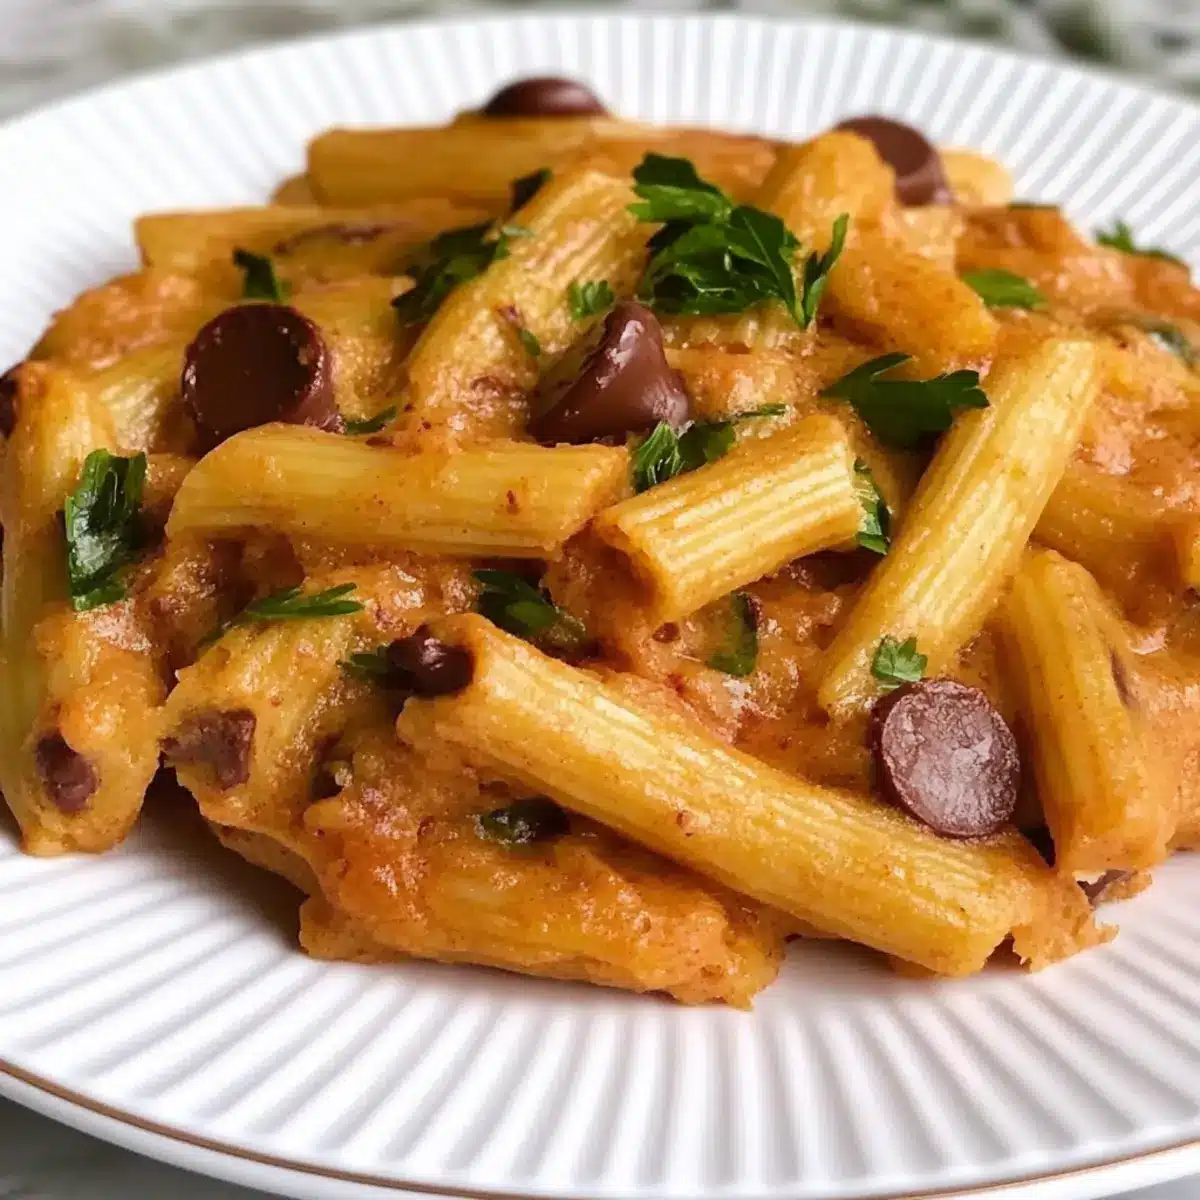
One Pot Creamy Cajun Sausage Pasta You'll Crave Tonight
Ingredients
Equipment
Method
- In a large pot, brown the sausage over medium heat until fully cooked.
- Add chopped onions, bell peppers, and garlic; sauté until softened.
- Stir in the chicken broth and pasta, bringing to a boil.
- Reduce heat, cover, and simmer until pasta is al dente, about 10-12 minutes.
- Mix in the heavy cream and Cajun seasoning, stir until well combined.
- Season with salt and pepper to taste; serve hot.
Leave a Reply