
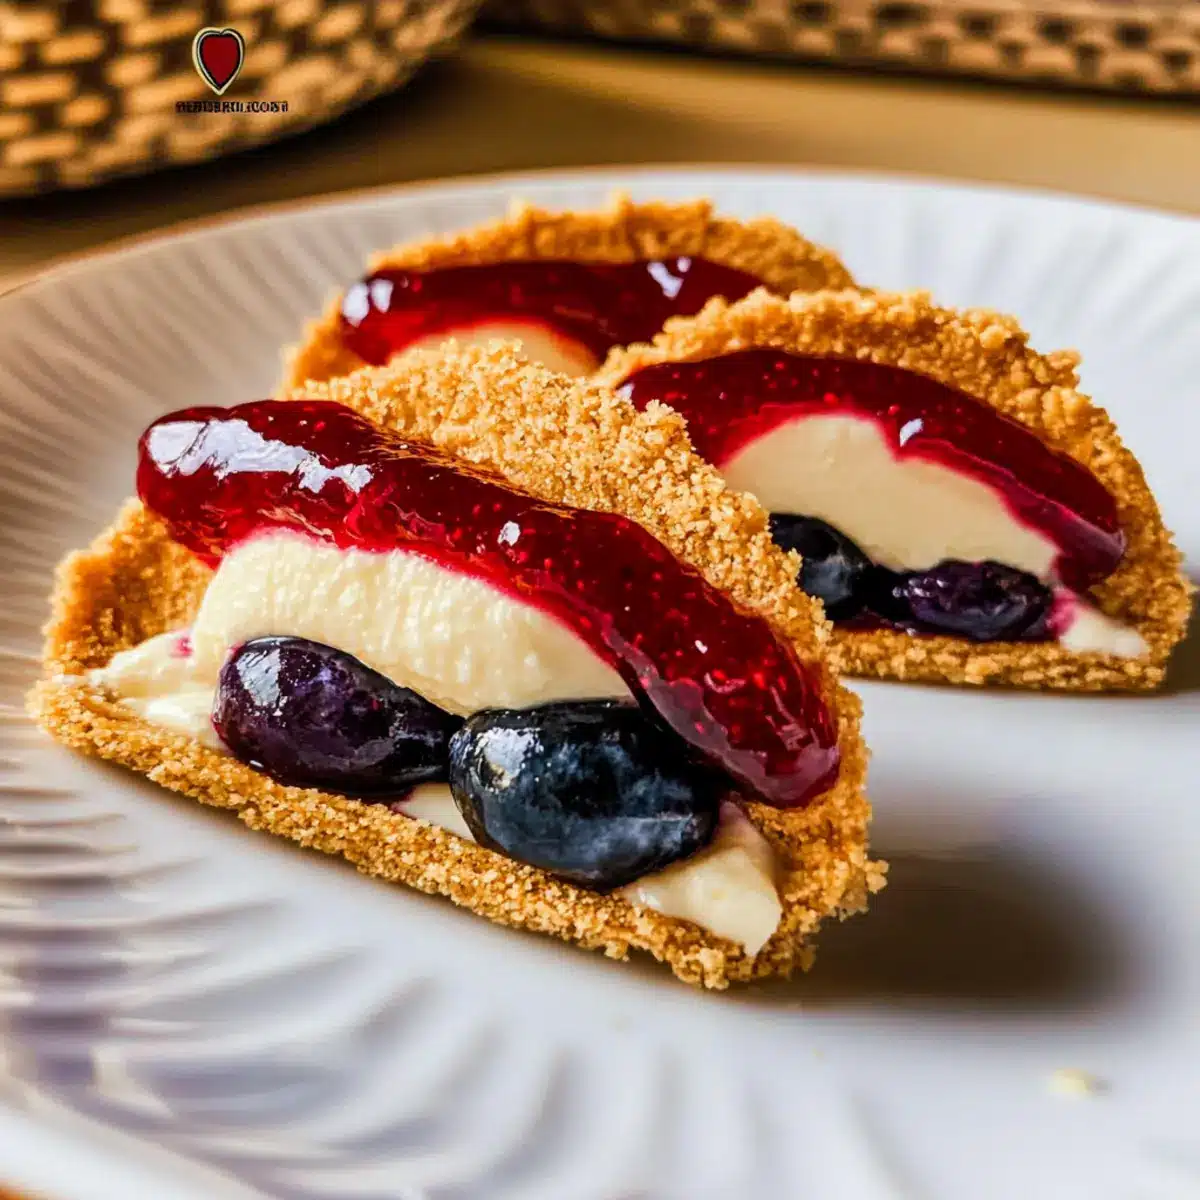
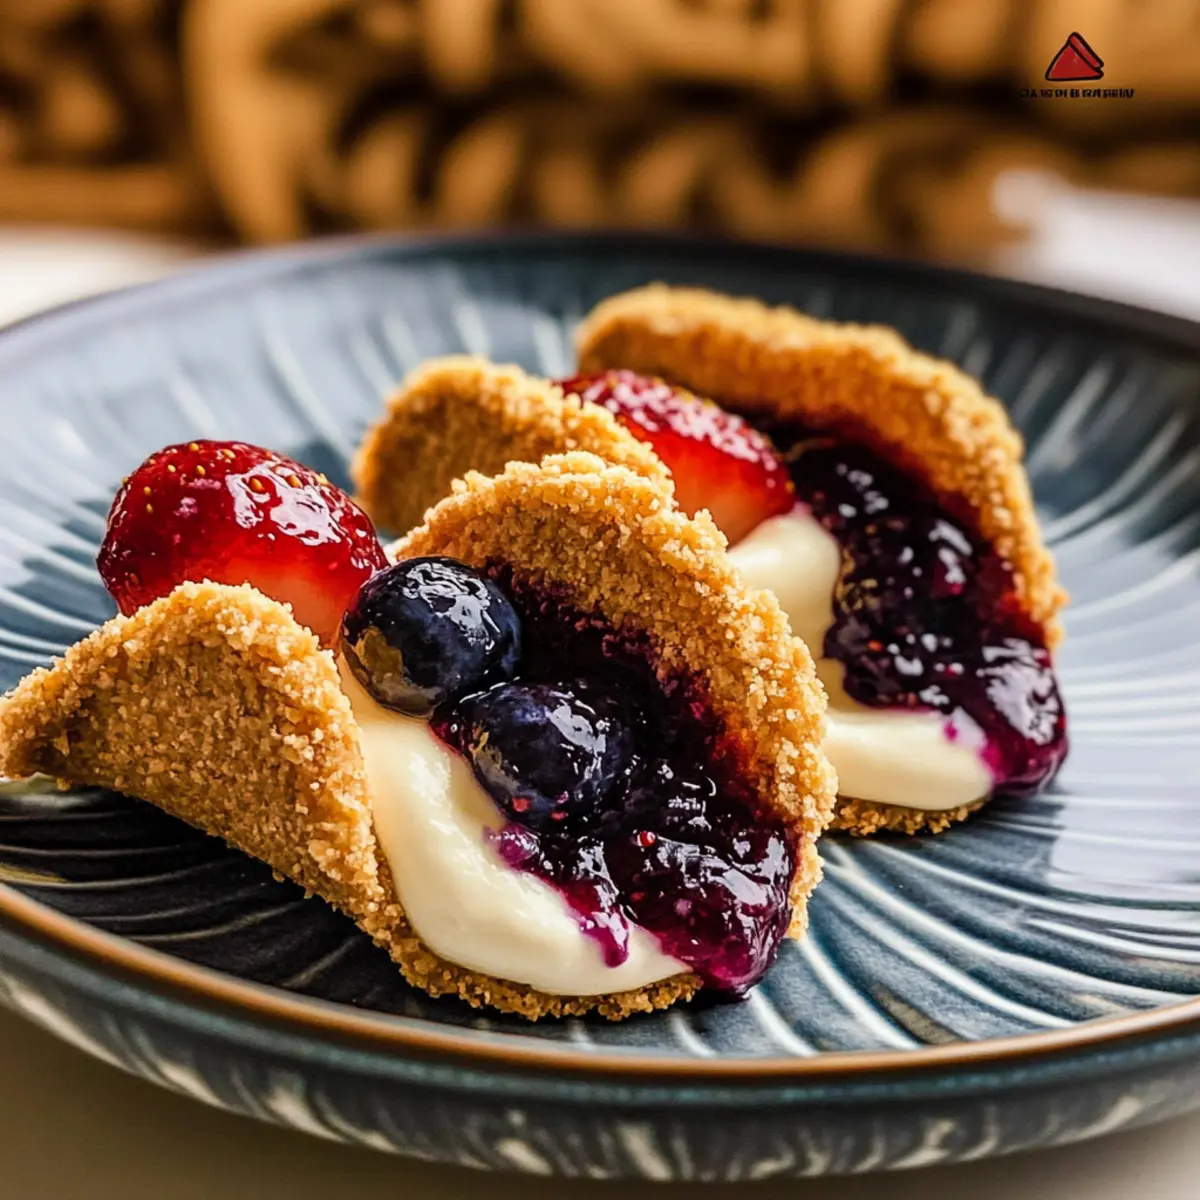
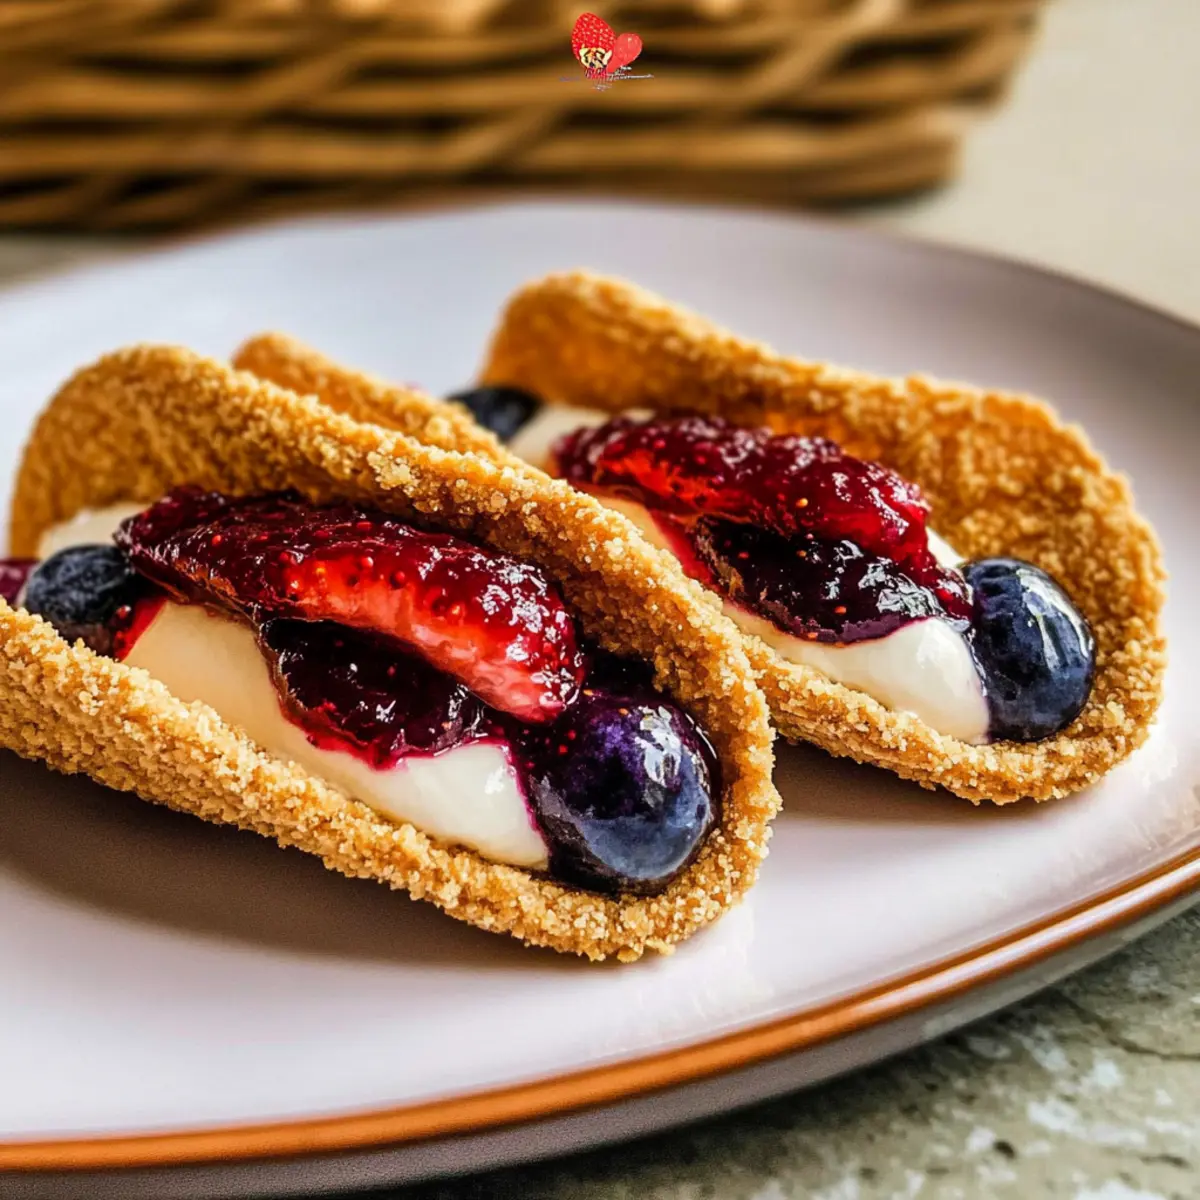
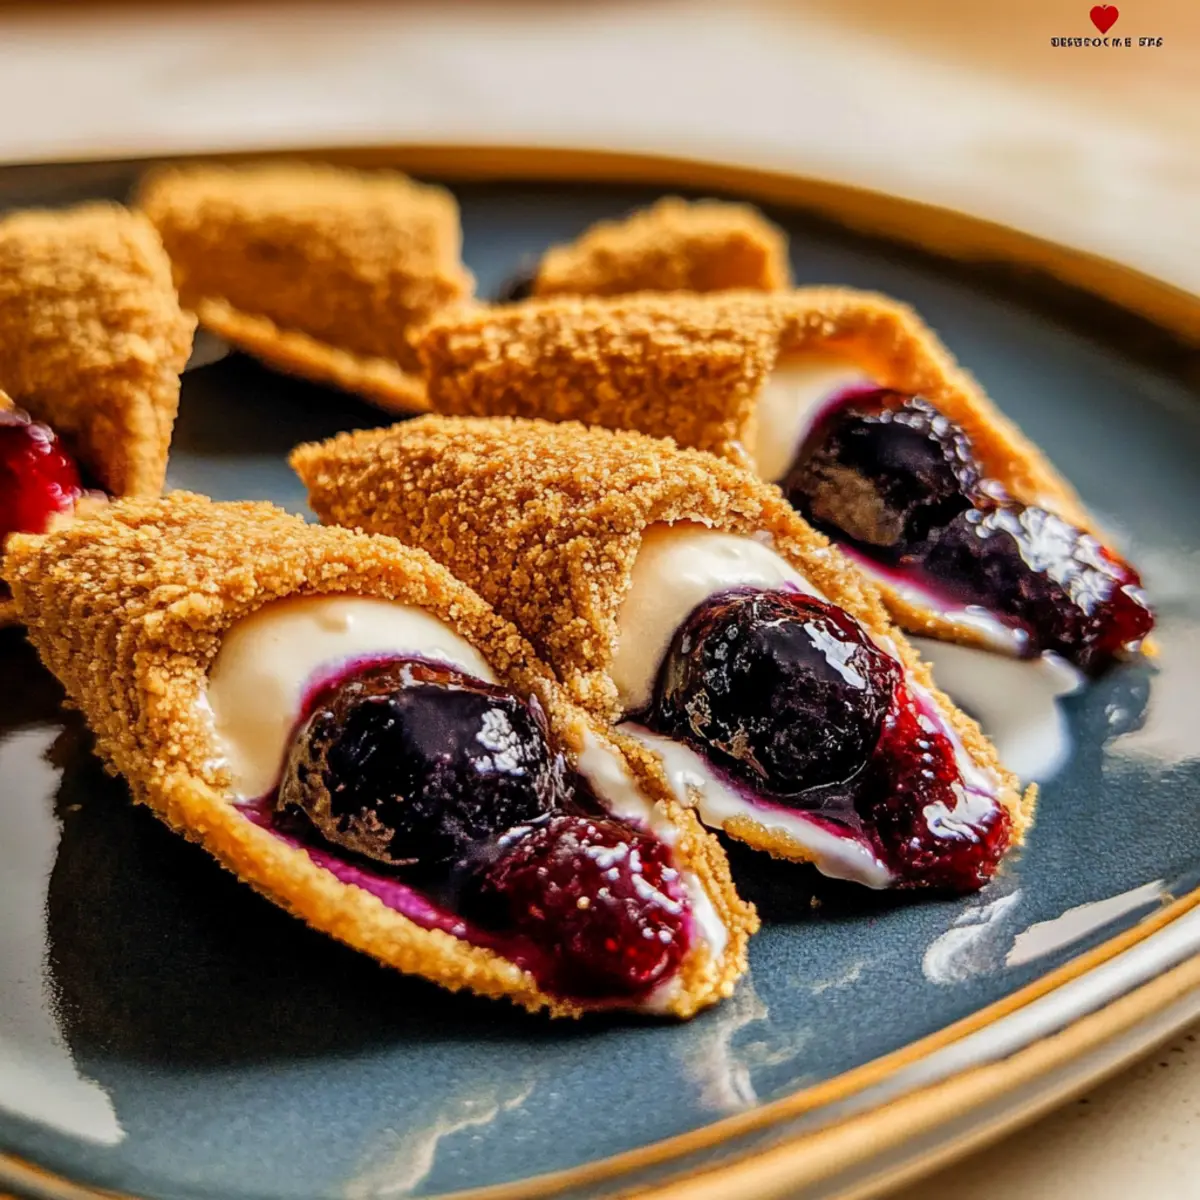
Tacos for dessert? You bet! These Berrylicious Cheesecake Tacos are a fun and unexpected twist that will have your taste buds dancing in delight. With a crunchy graham cracker crust enveloping a creamy cheesecake filling, they’re the perfect treat for summer celebrations or cozy brunches. Not only are these delightful bites quick to prepare, but they also offer a light, sweet escape from typical heavy desserts. Topped with fresh blueberry and strawberry jams, each bite is a burst of fruity goodness, making them an instant crowd-pleaser. So, are you ready to indulge in this playful dessert that reimagines tacos as a sweet sensation?
Why Are These Tacos So Irresistible?
Uniqueness: These Berrylicious Cheesecake Tacos turn a savory classic into an exciting dessert, igniting your creativity in the kitchen.
Quick to Make: With just a few steps, you’ll enjoy fresh and delightful tacos in no time—perfect for those lazy summer afternoons.
Flavor Explosion: The combination of the creamy cheese filling with fruity jams creates a divine taste experience, hitting all the right notes.
Versatile Toppings: Feel free to experiment with different jams or fruit toppings; variations like a rich chocolate drizzle can elevate them even further.
Crowd-Pleasing: Whether it’s a family gathering or a casual brunch, these fun tacos will have everyone asking for seconds!
Serve them alongside your favorite brunch items for a delightful spread—think of them as your dessert version of pairings from Fish Tacos Lime for a complete feast!
Berrylicious Cheesecake Tacos Ingredients
For the Taco Shells
- Tortilla – Use small flour tortillas for a softer taco base that contrasts beautifully with the creamy filling.
- Graham Cracker Crumbs – Provides a crunchy texture and rich cheesecake flavor; crushed digestive biscuits work as a great substitute.
- Unsalted Butter (melted) – Helps the crumbs stick, enhancing flavor; coconut oil is a nice dairy-free alternative.
For the Cheesecake Filling
- Cream Cheese (room temperature) – The star of the filling that gives it that luscious creaminess; opt for light cream cheese for a healthier option.
- Heavy Cream – Adds volume and lightness to your cheesecake; whipped coconut cream makes a delightful non-dairy substitute.
- Powdered Sugar – Sweetens the cheesecake filling; consider honey or agave syrup for a natural touch, but note that the texture may change.
- Lemon Juice – Adds a fresh zing that balances out the sweetness; lime juice gives a refreshing twist if you prefer.
- Vanilla Extract – Enhances the overall flavor; try vanilla bean paste for an even richer taste.
For the Toppings
- Blueberry Jam – A sweet topping that contributes a fruity punch; fresh berries can lighten it up further.
- Strawberry Jam – Complements the cheesecake wonderfully; feel free to explore other fruit jams like raspberry for variety.
Get ready to whip up these Berrylicious Cheesecake Tacos for a delightful twist on dessert!
Step‑by‑Step Instructions for Berrylicious Cheesecake Tacos
Step 1: Preheat the Oven
Begin by preheating your oven to 400°F (200°C). This will ensure that your Berrylicious Cheesecake Tacos bake evenly and reach that perfect crispy texture. While the oven warms up, gather your equipment, including a baking tray and an upside-down cupcake pan for shaping your taco shells.
Step 2: Prepare the Tortillas
Take a stack of small flour tortillas and use a 1.5-inch cookie cutter to cut out circles. Aim for about five circles per tortilla. To prevent air bubbles during baking, pierce each circle several times with a fork. This step is essential for achieving a good texture in your taco shells.
Step 3: Coat the Tortillas
Melt some unsalted butter in a microwave-safe bowl. Dip each tortilla circle into the melted butter, allowing the excess to drip off. Then, coat both sides with graham cracker crumbs, pressing gently to ensure they stick well. This mixture will add that delightful cheesecake crust flavor to your Berrylicious Cheesecake Tacos.
Step 4: Shape and Bake
Now it’s time to form your taco shells! Place the coated tortilla circles between the cups of your upside-down cupcake pan to create a lovely taco shape. Bake them in the preheated oven for 10 to 12 minutes or until they turn slightly golden brown. Once done, allow the shells to cool completely before filling.
Step 5: Make the Cheesecake Filling
In a mixing bowl, blend the room temperature cream cheese, lemon juice, and vanilla extract until smooth and creamy. In another bowl, whip the heavy cream with powdered sugar until stiff peaks form, ensuring a light and airy texture. Gently fold the whipped cream into the cream cheese mixture, creating a fluffy filling for your Berrylicious Cheesecake Tacos.
Step 6: Fill the Tacos
Once your taco shells are cooled, take a piping bag and fill it with the creamy cheesecake mixture. Gently pipe the filling into each taco shell, making sure they are generously filled. This step is where the magic of the Berrylicious Cheesecake Tacos truly comes alive.
Step 7: Add Toppings
To finish off your delightful dessert, top each filled taco with a layer of blueberry and strawberry jam. You can be as generous as you like—these sweet toppings will add an extra burst of flavor. Serve your Berrylicious Cheesecake Tacos immediately to enjoy the perfect combination of textures and tastes.
Berrylicious Cheesecake Tacos Variations
Feel free to explore these delightful twists that can elevate your Berrylicious Cheesecake Tacos and tailor them to your taste!
-
Dairy-Free: Substitute cream cheese with a plant-based cream cheese and use coconut whipped cream for a creamy filling without dairy.
Enjoy the same delightful texture without missing out on flavor! -
Natural Sweeteners: Swap powdered sugar with maple syrup or honey for a more natural sweetness; just adjust the amount to taste.
This gives the filling a nuanced sweetness that pairs beautifully with the fruit toppings. -
Texture Twist: Add finely chopped nuts like almonds or walnuts inside the taco shells for a satisfying crunch in every bite.
Nuts bring an earthy richness that complements the creamy filling perfectly. -
His & Hers: Create a chocolate version by mixing cocoa powder into the cream cheese filling for a deliciously rich alternative.
It turns a berry treat into a decadent chocolate dream that will charm every dessert lover. -
Summer Fruit Medley: Embrace the seasonal flavors by swapping out blueberry and strawberry jams for peach or raspberry.
The change of fruit can transform your tacos with brightness that captures the essence of summer. -
Spiced Filling: Enhance the flavor with a dash of cinnamon or nutmeg in the cheesecake mixture for warm, cozy notes.
This adds warmth and depth, perfect for a comforting dessert any time of the year. -
Citrus Zest: Boost the refreshing taste by incorporating citrus zest, like lemon or orange, into the filling for extra zing.
A little zest brightens up the profile, making each bite feel fresh and vibrant. -
Chocolate Drizzle: For that extra touch of indulgence, drizzle dark chocolate over the filled tacos before serving.
It adds a luscious and sophisticated touch, taking your dessert adventure to the next level!
Feel inspired to adapt these Berrylicious Cheesecake Tacos to your own taste—just like you would with your favorite dishes, perhaps inspired by Fish Tacos Lime for a sweet contrast in your dessert menu!
What to Serve with Berrylicious Cheesecake Tacos?
There’s nothing like elevating a delightful treat into a full meal experience, and these colorful tacos are no exception!
-
Vanilla Ice Cream: This creamy and dreamy scoop adds a delightful contrast to the cheesecake filling, enhancing the overall dessert experience.
-
Fresh Fruit Salad: A refreshing mix of seasonal fruits brightens the plate, balancing the sweetness of the tacos with a burst of natural flavor.
-
Minty Limeade: Quench your thirst with this zesty drink, which invigorates your taste buds and complements the fruity notes of the tacos.
-
Candied Pecans: These sweet, crunchy nuts provide a satisfying texture and a nutty flavor that beautifully contrasts the cheesecake’s smoothness.
-
Chocolate Drizzle: A silk ribbon of rich chocolate adds depth and indulgence, making your tacos feel even more special and luxurious.
-
Whipped Cream: A fluffy layer on top amplifies richness and offers a light finish to the cheesecake tacos—perfect for a cozy brunch!
-
Coconut Milkshake: This smooth, creamy drink echoes tropical flavors and enhances the berry toppings, creating a delightful harmony in every bite.
-
Cheesecake Bites: Keep the cheesecake theme alive by serving these bite-sized treats alongside; they make for playful mini desserts that match perfectly!
-
Savory Potato Wedges: For those who crave balance, crispy wedges with a touch of seasoning can create a lovely contrast against the sweet tacos.
How to Store and Freeze Berrylicious Cheesecake Tacos
Fridge: Store any leftover cheesecake filling in an airtight container for up to 3 days, ensuring it remains creamy and delicious.
Taco Shells: Keep the empty taco shells in an airtight container for up to a week. They are best enjoyed fresh but can be saved for later use.
Freezer: If you want to freeze assembled tacos, wrap each one individually in plastic wrap and store in a freezer-safe bag for up to 2 months. Thaw in the fridge before serving.
Reheating: For the best experience, fill tacos just before serving. If you’ve frozen them, zap the shells in the oven for a couple of minutes to restore their crispiness.
Make Ahead Options
These Berrylicious Cheesecake Tacos are perfect for busy home cooks looking to save time! You can prepare the taco shells up to 24 hours in advance; simply bake them and allow them to cool completely before storing in an airtight container. The cheesecake filling can also be made ahead—just refrigerate it for up to 3 days. When you’re ready to serve, fill the cooled taco shells with the cheesecake mixture and top them with the jams. This way, you’ll enjoy a fresh-tasting dessert with minimal last-minute effort, allowing you more time to relax and savor delightful moments with loved ones.
Expert Tips for Berrylicious Cheesecake Tacos
-
Room Temperature Cream Cheese: Ensure your cream cheese is at room temperature to mix smoothly; this prevents lumps in your cheesecake filling.
-
Gentle Folding: When combining the whipped cream with the cream cheese mixture, fold gently to maintain the airy texture; overmixing can lead to a dense filling.
-
Pre-bake Tortillas Carefully: Be cautious not to overbake your taco shells; they should be golden brown but still slightly soft for the best texture.
-
Serve Fresh: Ideally, fill and serve your Berrylicious Cheesecake Tacos immediately after assembly to prevent the shells from becoming soggy.
-
Customize Toppings: Experiment with different jams or fresh fruits to personalize your tacos; using seasonal berries can elevate the flavors significantly.
Berrylicious Cheesecake Tacos Recipe FAQs
What kind of tortillas should I use for the taco shells?
For the best texture and taste, I recommend using small flour tortillas. They provide a softer base that complements the creamy cheesecake filling. If you’re looking for a unique twist, try flavored tortillas like cinnamon or whole wheat!
How should I store leftover cheesecake filling?
Store any leftover cheesecake filling in an airtight container in the refrigerator for up to 3 days. Just be sure to keep it tightly sealed to maintain its creamy consistency and delicious flavor.
Can I freeze Berrylicious Cheesecake Tacos?
Absolutely! To freeze assembled tacos, wrap each one individually in plastic wrap and place them in a freezer-safe bag. They can be stored for up to 2 months. For the best results, thaw them in the refrigerator before enjoying. If the shells need a little crisping, a quick heat in the oven for a couple of minutes will do the trick!
What should I do if my cheesecake filling is too thick?
If your filling turns out too thick, don’t worry! You can gently fold in a little extra whipped cream until you achieve your desired consistency. Alternatively, adding a splash of milk or cream can help loosen it up while maintaining a smooth texture.
Are there any dietary considerations for these tacos?
These Berrylicious Cheesecake Tacos can easily be made suitable for various dietary needs! For a dairy-free version, substitute cream cheese with a non-dairy cream cheese alternative and use whipped coconut cream. Additionally, ensure that any jams are free from allergens, especially if serving to guests with dietary restrictions.
Berrylicious Cheesecake Tacos for a Sweet Summer Treat
Ingredients
Equipment
Method
- Preheat your oven to 400°F (200°C). Gather your equipment.
- Cut small flour tortillas into 1.5-inch circles. Pierce each circle with a fork to prevent bubbles.
- Melt unsalted butter and dip each circle into it. Coat both sides with graham cracker crumbs.
- Shape taco shells between the cups of an upside-down cupcake pan and bake for 10 to 12 minutes.
- Blend cream cheese, lemon juice, and vanilla extract until smooth. Whip heavy cream with powdered sugar until stiff peaks form, then fold into the cream cheese mixture.
- Fill the cooled taco shells with the cheesecake mixture using a piping bag.
- Top each taco with blueberry and strawberry jam before serving.
Leave a Reply