
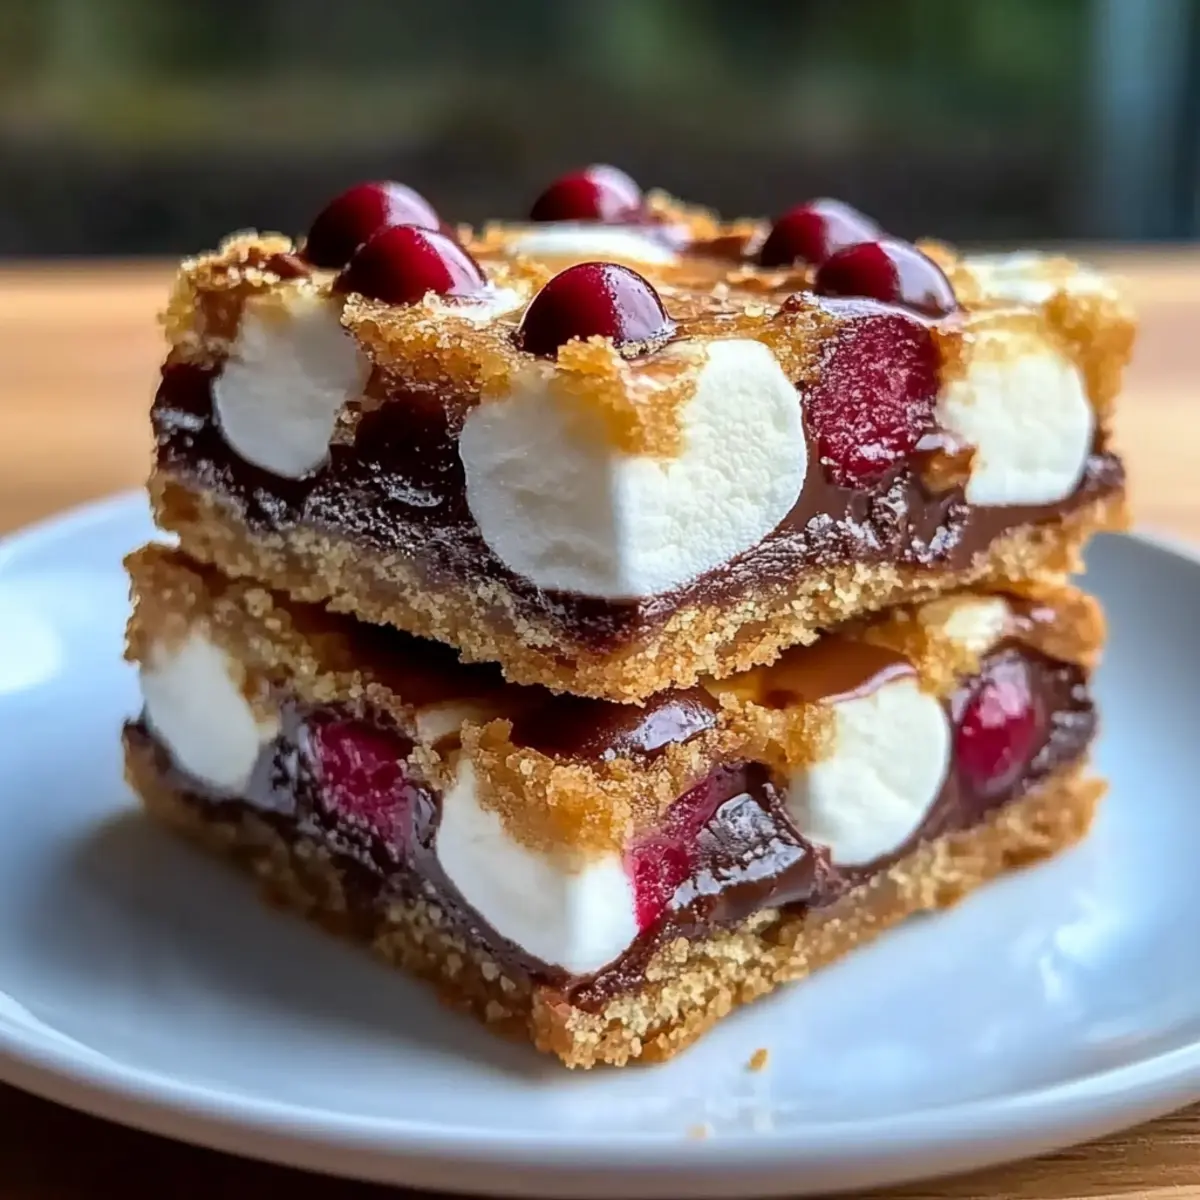
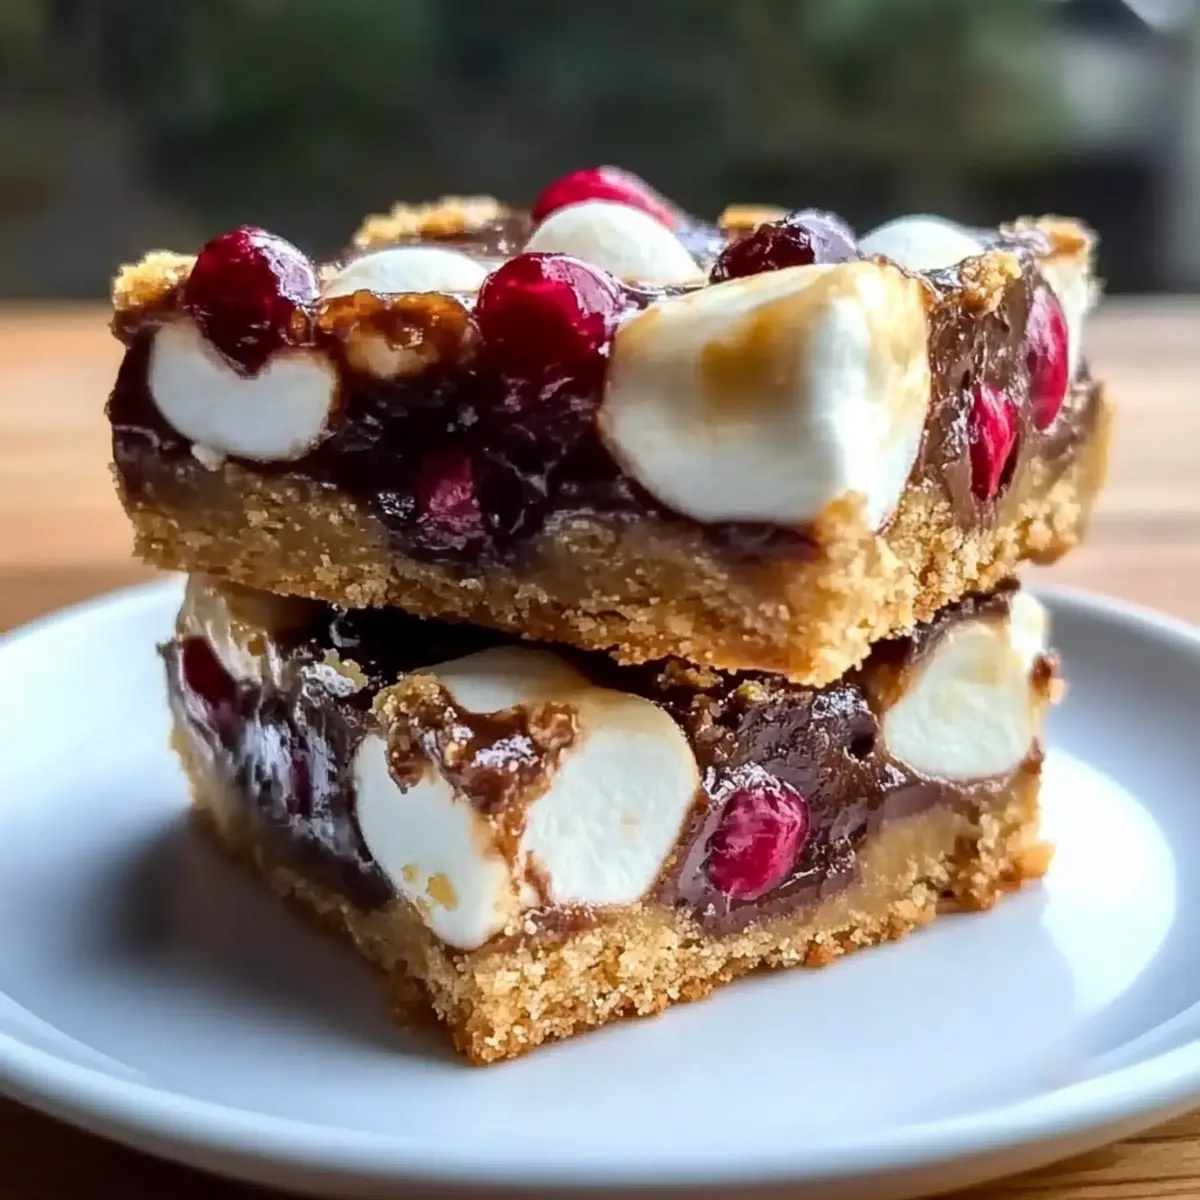
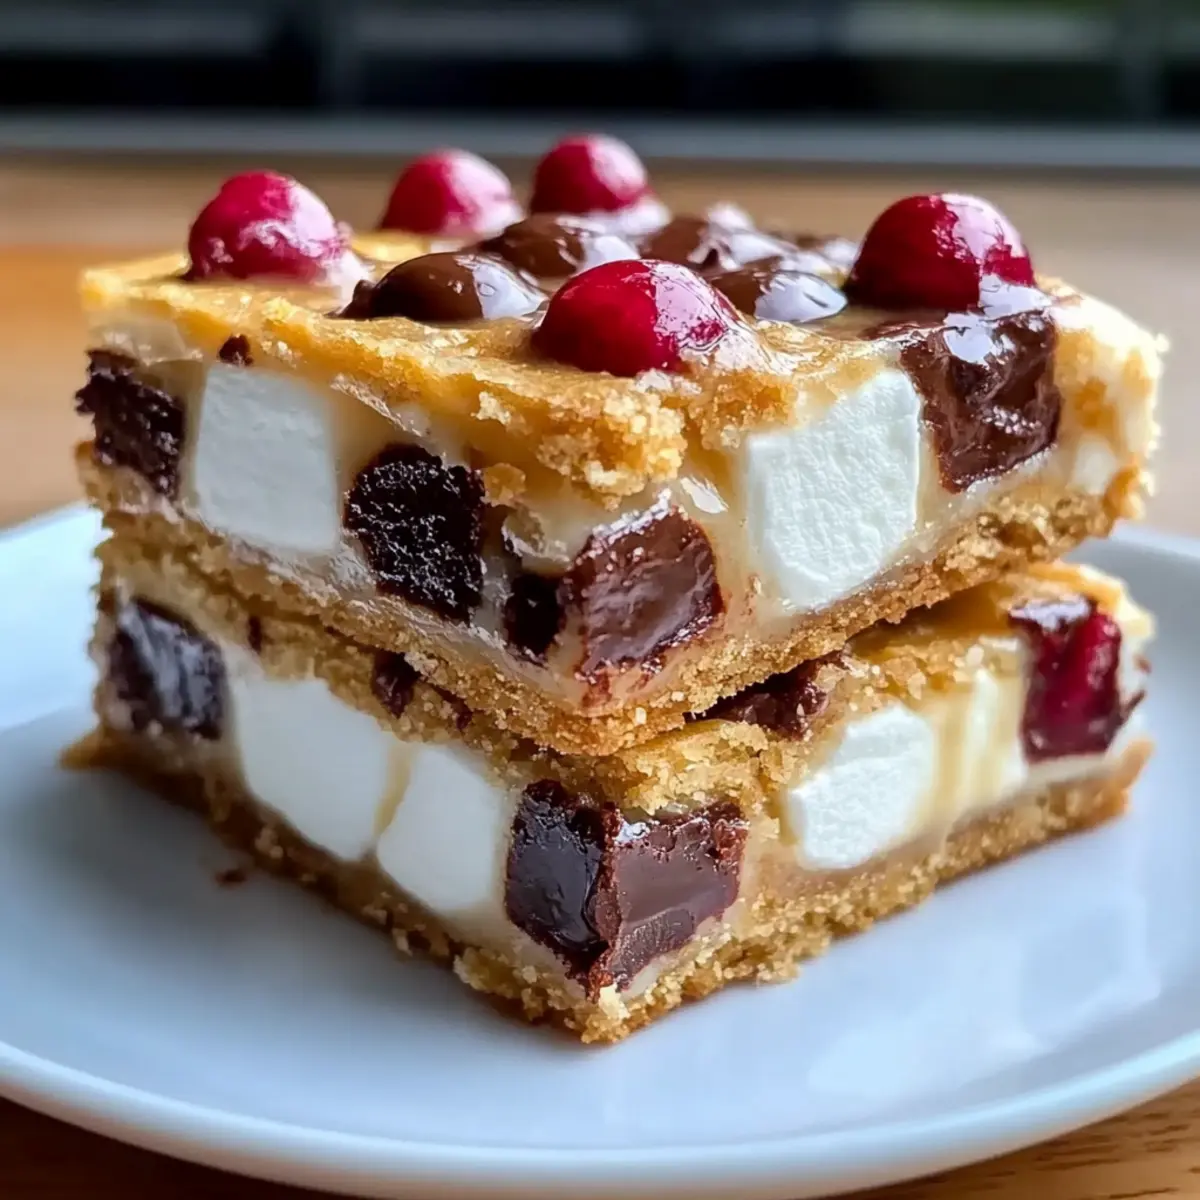
As the twinkling lights fill the room and the scent of gingerbread wafts through the air, I can’t help but feel that holiday magic is alive in the kitchen. This year, I’m excited to share my go-to recipe for Easy Christmas Bars—a quick dessert that captures the spirit of the season. Ready in just 15 minutes, these festive treats are perfect for holiday parties or cozy evenings with loved ones. What makes them even better? They are completely customizable, allowing everyone to join the sweet fun, whether you need nut-free, gluten-free, or even vegan options. Each bite is a delightful mix of rich chocolate, chewy marshmallows, and a buttery graham cracker base, making each square as memorable as the moments spent with family. Curious about how to make this crowd-pleaser your new holiday tradition? Let’s dive in!
Why are Christmas Bars a must-try?
Quick and Easy: With just 15 minutes of prep time, you can whip up these delicious Christmas bars, making them a perfect solution for busy holiday schedules.
Customizable for Everyone: Whether you’re hosting friends or accommodating dietary restrictions, these adaptable bars can easily become nut-free, gluten-free, or even vegan-friendly!
Rich, Indulgent Flavor: A luscious blend of chocolate, marshmallows, and graham crackers creates a satisfying treat that will have everyone coming back for seconds.
Perfect for Any Occasion: Ideal for holiday parties or cozy nights in, they’re a dessert that brings festive cheer to any gathering. Check out my Oatmeal Crumble Bars for another delicious option!
Charming Presentation: Dust with powdered sugar or garnish with mint leaves for an eye-catching finish that delights your guests before they even take a bite.
Indulge in the holiday spirit with these easy-to-make treats that everyone will love!
Christmas Bars Ingredients
For the Base
• Graham Cracker Crumbs – Creates a sweet, crunchy base; substitute with crushed gluten-free graham crackers or almond flour for a gluten-free option.
• Unsweetened Cocoa Powder – Adds a rich, chocolatey flavor; opt for high-quality cocoa for the best results.
• Powdered Sugar – Sweetens the bars and ensures a smooth texture; crucial for that melt-in-your-mouth experience.
• Unsalted Butter (melted) – Binds the ingredients together and brings richness; replace with melted coconut oil for a dairy-free version.
For the Mix
• Sweetened Condensed Milk – Provides moisture and sweetness, essential for a chewy texture; consider a homemade vegan version if desired.
• Mini Marshmallows – Introduce a fun, chewy element; regular marshmallows can also be used, but mini ones distribute more easily.
• Chocolate Chips – Enhances the chocolaty flavor; mix it up with dark, milk, or white chocolate varieties.
• Chopped Nuts (optional) – Adds a crunchy texture; omit for nut allergies or add extra chocolate chips for added sweetness.
Each ingredient plays a vital role in making these Christmas bars a festive delight that everyone can enjoy!
Step‑by‑Step Instructions for Easy Christmas Bars
Step 1: Preheat the Oven
Begin by preheating your oven to 350°F (175°C). This ensures a perfectly baked texture for your Easy Christmas Bars. While the oven warms up, gather your 9×13 inch baking pan and grease it with non-stick spray or line it with parchment paper for easy removal later.
Step 2: Mix the Dry Ingredients
In a large mixing bowl, combine graham cracker crumbs, unsweetened cocoa powder, and powdered sugar. Use a whisk to blend them together until the mixture appears uniform, with no visible lumps. This step lays the foundation for the rich flavors in your Christmas bars, ensuring a sweet and chocolaty base.
Step 3: Combine Wet Ingredients
Now, add the melted unsalted butter and sweetened condensed milk to the dry ingredients. Stir vigorously with a spatula or wooden spoon until the mixture becomes thick and homogenous. The creamy texture signals you’re well on your way to creating scrumptious Easy Christmas Bars.
Step 4: Fold in the Add-ins
Gently fold in the mini marshmallows, chocolate chips, and chopped nuts, if using. Aim to distribute these delightful add-ins evenly throughout the batter for a burst of flavor in every bite. The mixture should be soft yet sticky, brimming with the promise of chewy and chocolatey goodness.
Step 5: Spread the Mixture
Pour the thick batter into the prepared baking pan. Using an offset spatula or the back of a spoon, spread the mixture evenly across the bottom of the pan, ensuring it reaches all corners. This will ensure uniform baking and create beautifully shaped Easy Christmas Bars when cut.
Step 6: Bake to Perfection
Place the pan in the preheated oven and bake for 25–30 minutes. You’ll know they’re ready when the edges are set and the center feels slightly firm to the touch. The tempting aroma will fill your kitchen, making it hard to wait for these festive treats to cool.
Step 7: Cool and Cut
Once baked, remove the pan from the oven and allow the bars to cool completely in the pan on a wire rack. This crucial step helps the flavors develop and gives the bars their ideal chewy texture. Once cool, use a sharp knife to slice them into squares for serving.

Expert Tips for Christmas Bars
-
Melted Butter Matters: Ensure butter is fully melted for a smooth mixture. This helps bind ingredients and enhances flavor in your Christmas bars.
-
Greasing Techniques: Use non-stick spray or parchment paper for easy removal from the pan. This prevents sticking and makes serving hassle-free.
-
Cooling Is Key: Let the bars cool completely before cutting to prevent crumbling. A warm knife can also help achieve cleaner cuts for a prettier presentation.
-
Mix-In Variations: Feel free to experiment with various mix-ins like dried fruit or different types of chocolate for unique flavors. This customization keeps each batch exciting!
-
Storage Tips: Store bars in an airtight container at room temperature for up to a week. For longer freshness, freeze them—just ensure they’re well-wrapped!
What to Serve with Easy Christmas Bars?
As you gather around with loved ones, enhance the festive spirit by complementing these delightful treats with scrumptious accompaniments.
-
Hot Cocoa: This classic drink, rich and creamy, perfectly balances the chocolate flavors of the Christmas bars, creating a cozy indulgence.
-
Vanilla Ice Cream: A scoop of creamy vanilla ice cream adds a delightful contrast to the bars’ chewy texture, making each bite even more heavenly.
-
Spiced Apple Cider: Serve warm spiced apple cider for a seasonal beverage that adds a comforting warmth, enhancing the holiday atmosphere.
-
Powdered Sugar Dusting: A light dusting of powdered sugar transforms the Christmas bars into an elegant dessert, instantly elevating their visual appeal.
-
Fresh Mint Leaves: Adding a few fresh mint leaves as a garnish not only brings bright color but also enhances the holiday feeling with their refreshing aroma.
-
Dried Fruit Medley: A mix of dried cranberries and apricots on the side provides a chewy, sweet contrast that complements the bars’ rich flavors beautifully.
-
Peanut Butter Drizzle: For a nutty twist, a drizzle of creamy peanut butter enhances the richness of the bars and offers a delightful salty-sweet balance.
-
Chocolate Fondue: Set up a chocolate fondue station where guests can dip pieces of the Christmas bars for an interactive and decadently delicious dessert experience.
How to Store and Freeze Christmas Bars
Room Temperature: Store the bars in an airtight container at room temperature for up to one week. This keeps them fresh and chewy, ready for sweet cravings!
Fridge: For enhanced flavor, store Christmas bars in the refrigerator. They’ll taste even better after a day, lasting for about 1 week.
Freezer: To preserve for longer, freeze the bars for up to three months. Ensure they’re tightly wrapped in plastic wrap or foil to prevent freezer burn for the best texture upon thawing.
Reheating: If desired, gently warm the bars in the microwave for 10-15 seconds before indulging, bringing back that fresh-out-of-the-oven experience!
Make Ahead Options
These Easy Christmas Bars are perfect for meal prep enthusiasts looking to save time during the busy holiday season! You can mix the dry ingredients (graham cracker crumbs, cocoa powder, and powdered sugar) and store them in an airtight container for up to 3 days ahead. Additionally, you can combine the wet ingredients (melted butter and sweetened condensed milk) and refrigerate them overnight for freshness. When you’re ready to bake, simply combine the prepped components, fold in the mini marshmallows and chocolate chips, then spread the mixture into the pan and bake. This method retains their delightful texture and ensures your Christmas bars are just as scrumptious as when made fresh!
Christmas Bars: Delicious Variations to Try
Feel free to get creative with these Christmas bars, transforming them to match your taste buds or dietary needs!
- Nut-Free: Simply omit the chopped nuts and add more chocolate chips. This swap still delivers on flavor while keeping everyone safe.
- Gluten-Free: Swap in gluten-free graham crackers or almond flour for a delicious alternative that retains that sweet, crunchy base.
- Vegan: Replace the unsalted butter with melted coconut oil and use a vegan-friendly condensed milk. Your dairy-free guests will thank you!
- Mint Chocolate Twist: Add a splash of peppermint extract to the batter for a festive, refreshing flavor that evokes wintry vibes.
- Fruit and Nut Medley: Toss in dried cranberries or cherries, along with your favorite nuts for a colorful touch that adds a delightful chewiness to every bite.
- Spicy Touch: A pinch of cayenne or cinnamon can elevate the chocolate flavor, adding a warm kick that might become your new favorite twist!
- Peanut Butter Buff: Incorporate a swirl of creamy peanut butter into the batter before baking for an irresistible blend of flavors. This also pairs wonderfully with chocolate chips!
- S’mores Style: Mix in graham cracker chunks and mini marshmallows for a delightful s’mores experience. Remind everyone of nights spent around a campfire with each scrumptious bite.
Don’t forget to explore more irresistibly sweet options like my Oatmeal Crumble Bars to expand your holiday dessert repertoire!
Christmas Bars Recipe FAQs
What type of graham crackers should I use for Christmas Bars?
Absolutely! For the best flavor, opt for regular graham cracker crumbs. However, if you need a gluten-free option, crushed gluten-free graham crackers or even almond flour work well as substitutes. Just ensure the packaging is labeled gluten-free to avoid any cross-contamination.
How should I store leftover Christmas Bars?
The more the merrier! Store your Christmas bars in an airtight container at room temperature for up to a week. For even better flavor, let them sit in the fridge for a day—they’ll taste even more delightful! If you want to keep them longer, freeze for up to three months. Just wrap them tightly in plastic wrap or foil to prevent freezer burn.
Can I freeze Christmas Bars, and if so, how?
Certainly! To freeze your Christmas bars, first allow them to cool completely. Then, wrap them tightly in plastic wrap or aluminum foil—this is key to keeping them fresh. Place the wrapped bars in a freezer-safe bag or container. They can be stored in the freezer for up to three months. When you’re ready to enjoy, simply thaw them in the fridge overnight or at room temperature for a few hours.
What if my Christmas Bars are too crumbly after baking?
No worries! If your bars turn out crumbly, it might be due to not using enough sweetened condensed milk or not letting them cool completely before cutting. For future batches, make sure to follow the mixing instructions closely and allow the bars to cool completely in the pan. Additionally, if you find them challenging to cut, try using a warm knife for smoother edges.
Can I make Christmas Bars vegan?
Absolutely! To make your Christmas bars vegan, simply substitute the unsalted butter with melted coconut oil. For the sweetened condensed milk, you can use a homemade vegan alternative made from coconut milk as well. This way, everyone at your gathering can indulge guilt-free!
Are these Christmas Bars safe for nut allergies?
Yes, they’re very versatile! To accommodate those with nut allergies, simply omit the chopped nuts altogether. You can also add extra chocolate chips for that delightful crunch while keeping the bars nut-free. Just be sure to check that the chocolate chips you use are also nut-free to avoid any concerns.
Delicious Christmas Bars: The Ultimate Festive Treat!
Ingredients
Equipment
Method
- Preheat your oven to 350°F (175°C). Grease a 9x13 inch baking pan with non-stick spray or line it with parchment paper.
- In a large mixing bowl, combine graham cracker crumbs, unsweetened cocoa powder, and powdered sugar. Whisk until uniform.
- Add melted unsalted butter and sweetened condensed milk to the dry ingredients. Stir until it becomes thick and homogenous.
- Gently fold in the mini marshmallows, chocolate chips, and chopped nuts, distributing evenly throughout the batter.
- Pour the mixture into the prepared baking pan and spread it evenly across the bottom.
- Place the pan in the oven and bake for 25–30 minutes, until edges are set and the center is slightly firm.
- Remove from the oven and allow to cool completely in the pan. Cut into squares for serving.
Leave a Reply