
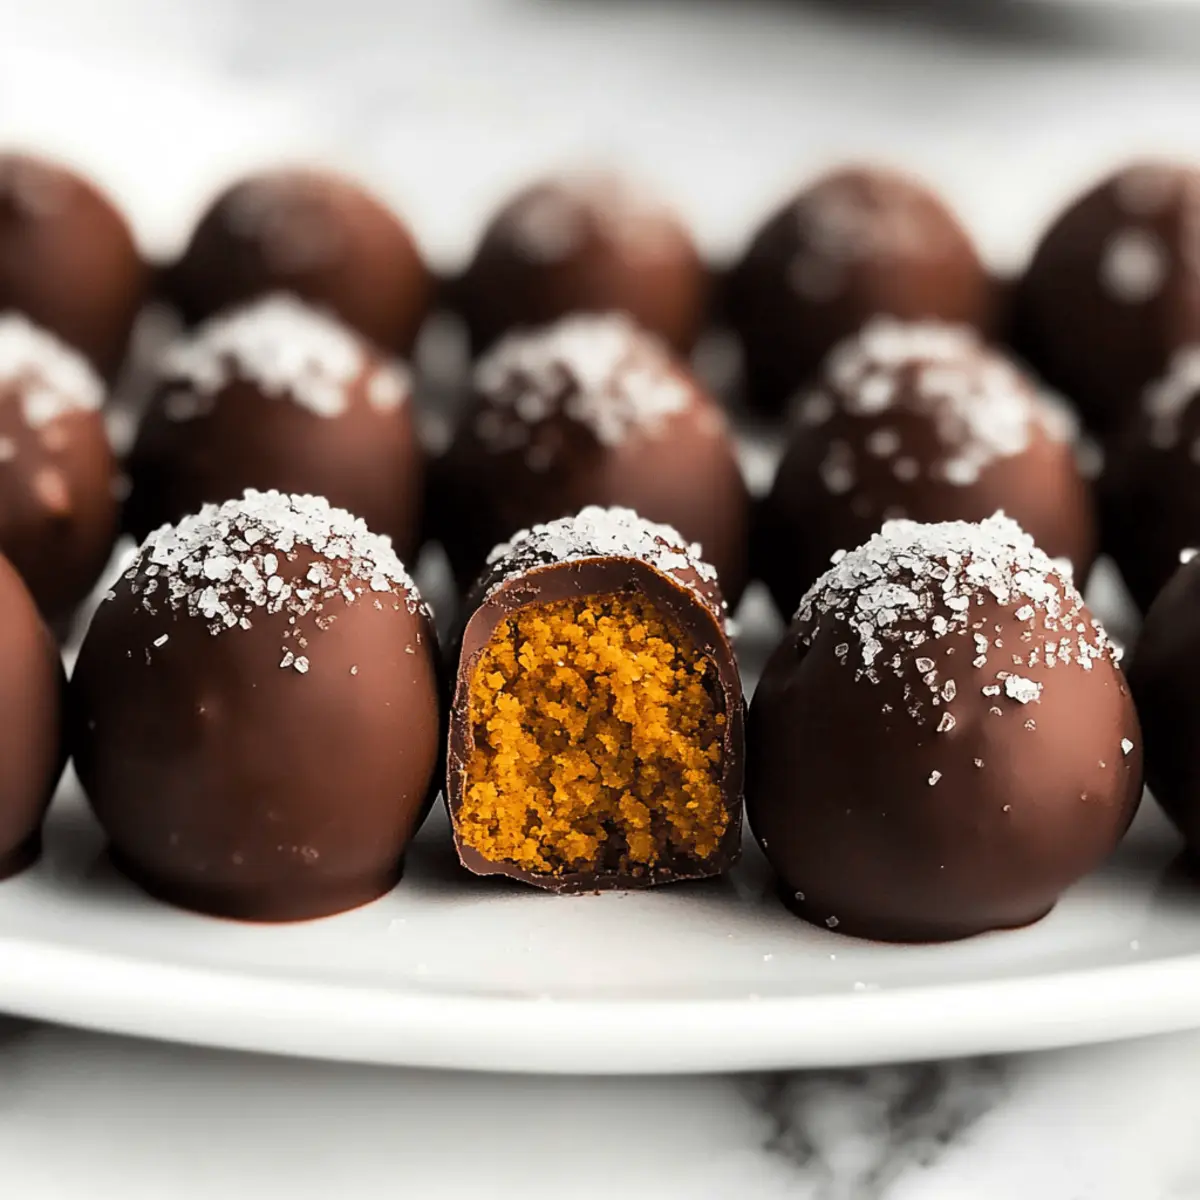
With a splash of fall and a hint of indulgence, these Healthy Pumpkin Truffles are the perfect way to celebrate the season! Picture this: creamy pumpkin puree encased in velvety dark chocolate, delicately infused with cozy spices that evoke memories of cozy evenings by the fire. What makes my Healthy Pumpkin Truffles irresistible is not just their rich flavor, but that they are also vegan, gluten-free, and low in calories—meaning you can enjoy these guilt-free delights without a second thought. Plus, they’re incredibly simple to prepare, making them a fantastic option for entertaining or a quick snack. Curious about how to whip up these delightful treats? Let’s dive into the world of pumpkin goodness together!
Why Are Healthy Pumpkin Truffles Irresistible?
Guilt-Free Indulgence: Enjoy the rich taste of pumpkin pie without the heavy calories!
Vegan and Gluten-Free: Perfect for everyone, no dietary restrictions need to hold you back!
Simple Preparation: No baking required—just mix, roll, and chill for delicious results.
Incredible Flavor: The cozy spices and creamy filling tantalize your taste buds in every bite.
Versatile Treats: Perfect for holiday gatherings, or enjoy as a quick snack anytime!
These Healthy Pumpkin Truffles are not only a delightful fall treat but also pair wonderfully with a warm cup of tea or coffee, much like my Baked Pumpkin Donuts or Chewy Pumpkin Cookies. Ready to get started? Let’s make some magic with pumpkin!
Healthy Pumpkin Truffles Ingredients
For the Truffle Filling
- Pumpkin Purée – Provides moisture and flavor; ensure you use canned pumpkin and not pumpkin pie mix for best results.
- Homemade Pumpkin Spice – Infuses that cozy pumpkin pie flavor; consider making your own for a stronger spice blend.
- Salt – Balances sweetness and enhances flavor; fine salt integrates better into the filling.
- Liquid Stevia – A no-calorie sweetener option; adjust to taste, but note may require flour adjustments with sugar substitutes.
- Oat Flour – Acts as a binder and adds structure; can be swapped with any flour except coconut flour for texture variation.
For the Chocolate Coating
- Dark Chocolate – Adds richness and contrast; opt for high-quality bars over chocolate chips for a superior melt.
- Flaky Sea Salt – A lovely optional topping; sprinkle after chocolate coating for an elegant finish.
These Healthy Pumpkin Truffles are a fantastic way to enjoy the flavors of the season without the guilt!
Step‑by‑Step Instructions for Healthy Pumpkin Truffles
Step 1: Prepare the Baking Sheet
Begin by lining a tray with wax or parchment paper, ensuring it’s large enough to hold all your truffles once formed. This will prevent sticking and make cleanup a breeze. Set the prepared tray aside while you work on the truffle filling, keeping your workspace organized and ready for the next delicious step.
Step 2: Make the Filling
In a medium mixing bowl, combine the pumpkin purée, homemade pumpkin spice, fine salt, and liquid stevia. Use a spatula to roughly mix until well blended. Gradually add the oat flour, stirring gently until the mixture forms a cohesive dough that’s slightly sticky but holds together well. This creamy filling is the base of your Healthy Pumpkin Truffles, blending delightful flavors into every bite.
Step 3: Form Balls
Once the mixture is ready, lightly oil your hands to prevent sticking, then scoop out portions of the filling and roll them into bite-sized spheres. Aim for a uniform shape for even coating and presentation. Place the formed truffles on your lined baking sheet, giving them a little space for easy handling and to allow for a smooth chocolate coating later.
Step 4: Melt Chocolate
In a microwave-safe bowl, break the dark chocolate into small pieces and heat it in 20-second intervals in the microwave. Stir thoroughly after each interval until the chocolate is completely melted and smooth in texture. This rich coating will provide a delectable contrast to your creamy pumpkin filling, making your Healthy Pumpkin Truffles irresistible.
Step 5: Coat the Truffles
Using two forks, carefully dip each truffle sphere into the melted chocolate. Ensure they’re fully covered, then gently tap off any excess chocolate. This technique helps achieve a thin, even coating that enhances flavor while maintaining the delicate shape of your truffles. Place each coated truffle back on the lined baking sheet.
Step 6: Set and Season
After coating the truffles, immediately sprinkle a pinch of flaky sea salt on top of each one before the chocolate sets. This optional touch brings out the flavors beautifully and adds an elegant finish. Allow the truffles to rest at room temperature briefly while you prepare to chill them for the best texture.
Step 7: Chill
Transfer the tray of coated Healthy Pumpkin Truffles to the refrigerator and chill for at least 30 minutes, or until the chocolate coating has hardened completely. This step locks in the delicious pumpkin flavor and gives the truffles a solid, satisfying bite. Once firm, they’ll be ready to enjoy or serve to guests for a delightful treat!
Make Ahead Options
These Healthy Pumpkin Truffles are perfect for meal prep, allowing you to save time during busy weeks! You can prepare the truffle filling up to 24 hours in advance; simply roll the mixture into balls and refrigerate them, ensuring freshness while keeping the flavors intact. If you’re looking to get ahead even further, you can coat the truffles in chocolate and store them in the fridge for up to 3 days before serving. Just remember to let them come to room temperature for about 10-15 minutes before enjoying, as this enhances their texture and flavor. With these make-ahead tips, you’ll have delicious treats ready at a moment’s notice, making snack time or dessert a breeze!
Healthy Pumpkin Truffles Variations & Substitutions
Feel free to play with these Healthy Pumpkin Truffles and make them your own; creativity in the kitchen is always encouraged!
-
Flour Swap: Replace oat flour with almond flour for a nutty flavor and a slightly denser texture.
-
Sweetness Alternative: Use maple syrup instead of liquid stevia for a more traditional sweetness, but remember to adjust the dry ingredients accordingly since syrup adds moisture.
-
Flavor Boost: Incorporate a dash of vanilla extract into the filling to add an extra layer of rich flavor and warmth.
-
Nutty Texture: Add chopped walnuts or pecans into the filling for a delightful crunch that complements the creamy pumpkin.
-
Cocoa Twist: Mix in cocoa powder into the filling for a chocolatey spin that harmonizes beautifully with the dark chocolate coating.
-
Chili Kick: Sprinkle cayenne pepper in the pumpkin filling for a surprising heat that enhances the earthy flavors of pumpkin.
-
Topping Options: Try tossing the truffles in crushed pecans or coconut flakes after coating in chocolate for an attractive texture contrast.
These variations not only offer a way to customize your Healthy Pumpkin Truffles but also provide you with opportunities to experiment, much like in my Pumpkin S’mores Cookies or Chewy Pumpkin Cookies. Happy cooking!
Storage Tips for Healthy Pumpkin Truffles
Fridge: Store your Healthy Pumpkin Truffles in an airtight container in the refrigerator for up to 5 days to maintain their freshness and delicious flavor.
Freezer: For longer storage, you can freeze the truffles for up to 2 months. Just arrange them in a single layer on a baking sheet until frozen, then transfer to a freezer-safe bag.
Thawing: When you’re ready to enjoy, thaw the truffles in the fridge for a few hours or overnight, allowing them to return to their creamy texture.
Reheating: These truffles are best served cold or at room temperature, so there’s no need to reheat—simply take them out and savor the goodness!
What to Serve with Healthy Pumpkin Truffles
Create the ultimate fall-inspired experience with these deliciously indulgent treats!
-
Creamy Hot Chocolate: The rich, velvety sweetness of hot chocolate perfectly complements the spiced flavors of the truffles for an irresistible pairing.
-
Spiced Chai Latte: A warm chai latte brings cozy, aromatic spices that enhance the pumpkin essence, making every bite of the truffles a delightful treat.
-
Almond Butter Toast: Crunchy, nutty almond butter toast offers a satisfying contrast to the truffles’ smooth texture, making it an excellent snack or breakfast option.
-
Fresh Fruit Salad: A refreshing medley of apples, pears, and citrus can balance the sweetness of the truffles, offering a light and fruity counterpoint.
-
Pumpkin Pie Milkshake: For an indulgent dessert, a rich pumpkin pie milkshake pairs beautifully, echoing the flavors of the truffles while adding a creamy twist.
-
Dark Roast Coffee: The bold and rich notes of dark roast coffee highlight the chocolate coating, creating a perfect morning or afternoon pick-me-up alongside your Healthy Pumpkin Truffles.
Each of these pairings enhances the warm, comforting flavors, making your pumpkin truffle experience even more delightful!
Expert Tips for Healthy Pumpkin Truffles
-
Measure Carefully: Accurate flour measurement is key to avoid dry or crumbly filling. Use a digital scale or the spoon-and-level method for the best results.
-
Chocolate Temperature: Maintain the melted chocolate’s warmth by using a panini press or griddle while coating. This ensures an even application and smooth finish on your Healthy Pumpkin Truffles.
-
Avoid Pre-packaged Spices: Instead of store-bought pumpkin spice blends, create your own for a fresher taste. Blends with a heavy emphasis on cinnamon can overpower the pumpkin flavor.
-
Coating Techniques: When dipping truffles, use two forks to manage and control excess chocolate. This method helps avoid messy coatings and keeps your truffles neat.
-
Flaky Salt Finish: For a gourmet touch, sprinkle flaky sea salt on the chocolate before it sets. This complimentary flavor enhances the sweetness of your Healthy Pumpkin Truffles beautifully.
Healthy Pumpkin Truffles Recipe FAQs
How do I select the right pumpkin purée?
To achieve the best flavor and texture in your Healthy Pumpkin Truffles, choose canned pumpkin purée rather than pumpkin pie mix. The latter contains added sugars and spices that can disrupt your recipe. Look for 100% pure pumpkin in labels without any additives.
How should I store my Healthy Pumpkin Truffles?
Store your Healthy Pumpkin Truffles in an airtight container in the refrigerator for up to 5 days. Make sure they are well-covered to keep their delightful flavor fresh. If you won’t finish them within this time, they can also be frozen for up to 2 months.
Can I freeze Healthy Pumpkin Truffles, and if so, how?
Absolutely! To freeze your Healthy Pumpkin Truffles, start by placing them in a single layer on a baking sheet. Freeze them until solid—this usually takes about 1-2 hours. Once frozen, transfer the truffles to a freezer-safe bag or container, ensuring to remove as much air as possible before sealing. This prevents freezer burn and preserves their delightful taste.
What can I do if my filling is too dry?
If you find the filling for your Healthy Pumpkin Truffles is too dry, add a small amount of additional pumpkin purée or a touch of liquid stevia to improve the texture. Be sure to mix thoroughly but gently until the mixture reaches a smooth, cohesive consistency. This will help maintain that delectable creamy filling you desire!
Are there any dietary considerations I should keep in mind?
Since these Healthy Pumpkin Truffles are vegan and gluten-free, they are suitable for various dietary preferences. However, please be mindful of potential nut allergies if you choose to substitute oat flour with almond or coconut flour. Always double-check ingredient labels if you are serving guests with dietary restrictions, ensuring they can indulge safely.
Healthy Pumpkin Truffles for a Guilt-Free Indulgence
Ingredients
Equipment
Method
- Prepare the Baking Sheet: Line a tray with wax or parchment paper.
- Make the Filling: Combine pumpkin purée, pumpkin spice, fine salt, and liquid stevia in a bowl.
- Form Balls: Scoop out the filling and roll into bite-sized spheres.
- Melt Chocolate: Break dark chocolate into pieces and microwave until melted.
- Coat the Truffles: Dip each truffle into the melted chocolate using two forks.
- Set and Season: Sprinkle flaky sea salt on top of each truffle before the chocolate sets.
- Chill: Refrigerate for at least 30 minutes until the chocolate has hardened.
Leave a Reply