
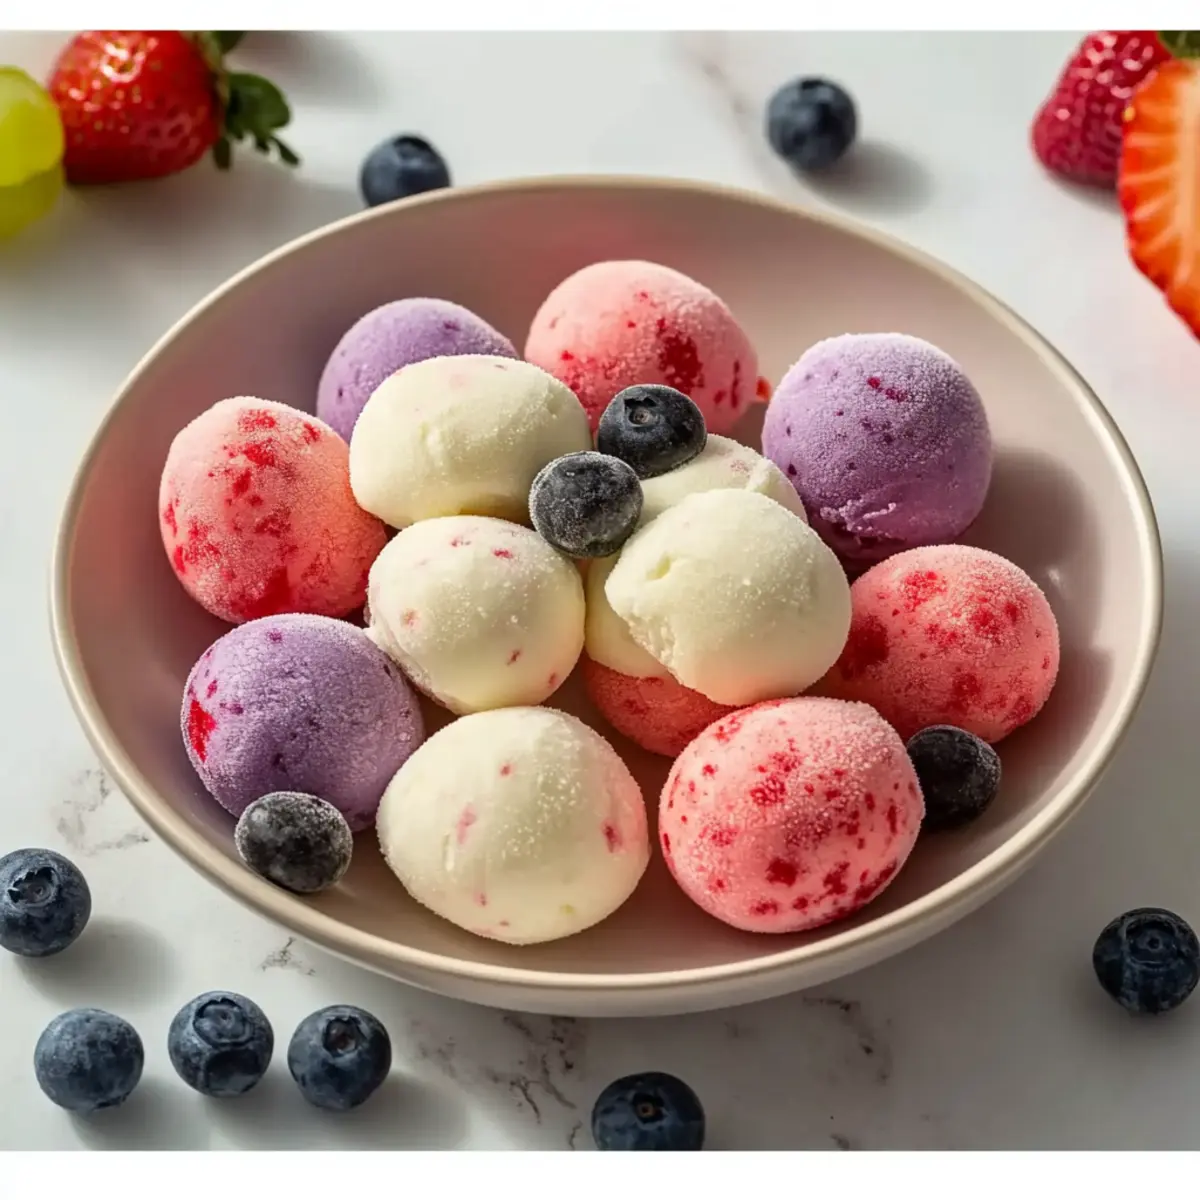
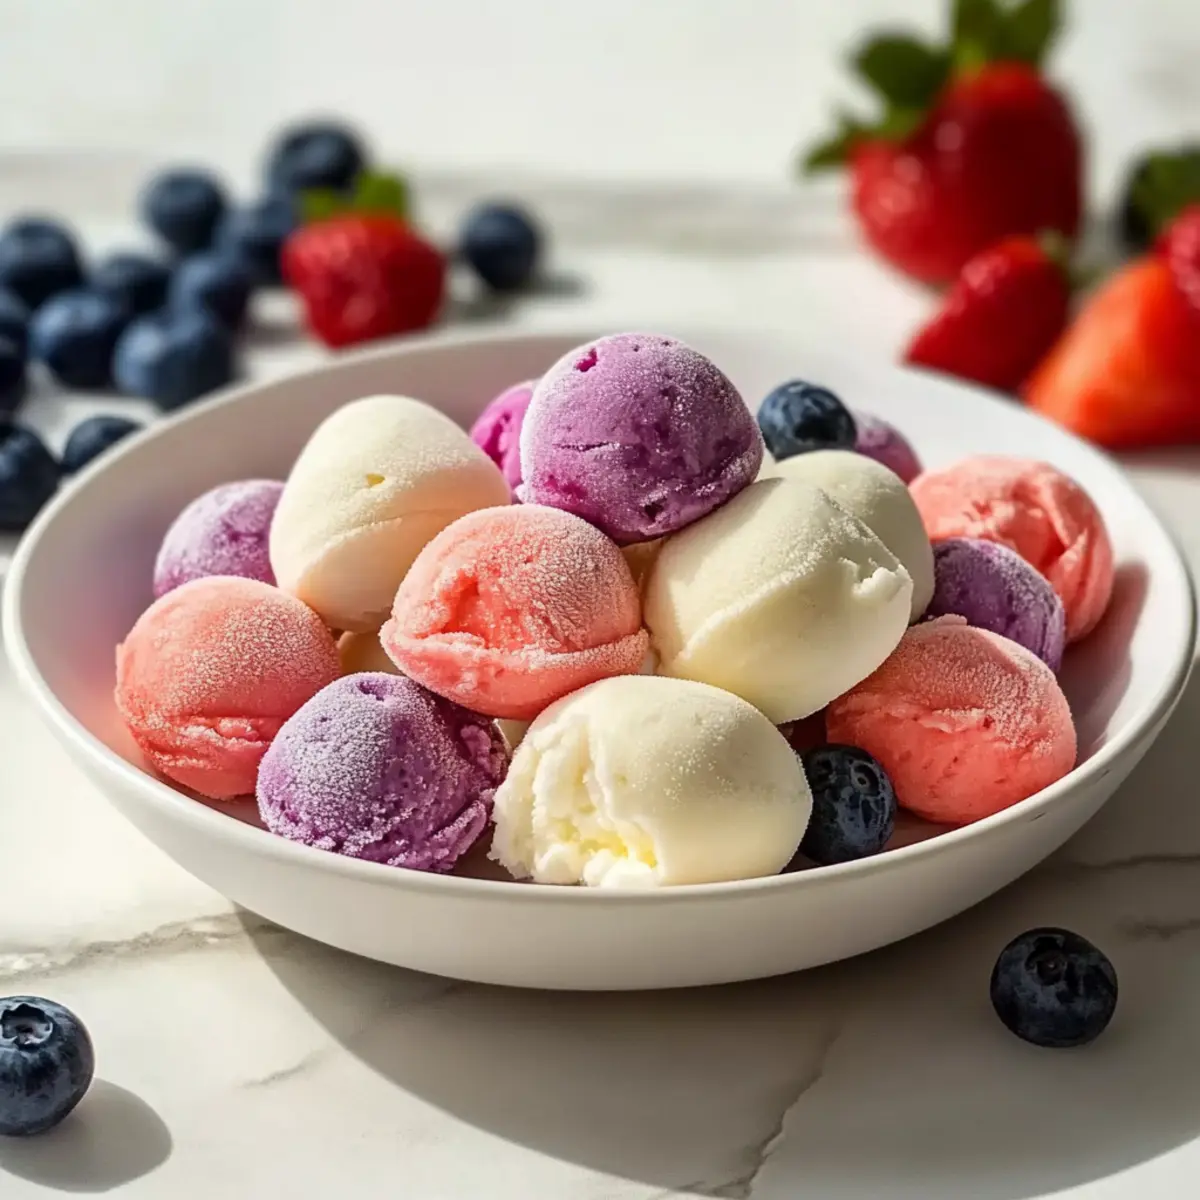
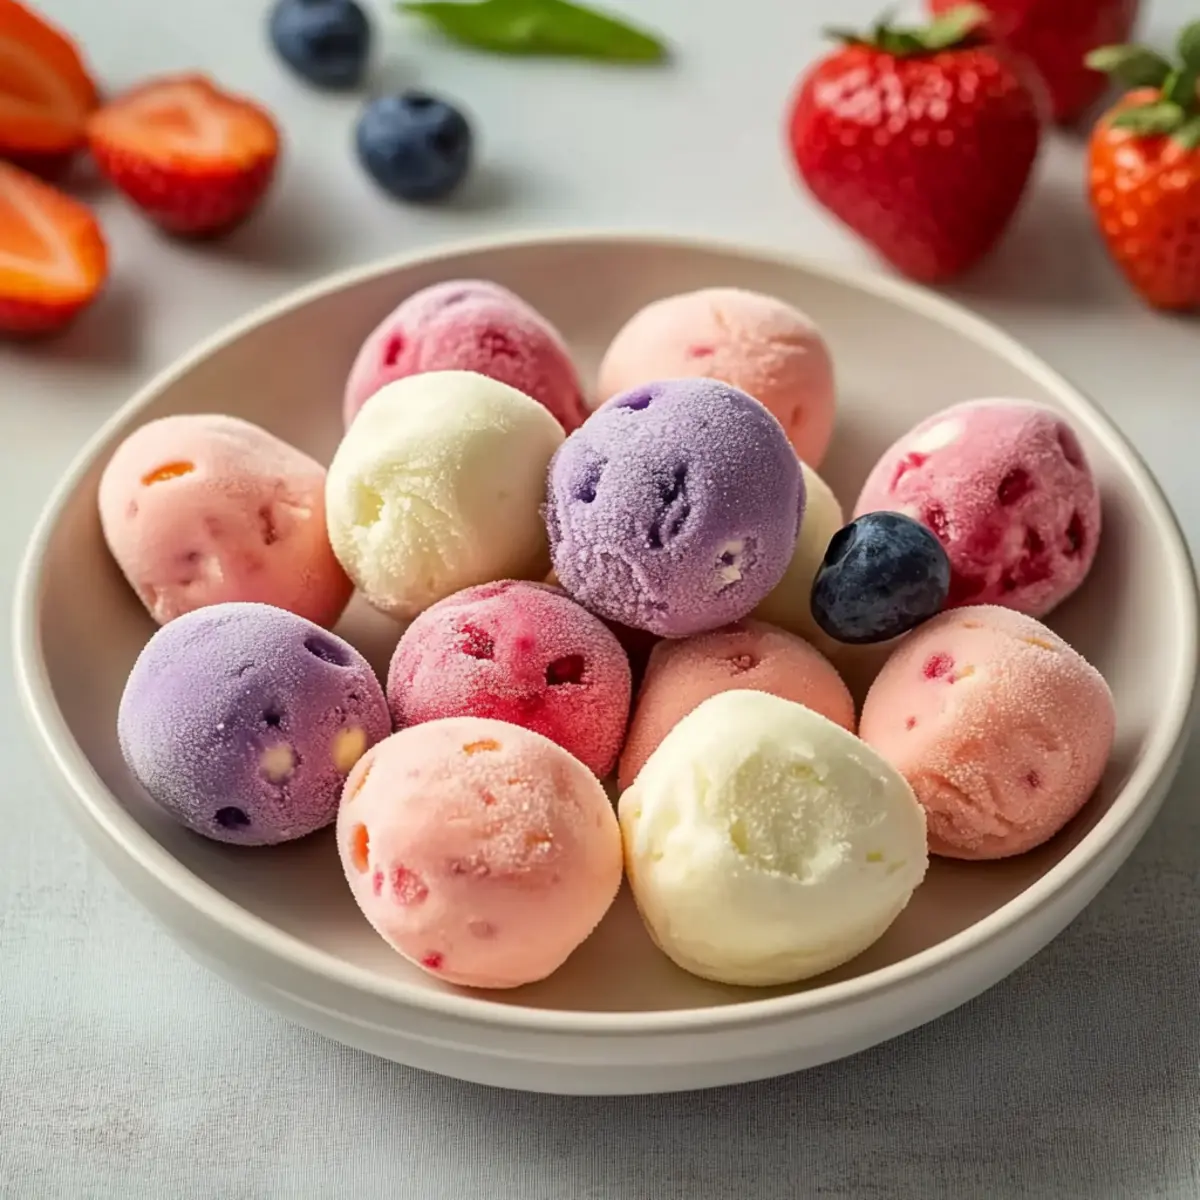
As I rummaged through my fridge, I stumbled upon a tub of creamy yogurt just waiting to be transformed into something exciting. That’s when I decided to whip up these Homemade Yogurt Bites—each one a delightful pop of flavor perfect for satisfying snack cravings, especially for the little ones. Not only are these bites a healthier alternative to sugary store-bought snacks, but they’re also incredibly customizable, ensuring everyone can enjoy their favorite flavors. With just a bit of prep time, you’ll be surprising your taste buds with nutritious, protein-rich snacks that keep the children happy and energized. Plus, involving them in the making process turns snack time into a fun family activity. Are you ready to dive into this creamy, dreamy adventure of yogurt goodness? Let’s get started!
Why Are Homemade Yogurt Bites a Must-Try?
Customization: With endless variations, you can tailor these bites to suit anyone’s taste – think fruity, nutty, or even savory!
Healthy Snacking: Packed with protein and probiotics, they offer a nutritious treat that’s better than any quick snack from the store.
Kid-Friendly: Involving kids in the making gives them a sense of accomplishment and encourages healthy eating habits.
Simple Preparation: Whipping up these yogurt bites is hassle-free, needing just a few ingredients and minimal effort.
Fun Storage: Create batches and enjoy them over weeks, ensuring there’s always a tasty snack on hand. Discover more creative snack ideas with Crockpot Garlic Potatoes or try out our delightful Smashed Carrots Bites!
Homemade Yogurt Bites Ingredients
• For the Base
- Yogurt – The main ingredient that provides creaminess; use Greek yogurt for a denser texture or opt for dairy-free alternatives like almond yogurt.
- Sweetener – Balance the flavors with honey or pureed fruits; remember that freezing dulls sweetness, so taste as you go!
• For the Flavor Boost
- Fruit (pureed or chopped) – Add vibrant colors and nutrients; try strawberries, blueberries, or even fun combinations like mango-pineapple!
- Vanilla Extract – This optional element deepens the flavor; a splash can elevate the overall sweetness giving a well-rounded taste.
• For Added Crunch
- Mix-ins (chocolate chips, granola, nuts) – These optional additions contribute delightful textures and flavors, but use these sparingly to keep it safe for younger kids.
These Homemade Yogurt Bites are not only delicious but can be varied to keep everyone happy!
Step‑by‑Step Instructions for Homemade Yogurt Bites
Step 1: Prepare Your Baking Sheet
Begin by lining a baking sheet with parchment paper or a silicone mat to prevent sticking. This surface will hold your Homemade Yogurt Bites while they freeze, ensuring they come off easily later. Make sure the sheet fits comfortably in your freezer, giving enough space for airflow around the yogurt.
Step 2: Mix the Yogurt Base
In a large mixing bowl, add your choice of yogurt along with your preferred sweetener and a splash of vanilla extract. Whisk these ingredients together until the mixture is smooth and creamy, taking about 2–3 minutes. The texture should be consistent with no lumps; this is the base of your delightful yogurt bites, setting the stage for flavor.
Step 3: Add Fruits and Mix-ins
Gently fold in your favorite fruits—either pureed or chopped—along with any optional mix-ins, such as chocolate chips or granola. Stir carefully to avoid smashing the fruits while evenly distributing the mix-ins throughout the Yogurt Bites mixture. This step adds flavor and texture, bringing your creation to life!
Step 4: Transfer the Mixture
Use a piping bag to transfer the yogurt mixture to your prepared baking sheet, but if you don’t have one handy, two spoons can do the trick. Scoop dollops onto the sheet, aiming for bite-sized portions about one inch apart. These will be your frozen delights, so make sure they’re uniform for even freezing and easy snacking.
Step 5: Freeze Until Solid
Place the baking sheet in the freezer for at least 2 to 3 hours or until the yogurt bites are completely solid. After this time, they should feel firm to the touch but still creamy inside. Keep an eye on them, as freezing time can vary depending on your freezer and the thickness of the yogurt drops.
Step 6: Store Your Yogurt Bites
Once solid, carefully transfer the yogurt bites into an airtight container, being cautious not to break them. If stacking layers, place a small piece of parchment paper between them to prevent sticking. These Homemade Yogurt Bites can be stored in the freezer for up to two months, ready to satisfy those snack cravings at any time.
Make Ahead Options
These Homemade Yogurt Bites are perfect for meal prep enthusiasts! You can mix the yogurt base (yogurt, sweetener, and vanilla extract) up to 24 hours in advance; simply refrigerate it in an airtight container. Additionally, you can chop or puree your chosen fruits ahead of time, storing them separately in the refrigerator to maintain freshness. When you’re ready to serve, just assemble the bites and freeze them for 2 to 3 hours until solid. This approach not only saves time but also ensures that your snacks are just as delicious and nutritious when you need them, making busy weeknights a breeze.
Expert Tips for Homemade Yogurt Bites
• Choose the Right Yogurt: For the creamiest texture, opt for full-fat Greek yogurt. Dairy-free options like almond yogurt also work and suit various dietary needs.
• Taste as You Go: Since freezing dulls sweetness, adjust your sweetener accordingly. Always taste your yogurt mixture before freezing for the best flavor.
• Mind the Mix-ins: Use mix-ins like nuts or chocolate chips sparingly to avoid choking hazards for little ones. Less is often more for the perfect texture!
• Fun Shapes: Consider using silicone molds for fun shapes instead of a baking sheet. This adds an element of surprise and joy, making snack time even more appealing!
• Layering for Color: Create vibrant layers by mixing different fruit purees into your yogurt base before freezing. This adds a fun visual appeal to your Homemade Yogurt Bites.
What to Serve with Yogurt Bites?
Looking to create a delightful and nourishing spread to complement these refreshing snacks?
- Fruit Salad: A vibrant mix of seasonal fruits adds a burst of freshness and color that pairs beautifully with creamy yogurt.
- Homemade Granola: Crunchy granola brings texture and a touch of sweetness, making it a perfect crunchy counterpart to yogurt bites.
- Nut Butter Spoons: Offer almond or peanut butter for dipping; the rich, nutty flavor perfectly contrasts the light, fruity yogurt.
- Veggie Sticks: Crisp, fresh veggies like carrots and celery not only provide crunch but add a healthy, savory component to your snack ensemble.
- Smoothie Bowls: Serve alongside smoothie bowls made with blended fruits; this allows for a delightful mix of frozen yogurt bites and smooth textures.
- Rice Cakes: Light and airy, plain rice cakes can be topped with yogurt and fruits, forming a terrific snack to keep the energy up!
- Sparkling Water: Enhance your snack time with bubbly, flavored sparkling water to add a refreshing zing without the extra calories.
- Mini Muffins: Pair these bites with a batch of healthy mini muffins for a well-rounded snack that’s fun and satisfying.
Homemade Yogurt Bites Variations
Feel free to get creative with these yogurt bites, tailoring them to your taste and preferences for a delightful experience.
-
Dairy-Free:
Substitute regular yogurt with coconut or almond yogurt for a creamy, plant-based option that’s just as satisfying. -
Fruit Medley:
Try mixing in a combination of fruits like raspberries, kiwi, or even peaches for a colorful twist. Each fruit brings a unique taste while boosting nutrition. -
Nut Butter Swirl:
Fold in a spoonful of peanut or almond butter for a rich, nutty flavor that complements the creamy yogurt—perfect for adding extra protein! -
Savory Delight:
Use plain yogurt mixed with herbs like dill and chives for a savory spin, and incorporate chopped veggies for an unexpected yet delicious snack. -
Chocolate Explosion:
Add mini chocolate chips or drizzle melted dark chocolate over the frozen bites for a decadent touch that’s sure to please any chocolate lover. -
Seasonal Spices:
Enhance flavor by mixing in seasonal spices like cinnamon or pumpkin spice in fall, offering warmth and nostalgia in every bite. -
Granola Crunch:
Sprinkle a little granola on top before freezing to create a delightful crunch, making snacking even more enjoyable and textured. -
Zesty Twist:
Incorporate a little lemon or lime zest into your yogurt mix for a refreshing tang that brightens the flavors, making every bite a little zesty surprise!
Feel inspired? While you whip up these delightful bites, you might want to explore more flavors with options like Crockpot Garlic Potatoes or try the crunchy goodness of Smashed Carrots Bites!
How to Store and Freeze Homemade Yogurt Bites
Fridge: Store leftover bites in an airtight container for up to 3 days if not frozen, but for best taste, keep them in the freezer.
Freezer: Keep your Homemade Yogurt Bites in an airtight container in the freezer for up to 2 months without losing flavor or texture.
Layer Separation: If stacking your yogurt bites in a container, use parchment paper between layers to prevent sticking and maintain their lovely shapes.
Reheating: Yogurt bites can be enjoyed straight from the freezer. No need to thaw; simply pop them in your mouth for a refreshing treat!

Homemade Yogurt Bites Recipe FAQs
What type of yogurt should I use for the best texture?
For the creamiest texture, I recommend using full-fat Greek yogurt. Its thickness gives the yogurt bites a lovely rich texture. If you prefer a lighter version or have dietary restrictions, consider using dairy-free options like almond or coconut yogurt, which can be just as delicious!
How long can I store my Homemade Yogurt Bites?
You can store your Homemade Yogurt Bites in an airtight container in the freezer for up to 2 months. Just be sure to separate layers with parchment paper if stacking them to prevent sticking, ensuring they stay pretty and intact!
Can I freeze my yogurt bites?
Absolutely! Freezing is the best way to enjoy these yogurt bites for an extended period. After following the recipe, simply freeze them for 2-3 hours until they are solid, then transfer to an airtight container. They maintain their flavor and texture beautifully in the freezer!
What should I do if my yogurt mixture is too runny?
If you find your yogurt mixture is too runny to hold its shape, try adding a bit more yogurt or a small amount of cornstarch to thicken it up. Another option is to freeze it for a shorter time—just enough until firm enough to hold its shape, which may help keep them from getting too watery.
Are Homemade Yogurt Bites safe for kids with allergies?
While they are typically a healthy snack, be mindful of potential allergens. If your child has a dairy allergy, opt for dairy-free yogurt alternatives. Also, ensure any add-ins like chocolate chips or granola do not contain allergens. Always check labels and consult with a pediatrician if in doubt.
How do I make my yogurt bites more visually appealing?
To create a stunning visual, consider layering different flavored yogurt or using fruit purees to create colorful swirls in the yogurt mixture. You can also use fun silicone molds to shape the bites, making them even more enticing for kids and adults alike!
Homemade Yogurt Bites: Fun, Healthy Snacks for Everyone
Ingredients
Equipment
Method
- Prepare your baking sheet by lining it with parchment paper or a silicone mat.
- In a large mixing bowl, whisk together the yogurt, sweetener, and vanilla extract until smooth.
- Gently fold in the fruits and any optional mix-ins until evenly distributed.
- Transfer the mixture to the baking sheet using a piping bag or two spoons to create dollops.
- Freeze the yogurt bites for at least 2 to 3 hours or until solid.
- Once frozen, transfer the bites to an airtight container for storage.
Leave a Reply