
While flipping through an old recipe book, I found a gem: arepas, the beloved staple of Venezuelan cuisine. My mouth watered at the thought of their warm, comforting embrace, but then reality hit—carbs don’t always play nice with my keto goals. That’s when I decided to create a Keto Arepas Recipe that captures all the magic without the guilt. These low-carb delights are not only super easy to whip up but also deliciously versatile—perfect for breakfast, lunch, or as a side to your favorite dish. Made with simple ingredients like almond flour and gooey cheese, they bring a delightful twist to your dining table. Curious about how I transformed this traditional treat to fit our healthy cravings? Dive in and let’s make it together!
Why Are These Arepas a Game Changer?
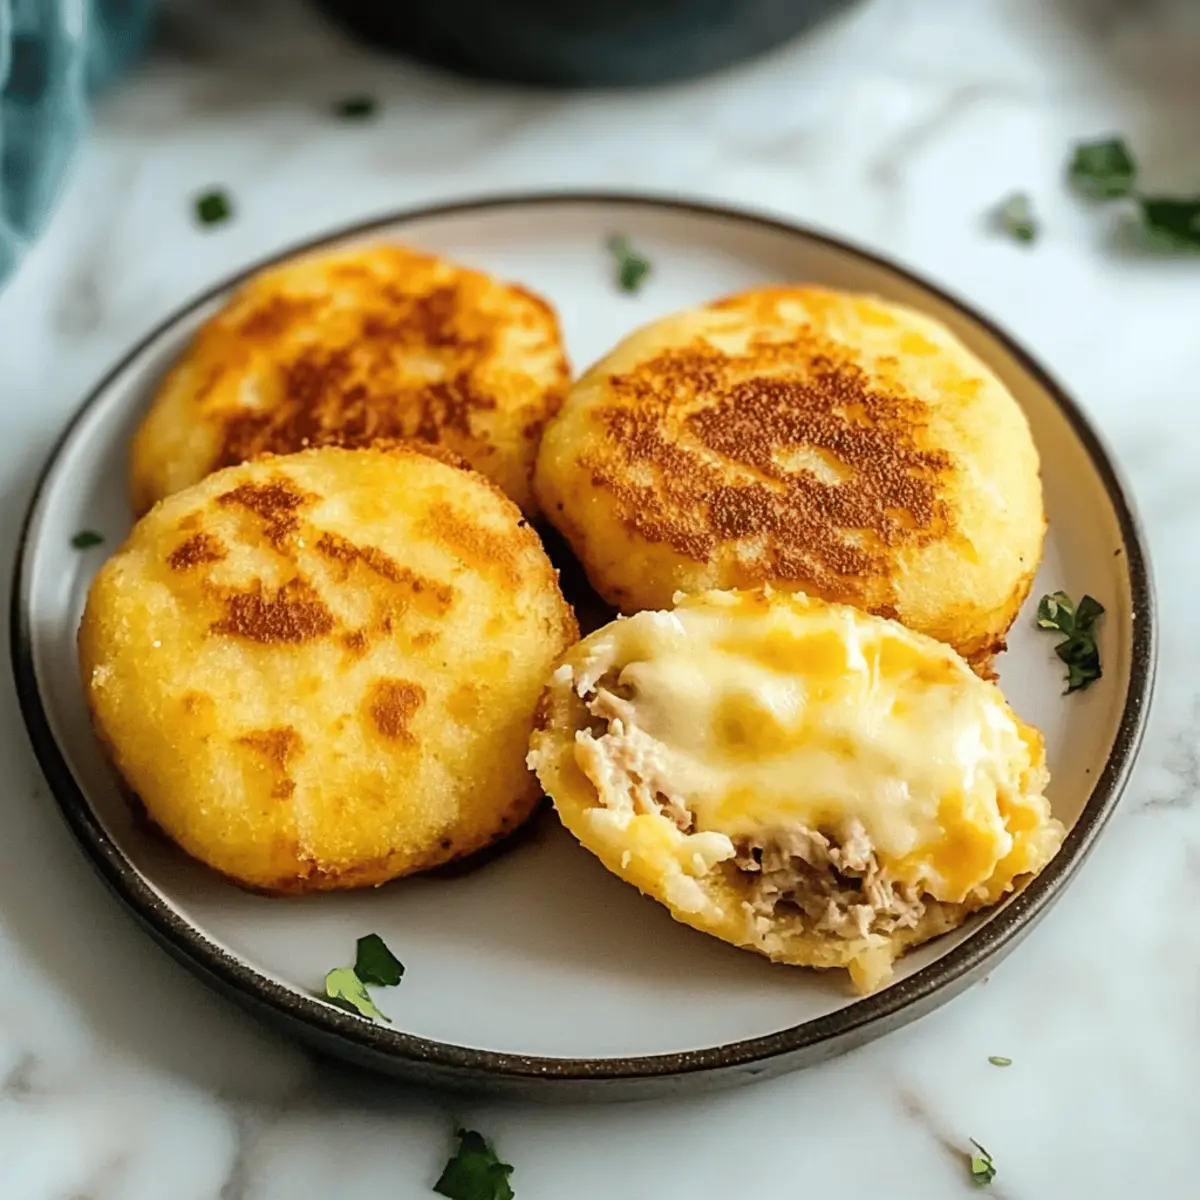
Crispy, These keto arepas offer that perfect crunch you crave, making them a delightful base for an array of fillings.
Low-Carb Delight, Enjoy the traditional flavors of Venezuelan arepas without compromising your keto lifestyle.
Versatile Use, Great for breakfast or lunch—stuff them with eggs or avocado, or serve them as a side with grilled meats.
Easy Preparation, With minimal ingredients and steps, even novice cooks can master this simple recipe.
Crowd-Pleasing, These cheesy treats are sure to impress family and friends, satisfying both keto enthusiasts and traditionalists alike! Check out more easy Hispanic recipes like our Steak Pasta Cozy for delicious meal ideas!
Keto Arepas Recipe Ingredients
For the Arepas
• Almond Flour – Provides the base and structure for the arepas; substitute with ¼ cup coconut flour for a different flavor and texture.
• Shredded Mozzarella – Adds creaminess and helps bind the ingredients; you can use any cheese that melts well.
• Psyllium Husk – Enhances the dough’s elasticity and texture, preventing crumbliness; essential for the chewy characteristic; omit only if necessary.
• Egg – Acts as a binder and adds moisture; ensure it is well mixed for even texture.
• Warm Water – Hydrates the flour mixture for optimal dough consistency; add gradually until the dough is soft but not sticky.
• Salt – Adds flavor; adjust to taste.
• Butter or Oil – Used for frying, contributing to a golden, crispy crust.
Tips for Serving
• Guacamole or Sour Cream – Complement your keto arepas with these creamy delights for added richness.
• Grilled Meats or Soups – These arepas work beautifully as a side dish to elevate any meal.
Step‑by‑Step Instructions for Keto Arepas Recipe
Step 1: Mix the Dry Ingredients
In a mixing bowl, combine almond flour, psyllium husk, shredded mozzarella cheese, and salt. Use a whisk to ensure these dry ingredients are well-blended, as this will create a uniform dough later. This mixture should appear fluffy, with the cheese evenly distributed throughout.
Step 2: Incorporate Wet Ingredients
Add one egg into the dry mixture and blend thoroughly until it’s evenly integrated. Gradually pour in warm water, stirring continuously, until the dough reaches a soft yet manageable consistency—think Play-Doh texture. The mixture should be moist without being sticky.
Step 3: Shape the Dough
Divide the dough into four equal portions and roll each into a ball. Gently flatten each ball into discs about ½ inch thick—this helps achieve that delightful crispy exterior. Ensure the discs are uniform in thickness for even cooking, which is crucial for perfect keto arepas.
Step 4: Heat the Skillet
Heat a nonstick skillet over medium heat and add a generous amount of butter or oil. Allow it to melt and coat the bottom of the pan. The skillet should be hot enough that a drop of water sizzles upon contact—this indicates it’s ready for the keto arepas.
Step 5: Cook the Arepas
Carefully place the shaped arepas into the skillet, making sure not to overcrowd the pan. Cook for 4-5 minutes on each side, until they are golden brown and slightly puffed. You’ll want to flip them halfway through to get that perfect color and texture on both sides.
Step 6: Rest and Prepare for Filling
Once the keto arepas are done cooking, transfer them to a plate and let them rest for a couple of minutes. This resting period will help them firm up slightly, making them easier to slice open. Now they’re ready for your favorite fillings, so feel free to get creative!

Tips for the Best Keto Arepas
-
Proper Dough Consistency: Achieving the right dough texture is crucial; it should be soft but not sticky. Adjust water gradually to avoid crumbliness.
-
Heat Matters: Ensure your skillet is preheated correctly before cooking. A hot pan helps create that delicious crispy crust on the outside of your keto arepas.
-
Careful Cooking: Don’t overcrowd the skillet; cooking in batches prevents steaming and ensures all arepas have a chance to develop their golden hue.
-
Do Not Rush Resting: After cooking, let arepas rest for a few minutes. This helps them firm up for easy slicing and optimal filling placement.
-
Experiment with Fillings: Get creative! Use pulled pork, avocado, or scrambled eggs as fillings to customize your keto arepas experience.
What to Serve with Keto Arepas
Enhance your meal experience by pairing beautifully flavorful items alongside these delicious keto arepas!
-
Guacamole: The creamy, zesty flavor of guacamole elevates the arepas, adding a refreshing twist that complements their texture.
-
Sour Cream: A dollop of sour cream adds richness and tanginess, perfect for balancing the savory goodness of the arepas.
-
Grilled Chicken: Tender, juicy grilled chicken provides a hearty filling that harmonizes with the lightness of the keto arepas, making for a satisfying meal.
-
Avocado Salad: A vibrant avocado salad brings in fresh ingredients and crunch, offering a delightful contrast that makes each bite enjoyable.
-
Spicy Salsa: The kick of spicy salsa can uplift the flavors of the keto arepas, providing a zing that adds excitement to your plate.
-
Roasted Vegetables: The caramelized sweetness of roasted vegetables balances the savory notes of the arepas while adding nutritious elements to your meal.
-
Cilantro Lime Rice: A fragrant cilantro lime rice is an excellent side, providing aromatic flavors that play beautifully with the cheesy carby bites.
-
Chilled White Wine: For drinks, a light, chilled white wine pairs wonderfully, enhancing the overall dining experience with its refreshing notes.
-
Chocolate Avocado Mousse: For dessert, this creamy mousse is a guilt-free, indulgent way to finish your meal, marrying well with the salty flavors of the arepas.
Storage Tips for Keto Arepas
Fridge: Store cooked keto arepas in an airtight container for up to 5 days. Make sure they are completely cooled before sealing to avoid moisture buildup.
Freezer: To freeze, place cooked arepas in a single layer between sheets of parchment paper, then seal them in a freezer-safe bag. They can last up to 2 months in the freezer.
Reheating: For the best texture, reheat frozen keto arepas in a toaster oven or skillet over medium heat for about 5 minutes. This helps regain their crispy exterior.
Room Temperature: If serving immediately, keto arepas are best enjoyed fresh, but they can sit at room temperature for up to 2 hours before they start to lose their texture.
Make Ahead Options
These Keto Arepas are perfect for meal prep enthusiasts looking to save time on busy weeknights! You can prepare the dough and shape the arepas up to 24 hours in advance. Simply follow steps 1 through 3, then wrap the shaped discs in plastic wrap and refrigerate them. This will help prevent drying and maintain their texture. When you’re ready to serve, heat a skillet and cook the arepas for 4-5 minutes on each side until golden brown. This method ensures your Keto Arepas come out just as delicious and fresh as if they were made on the spot, making your meal planning a breeze!
Keto Arepas Recipe Variations
Customize your keto arepas with these delightful twists to make them uniquely yours!
-
Coconut Flour: Substitute almond flour with ¼ cup coconut flour for a slightly sweet and tropical flavor.
-
Cheese Options: Experiment with different cheeses like pepper jack for a spicy kick or cheddar for a sharp taste. Melted cheese adds flavor and a delicious stretch.
-
Savory Fillings: Fill your keto arepas with spicy chorizo, bell peppers, and onions for a fully loaded meal. This combo brings a burst of flavor that will have your taste buds dancing!
-
Herb Infusion: Mix fresh herbs like cilantro or chives into the dough for an aromatic twist. These herbs enhance the taste and add a fresh touch, making each bite delightful.
-
Pork Perfection: Use leftover roasted pork or pulled chicken as a filling to minimize waste. Not only is it a sustainable choice, but it also adds heartiness to your meal.
-
Breakfast Delight: Transform these into breakfast arepas by adding scrambled eggs and avocado for a creamy and fulfilling start to your day. Start your morning right with this protein-packed option!
-
Heat Factor: Add diced jalapeños to the dough for a spicy version that packs a punch. Spice lovers will appreciate the extra kick in every bite.
-
Sweet Treats: Want something sweet? Fill your arepas with a blend of cream cheese and berries for a delicious dessert option. It’s a delightful twist perfect for satisfying your sweet tooth!
For more inspiration, check out our classic Steak Pasta Cozy or dive into our collection of flavorful options like Steak Pasta. Embrace creativity in the kitchen while celebrating the flavors you love!

Keto Arepas Recipe FAQs
How do I know if my almond flour is fresh enough to use?
Absolutely! Fresh almond flour should have a light nutty smell. If it smells off or has dark spots, it’s best to discard it. I always opt for finely ground almond flour for the best texture in my arepas!
What is the best way to store leftover keto arepas?
You can store your cooked keto arepas in an airtight container in the fridge for up to 5 days. Let them cool completely before sealing to prevent moisture buildup, which could make them soggy. If you want to keep them longer, I recommend freezing them!
Can I freeze the keto arepas? If so, how?
Absolutely! To freeze, arrange the cooked keto arepas in a single layer on a baking sheet lined with parchment paper. Once they are frozen solid, transfer them to a freezer-safe bag, placing parchment paper between layers to prevent sticking. They can be frozen for up to 2 months.
Why are my arepas crumbling?
Very commonly, crumbling happens when there isn’t enough moisture in the dough. If your dough feels too crumbly, gradually add a teaspoon of warm water to fix the texture. Remember, your dough should feel soft but not sticky! If they are overcooked, they could also lose their moisture, so keep that cooking time in check—4 to 5 minutes per side usually works perfectly.
Can my keto arepas be made vegan?
While this keto arepas recipe includes an egg for binding, you can use a flaxseed or chia seed egg as a substitute! To make this, mix 1 tablespoon of ground flaxseeds or chia seeds with 3 tablespoons of water, then let it sit for about 10 minutes to thicken before mixing it into your dough. This will help maintain the structure while keeping the recipe plant-based.
Are keto arepas suitable for pets?
I wouldn’t recommend sharing keto arepas with pets. Ingredients like cheese and psyllium husk may not be suitable for them. Always consult your vet before introducing new foods into their diet!

Keto Arepas Recipe: Crispy, Cheesy Low-Carb Goodness
Ingredients
Equipment
Method
- In a mixing bowl, combine almond flour, psyllium husk, shredded mozzarella cheese, and salt. Use a whisk to ensure these dry ingredients are well-blended.
- Add one egg into the dry mixture and blend thoroughly. Gradually pour in warm water, stirring continuously until the dough reaches a soft yet manageable consistency.
- Divide the dough into four equal portions, roll each into a ball, and flatten into discs about ½ inch thick.
- Heat a nonstick skillet over medium heat. Add butter or oil and let it coat the pan. The skillet should be hot enough that a drop of water sizzles upon contact.
- Carefully place the shaped arepas into the skillet and cook for 4-5 minutes on each side until golden brown and slightly puffed.
- Let the keto arepas rest for a couple of minutes on a plate, then slice open for your favorite fillings.
Leave a Reply