
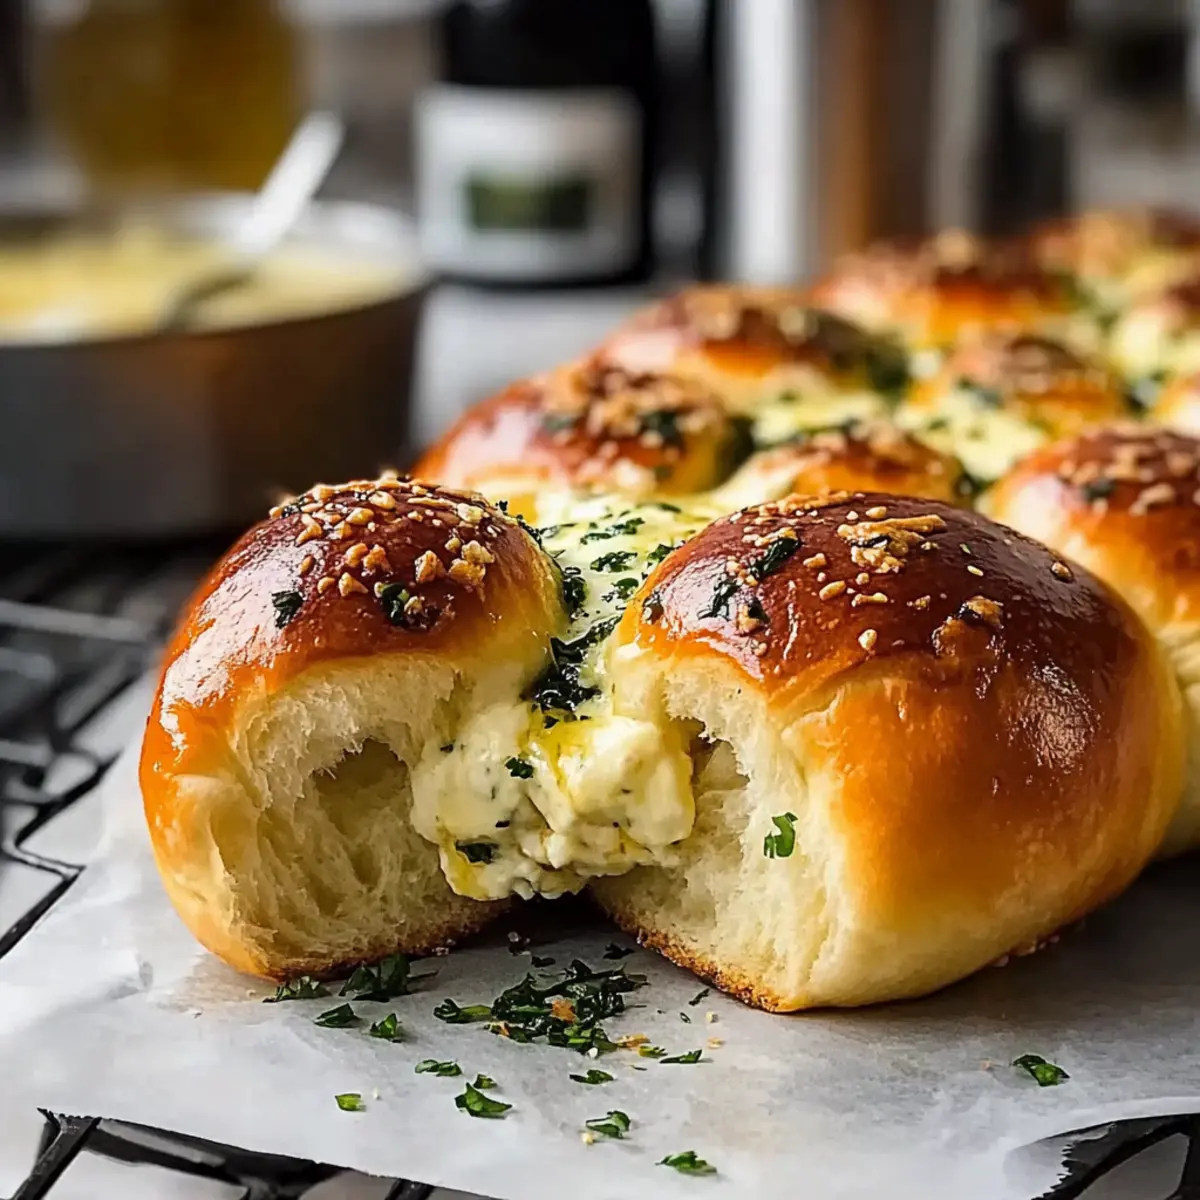
As I watched the golden-brown crust of my Homemade Korean Cream Cheese Garlic Bread emerging from the oven, a wave of anticipation washed over me—this wasn’t just any bread; it was a delightful fusion of crispy exterior and creamy filling that’s about to transform snack time. With a perfect balance of sweet cream cheese wrapped in a savory garlic butter sauce, this dish is a quick and easy crowd-pleaser that will elevate any meal or cozy gathering. Plus, its irresistibly simple preparation makes it the ideal comfort food to whip up whenever cravings strike. Have you ever enjoyed a treat that’s not just delicious but also downright comforting? Let’s dive into this indulgent recipe and make your taste buds sing!
Why Is Korean Cream Cheese Garlic Bread Irresistible?
Unique Flavor Combination: The perfect blend of creamy sweetness and savory garlic makes every bite an unforgettable experience.
Simple Preparation: Even novice cooks can master this recipe with ease—just a few straightforward steps for a showstopping treat!
Crowd-Pleasing Appeal: Whether for brunch or an evening snack, this bread wows guests and family alike, pairing beautifully with favorites like Crockpot Garlic Butter Beef Bites or a refreshing Creamy Cucumber Salad with Bacon and Cheese.
Versatile Snacking: Enjoy it on its own or as a side dish—it’s the ultimate comfort food for any occasion!
Texture Paradise: Crispy on the outside, soft and creamy on the inside, this bread is a delightful surprise at every turn.
Korean Cream Cheese Garlic Bread Ingredients
For the Bread Base
- Brioche Buns – Softness and sweetness for an ideal bread base. Substitute with other soft rolls if brioche is unavailable.
For the Creamy Filling
- Cream Cheese – Provides a rich, creamy filling that defines the bread’s texture. Use full-fat cream cheese for the best results; avoid low-fat as it may affect consistency.
- Sugar – Adds sweetness to the filling and balances the garlic flavor. Possible substitution: honey for a different flavor.
- Vanilla Extract – Enhances the cream cheese filling’s sweetness. Optional to omit for a more savory note.
For the Garlic Butter Sauce
- Butter – Acts as a base for the garlic sauce and contributes richness. Use unsalted butter for better control of saltiness.
- Minced Garlic – Delivers the signature garlic flavor. Ensure it’s fresh; avoid pre-minced varieties for best results.
- Milk – Ensures a smooth garlic butter sauce. Optional substitute: cream for a richer sauce.
- Heavy Cream – Adds richness to the sauce. Can be omitted or replaced with more milk.
- Mayonnaise – Contributes to the moisture and flavor of the garlic butter custard. Hellmann’s is recommended; substitute with Greek yogurt for a tangy flavor.
- Dried Parsley – Provides a pop of color and subtle herbaceous notes. Substitute with fresh parsley for a more vibrant flavor.
- Egg – Binds ingredients together and adds richness. Omit for a vegan version, though texture may vary.
- Salt – Balances flavors in the sweet and savory components. Adjust to taste; omit for a low-sodium version.
Step‑by‑Step Instructions for Homemade Korean Cream Cheese Garlic Bread
Step 1: Preheat the Oven
Begin by preheating your oven to 180°C (356°F). This ensures that your Homemade Korean Cream Cheese Garlic Bread bakes evenly, resulting in that golden-brown crust we all love. While the oven preheats, gather your baking tray and line it with parchment paper for easy cleanup later.
Step 2: Prepare the Ingredients
Next, finely mince your garlic and set it aside. Organize your ingredients—cream cheese, sugar, butter, milk, mayonnaise, parsley, egg, and salt—into separate bowls. This step will streamline your cooking process and keep things tidy as you create the delicious filling for the Korean cream cheese garlic bread.
Step 3: Make the Cream Cheese Filling
In a bowl, combine softened cream cheese, 4 tablespoons of sugar, and a splash of vanilla extract. Mix until smooth and creamy, creating a cloud-like filling. Once blended, transfer this mixture into a piping bag or a small plastic bag with a corner snipped off for easier filling of the brioche buns in the next steps.
Step 4: Prepare the Garlic Butter Sauce
Melt 20 grams of unsalted butter in a saucepan over medium-low heat. Add in the minced garlic, gently cooking it for about 2-3 minutes until it’s fragrant and lightly golden. Be careful not to burn the garlic; it should simply fragrant without browning excessively.
Step 5: Combine Sauce Ingredients
In another bowl, whisk together the garlic butter, the remaining melted butter, milk, mayonnaise, 3 tablespoons of sugar, dried parsley, the egg, and a pinch of salt. Continue mixing until the ingredients form a glossy, well-combined sauce, ready to envelop the brioche and enhance the flavors of your Korean cream cheese garlic bread.
Step 6: Prepare the Brioche Buns
Now, take each brioche bun and, using a sharp knife, make a cut to divide them into six sections without cutting all the way through. This creates pockets for the delicious cream cheese filling, allowing each bun to maintain its shape while being generously stuffed.
Step 7: Fill the Buns
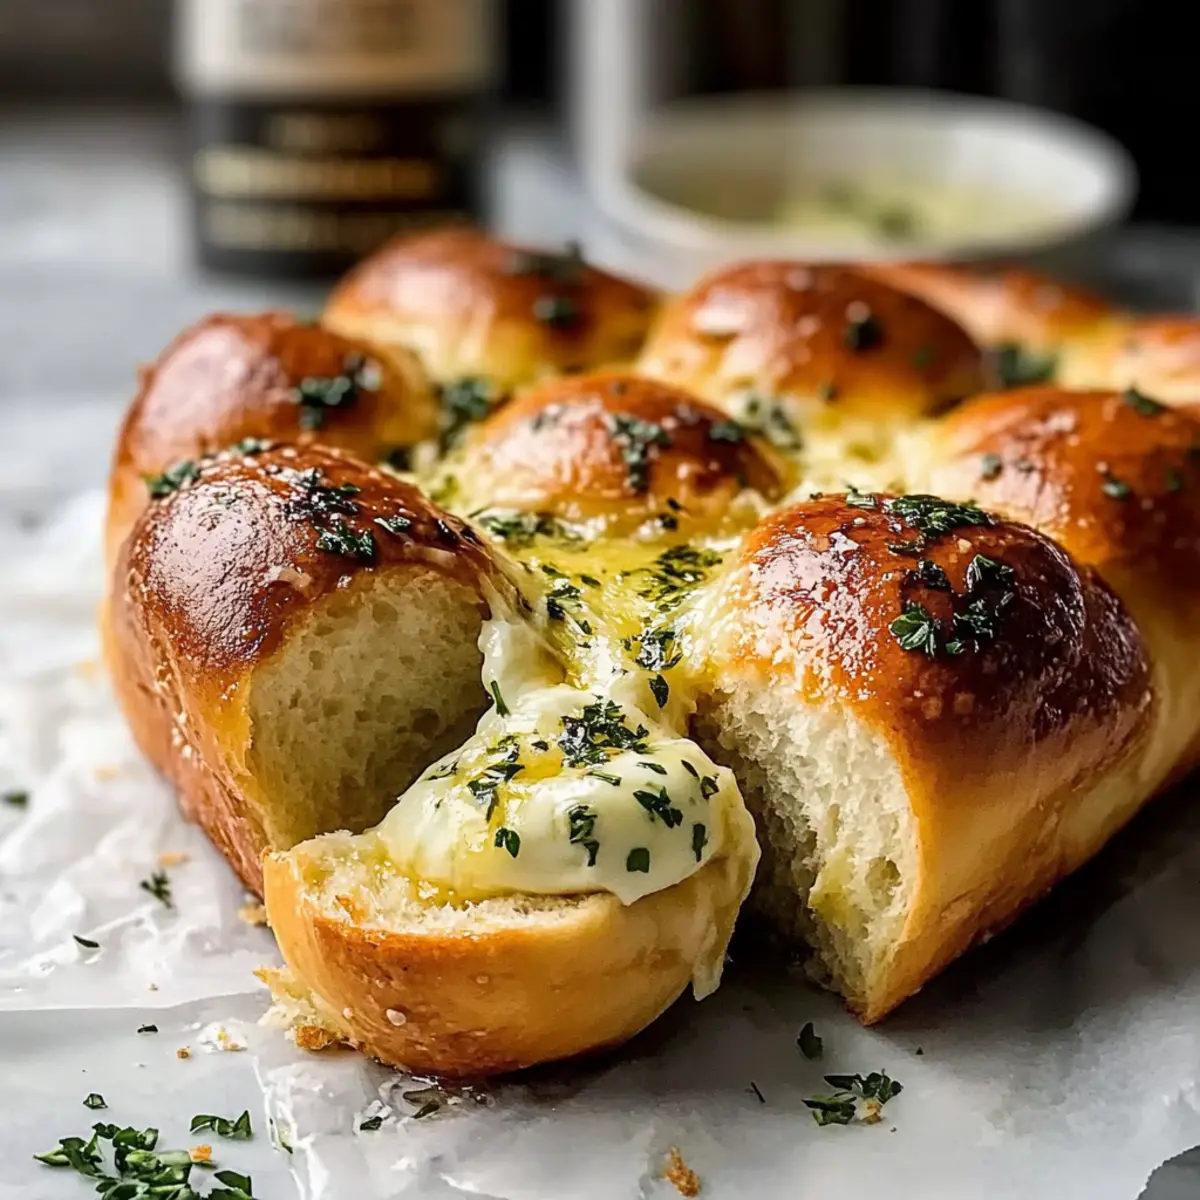
Carefully fill each pocket of the brioche buns with your cream cheese mixture, being generous but mindful not to overfill. Once filled, dip each bun into the prepared garlic butter sauce, ensuring they are fully coated with the rich and savory mix, which will add incredible flavor during baking.
Step 8: Pipe Extra Filling
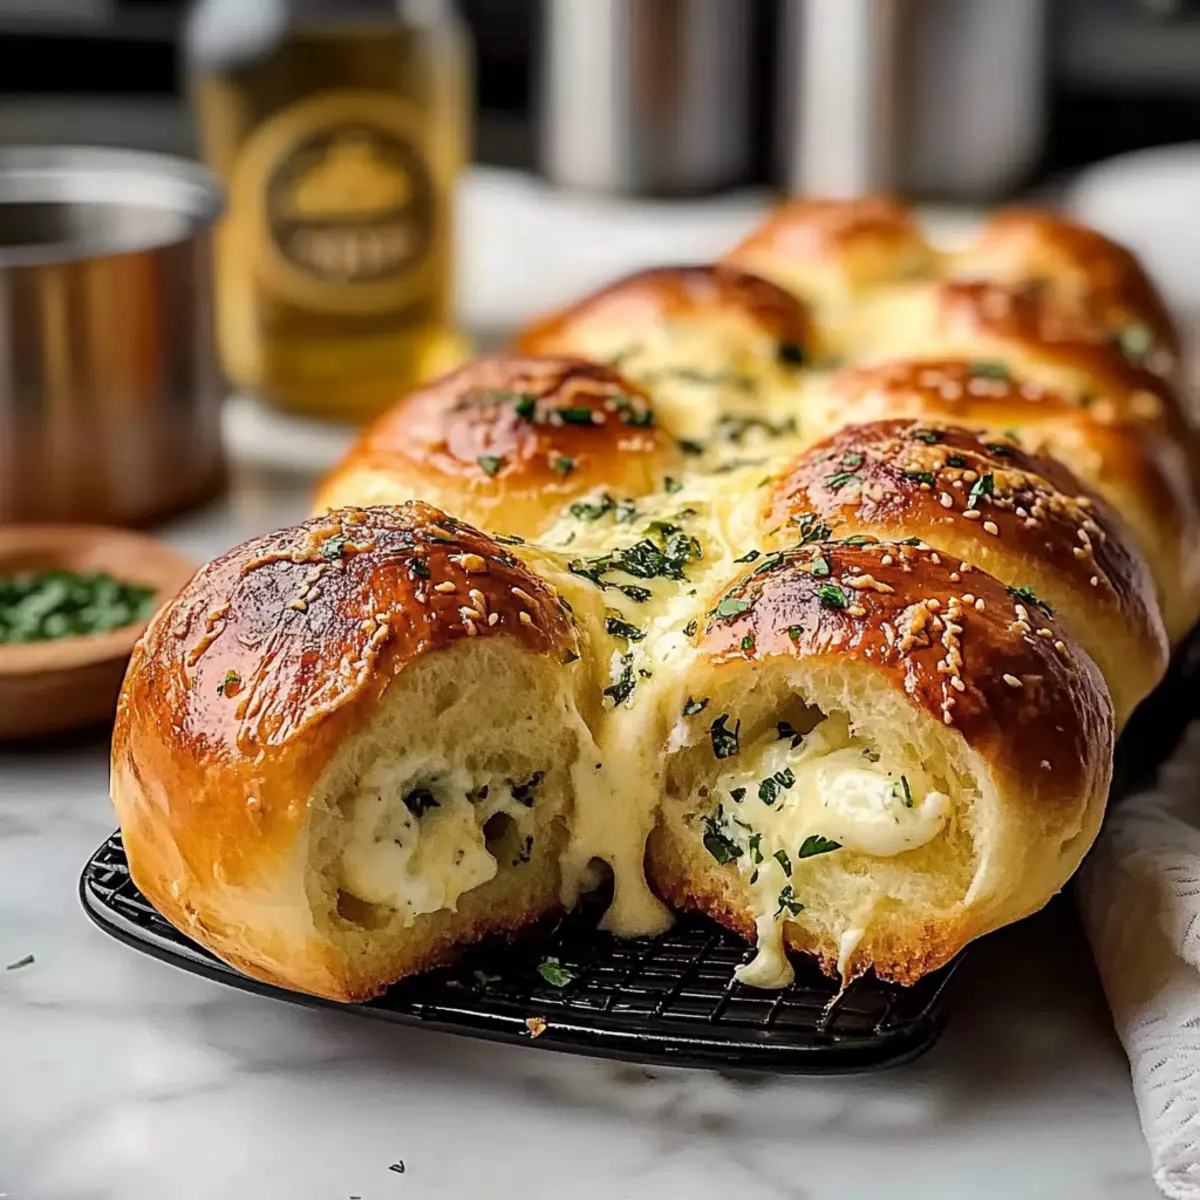
Once the buns are coated in the garlic butter sauce, place them on your lined baking tray. Use any remaining cream cheese filling from the piping bag to pipe a swirl on top of each bun, adding an extra layer of creamy goodness that will melt beautifully during baking.
Step 9: Bake the Buns
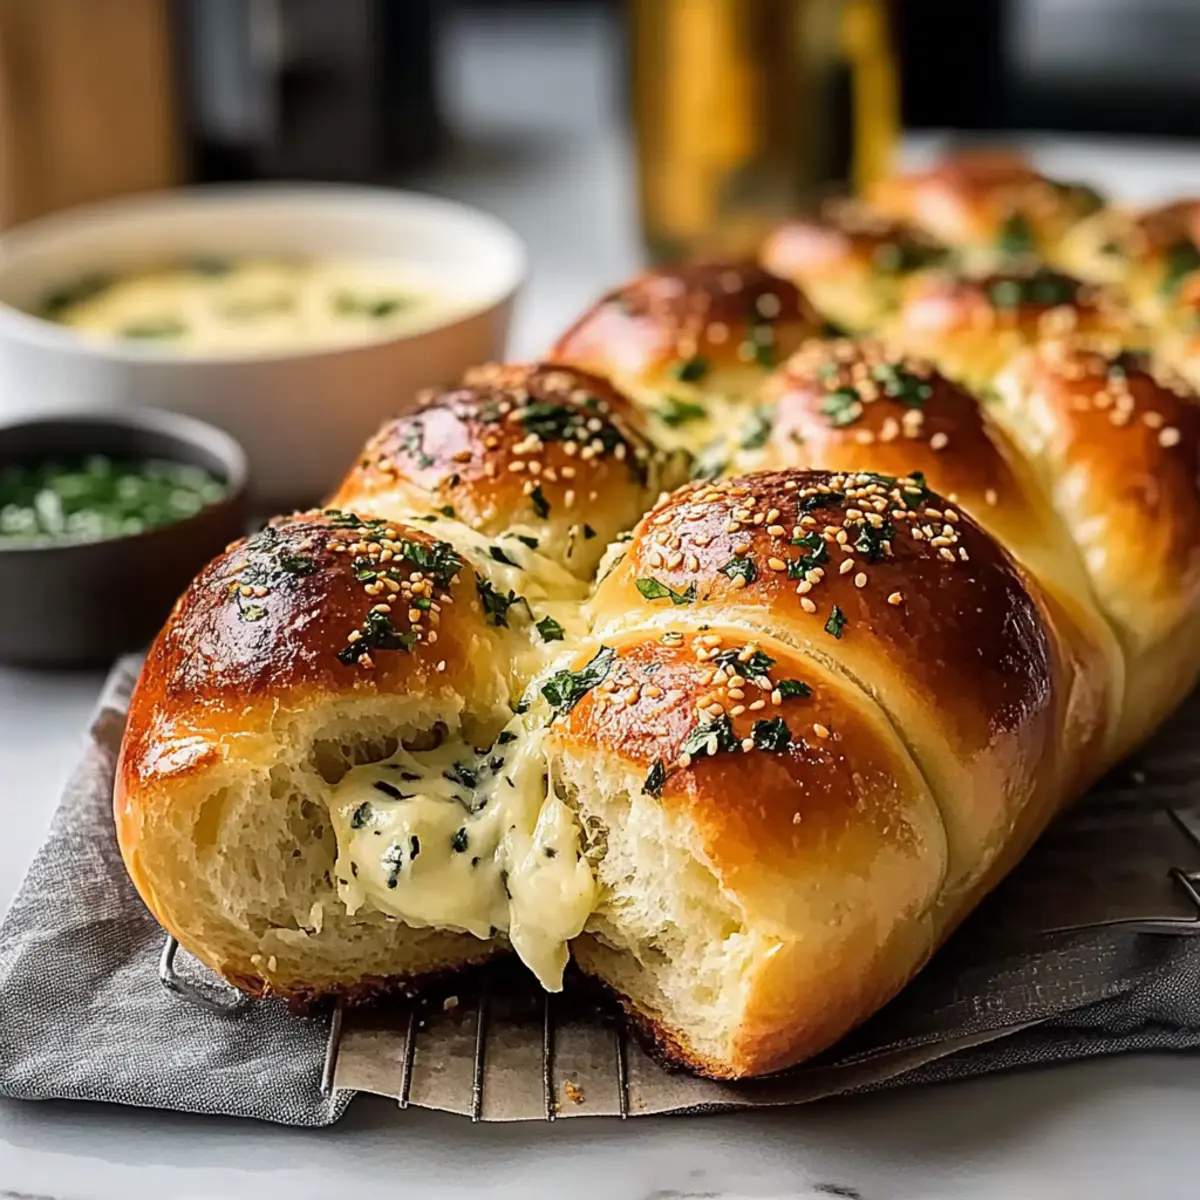
Slide your baking tray into the preheated oven and bake the buns for about 10 minutes. You’ll want to keep an eye on them; they should turn golden brown and the filling should begin to set, creating a wonderful contrast between the crispy exterior and gooey filling.
Step 10: Cool Before Serving
Once the buns are out of the oven, allow them to cool for 5-10 minutes. This cooling period will help the cream cheese filling firm up just a bit, ensuring that your Homemade Korean Cream Cheese Garlic Bread has the perfect texture when you take your first delicious bite.
Make Ahead Options
These Homemade Korean Cream Cheese Garlic Bread are perfect for busy weeknights! You can prepare the cream cheese filling and garlic butter sauce up to 24 hours in advance, which saves time when you’re ready to bake. Simply store them separately in airtight containers in the refrigerator. Additionally, you can cut the brioche buns and fill them with the cream cheese mixture up to 3 days ahead; just keep them tightly covered to maintain their moisture. When you’re ready to serve, dip the filled buns in the garlic butter sauce, bake for 10 minutes in a preheated oven, and enjoy restaurant-quality results with minimal effort!
Korean Cream Cheese Garlic Bread Variations
Feel free to personalize your Korean Cream Cheese Garlic Bread with these delightful twists that elevate flavor and fun!
-
Dairy-Free: Swap cream cheese with plant-based alternatives like cashew or almond cream cheese for a similar texture.
-
Sugar-Free: Substitute regular sugar with a natural sweetener like agave or monk fruit to satisfy your sweet tooth without calories. This is a great option for those cutting back on sugar.
-
Spicy Kick: Add a teaspoon of red pepper flakes or Sriracha to the garlic butter sauce for a spicy version that’ll make your taste buds dance! The heat pairs surprisingly well with the creaminess of the filling.
-
Herb-Infused: Mix fresh herbs, like basil or chives, into the garlic butter sauce to introduce a fresh, vibrant flavor. The herbs will make each bite feel like spring, perfect for a cozy brunch spread.
-
Cheesy Upgrade: Incorporate shredded cheese, like mozzarella or cheddar, into the cream cheese filling for extra melty goodness. Imagine a gooey, cheesy surprise that adds a whole new layer to this delightful bread!
-
Sweet Spin: For a dessert twist, use flavored cream cheese like strawberry or orange, replacing vanilla in the filling; it’s a deliciously sweet treat. Imagine serving this at a brunch—definitely a showstopper!
-
Gluten-Free: Opt for gluten-free rolls if you’re avoiding gluten, allowing everyone to enjoy this delightful bread while still accommodating dietary needs. Plus, the flavors will shine through just the same.
These variations are not only delicious but also allow you to explore new flavor profiles. Whether you stick with the original or experiment a bit, each bite of your Korean Cream Cheese Garlic Bread will surely be a delight! And if you’re looking for a savory pairing, try serving it alongside my Sticky Garlic Chicken for the ultimate comfort food experience!
Expert Tips for Korean Cream Cheese Garlic Bread
-
Cut with Care: Avoid cutting the brioche buns all the way through to maintain their shape. This will ensure your filling stays secure and doesn’t leak out during baking.
-
Gentle Garlic Cooking: Cook the minced garlic slowly over medium-low heat to prevent it from burning. Burnt garlic has a bitter taste, so patience here is key for that aromatic burst of flavor.
-
Cooling Matters: Allow your Korean Cream Cheese Garlic Bread to cool for 5-10 minutes before serving. This will help the cream cheese filling firm up, creating that delightful texture difference between creamy and crispy.
-
Extra Flavor Boost: Brush any remaining garlic butter sauce on top of the buns just before the final minutes of baking to achieve an even more golden finish and enhance the flavor profile.
-
Experiment with Fillings: Feel free to get creative! Try adding herbs to the garlic butter or swapping cream cheese with a different cheese to find your favorite variation and keep snack time exciting.
What to Serve with Homemade Korean Cream Cheese Garlic Bread
Savor the rich flavor of this indulgent treat as you explore delightful pairings to create a memorable meal experience.
-
Crispy Korean Fried Chicken: The savory crunch of fried chicken complements the creamy sweetness of the garlic bread, making it a perfect duo for a satisfying feast.
-
Refreshing Cucumber Salad: Light and crisp, this salad adds a refreshing contrast with its tangy dressing, balancing the richness of the bread beautifully.
-
Spicy Tteokbokki: The heat from this traditional dish pairs perfectly with the creamy filling, creating an exciting harmony of flavors that will tantalize your taste buds.
-
Fruity Dessert Platter: Offer a colorful selection of seasonal fruits like strawberries and mangoes, providing a sweet yet refreshing end to your meal.
-
Rich Coffee or Tea: Enhance your snack time with a cup of dark coffee or fragrant tea to cut through the richness and elevate your taste experience.
-
Cheesy Scrambled Eggs: Serve alongside fluffy scrambled eggs for a comforting brunch spread, adding protein to your meal while staying deliciously indulgent.
-
Tangy Kimchi: The fermented crunch of kimchi brings a spicy, tangy flavor that contrasts beautifully with the sweet cream cheese, ensuring an exciting culinary journey.
Indulge in these combinations to create an unforgettable dining experience!
Storage Tips for Korean Cream Cheese Garlic Bread
-
Room Temperature: Store in an airtight container for up to 2 days to maintain freshness, enjoying the delightful texture at its best.
-
Fridge: If you need to keep them longer, transfer the buns to the refrigerator, where they’ll stay fresh for up to 5 days—great for snacking any time!
-
Freezer: For longer storage, individually wrap the buns in plastic wrap and place them in a freezer-safe bag for up to 2 months.
-
Reheating: Reheat frozen Korean cream cheese garlic bread in a 350°F oven for about 10-15 minutes until heated through and crispy, bringing back that bakery-fresh delight!
Homemade Korean Cream Cheese Garlic Bread Recipe FAQs
What type of brioche buns should I use?
Absolutely! Softness is key for that perfect texture. While brioche is ideal due to its sweetness and fluffiness, you can substitute it with other soft rolls like challah or even dinner rolls if brioche isn’t available. Just make sure they’re fresh!
How should I store leftover Korean cream cheese garlic bread?
Very easy! For short-term storage, keep your Homemade Korean Cream Cheese Garlic Bread in an airtight container at room temperature for up to 2 days. If you’d like to keep them longer, pop them into the refrigerator where they’ll stay fresh for up to 5 days. Just remember to reheat before serving!
Can I freeze these buns?
Definitely! For freezing, wrap each bun individually in plastic wrap and place them in a freezer-safe bag. They can be frozen for up to 2 months. When you’re ready to enjoy them again, reheat in a 350°F oven for about 10-15 minutes until they’re warm and crispy. It’s like having a little piece of comfort food ready whenever cravings hit!
What should I do if my garlic butter sauce seems too runny?
No worries! If your garlic butter sauce is too runny, you can thicken it by whisking in a bit more mayonnaise or a spoonful of cream cheese until you reach your desired consistency. Another option is to let it cook a little longer on low heat, stirring frequently until it thickens up slightly. It’s all about finding that perfect balance!
Are there any dietary considerations for this recipe?
Yes! If you’re looking to make a vegan version, simply omit the egg and substitute the cream cheese with a plant-based alternative. Additionally, check your mayonnaise; you can use vegan mayo for the same creamy consistency. For allergens, always ensure that your cream cheese and other ingredients are free from any nuts or gluten if needed, depending on dietary restrictions. Always better to check labels!
Irresistibly Creamy Korean Cream Cheese Garlic Bread Recipe
Ingredients
Equipment
Method
- Preheat your oven to 180°C (356°F). Line your baking tray with parchment paper.
- Finely mince your garlic and organize your ingredients into separate bowls.
- Combine softened cream cheese, sugar, and vanilla extract in a bowl. Mix until smooth and creamy.
- Melt butter in a saucepan over medium-low heat. Add minced garlic and cook gently for 2-3 minutes.
- In another bowl, whisk together garlic butter, remaining melted butter, milk, mayonnaise, sugar, parsley, egg, and salt.
- Make a cut in each brioche bun to create pockets without cutting all the way through.
- Fill each pocket with the cream cheese mixture and dip in the garlic butter sauce.
- Place buns on the baking tray and pipe additional cream cheese filling on top.
- Bake the buns for about 10 minutes until golden brown.
- Allow the buns to cool for 5-10 minutes before serving.
Leave a Reply