
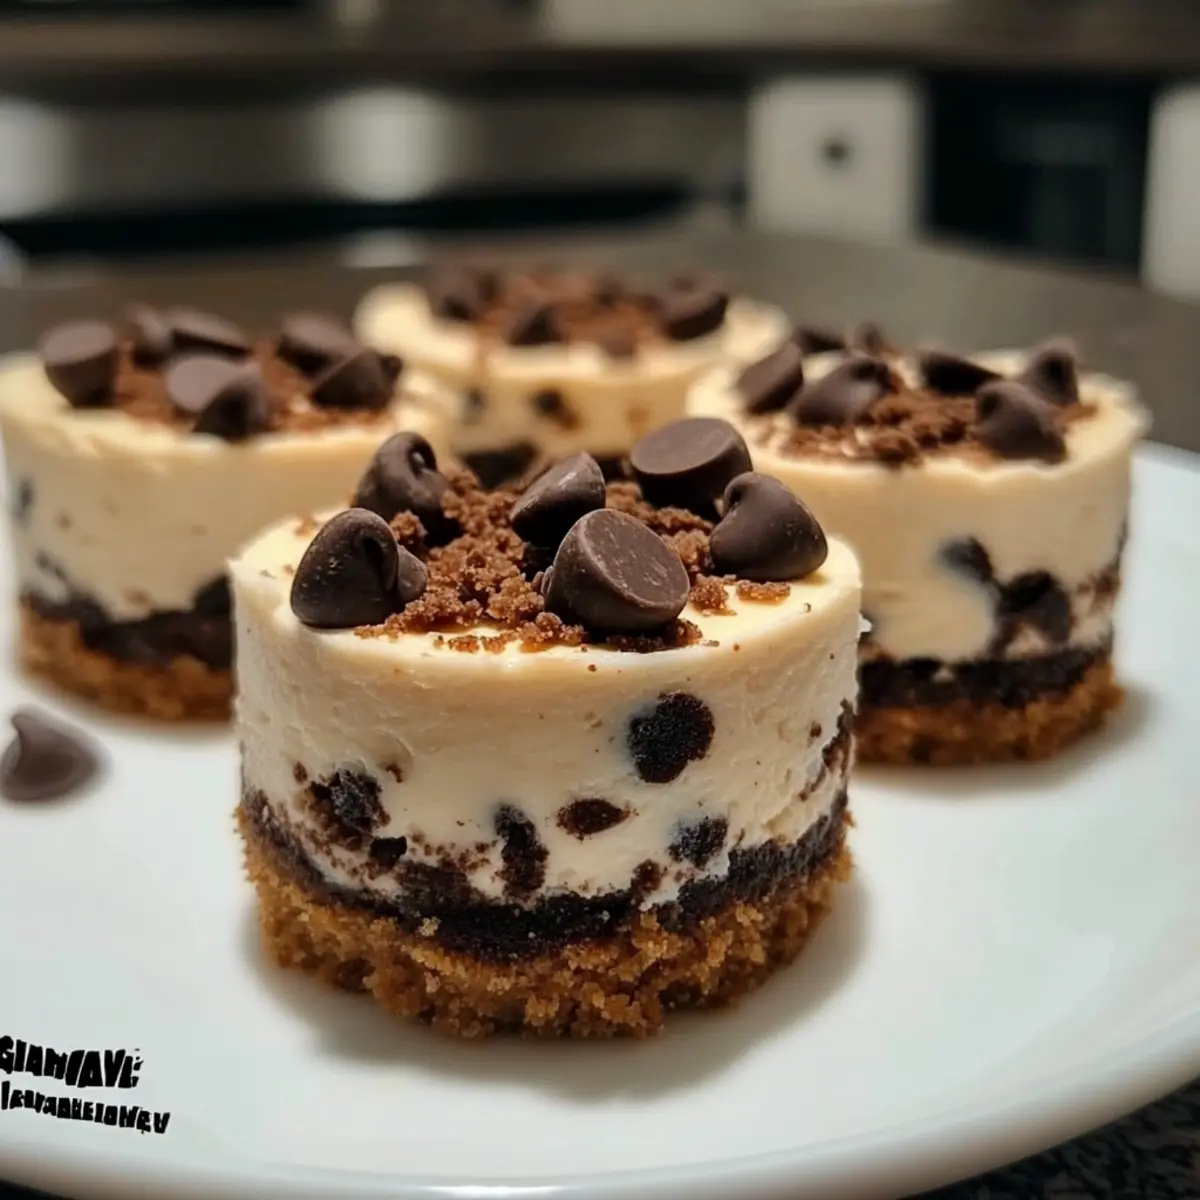
The first time I tasted these Mini Chocolate Chip Cookie Dough Cheesecakes, I felt a rush of nostalgia—like being a kid again, sneaking spoonfuls of cookie dough when no one was watching. This delightful no-bake dessert combines creamy cheesecake with safe-to-eat cookie dough and mini chocolate chips, creating a sweet treat that’s perfect for both celebrations and cozy evenings at home. Not only are they eggless and freezer-friendly, making them a breeze to prepare ahead of time, but they also cater to everyone’s sweet tooth, including the little ones! If you’ve been craving a homemade dessert that offers a fun twist on classic flavors, I promise you’ll love every bite. Ready to whip up something truly special?
Why Are These Cheesecakes So Irresistible?
Simplicity: This no-bake recipe makes whipping up these treats a breeze, perfect for novice bakers and seasoned chefs alike.
Timeless Flavor: The combination of cookie dough and cheesecake is nostalgic, offering a rich, creamy delight that hits all the right notes.
Kid-Friendly: With no eggs and safe-to-eat cookie dough, kids can enjoy these scrumptious bites worry-free.
Versatility: Feel free to swap in your favorite chocolate varieties or try Gluten Free Chocolate Chip for a twist on this classic!
Freezer-Friendly: Make a batch in advance and store them for up to two months—perfect for surprising guests or satisfying late-night cravings.
Crowd-Pleasing: These mini cheesecakes are guaranteed to impress at any gathering, from birthday parties to quiet family dinners.
Mini Chocolate Chip Cookie Dough Cheesecakes Ingredients
-
For the Crust
• Graham cracker crumbs – The base structure for the crust; substitute with digestive biscuits or Oreo crumbs for a unique twist.
• Brown sugar – Adds sweetness with a hint of caramel; can be replaced with coconut sugar for a healthier variation.
• Unsalted butter – Binds the crust together; margarine works well as a dairy-free substitute. -
For the Cheesecake Filling
• Cream cheese – Provides a rich creaminess; ensure it’s softened to room temperature for a smooth texture.
• Granulated sugar – Sweetens the filling; feel free to reduce for a less sweet cheesecake.
• Mini chocolate chips – Introduces delightful bursts of chocolate; you can swap these for dark or white chocolate as desired.
• All-purpose flour (heat treated) – Thickens the filling while ensuring it’s safe to eat raw; omit if using traditional cheesecake methods.
• Sweetened condensed milk – Adds creaminess and sweetness; can be replaced with coconut cream for a dairy-free option.
• Vanilla extract – Provides an aromatic essence; almond extract can be used for a unique flavor profile.
• Pinch of salt – Enhances the sweetness and balances flavors perfectly. -
Optional Brownie Layer
• Brownie batter – Elevates the richness of the dessert; can be pre-made or homemade for convenience. Omitting this layer keeps it simpler for a classic cheesecake vibe.
This ingredient list will make your Mini Chocolate Chip Cookie Dough Cheesecakes an absolute hit at your next gathering! Enjoy creating this delightful treat that combines nostalgia with modern flavors.
Step‑by‑Step Instructions for Mini Chocolate Chip Cookie Dough Cheesecakes
Step 1: Preheat the Oven
Begin by preheating your oven to 325°F (if using the optional brownie layer). This ensures that your brownie batter gets that perfect texture. While the oven warms up, gather all your ingredients and prepare your muffin tin by lining it with cupcake liners, making your cleanup a breeze later on.
Step 2: Make the Crust
In a medium bowl, combine the graham cracker crumbs, brown sugar, and melted butter until you achieve a sandy texture. Press this mixture firmly into the bottom of the lined muffin cups to form your crust. Bake in the preheated oven for 5 minutes, then remove and let cool completely while you prepare the filling.
Step 3: Prepare the Brownie Layer (Optional)
If you’re adding a brownie layer, pour your prepared brownie batter over the cooled graham cracker crust. Ensure even distribution for consistent texture. Bake for another 5 minutes until just set, then let the layers cool completely before moving on to the cheesecake filling.
Step 4: Mix the Cheesecake Filling
In a large mixing bowl, beat the softened cream cheese, granulated sugar, flour, sweetened condensed milk, vanilla extract, and a pinch of salt until the mixture is silky smooth. This should take about 3–4 minutes. Scrape down the sides of the bowl to ensure every ingredient is blended well—this is the heart of your Mini Chocolate Chip Cookie Dough Cheesecakes.
Step 5: Incorporate the Chocolate Chips
Gently fold in the mini chocolate chips into the cheesecake mixture, stirring just until evenly distributed. This will add delightful bursts of chocolate flavor throughout your creamy filling. You can also reserve a few chips to sprinkle on top for added texture and visual appeal.
Step 6: Assemble the Cheesecakes
Spoon the luscious filling into each muffin cup, filling them almost to the top. Use a spatula to smooth the tops if desired, ensuring an even presentation. Top each one with extra mini chocolate chips for that irresistible finishing touch, enhancing the charm of your Mini Chocolate Chip Cookie Dough Cheesecakes.
Step 7: Chill and Firm Up
Now, place the assembled cheesecakes in the refrigerator for at least 4 hours to set. If you’re short on time, you can also freeze them for about 1 hour. Once firm, the cheesecakes will be easy to remove from the liners—just peel them away carefully to serve up delicious bites of joy!
What to Serve with Mini Chocolate Chip Cookie Dough Cheesecakes
Dive into these luscious cheesecakes that are perfect for a sweet celebration or a cozy night spent relaxing.
-
Fresh Berries:
A mix of strawberries, blueberries, and raspberries adds a refreshing burst of flavor, balancing the rich cheesecake beautifully. -
Whipped Cream:
Light and airy whipped cream provides a delightful contrast in texture, enhancing every bite of these decadent mini cheesecakes. -
Chocolate Sauce:
Drizzling warm chocolate sauce over your cheesecakes amplifies the indulgence and invites sweet nostalgia with every taste. -
Coffee:
A cup of freshly brewed coffee complements the sweetness and richness, making it a perfect pairing for dessert lovers. -
Vanilla Ice Cream:
The creaminess of vanilla ice cream alongside these cheesecakes creates a delectable contrast and craves satisfaction in every spoonful. -
Caramel Sauce:
Drizzling caramel adds a rich, buttery layer of flavor, enhancing the mini chocolate chip cookie dough cheesecakes even more. -
Nutty Toffee Bits:
Sprinkling crunchy toffee bits provides an unexpected textural crunch, introducing a delightful twist to the otherwise smooth dessert. -
Mint Tea:
A warm cup of mint tea refreshes the palate and aids digestion, wrapping up your dessert experience on a soothing note.
Expert Tips for Mini Chocolate Chip Cookie Dough Cheesecakes
-
Heat-Treat the Flour: Always heat-treat your all-purpose flour before use, as this removes any harmful bacteria, making your Mini Chocolate Chip Cookie Dough Cheesecakes safe for everyone to enjoy.
-
Soften Cream Cheese: Make sure your cream cheese is brought to room temperature prior to mixing. This ensures a smooth and creamy filling without any lumps—so satisfying!
-
Chill Before Serving: For the best texture, chill your cheesecakes for at least 4 hours. If you’re in a rush, a quick freeze for 1 hour will do the trick—just let them sit out briefly for easier peeling.
-
Don’t Skimp on Chocolate: For a burst of flavor, make sure to fold in enough mini chocolate chips. They add delightful pockets of sweetness, so reserve a few to sprinkle on top as a finishing touch!
-
Customize Your Flavors: Feel free to experiment with different extracts or flavored cream cheese to make these cheesecakes suit your taste. Vanilla, almond, or even chocolate cream cheese can give a fun twist.
-
Add Mix-Ins: For an extra special touch, consider adding chopped nuts or drizzles of caramel in the filling. This not only elevates the flavor but also adds a satisfying texture to your Mini Chocolate Chip Cookie Dough Cheesecakes!
Make Ahead Options
These Mini Chocolate Chip Cookie Dough Cheesecakes are perfect for meal prep, saving you time on busy weeknights! You can prepare the crust and optional brownie layer up to 24 hours in advance. Simply follow the initial steps to set up the crust, and once cooled, store them in an airtight container in the refrigerator. The cheesecake filling can also be made up to 3 days ahead; just mix everything and gently fold in the mini chocolate chips, then refrigerate until it’s time to assemble. When ready to serve, simply spoon the filling into the prepared crusts and chill until firm. This way, you’ll have delicious mini cheesecakes ready to impress with minimal effort!
How to Store and Freeze Mini Chocolate Chip Cookie Dough Cheesecakes
Refrigerator: Store your cheesecakes in an airtight container in the fridge for up to 5 days. They’ll remain delicious, creamy, and ready to impress whenever you need a sweet treat.
Freezer: For longer storage, wrap the individual cheesecakes tightly in plastic wrap and place them in a freezer-safe container. They can last for up to 2 months without losing their delightful flavor.
Thawing: When you’re ready to enjoy your frozen cheesecakes, simply move them to the refrigerator to thaw overnight. This will ensure they regain their creamy texture perfectly.
Serving: After thawing, feel free to add an extra sprinkle of mini chocolate chips on top for a fresh and tasty presentation—it’s like serving a brand-new batch of Mini Chocolate Chip Cookie Dough Cheesecakes!
Mini Chocolate Chip Cookie Dough Cheesecakes Variations
Feel free to personalize your Mini Chocolate Chip Cookie Dough Cheesecakes with these fun and flavorful swaps!
-
Gluten-Free Crust: Use almond flour instead of graham cracker crumbs for a gluten-free twist that still offers great texture.
-
Healthy Sugar Swap: Replace brown sugar with coconut sugar for a more natural sweetness, perfect for those watching their sugar intake.
-
Dairy-Free Delight: Swap out cream cheese with a vegan cream cheese alternative to cater to dairy-free diets while still keeping it creamy.
-
Flavor Explosion: Fold in a handful of chopped nuts or a drizzle of caramel sauce to the filling for added texture and flavor richness.
-
Seasonal Swaps: Try flavored extracts like peppermint or orange for a festive flair—these fragrant touches can turn your mini cheesecakes into seasonal delights.
-
Enhanced Chocolate: Substitute mini chocolate chips with chunks of your favorite chocolate bar for a more decadent chocolate experience. A festive touch of Chocolate Chip Cookies on top adds extra charm!
-
Additional Layers: Think beyond the brownie layer—add a layer of fruit preserves under the cheesecake filling for a burst of tart sweetness!
-
Nutty Textures: Introduce crushed pretzels into the crust for an exciting salty-sweet combo that’ll keep everyone guessing.
Each of these variations will add a personal touch, making your Mini Chocolate Chip Cookie Dough Cheesecakes even more delightful! Enjoy experimenting and finding your perfect mix!
Mini Chocolate Chip Cookie Dough Cheesecakes Recipe FAQs
How do I choose the best ripeness for my ingredients?
Absolutely! For the best flavor, use fresh cream cheese; it should be soft and creamy, ideally brought to room temperature before mixing. If using butter, opt for unsalted and fresh to ensure optimal taste, while also checking your chocolate chips for freshness—look for vibrant colors and a smooth texture without any discoloration.
What is the best way to store Mini Chocolate Chip Cookie Dough Cheesecakes?
Store your delicious cheesecakes in an airtight container in the refrigerator for up to 5 days. For longer storage, wrap each mini cheesecake tightly in plastic wrap and place them in a freezer-safe container, where they can last for up to 2 months without losing flavor or texture.
Can I freeze Mini Chocolate Chip Cookie Dough Cheesecakes?
Yes, these treats are freezer-friendly! To freeze, wrap individual cheesecakes in plastic wrap and place them in a freezer-safe container. When you’re ready to enjoy them, transfer them to the refrigerator and let them thaw overnight for the best texture.
What should I do if my cheesecake filling is lumpy?
Very good question! Lumpy filling usually means the cream cheese wasn’t softened enough. To avoid this problem, ensure that your cream cheese is at room temperature before mixing. If you’re already mixing and find lumps, simply continue beating the mixture vigorously until it becomes smooth. You can also pass it through a fine mesh sieve for an extra-silky texture—patience pays off here!
Are these cheesecakes safe for kids?
Definitely! These Mini Chocolate Chip Cookie Dough Cheesecakes are made eggless, and the flour is heat-treated to eliminate any bacteria, making them a great, safe treat for kids. Just keep an eye on portion sizes, as they are quite rich!
Can I make these cheesecakes gluten-free?
Absolutely! Substitute the graham cracker crumbs with gluten-free options like almond flour or gluten-free cookies to keep this dessert both friendly and delicious for those avoiding gluten. Give it a try, and let those flavors shine!
Mini Chocolate Chip Cookie Dough Cheesecakes to Impress Everyone
Ingredients
Equipment
Method
- Preheat the oven to 325°F if using the optional brownie layer. Prepare the muffin tin by lining it with cupcake liners.
- In a medium bowl, combine the graham cracker crumbs, brown sugar, and melted butter until sandy. Press into the bottom of the lined muffin cups.
- If adding a brownie layer, pour the brownie batter over the cooled crust and bake for another 5 minutes. Let cool completely.
- In a large mixing bowl, beat cream cheese, granulated sugar, flour, condensed milk, vanilla extract, and a pinch of salt until smooth, about 3–4 minutes.
- Gently fold in mini chocolate chips, reserving a few for topping.
- Spoon the cheesecake filling into the muffin cups, filling almost to the top and smoothing the tops as desired. Sprinkle reserved chocolate chips on top.
- Chill in the refrigerator for at least 4 hours or freeze for about 1 hour before serving.
Leave a Reply