
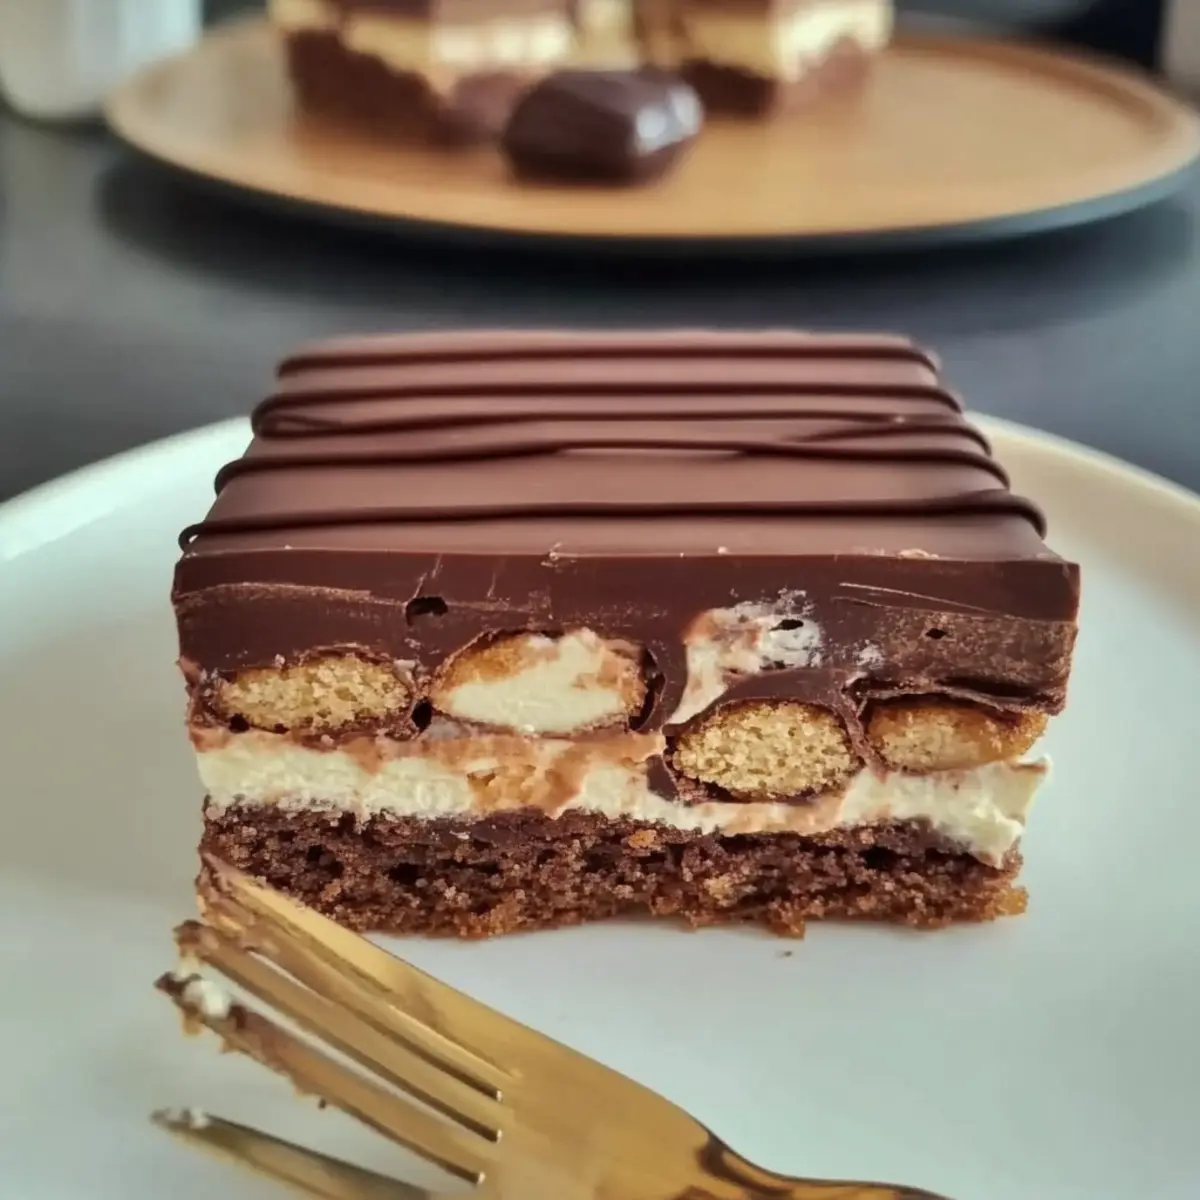
As I was rummaging through my kitchen looking for a quick solution to a sweet craving, a delightful idea struck me—a recipe for No-Bake Kinder Bueno Bars that promises to bring joy without the fuss. These creamy, layered treats blend cocoa biscuits with a luscious mascarpone filling and the irresistible crunch of Kinder Bueno bars. Not only is this an easy dessert to whip up with zero baking required, but it’s also a fantastic way to impress guests without spending hours in the kitchen. Perfect for those afternoons when you need a comforting indulgence, or simply when chocolate calling your name becomes too loud to ignore. Curious how to make this delectable treat? Let’s dive into the steps so you can bring a slice of happiness to your table!
Why You’ll Crave No-Bake Kinder Bueno Bars?
Effortless Preparation: With no baking involved, you can quickly assemble these bars in just a few simple steps, making them perfect for busy cooks or spontaneous dessert-making.
Decadent Flavor: The rich mascarpone filling paired with the sweet crunch of Kinder Bueno bars creates a mouthwatering experience that chocolate lovers will adore.
Layered Delight: Each bite offers a fantastic contrast of textures—from crunchy cocoa biscuits to creamy fillings—making every slice an exciting treat.
Crowd-Pleaser: Ideal for gatherings, these bars are sure to win the hearts of your guests. Pair them with a cup of coffee or a scoop of ice cream for an indulgent dessert experience. If you’re enjoying deliciously sweet treats like these, check out our amazing Oatmeal Crumble Bars for another fantastic dessert idea!
Make-Ahead Magic: Prepare these bars a day in advance for a stress-free event or dessert night; they’re even better after chilling overnight in the fridge.
No-Bake Kinder Bueno Bars Ingredients
Optional Note: Gather everything you need for these delightful treats and prepare to indulge!
For the Base
• Cocoa Biscuits – Provides the structure and chocolate flavor for a solid base.
• Milk – Briefly dip the biscuits in milk to soften them just enough for easy layering.
For the Filling
• Mascarpone Cheese – Offers a rich and creamy filling; ensure it’s cold for the perfect texture.
• Powdered Sugar – Sweetens the filling while keeping it smooth, using just enough due to the sweetness from the Kinder Bueno.
• Heavy Cream (250 ml, 35%) – Whipped to add lightness and volume; make sure it’s cold for ideal whipping.
• Kinder Bueno Bars – Chopped and folded into the cream to infuse irresistible hazelnut and wafer goodness throughout.
For the Topping
• Milk Chocolate – The main component that adds sweetness and a smooth finish; opt for high-quality chocolate.
• Heavy Cream (100 ml) – Mixed with chocolate to enhance smoothness in the topping.
• Dark Chocolate – Balances out the sweetness when combined with milk chocolate for a rich topping.
Optional Decoration
• Melted Chocolate – Drizzle on top for a stylish finish, adding a touch of flair.
• Additional Kinder Bueno Pieces – Use these as garnishing to elevate the presentation and flavor of your No-Bake Kinder Bueno Bars!
Step‑by‑Step Instructions for No-Bake Kinder Bueno Bars
Step 1: Whip the Cream
In a large mixing bowl, pour in 250 ml of cold heavy cream. Using an electric mixer, whip the cream on medium speed until it thickens slightly and forms soft peaks, about 3-5 minutes. The cream should hold its shape but still be smooth and billowy. This will form the light base for your No-Bake Kinder Bueno Bars.
Step 2: Combine with Mascarpone
Next, add 250 g of cold mascarpone cheese and 50 g of powdered sugar to the whipped cream. Gently fold the mixture together using a spatula, being careful not to deflate the cream. Mix just until the ingredients are well combined and the filling becomes smooth and firm, which should take about 2-3 minutes.
Step 3: Fold in Kinder Bueno
Chop up 3-4 Kinder Bueno bars into small pieces and fold them into your creamy mascarpone mixture. Use a spatula to gently incorporate the chocolatey hazelnut pieces, ensuring they’re evenly distributed throughout the filling. This step adds delightful texture and flavor to your No-Bake Kinder Bueno Bars.
Step 4: Set Up the Base Layer
Take 9 cocoa biscuits and quickly dip each one in milk for just a second to soften them slightly. Line the bottom of a rectangular baking pan with these dipped biscuits, creating a solid base. Spread half of the mascarpone filling evenly over the biscuits, smoothing it out to create a nice layer.
Step 5: Repeat the Layering Process
Now, take another set of cocoa biscuits and dip them briefly in milk, just like before. Layer them over the mascarpone filling, pressing down gently. Then, add the remaining mascarpone mixture on top, spreading it out evenly once more for a consistent look. Finish with a final layer of dipped biscuits.
Step 6: Chill the Bars
Cover the baking pan with plastic wrap and place it in the refrigerator. Allow the No-Bake Kinder Bueno Bars to chill for 1-2 hours. This is the crucial step for firming up the layers, giving them structure and allowing the flavors to meld beautifully.
Step 7: Prepare the Chocolate Topping
In a small saucepan, heat 100 ml of heavy cream until it’s nearly boiling. Remove it from the heat and pour it over a mix of 100 g of chopped milk chocolate and 50 g of dark chocolate in a heat-proof bowl. Let it sit for a moment, then stir until the chocolate is fully melted and smooth, creating a luscious topping.
Step 8: Drizzle the Topping
Once the chocolate topping has cooled slightly but is still pourable, take the chilled bars from the refrigerator. Carefully pour the topping over the layered treat, ensuring it covers the entire surface smoothly. Allow it to set for a few minutes at room temperature before chilling again.
Step 9: Final Chill
Return the bars to the refrigerator for an additional 2 hours, ensuring they are completely set and firm. This is essential for achieving those clean, defined layers when you cut into the No-Bake Kinder Bueno Bars later on.
Step 10: Serve and Decorate
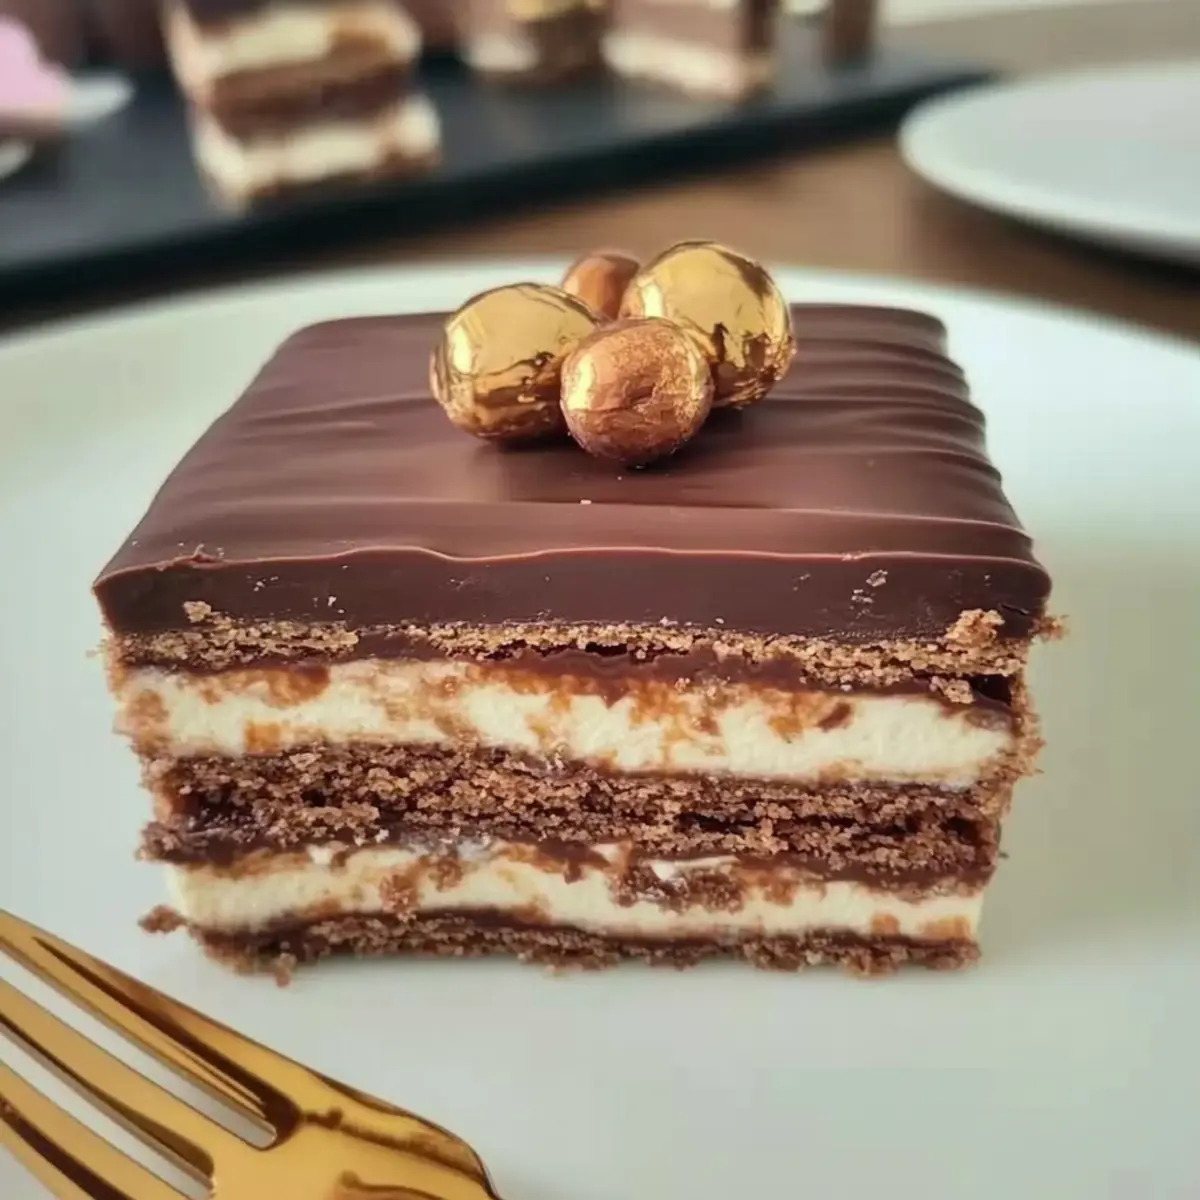
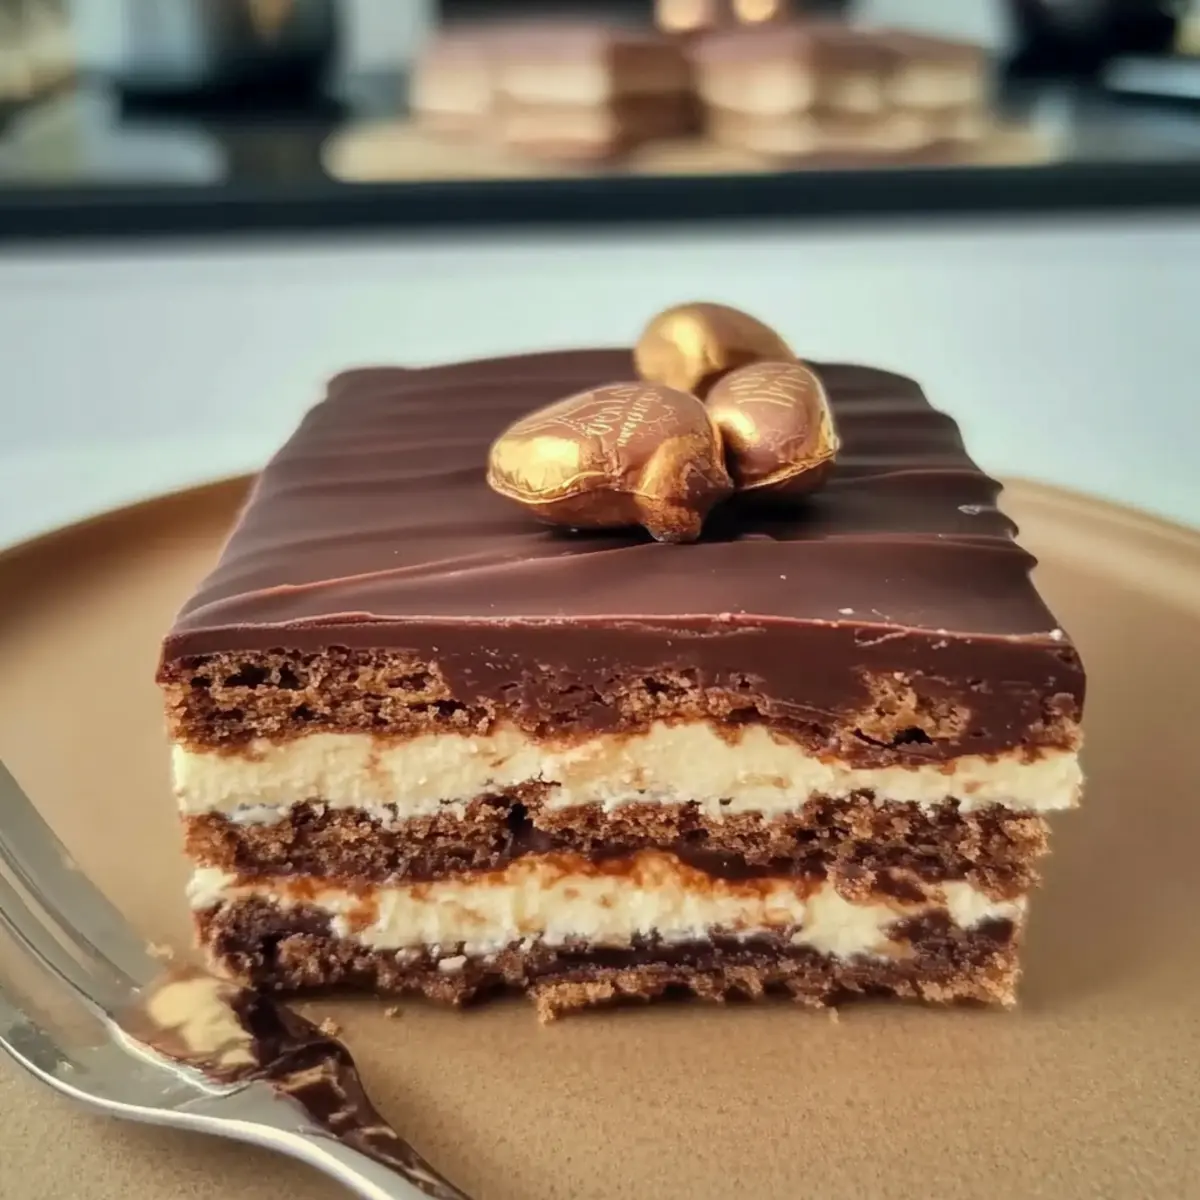
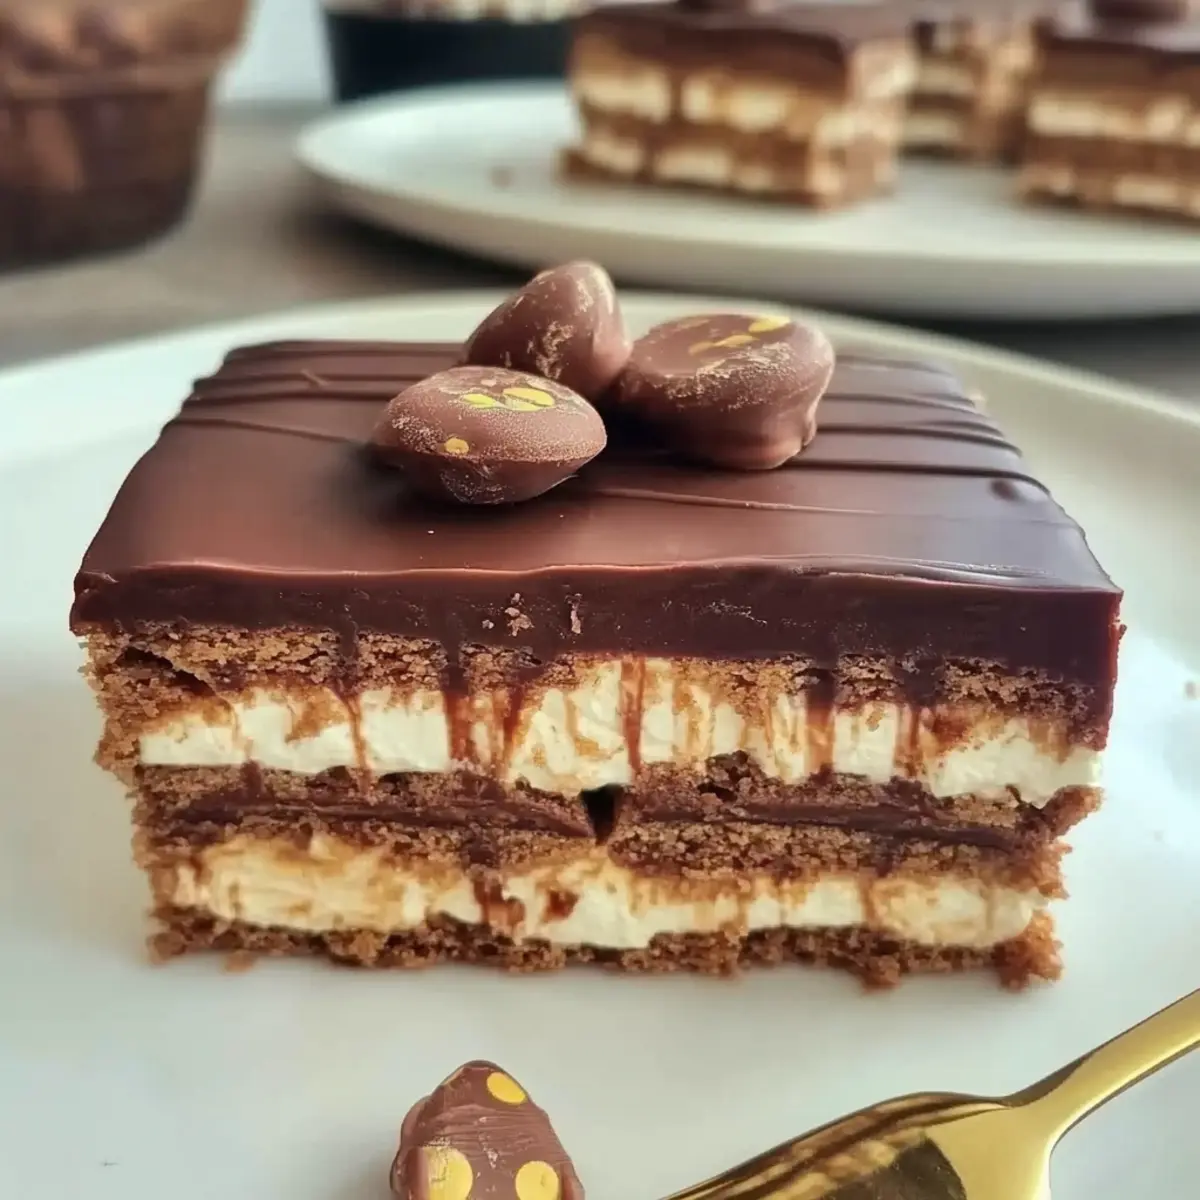
When ready to serve, remove the bars from the pan and cut them into neat slices. For an extra touch, you can drizzle melted chocolate on top and garnish with extra pieces of Kinder Bueno. These stunning No-Bake Kinder Bueno Bars are perfect for impressing your guests and satisfying your sweet tooth!
No-Bake Kinder Bueno Bars Variations
Feel free to explore these delightful twists to make the No-Bake Kinder Bueno Bars truly your own!
-
Nut-Free: Substitute the mascarpone with a thick coconut cream for a dairy-free alternative that keeps the creamy texture.
-
Gluten-Free: Use gluten-free cocoa biscuits instead of regular ones for a safe and delicious treat for everyone.
-
Chocolate Lovers: Increase the chocolate flavor by incorporating chocolate hazelnut spread into the mascarpone filling alongside the Kinder Bueno for rich, chocolatey goodness.
-
Add Some Crunch: Include chopped nuts such as hazelnuts or almonds in the filling for extra texture and a satisfying crunch.
-
Caramel Twist: Drizzle caramel sauce over the chocolate topping for a sweet and decadent finish that’ll have everyone swooning.
-
Fruit infusion: Add a layer of sliced bananas or strawberries between the filling and the top biscuit layer for a fruity, refreshing twist.
-
Spicy Kick: Mix in a pinch of cayenne pepper to the chocolate topping to create a surprising heat that balances the sweetness.
-
Coffee Flavor: For a café-inspired treat, add instant coffee granules to the mascarpone filling for that lovely mocha vibe.
Feel inspired yet? Each of these variations can bring a new flavor dimension to your No-Bake Kinder Bueno Bars. As you embark on this delectable journey, don’t forget to try pairing them with our scrumptious Oatmeal Crumble Bars or incorporate unique ingredients to discover even more delightful combinations!
Expert Tips for No-Bake Kinder Bueno Bars
-
Chill Ingredients: Ensure your heavy cream and mascarpone are chilled for optimal whipping and mixing. This step is essential for achieving that light, fluffy filling.
-
Milk Dipping Time: Briefly dip the cocoa biscuits in milk; if left too long, they may become soggy and ruin the texture. A quick dip is all you need!
-
Cooling Topping: Allow the chocolate topping to cool slightly before pouring it over the bars. This helps prevent it from melting your upper biscuit layer, maintaining beautiful layers.
-
Layer Evenly: For the best presentation of your No-Bake Kinder Bueno Bars, aim for even layers of filling and biscuits, resulting in clean and defined slices when cutting.
-
Use Quality Chocolate: Opt for good quality chocolate for the topping; it makes all the difference in flavor and texture, elevating your dessert experience!
Make Ahead Options
These No-Bake Kinder Bueno Bars are perfect for meal prep enthusiasts! You can prepare the bars up to 24 hours in advance by completing all steps except for the final chilling and decorating. Layer the cocoa biscuits and mascarpone filling, refrigerate until firm (1-2 hours), and then cover tightly with plastic wrap to maintain freshness. When you’re ready to serve, simply make the chocolate topping, pour it over the bars, and return them to the fridge for another 2 hours to set. This method ensures the bars remain just as delicious as if they were freshly made while saving you time on busy days!
What to Serve with No-Bake Kinder Bueno Bars?
These delightful bars are perfect for elevating your dessert spread, inviting sweetness and indulgent flavors into your dining experience.
-
Fresh Berries: The natural tartness of raspberries or strawberries pairs beautifully with the sweet, creamy bars, adding a refreshing contrast.
-
Vanilla Ice Cream: A scoop of velvety vanilla ice cream creates a luscious pairing, enhancing the chocolatey goodness of the bars.
-
Espresso or Coffee: A warm cup intermingles rich flavors, providing a perfect balance to the creamy sweetness of the Kinder Bueno Bars.
-
Chocolate Drizzle: Elevate the visual appeal and flavor by drizzling extra melted chocolate over the bars; it intensifies the chocolate experience.
-
Whipped Cream: Light and airy, a dollop of freshly whipped cream brings a delightful creaminess that complements the bars’ texture nicely.
-
Nutty Biscotti: The crunchy texture of biscotti provides a delicious contrast, offering a delightful nutty flavor that pairs wonderfully with the bars.
-
Mint Tea: A warm cup of herbal mint tea refreshes the palate, making it a soothing companion to the indulgence of your dessert.
-
Caramel Sauce: Drizzling warm caramel sauce over the bars adds an additional layer of sweetness and a unique flavor twist that’s hard to resist.
How to Store and Freeze No-Bake Kinder Bueno Bars
Fridge: Store your No-Bake Kinder Bueno Bars in an airtight container in the refrigerator for up to 5 days to maintain freshness and flavor.
Freezer: If you want to keep them longer, wrap the bars tightly with cling film or foil and freeze for up to 2 months. Thaw in the fridge before serving.
Reheating: These bars are best enjoyed chilled, so there’s no need for reheating. Simply slice and serve straight from the fridge for a delightful treat!
Make-Ahead Tip: Preparing your bars a day in advance allows the flavors to deepen and makes for a stress-free dessert option when hosting friends and family.
No-Bake Kinder Bueno Bars Recipe FAQs
How do I choose the right cocoa biscuits for the base?
Absolutely! When selecting cocoa biscuits, look for high-quality brands that have a rich chocolate flavor and a crisp texture. Check for freshness as well; avoid biscuits with dark spots or an off smell for the best results in your No-Bake Kinder Bueno Bars.
What’s the best way to store the No-Bake Kinder Bueno Bars?
To keep your bars fresh, store them in an airtight container in the refrigerator where they’ll last for up to 5 days. Make sure they’re sealed well, as exposure to air can cause them to dry out or lose their creaminess.
Can I freeze No-Bake Kinder Bueno Bars?
Yes, you can! Wrap the bars tightly in cling film or foil and place them in a freezer-safe container. They can be frozen for up to 2 months. When you’re ready to enjoy, simply transfer them to the fridge to thaw for a few hours before serving.
What if my filling doesn’t set properly?
If your filling isn’t firming up, check to see that both your heavy cream and mascarpone cheese were very cold before mixing. It’s crucial for the whipping process. If the mixture still seems too loose, you can whip extra cream separately and fold it in for additional volume until it reaches the desired consistency.
Are No-Bake Kinder Bueno Bars gluten-free?
Certainly! For a gluten-free version, simply substitute the cocoa biscuits with gluten-free cookies. This swap maintains the structure and flavor you love while making these treats suitable for those with gluten sensitivities.
Can I use a different type of chocolate in the recipe?
Very much! If you’re in the mood for something different, feel free to swap the milk chocolate for dark chocolate or white chocolate, depending on your preference. Just remember to adjust the sweetness level since different chocolates can vary in sugar content!
Irresistible No-Bake Kinder Bueno Bars for Effortless Indulgence
Ingredients
Equipment
Method
- In a large mixing bowl, pour in 250 ml of cold heavy cream and whip on medium speed until it thickens and forms soft peaks, about 3-5 minutes.
- Add 250 g of cold mascarpone cheese and 50 g of powdered sugar to the whipped cream. Gently fold until smooth, about 2-3 minutes.
- Chop 3-4 Kinder Bueno bars into small pieces and fold them into the creamy mascarpone mixture.
- Quickly dip 9 cocoa biscuits in milk and line the bottom of a rectangular baking pan. Spread half of the mascarpone filling over the biscuits.
- Layer another set of dipped cocoa biscuits over the mascarpone filling, then add the remaining mascarpone mixture on top.
- Cover the baking pan and chill in the refrigerator for 1-2 hours.
- In a small saucepan, heat 100 ml of heavy cream until nearly boiling. Pour it over 100 g of chopped milk chocolate and 50 g of dark chocolate.
- Once the topping has cooled slightly, pour it over the chilled bars.
- Return the bars to the refrigerator for an additional 2 hours.
- Cut into slices and optionally drizzle melted chocolate and garnish with extra Kinder Bueno pieces.
Leave a Reply