
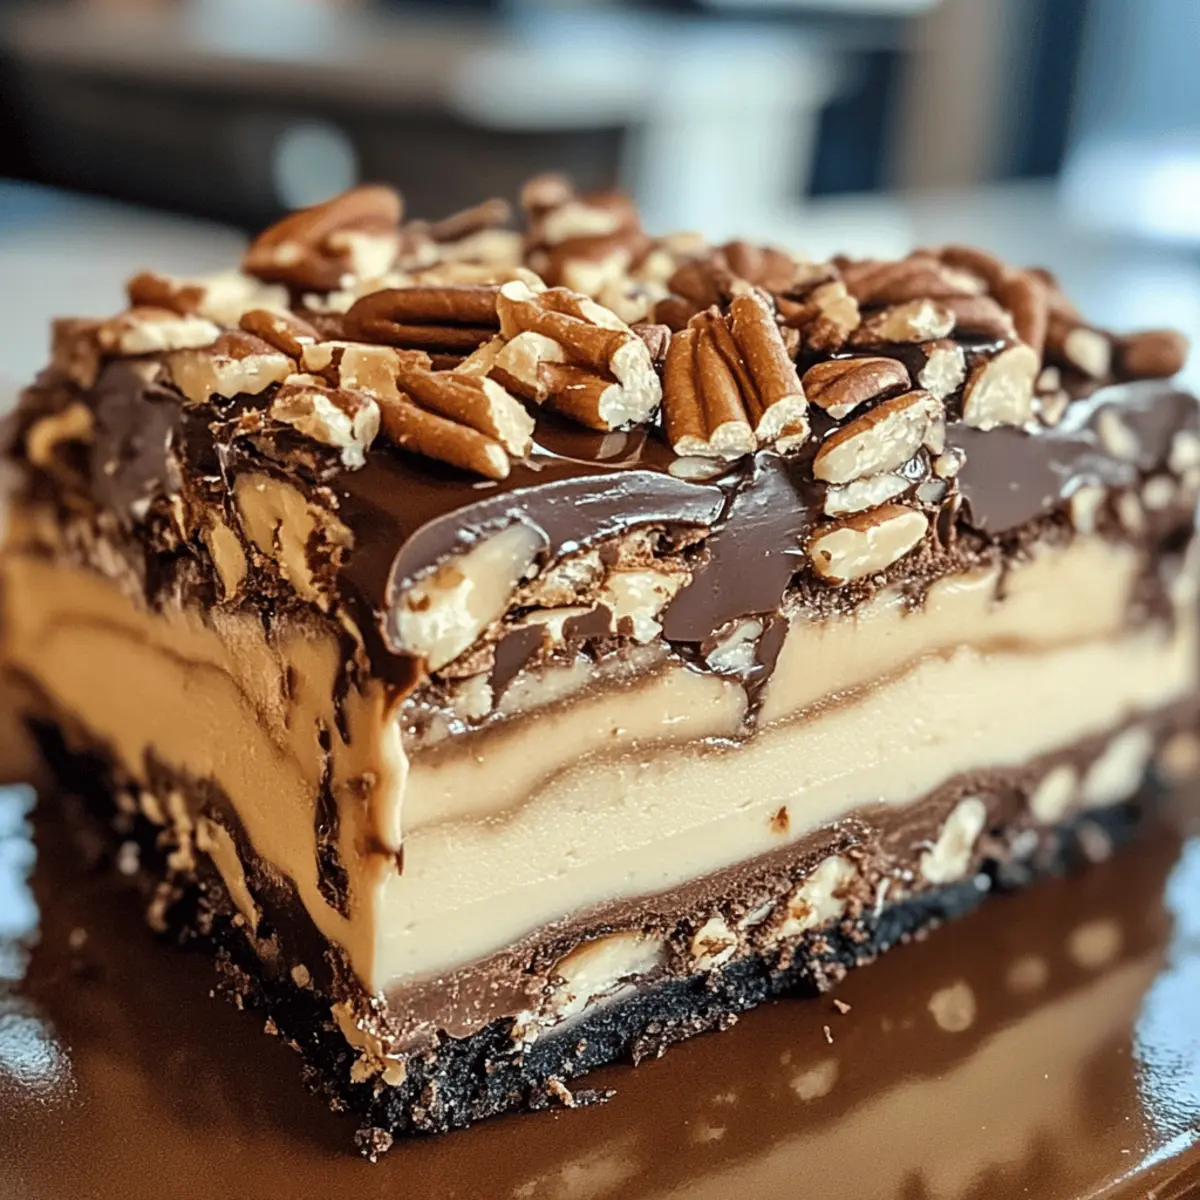
As I stood in my kitchen, the aroma of melted chocolate wafted through the air, teasing my taste buds and signaling that something magical was on the way. Today, I’m excited to share my No Bake Turtle Lush recipe—an indulgent layered dessert that captures the essence of those delightful turtle candies we all know and love. This no-bake wonder is not only a crowd-pleaser, but it’s also perfect for warm days or unexpected gatherings, allowing you to serve up a delightful dessert without breaking a sweat. With creamy layers, crunchy pecans, and a drizzle of rich chocolate and caramel, every bite is a slice of heaven. Curious about how to create this delightful treat with easily customizable layers? Let’s dive in!
Why is No Bake Turtle Lush a Must-Try?
Decadent Layers create a delightfully rich experience, blending creamy filling with crunchy pecans and smooth chocolate sauce. Versatile Customizations let you swap crusts or add favorite fruits, making each version uniquely yours! Quick and Hassle-Free, this dessert is perfect for impressing guests without spending hours in the kitchen. Crowd-Pleasing Appeal guarantees smiles, as it’s reminiscent of beloved turtle candies. Whether you’re enjoying it at a gathering or a cozy night in, this indulgent treat is sure to please. For similar sweet ideas, check out my Baked Pumpkin Donuts that offer a delightful twist!
No Bake Turtle Lush Ingredients
Indulge in this delightful treat with these simple ingredients!
For the Crust
• Oreo Crust – Provides a sweet, chocolatey base; feel free to swap with graham crackers or gluten-free cookies for variety.
For the Cream Layer
• Cream Cheese – Adds richness and creaminess; ensure it’s softened for easy mixing to create that smooth filling.
• Powdered Sugar – Sweetens the filling while maintaining a silky texture; adjust to taste for sweetness.
• Whipped Topping – Lightens up the filling; homemade whipped cream can amp up the flavor freshness.
For the Pudding Layer
• Vanilla Pudding Mix – Essential for that creamy layer; try swapping with instant chocolate pudding mix for a chocolatey twist.
• Milk – Used to prepare the pudding mix; opt for any dairy or non-dairy alternatives to suit your preferences.
For the Toppings
• Chocolate Sauce – Drizzled on top for a rich finishing touch; consider making your own for an even fresher taste.
• Caramel Sauce – Adds gooey sweetness; a must-have for capturing the essence of turtle candies!
• Pecans – Provides that lovely crunch; can be swapped for walnuts or omitted for nut-free versions.
Dive into this No Bake Turtle Lush with these delightful ingredients and create a dessert that everyone will love!
Step‑by‑Step Instructions for No Bake Turtle Lush
Step 1: Prepare the Crust
Start by crushing 24 Oreo cookies in a food processor until they resemble fine crumbs. In a mixing bowl, combine the cookie crumbs with ½ cup of melted butter, stirring until evenly coated. Press this mixture firmly into the bottom of a 9×13 inch baking dish, creating a solid layer. Place the crust in the refrigerator for about 15 minutes to set while you prepare the filling.
Step 2: Mix the Cream Cheese Filling
In a large mixing bowl, beat 8 oz of softened cream cheese and 1 cup of powdered sugar using an electric mixer on medium speed until the mixture is smooth and creamy, about 2-3 minutes. Make sure there are no lumps for a velvety texture. This cream cheese filling will provide a rich base for your No Bake Turtle Lush.
Step 3: Incorporate Whipped Topping
Gently fold in 1 cup of whipped topping into the cream cheese mixture using a spatula. Be careful not to deflate the whipped topping; you want to maintain that light and airy texture. Once well combined, spread half of this cream cheese mixture evenly over the chilled Oreo crust, smoothing it out with a spatula for an even layer.
Step 4: Prepare the Pudding Layer
In a separate bowl, whisk together 2 cups of cold milk with a 3.4 oz package of vanilla pudding mix according to package instructions. Continue whisking for about 2 minutes until the mixture thickens to a creamy consistency. This pudding layer will add a delightful contrast to the creamy filling in your No Bake Turtle Lush.
Step 5: Layer the Pudding
Carefully pour half of the prepared pudding over the cream cheese layer in the baking dish. Use a spatula to spread it out evenly. The pudding should create a smooth, luscious layer that complements the rest of the dessert.
Step 6: Build the Second Layer
Now, drizzle ½ cup of chocolate sauce over the pudding layer, allowing it to seep in slightly for added flavor. Next, spread the remaining cream cheese mixture on top, smoothing it out gently. Follow this with the rest of the vanilla pudding, creating a beautiful river of creamy goodness in your No Bake Turtle Lush.
Step 7: Drizzle and Top
For the finishing touch, drizzle ½ cup of caramel sauce over the top layer and sprinkle with chopped pecans for that crunchy texture. Make it as generous as you’d like, as this adds that irresistible turtle candy essence.
Step 8: Chill and Serve
Cover the dish with plastic wrap and refrigerate for at least 4 hours, or overnight for the best results. This chilling time allows the flavors to meld beautifully, creating that perfect No Bake Turtle Lush experience. When ready to serve, slice and enjoy this delightful dessert!
What to Serve with No Bake Turtle Lush?
Elevate your dessert experience with delightful pairings that enhance this creamy, crunchy indulgence and leave your guests asking for more.
-
Fresh Berries: Bright and juicy, berries cut through the richness, adding a refreshing contrast that balances the sweetness. Serve strawberries or raspberries on the side for a pop of color.
-
Whipped Cream: A dollop of light, airy whipped cream is the perfect addition—enhancing creaminess while providing a fluffy texture that complements every layer of the lush.
-
Coffee: Serve alongside a warm cup of coffee to contrast the dessert’s sweetness. The rich flavors in the coffee perfectly balance the luscious layers, making for a delightful after-dinner treat.
-
Ice Cream: A scoop of vanilla or caramel ice cream adds another cool layer of indulgence that elevates every bite of the Turtle Lush. The creamy melt of ice cream pairs beautifully with the crunchy toppings.
-
Chocolate-Covered Strawberries: These elegant treats add a touch of decadence, echoing the chocolate themes in the Turtle Lush. They’re a fun, finger-friendly option that delights everyone.
-
Nutty Biscotti: Perfect for dipping, biscotti offers a crunchy texture that mirrors the pecans in the dessert. A little nutty sweetness is the perfect companion for this rich filling.
-
Chilled Lemonade: For a refreshing twist, serve chilled lemonade. Its citrus notes cut through the rich layers, creating a lively flavor contrast that invigorates the palate.
-
Salted Caramel Brownies: For those craving even more chocolate decadence, rich brownies drizzled with salted caramel make a heavenly pairing that ensures every dessert lover leaves satisfied.
No Bake Turtle Lush Variations & Substitutions
Feel free to get creative with your No Bake Turtle Lush—customize it with these delightful swaps and add-ons!
-
Gluten-Free Crust: Use gluten-free cookies to make a sweet, crumbly crust that everyone can enjoy. This way, all your friends can savor this decadent treat without worry!
-
Nut-Free Option: Omit the pecans for a nut-free version or replace with crispy rice cereal for added crunch without the nuts. Your family won’t even miss the pecans when their taste buds are dancing!
-
Chocolate Lovers: Swap the vanilla pudding for instant chocolate pudding to intensify the chocolate flavor throughout. Each bite will be a rich explosion of chocolate joy.
-
Fruit Layer: Add a layer of sliced strawberries or bananas for a fruity twist that complements the rich flavors. The sweetness of the fruit will provide a refreshing contrast to the rich layers, and it can add a pop of color!
-
Homemade Whipped Cream: Instead of store-bought whipped topping, make your own for a fresher taste. Just whip heavy cream with some sugar and vanilla until soft peaks form, creating a fluffier texture.
-
Caramel Drizzles: Use salted caramel sauce instead of regular for a savory-sweet contrast that enhances the dessert’s flavor profile. The hint of salt will elevate the sweetness, making each bite irresistible!
-
Flavor Infusion: Mix in a teaspoon of instant coffee granules to the cream cheese layer for a delightful mocha twist. This adds depth to the dessert and may just surprise your guests!
-
Layered Ice Cream: For a whimsical twist, layer in some softened ice cream (like vanilla or chocolate) between the layers for a frozen treat perfect for summer. It turns your No Bake Turtle Lush into a refreshing delight!
With these variations, you’ll find endless ways to enjoy your No Bake Turtle Lush. Whether you stick to the original or mix it up a bit, there’s no wrong way to indulge in this delicious dessert. Don’t forget to check out my High Protein Bake and Apple Cinnamon Bake for more fun and delectable options!
How to Store and Freeze No Bake Turtle Lush
Fridge: Keep your No Bake Turtle Lush in an airtight container, where it will stay fresh for up to 5 days. This is perfect for those who can’t resist a slice each day!
Freezer: For longer storage, you can freeze the dessert for up to 2 months. Make sure to wrap it well to prevent freezer burn. Thaw in the fridge before serving for best results.
Reheating: This dessert is best served chilled, so no reheating is necessary. Simply slice and enjoy the creamy layers of indulgence!
Cutting Portions: When ready to serve, use a sharp knife to cut clean slices. Wipe the knife between cuts for a beautiful presentation that shows off those decadent layers.
Make Ahead Options
These No Bake Turtle Lush layers are ideal for meal prep, allowing you to save time for those busy weeknights or last-minute gatherings! You can prepare the crust and cream cheese mixture up to 24 hours in advance, storing them separately to maintain freshness. For optimal flavor, make it yet another day ahead, letting the entire dessert chill overnight in the refrigerator. Just remember, to keep the crust crunchy, avoid adding the toppings until just before serving. When ready to delight your guests, simply layer the pudding and top it with chocolate sauce, caramel, and pecans. This way, you’ll achieve a stunning dessert that tastes just as delicious while cutting down your effort on the day of your gathering!
Expert Tips for No Bake Turtle Lush
• Prep Ahead: Prepare your No Bake Turtle Lush a day in advance. Chilling overnight enhances the flavors and creates the perfect texture.
• Room Temperature Cream Cheese: Always use softened cream cheese to ensure a creamy filling without lumps. Let it sit out for about 30 minutes before mixing.
• Crust Alternatives: While Oreos are classic, experimenting with graham crackers or gluten-free cookies can deliver delightful variations in flavor and texture.
• Layering Technique: Use a spatula to smooth out each layer gently. This ensures an even presentation and seamless experience when digging in.
• Storage Tips: Keep leftovers in an airtight container in the refrigerator for up to 5 days, or freeze for up to 2 months. Just thaw before serving!
No Bake Turtle Lush Recipe FAQs
What type of Oreos should I use for the crust?
You can use classic Oreos for a sweet, chocolatey base, but feel free to get creative! Double Stuf Oreos add extra creaminess, while gluten-free cookies can be a fantastic alternative for those with dietary restrictions.
How should I store leftover No Bake Turtle Lush?
Store your No Bake Turtle Lush in an airtight container in the refrigerator for up to 5 days. For longer storage, it can be frozen for up to 2 months. Just make sure to wrap it tightly to avoid freezer burn!
Can I freeze No Bake Turtle Lush? If so, how?
Absolutely! To freeze, slice the No Bake Turtle Lush, then wrap individual portions in plastic wrap followed by aluminum foil for extra protection. Place them in a freezer-safe container. When you’re ready to enjoy, just thaw in the refrigerator overnight before serving again!
What should I do if my cream cheese filling is lumpy?
No worries! Lumps often occur if the cream cheese isn’t softened properly. To avoid this, let it sit out at room temperature for about 30 minutes before mixing. If lumps do appear, continue to mix with an electric mixer, or push the filling through a fine sieve to achieve a smooth texture.
Is No Bake Turtle Lush suitable for those with nut allergies?
While this recipe includes pecans for crunch, you can easily omit them or substitute with seeds like sunflower seeds for a similar texture, staying safe for those with nut allergies. Always double-check other ingredients, like pudding mix and whipped topping, to ensure they are nut-free.
Can I prepare No Bake Turtle Lush in advance?
Yes, indeed! In fact, making it a day ahead is highly recommended. This allows the layers to set beautifully and the flavors to meld together, creating a richer taste when you’re ready to serve. Just remember to refrigerate it for at least 4 hours or, preferably, overnight!
No Bake Turtle Lush: Your New Favorite Decadent Delight
Ingredients
Equipment
Method
- Crush 24 Oreo cookies in a food processor. Combine with ½ cup melted butter, press into a 9x13 inch baking dish, and refrigerate for 15 minutes.
- In a bowl, beat 8 oz softened cream cheese and 1 cup powdered sugar until smooth, about 2-3 minutes.
- Fold in 1 cup whipped topping to the cream cheese mixture. Spread half over the chilled crust.
- Whisk together 2 cups cold milk with a 3.4 oz vanilla pudding mix for about 2 minutes until thick.
- Pour half of the pudding over the cream cheese layer, spreading it out evenly.
- Drizzle ½ cup chocolate sauce over the pudding, then spread the remaining cream cheese mixture on top.
- Top with the rest of the pudding and drizzle ½ cup caramel sauce, sprinkle with pecans.
- Cover with plastic wrap and refrigerate for at least 4 hours or overnight before serving.
Leave a Reply