
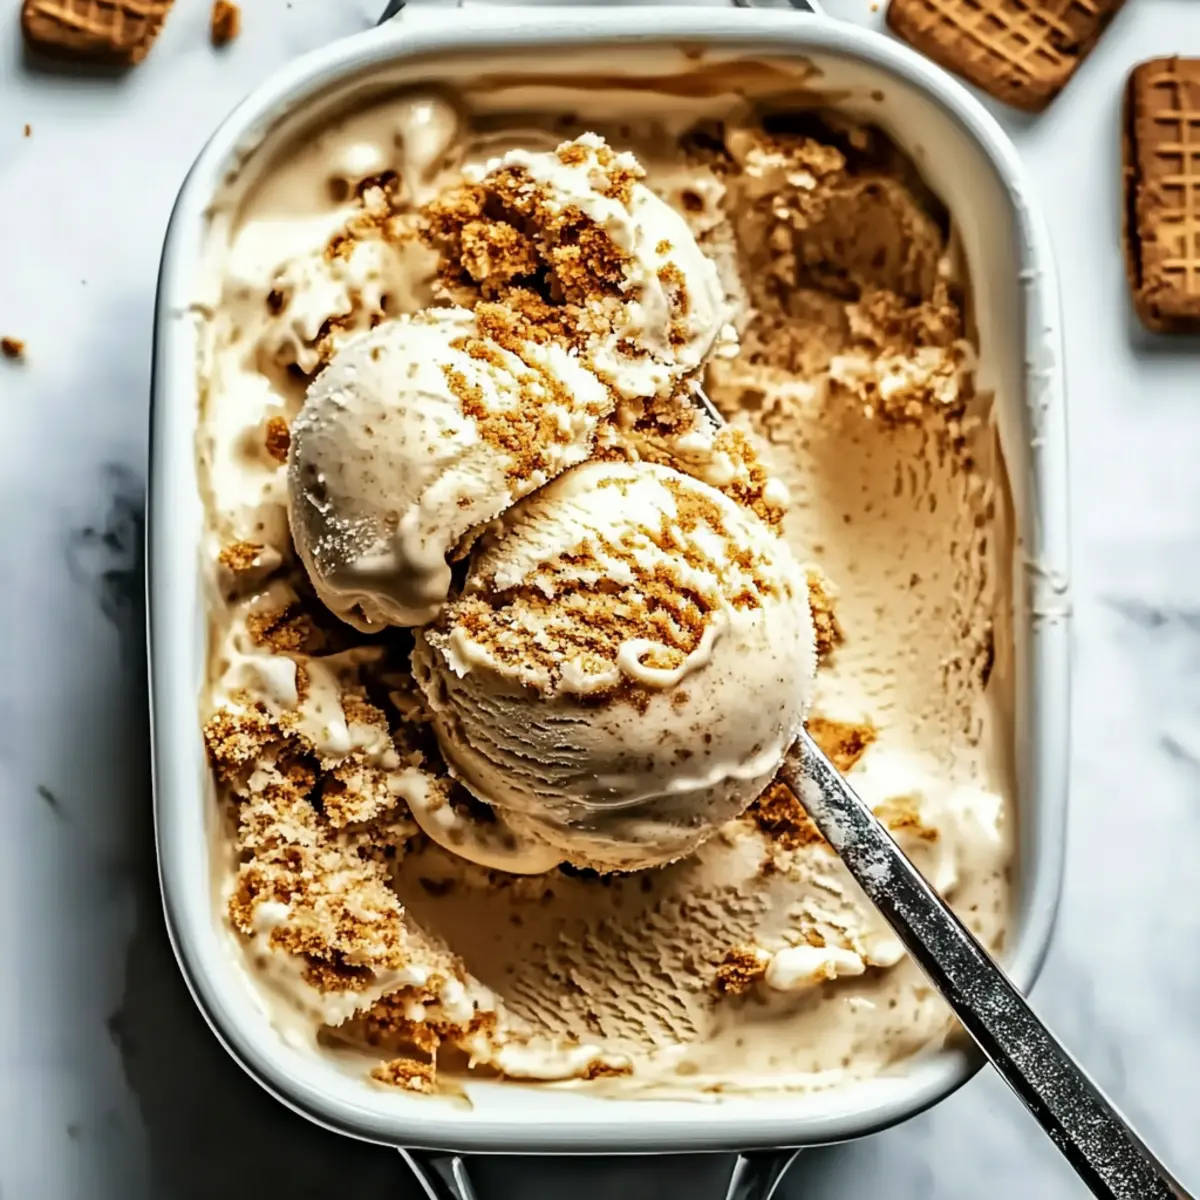
As the sun beats down and the days stretch longer, what could be better than a delightful scoop of homemade ice cream? Enter my No Churn Biscoff Ice Cream, an irresistibly creamy treat that requires no specialized equipment, making it the perfect summer dessert for any spontaneous gathering. With just a handful of ingredients like sweetened condensed milk and the unique flavor of Biscoff spread, you can whip up this easy recipe in mere minutes. Not only is this ice cream gluten-free, but it’s also a fantastic way to impress friends and family without spending hours in the kitchen. So, why settle for store-bought when you can create your own luscious, dreamy dessert right at home? Are you ready to indulge in this creamy bliss?
Why Is No Churn Biscoff Ice Cream a Must-Try?
Simplicity, this recipe requires no ice cream maker, allowing you to enjoy creamy ice cream without the fuss!
Decadent flavor, combines the luxurious taste of Biscoff spread with sweetened condensed milk for an unforgettable treat.
Quick prep, you can whip it up in under 15 minutes—perfect for last-minute dessert cravings or summer parties.
Versatile options, swap in your favorite ingredients like chocolate chips or nuts to customize your ice cream experience!
Crowd pleaser, delight guests with this unique homemade dessert at your next gathering, especially when served alongside warm brownies.
With its ease and rich, delectable flavor, you won’t be able to resist trying this wonderful Creamy Corn Pasta Salad as well for a complete summer meal.
No Churn Biscoff Ice Cream Ingredients
For the Base
• Sweetened Condensed Milk – Provides a rich sweetness; you can substitute with evaporated milk for a lighter option.
• Biscoff Spread – Acts as the star ingredient, delivering a distinct caramel flavor; feel free to replace it with cookie butter or nut butter for variation.
• Heavy Whipping Cream – Ensures a fluffy texture; consider using coconut cream for a dairy-free version.
• Vanilla Extract – Enhances the flavor ensemble; swap it for almond extract for an exciting twist.
For the Mix-ins
• Chopped Biscoff Cookies – Introduces delightful crunch and extra flavor; you can use any crunchy cookie or even chocolate chips for a fun mix.
This No Churn Biscoff Ice Cream is not only easy to make, but it also adapts beautifully with different additions for a personalized summer dessert experience!
Step‑by‑Step Instructions for No Churn Biscoff Ice Cream
Step 1: Blend the Base
In a large mixing bowl, combine one can of sweetened condensed milk with ½ cup of Biscoff spread. Whisk these together until smooth and well-blended, ensuring there are no lumps. This creamy mixture will form the base of your No Churn Biscoff Ice Cream, so take a moment to achieve a velvety texture.
Step 2: Melt and Cool the Remaining Spread
Take the remaining ½ cup of Biscoff spread and microwave it for about 30 seconds until slightly melted. Check the consistency: it should be pourable but not hot. Allow it to cool for a few minutes to prevent it from affecting the whipped cream’s texture when mixed later.
Step 3: Whip the Cream
In an electric mixer, pour 2 cups of heavy whipping cream and add 1 teaspoon of vanilla extract. Beat on medium-high speed until stiff peaks form, usually taking around 3-5 minutes. The cream should be fluffy and hold its shape, creating the perfect texture for your No Churn Biscoff Ice Cream.
Step 4: Combine Mixtures
Gently fold the whipped cream into the Biscoff mixture using a spatula. Start with a small amount of whipped cream to lighten the base, then gradually add the rest. This technique preserves the airiness of the whipped cream, making your No Churn Biscoff Ice Cream irresistibly fluffy and creamy.
Step 5: Add the Crunch
Stir in ½ cup of chopped Biscoff cookies into the mixture. These cookies will add delightful texture and enhance the overall flavor of your No Churn Biscoff Ice Cream. Make sure to distribute the cookie pieces evenly so every scoop has that perfect crunch.
Step 6: Swirl and Freeze
Transfer half of the ice cream mixture into a 9×5 inch loaf pan. Drizzle half of the melted Biscoff spread on top, swirling it through the mixture for a marbled effect. Repeat this layering process with the remaining mixture and melted Biscoff. This will create beautiful swirls that enhance the visual appeal and flavor.
Step 7: Final Touches
Sprinkle extra chopped Biscoff cookies on top of the layered ice cream for an added crunch and aesthetic touch. Cover the pan tightly with plastic wrap to prevent ice crystals from forming, then place in the freezer. Allow it to freeze for 6-8 hours, or until firm and scoopable.
Step 8: Serve and Savor
Once set, remove your No Churn Biscoff Ice Cream from the freezer. Let it sit at room temperature for a few minutes before scooping, making it easier to serve. Enjoy this creamy delight on its own or alongside warm desserts for an unforgettable summer treat.
Make Ahead Options
No Churn Biscoff Ice Cream is a fantastic choice for busy home cooks looking to streamline their dessert prep! You can prepare the entire mixture up to 24 hours in advance before freezing it. To make things easier, simply mix the sweetened condensed milk and Biscoff spread, whip the cream, and fold them together as instructed. Transfer this blend to your loaf pan, swirling in the melted Biscoff and cookie pieces before tightly covering it with plastic wrap and placing it in the freezer. To maintain its creamy texture, store it in an airtight container, and when you’re ready to serve, just remove it from the freezer a few minutes beforehand for scooping ease. This way, you’ll have an indulgent, homemade treat ready for any occasion with minimal last-minute effort!
What to Serve with No Churn Biscoff Ice Cream?
Elevate your summer dessert experience with delightful pairings that complement this creamy treat perfectly.
-
Warm Brownies: The rich, fudgy texture of warm brownies creates a luxurious contrast to the cool, creamy ice cream.
Indulging in a scoop of No Churn Biscoff Ice Cream on a fudgy brownie brings an unforgettable blend of warmth and chill. -
Chocolate Chip Cookies: Classic cookies full of gooey chocolate bits add a chewy texture that balances the ice cream’s creaminess.
A cookie sandwich? Yes, please! A chocolate chip cookie filled with No Churn Biscoff Ice Cream makes for a delightful way to satisfy cravings. -
Fresh Berries: The acidity and freshness of berries like strawberries or raspberries cut through the richness, providing a refreshing bite.
Top your ice cream with a handful of berries for a touch of color and a burst of flavor that brightens each scoop. -
Toasted Almonds: Crunchy, toasted almonds add a nutty flavor that harmonizes beautifully with the sweet chocolate and caramel notes.
Sprinkling toasted almonds over your ice cream brings an enticing crunch and elevates the dessert experience. -
Espresso or Coffee: The bitterness of a strong espresso drizzled over a scoop delivers an incredible flavor combination that coffee lovers will adore.
Pairing your ice cream with a shot of espresso creates a delightful coffee break experience that’s almost too good to be true! -
Chocolate Sauce: Drizzling warm chocolate sauce enhances the dessert with decadent richness, creating a perfect flavor harmony.
Imagine the rich chocolate cascading over the creamy No Churn Biscoff Ice Cream—every bite will feel like a lavish treat! -
Shortcakes: Fluffy shortcakes provide a light, sweet base that complements the indulgent taste of the ice cream.
Layer your No Churn Biscoff Ice Cream between split shortcakes for a delightful summertime dessert that’s both charming and delicious.
Expert Tips for No Churn Biscoff Ice Cream
-
Cold Cream: Ensure the heavy cream is very cold before whipping; this helps achieve stiff peaks faster and gives your ice cream a fluffy texture.
-
Mix-In Mindfulness: When adding crushed Biscoff cookies, don’t overmix—they should distribute evenly but maintain some texture for delightful crunch in every bite!
-
Layering Techniques: For the prettiest swirls, alternate layers of the ice cream mixture and melted Biscoff spread. This creates a beautiful marbled effect that’s as appealing to the eyes as it is to the taste buds.
-
Freezing Time: Patience is key! Allow the ice cream to freeze overnight, if possible, for the best flavor and texture. It helps the flavors meld together beautifully.
-
Storage Solutions: Always store your No Churn Biscoff Ice Cream in an airtight container to prevent freezer burn. This will help maintain its creamy consistency and delightful flavor for up to a week.
Storage Tips for No Churn Biscoff Ice Cream
-
Freezer: Keep your No Churn Biscoff Ice Cream tightly covered in an airtight container to maintain its creamy texture and prevent freezer burn for up to a week.
-
Serving: For the best experience, let the ice cream sit out for about 5 minutes before scooping. This will soften it slightly, making it easier to serve and enhancing the overall mouthfeel.
-
Combination: Consider making a double batch if you’re expecting guests! This delightful treat is sure to impress, and leftovers will keep well for your late-night cravings.
-
Reheating Options: If your leftover ice cream becomes too hard, short bursts in the microwave (10-15 seconds) can help soften it, so it’s ready for a perfect scoop again.
No Churn Biscoff Ice Cream Variations
Feel free to get creative with your No Churn Biscoff Ice Cream—each variation offers a delightful twist that makes this treat even more enjoyable!
-
Nutty Delight: Add chopped walnuts or pecans for a crunchy texture that pairs beautifully with the creamy base. Nuts bring warmth and earthiness to the sweet ice cream, enhancing its complexity.
-
Chocolate Bliss: Mix in mini chocolate chips or swirl in fudge for a decadent chocolaty hint. The rich, dark flavors complement the caramel notes of Biscoff wonderfully.
-
Dairy-Free Option: Substitute heavy cream with coconut cream to make a delicious dairy-free version. Its tropical flavor adds a delightful dimension to this already indulgent dessert.
-
Spicy Heat: Add a pinch of cinnamon or a dollop of chili powder for a warm kick. This unexpected twist elevates your ice cream from a simple dessert to a unique culinary experience.
-
Fruit Infusion: Toss in diced strawberries or raspberries for a fruity tang that balances the sweetness. The bursts of flavor refresh the palate with every spoonful!
-
Biscoff Swirl: Increase the amount of melted Biscoff spread you swirl into your ice cream to amplify that distinctive flavor. More of the iconic taste means more deliciousness in every scoop!
-
Almond Substitute: Use almond extract instead of vanilla for a nutty flavor twist, or enhance the original flavor with a hint of almond extract throughout the recipe.
-
Caramel Layering: Drizzle caramel sauce between layers for an even richer sweetness. The gooey texture creates a delightful contrast with the creamy ice cream composition.
Embrace your adventurous side and personalize this dessert to suit your taste! If you’re looking for more exciting dinner options to pair with your ice cream, try the Creamy Tuscan Ravioli Soup or Smothered Chicken and Rice for a delightful summer meal!
No Churn Biscoff Ice Cream Recipe FAQs
What type of Biscoff spread should I use?
You can use the classic Biscoff spread for that iconic caramelized flavor, but feel free to swap in cookie butter or nut butter for variations. Just ensure the consistency is thick yet spreadable for the best results.
How should I store my No Churn Biscoff Ice Cream?
Store your ice cream in an airtight container in the freezer for up to a week. This prevents freezer burn and keeps the texture creamy. For best results, cover the surface with plastic wrap before sealing the container.
Can I freeze leftover No Churn Biscoff Ice Cream?
Absolutely! You can freeze your ice cream for up to three months. Make sure it’s in an airtight container to maintain its fluffy texture. To enjoy it later, simply let it sit at room temperature for about 5 minutes to soften before scooping.
What if my ice cream is too hard to scoop?
If your ice cream is rock solid after freezing, microwave it in short bursts (10-15 seconds) to soften it. Alternatively, let it sit at room temperature for a few minutes before serving. This will help bring it back to that perfect scoopable consistency.
Are there any dietary considerations?
Yes! This recipe can be made gluten-free by ensuring that your Biscoff spread and cookies are certified gluten-free. For dairy-free options, replace heavy cream with coconut cream and use dairy-free condensed milk to cater to lactose sensitivities.
How can I customize my No Churn Biscoff Ice Cream?
You can add chocolate chips, nuts, or different flavored extracts to make it your own! For a fun twist, try swirling in some fudge or drizzling caramel sauce before freezing for an extra layer of flavor. The more, the merrier!
No Churn Biscoff Ice Cream That's a Summer Game-Changer
Ingredients
Equipment
Method
- In a large mixing bowl, combine one can of sweetened condensed milk with ½ cup of Biscoff spread. Whisk until smooth.
- Microwave the remaining ½ cup of Biscoff spread for about 30 seconds until slightly melted and let it cool.
- In an electric mixer, pour in 2 cups of heavy whipping cream and 1 teaspoon of vanilla extract. Beat until stiff peaks form (3-5 minutes).
- Gently fold the whipped cream into the Biscoff mixture using a spatula. Preserve the airiness of the whipped cream.
- Stir in ½ cup of chopped Biscoff cookies into the mixture, distributing evenly.
- Transfer half of the ice cream mixture into a loaf pan. Drizzle half of the melted Biscoff spread on top, swirling it in.
- Repeat the layering process with the remaining mixture and melted Biscoff, creating beautiful swirls.
- Sprinkle extra chopped Biscoff cookies on top. Cover with plastic wrap and freeze for 6-8 hours.
- Once set, let it sit for a few minutes before scooping. Enjoy your creamy delight!
Leave a Reply