
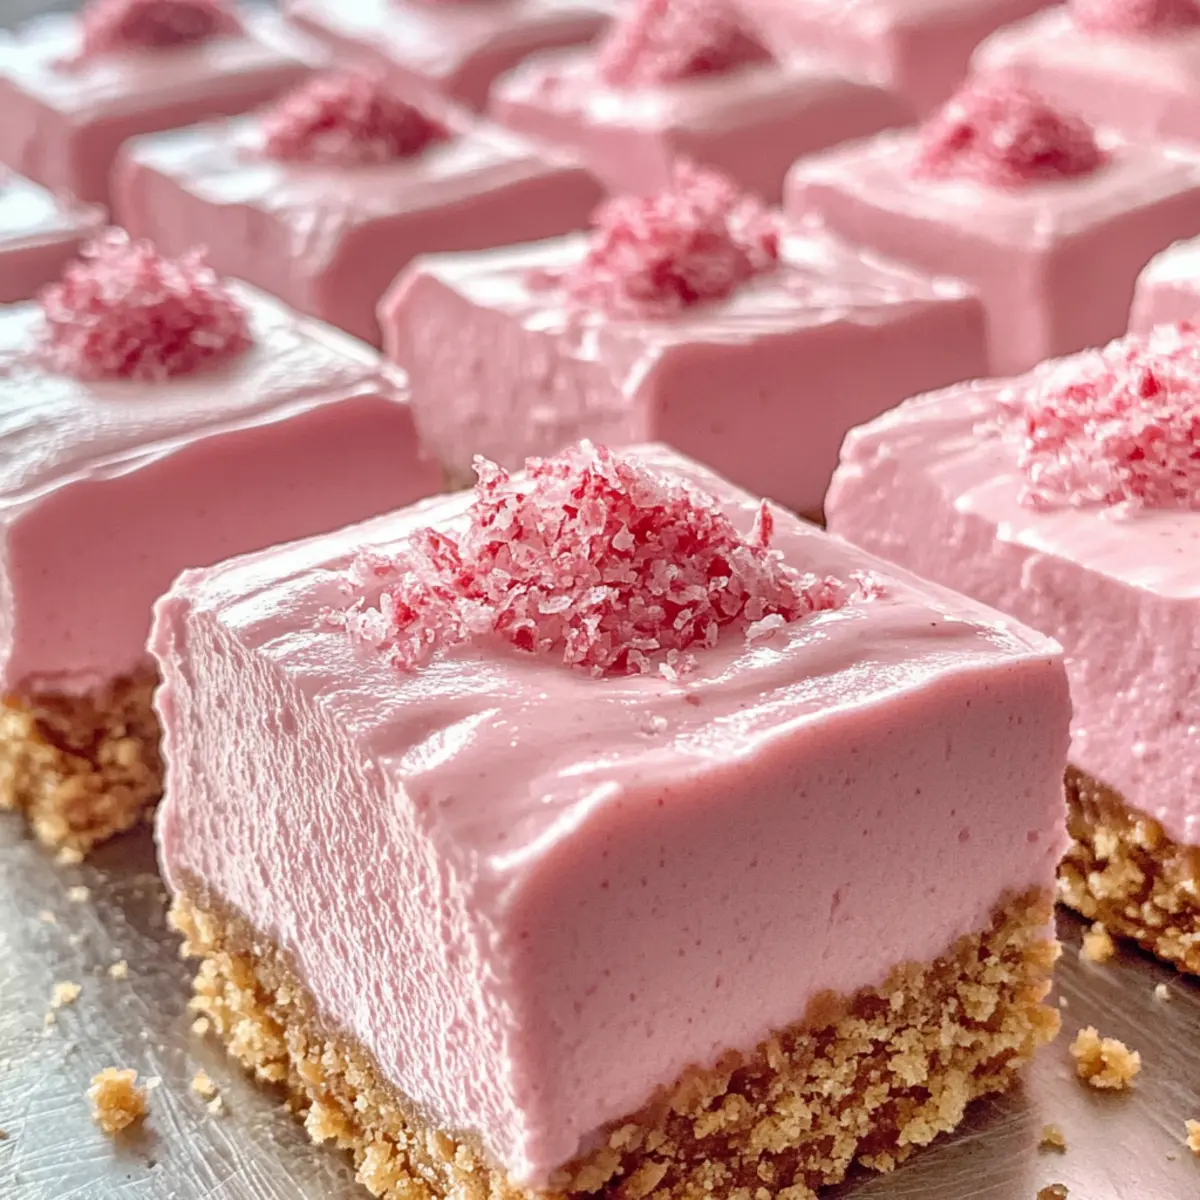
As I rummaged through my pantry one afternoon, I unearthed a forgotten box of graham crackers, and it ignited a delightful spark of inspiration. I knew I had to transform them into something special, which led me to create these irresistible No-Bake Pink Velvet Cheesecake Bites. With their dreamy creamy filling and gentle blush of color, these treats are not just a feast for the eyes, but they also offer a quick and crowd-pleasing way to satisfy your sweet tooth. Plus, they’re highly adaptable—whether you’re gluten-free, dairy-free, or craving a unique flavor twist, there’s a version just for you. So, are you ready to whip up a dessert that’s as fun to make as it is to eat? Let’s dive in!
What Makes These Cheesecake Bites Irresistible?
Effortless Creation: The no-bake method means you can whip these up in no time, no oven required!
Customizable Delight: Whether you’re gluten-free or dairy-free, there’s a version for everyone to enjoy.
Appealing Presentation: Their vibrant pink color adds a festive touch suitable for any occasion, sure to impress your guests!
Creamy Texture: Experience the heavenly contrast of the velvety cheesecake filling and the crunchy graham cracker crust.
Perfect Make-Ahead Treat: Easily prepare these bites in advance, storing them in the fridge for a sweet surprise anytime.
Unleash your creativity by making them with a drizzle of melted chocolate or a side of fresh berries—your taste buds will thank you!
Pink Velvet Cheesecake Bites Ingredients
For the Cream Filling
• Cream Cheese – Provides a rich, creamy filling; use low-fat for a lighter version.
• Confectioners’ Sugar – Adds sweetness; granulated sugar can be used as a substitute.
• Vanilla Extract – Enhances flavor; feel free to swap for almond extract for a unique twist.
• Pink Food Coloring – Gives the cheesecake its signature hue; natural alternatives are a healthier choice.
For the Crust
• Graham Cracker Crumbs – Forms the crunchy base; substitute with digestive biscuits for a different flavor.
• Unsalted Butter – Binds the crust together; opt for coconut oil as a dairy-free option.
Create your own scrumptious Pink Velvet Cheesecake Bites today, and let your culinary imagination soar!
Step‑by‑Step Instructions for No-Bake Pink Velvet Cheesecake Bites
Step 1: Prepare the Baking Dish
Start by lining an 8-inch square baking dish with parchment paper, leaving some overhang for easy removal later. This will ensure your No-Bake Pink Velvet Cheesecake Bites can be lifted out effortlessly once set. Make sure the parchment paper is smoothed down to avoid air pockets for a perfect crust.
Step 2: Mix the Cream Filling
In a large mixing bowl, combine the cream cheese and confectioners’ sugar. Using a hand mixer, beat the mixture on medium speed for about 2-3 minutes until it becomes smooth and creamy, with no lumps. This creamy filling will be the heart of your pink velvet cheesecake bites, so take your time to get it perfectly blended.
Step 3: Add Flavor and Color
Next, mix in the vanilla extract and a few drops of pink food coloring to the cream cheese mixture. Continue to blend until the color is uniform and to your desired shade of pink. This beautiful hue will not only enhance the visual appeal but also add to the festive vibe of your No-Bake Pink Velvet Cheesecake Bites.
Step 4: Prepare the Crust
In a separate bowl, combine graham cracker crumbs with melted unsalted butter until the mixture resembles wet sand. This combination will form the delicious, crunchy crust of your cheesecake bites. Ensure the crumbs are evenly coated with butter for the best texture and flavor.
Step 5: Form the Crust
Firmly press the crumb mixture into the bottom of the lined baking dish, spreading it evenly to create a solid crust layer. Use the back of a measuring cup to compact the crumbs for a sturdy base. This step is vital in ensuring the crust holds together once it’s time to slice your No-Bake Pink Velvet Cheesecake Bites.
Step 6: Spread the Cream Filling
With the crust prepared, spread the cream cheese filling evenly over the top using a spatula. Make sure to smooth it out to create a flat surface, ensuring that each bite of the cheesecake is just as delightful as the last. This layer of creamy goodness is what will make your bites truly irresistible.
Step 7: Chill in the Refrigerator
Place the baking dish in the refrigerator and chill for at least 4 hours, or preferably overnight. This cooling period allows the cheesecake to set properly, achieving the perfect creamy texture for your Pink Velvet Cheesecake Bites. Be patient, as a longer chill time results in firmer bites.
Step 8: Cut and Serve
Once chilled and set, lift the cheesecake out of the dish using the parchment paper edges. Cut the chilled dessert into bite-sized squares. Serve your vibrant No-Bake Pink Velvet Cheesecake Bites chilled, and enjoy their creamy filling and crunchy crust that are sure to impress your guests!
Make Ahead Options
These No-Bake Pink Velvet Cheesecake Bites are a fantastic time-saver for busy weeknights or special occasions! You can prepare the cream filling and graham cracker crust up to 24 hours in advance. Simply mix the cream cheese mixture and crust as directed, then layer them in the baking dish. Cover tightly with plastic wrap and refrigerate until you’re ready to set. To maintain their delightful texture, ensure they are well-covered to avoid excess moisture. When you’re ready to serve, just chill the bites for at least 4 hours before cutting them into squares. This way, you can offer a fresh, rich dessert that’s just as delicious, making your event stress-free and enjoyable!
Pink Velvet Cheesecake Bites Variations
Feel free to get creative and adjust these cheesecake bites to suit your taste or dietary needs!
-
Dairy-Free: Substitute vegan cream cheese and coconut oil to keep it creamy without dairy.
-
Gluten-Free: Use gluten-free graham cracker crumbs or cookies to cater to gluten sensitivities.
-
Berry Bliss: Fold in crushed berries into the filling for a refreshing, fruity burst of flavor.
-
Zesty Twist: Add a teaspoon of lemon zest for a bright, tangy contrast to the sweetness.
-
Chocolate Drizzle: Top with melted chocolate for a decadent finish that elevates the flavors and presentation.
-
Nutty Delight: Incorporate finely chopped nuts, like almonds or pecans, into the crust for added texture and flavor.
-
Flavor Enhancer: Swap vanilla extract with almond extract for an intriguing twist that adds depth to each bite.
If you’re fascinated by fun twists, don’t miss checking out these delicious links: Smashed Carrots Bites and Garlic Butter Beef. Enjoy experimenting!
How to Store and Freeze Pink Velvet Cheesecake Bites
Fridge: Store your Pink Velvet Cheesecake Bites in an airtight container for up to 1 week. This keeps them fresh and ready for a quick sweet treat any time!
Freezer: For long-term storage, freeze the bites in a single layer with parchment paper between them for up to 3 months. This prevents sticking and makes for easy serving.
Thawing: To enjoy, simply transfer the frozen bites to the fridge for several hours to thaw before serving. They’ll regain their delightful creamy texture, perfect for your next gathering.
Serving Tip: Serve chilled and consider pairing with fresh berries or a drizzle of chocolate for an extra touch of elegance!
Expert Tips for Pink Velvet Cheesecake Bites
-
Room Temperature Cream Cheese: Ensure your cream cheese is at room temperature for smooth mixing. Cold cream cheese can lead to lumps in your filling.
-
Chill Time Matters: For the best texture, allow your Pink Velvet Cheesecake Bites to chill overnight. This helps the flavors meld together and ensures they slice cleanly.
-
Customize Wisely: Experiment with flavors by adding fresh berries or citrus zest. Avoid overmixing the cream filling once you add color to keep a lovely texture.
-
Crust Consistency: When pressing the crust, ensure it’s firmly compacted. A loose crust might crumble when sliced, making your bites hard to handle.
-
Storage Savvy: Keep your bites in an airtight container in the fridge. If freezing, layer parchment between them to prevent sticking.
What to Serve with No-Bake Pink Velvet Cheesecake Bites
Looking to create the ultimate dessert spread for your next gathering? Elevate your sweet experience with these delicious pairings!
- Fresh Berries: Juicy strawberries, blueberries, or raspberries add vibrant color and a refreshing burst of flavor that perfectly balances the sweetness of the cheesecake bites.
- Whipped Cream: A dollop of fluffy whipped cream brings a light, airy element that complements the rich creaminess of the cheesecake, adding a delightful texture.
- Chocolate Sauce: Drizzling warm chocolate sauce over the bites takes indulgence to another level, creating a luxurious treat for chocolate lovers.
- Mint Leaves: Fresh mint leaves provide a pop of color and a subtle herbal note that lifts the dessert, making each bite feel like a special occasion.
- Coffee: A cup of rich, aromatic coffee pairs beautifully, creating a comforting contrast to the dessert’s sweetness and enhancing the overall experience.
- Chilled Sparkling Water: Serve with sparkling water infused with lemon or berries for a refreshing palate cleanser that keeps the dessert feeling light and festive.
- Ice Cream: Pairing the bites with a scoop of vanilla or strawberry ice cream transforms your dessert into a delightful sundae experience, offering both temperature and flavor contrasts.
- Chocolate Dipped Pretzels: Crunchy, salty pretzels dipped in chocolate add a fun texture and flavor contrast that complements the creaminess of the cheesecake bites perfectly.
- Fruit Platter: A colorful assortment of seasonal fruits brings brightness and freshness, pairing well with the creamy bites and adding a vibrant visual appeal to your spread.
No-Bake Pink Velvet Cheesecake Bites Recipe FAQs
How do I know if my cream cheese is fresh enough to use?
Absolutely! Look for cream cheese that is smooth and has a uniform color. If you see any dark spots or a gritty texture, it’s best to discard it. Fresh cream cheese should have a mild aroma, so trust your senses!
What’s the best way to store leftover cheesecake bites?
Keep your Pink Velvet Cheesecake Bites in an airtight container in the refrigerator for up to 1 week. If you anticipate having leftovers, storing them well will help maintain their creamy texture and flavor, ensuring they’re ready to enjoy at any moment!
Can I freeze Pink Velvet Cheesecake Bites?
Yes, you can! To freeze, layer the bites between sheets of parchment paper in an airtight container or freezer-safe bag. They’ll keep well for up to 3 months. When you’re ready to enjoy, simply place them in the fridge for several hours to thaw. They’ll taste just as fresh as when you made them!
What should I do if my crust crumbles when slicing?
Very! If your crust is crumbly, it might not have been pressed firmly enough into the dish. Next time, be sure to press the crumb mixture down with the back of a measuring cup for a solid foundation. Alternatively, you can add a tiny bit more melted butter to help bind the crust together!
Are there any dietary considerations I should be aware of?
Definitely! For those with gluten or dairy sensitivities, you can easily modify the recipe. Use gluten-free graham cracker crumbs for a gluten-free option and vegan cream cheese with coconut oil for a dairy-free twist. It’s a crowd-pleaser that everyone can enjoy!
Can I incorporate other flavors into these cheesecake bites?
Oh, yes! You can add crushed berries or citrus zest into the cream filling for a fruity explosion. The more, the merrier! Just be mindful to adjust the sweetness accordingly. Enjoy experimenting with flavors!
Irresistible Pink Velvet Cheesecake Bites: No-Bake Delight
Ingredients
Equipment
Method
- Line an 8-inch square baking dish with parchment paper, allowing some overhang for easy removal.
- In a large mixing bowl, combine cream cheese and confectioners' sugar; beat with a hand mixer on medium speed for 2-3 minutes until smooth.
- Mix in vanilla extract and a few drops of pink food coloring until the mixture is evenly colored.
- In a separate bowl, combine graham cracker crumbs with melted unsalted butter until it resembles wet sand.
- Press the crumb mixture evenly into the bottom of the lined baking dish.
- Spread the cream cheese filling evenly over the crust using a spatula.
- Chill in the refrigerator for at least 4 hours or preferably overnight to set.
- Lift the cheesecake out using the parchment paper; cut into bite-sized squares and serve chilled.
Leave a Reply