
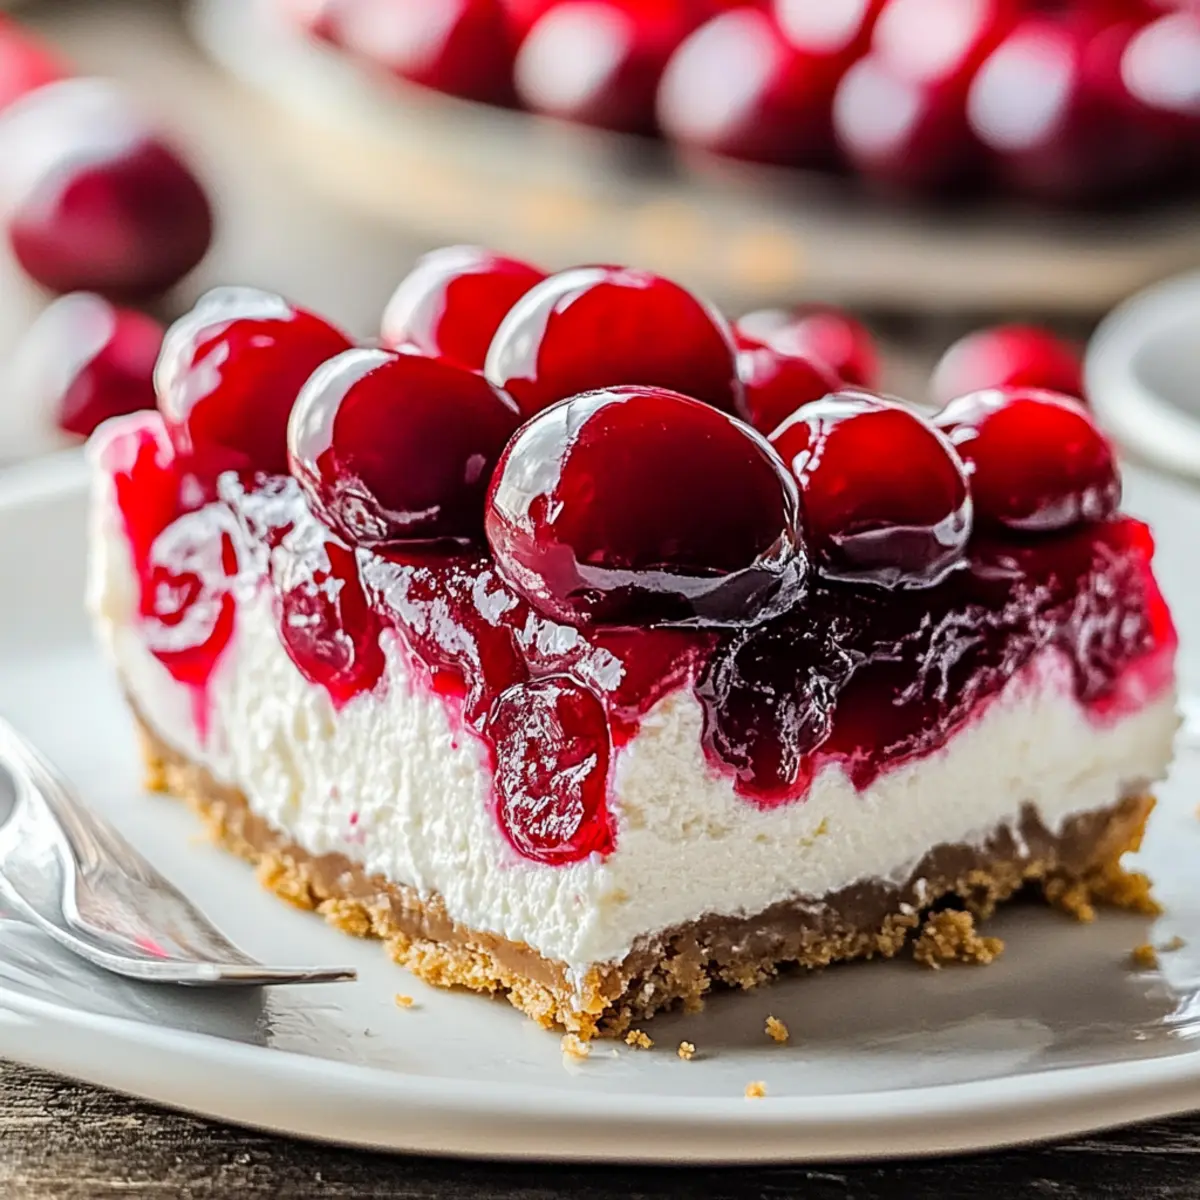
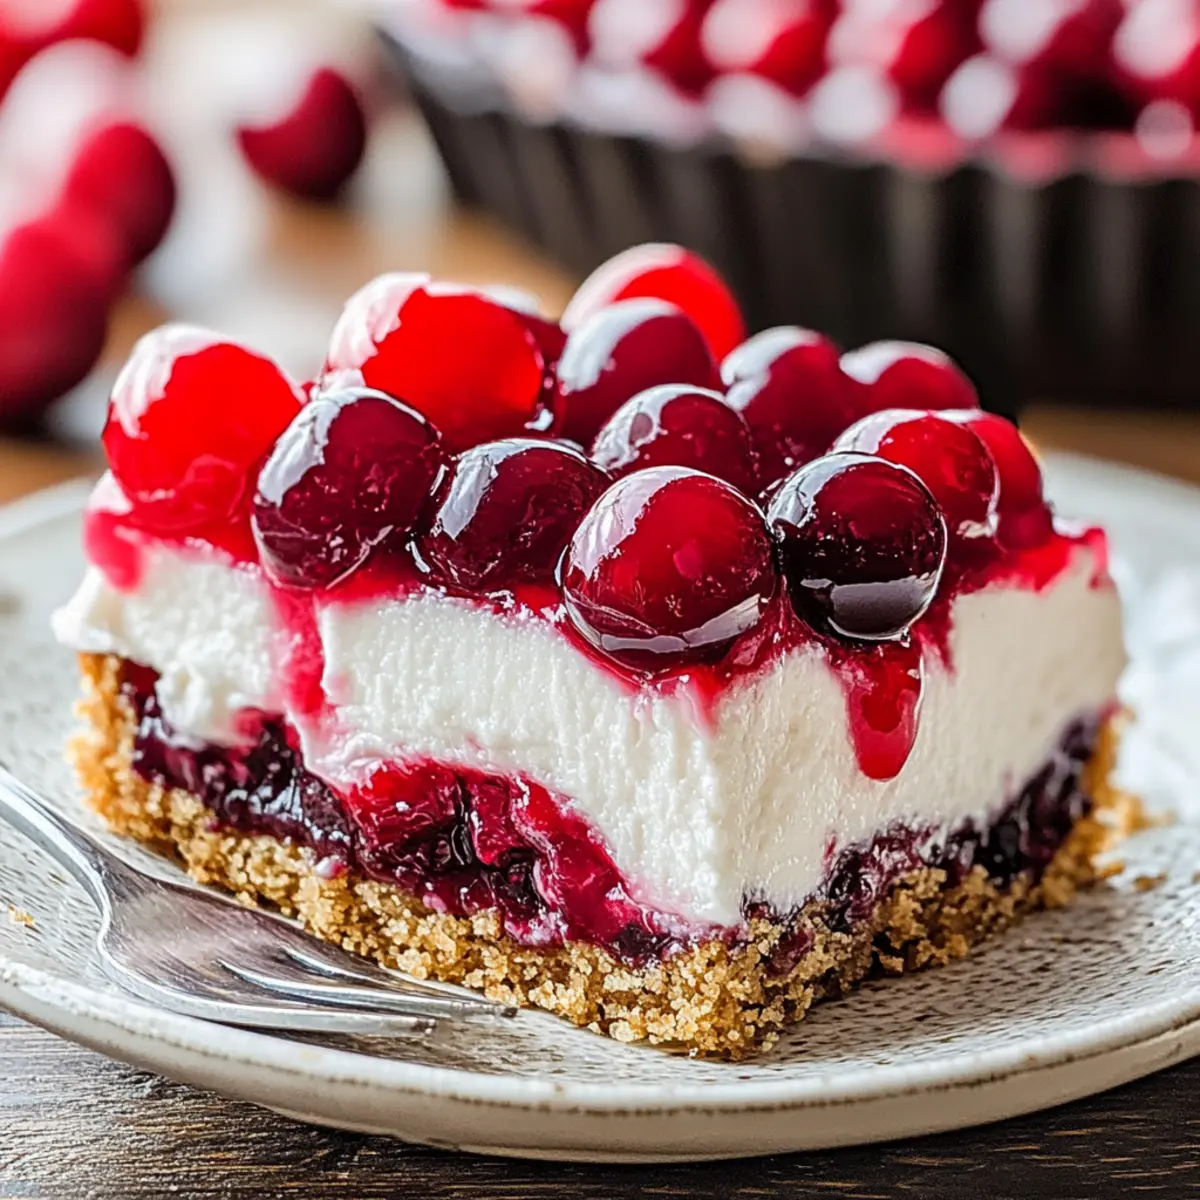
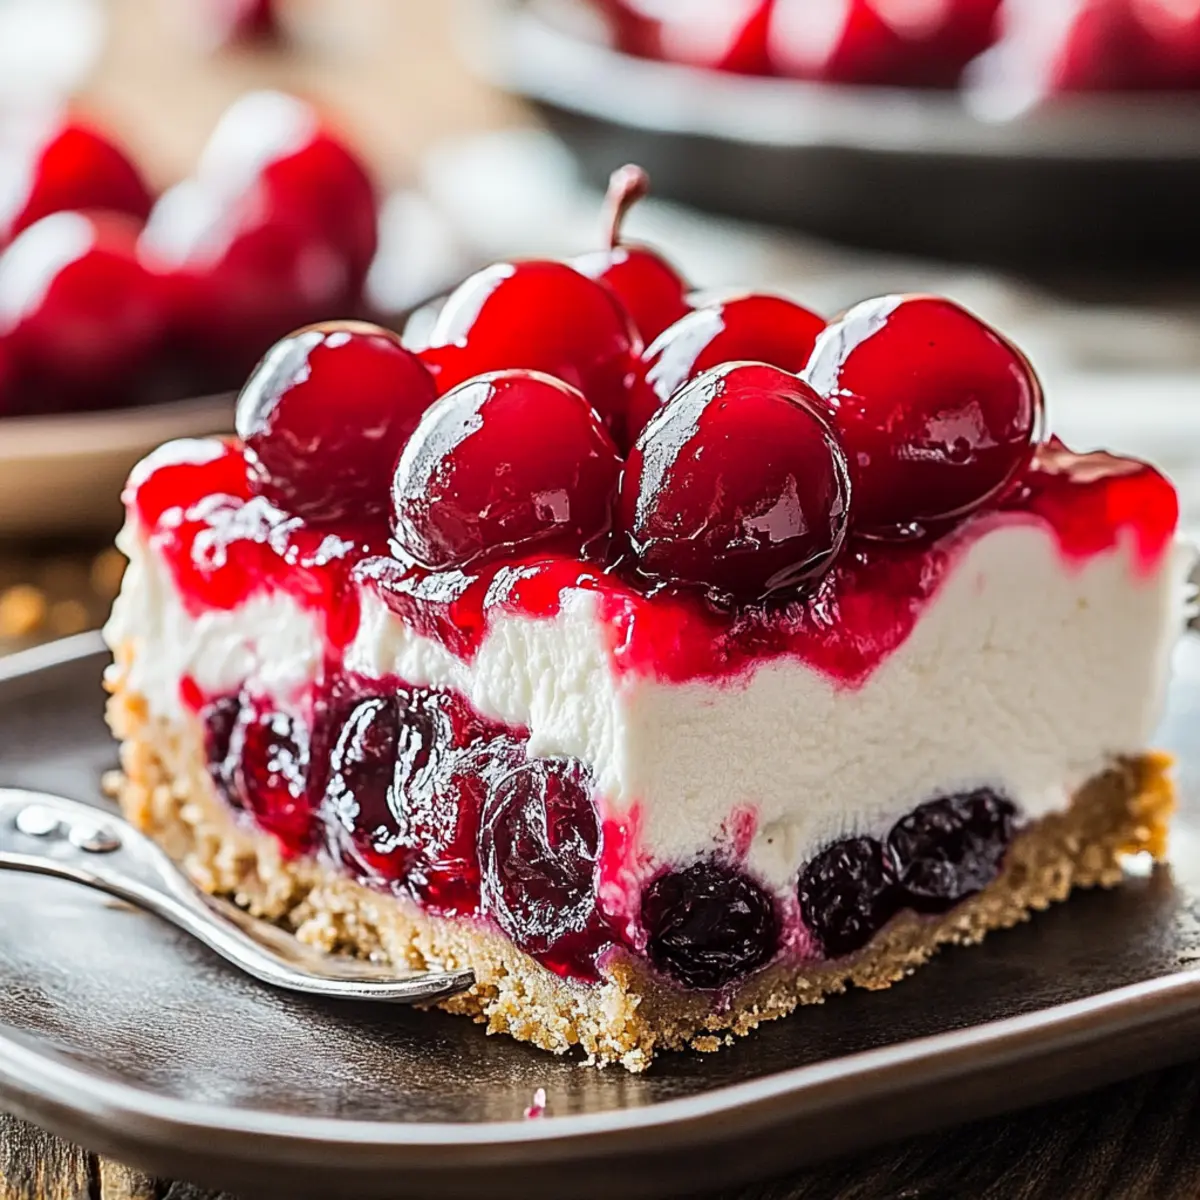
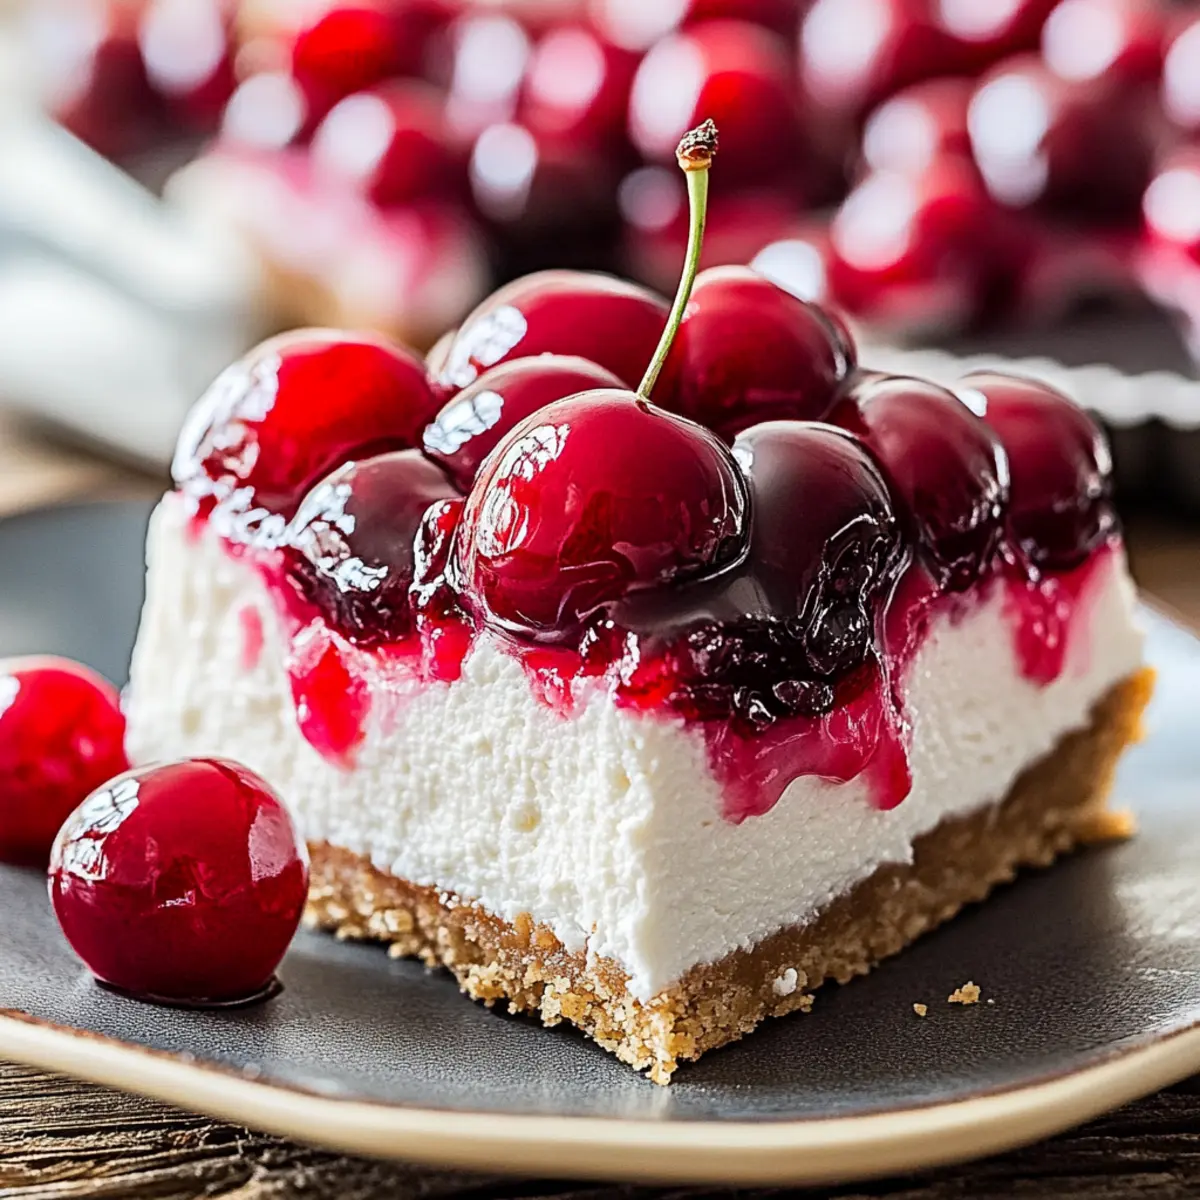
The moment I lifted the lid off the chilled dish, a wave of delicious nostalgia swept over me; it took me back to sun-soaked summer picnics and laughter-filled gatherings. The Cherry Cheesecake Lush is a crowd-pleaser that combines wonderfully creamy cheesecake filling, a buttery graham cracker crust, and a sweet-tart cherry pie topping, creating a festive treat that’s as easy to prepare as it is delightful to taste. This no-bake dessert not only saves you the hassle of turning on the oven, but it’s also make-ahead, allowing for stress-free entertaining. Whether you’re hosting friends or simply craving a sweet indulgence, this dessert is sure to impress. Curious how you can whip up this delectable delight without breaking a sweat? Let’s dive into the recipe!
Why is Cherry Cheesecake Lush a Must-Try?
Irresistible Layers: Each bite offers a perfect blend of creamy cheesecake and buttery crust, topped with a burst of cherries.
No-Bake Convenience: Say goodbye to oven time—this dessert is as easy as mix, layer, and chill!
Make-Ahead Wonder: Prepare it in advance to free up your time for hosting and enjoying your guests.
Versatile Flavors: Not a cherry fan? Try blueberries or strawberries for a delightful twist.
Crowd-Pleasing Delight: Whether it’s a picnic or a dinner party, this lush treat is sure to wow everyone.
If you’re intrigued by the simplicity of no-bake desserts, you might also enjoy our Cherry Cobbler Muffins for another easy, scrumptious option!
Cherry Cheesecake Lush Ingredients
• Get ready to gather the essentials for your Cherry Cheesecake Lush!
For the Crust
- Graham Cracker Crumbs – Provides a sweet, crumbly crust; substitute with chocolate wafer crumbs for a unique twist.
- Granulated Sugar – Adds sweetness to the crust and filling; brown sugar can be used for a more caramel-like flavor.
- Melted Butter – Binds the crust ingredients together; coconut oil is a great dairy-free alternative.
For the Filling
- Cream Cheese – Essential for a creamy texture; make sure it’s softened to avoid lumps, and vegan cream cheese works too.
- Powdered Sugar – Sweetens the filling while providing structure; no substitutions needed if you want a smooth finish.
- Vanilla Extract – Enhances flavor depth; try almond extract for a fun twist.
- Whipped Topping – Adds lightness and volume; use homemade whipped cream for a fresh taste.
For the Topping
- Cherry Pie Filling – Offers a fruity burst on top; fresh cherries can be substituted for a healthier option.
Now that you have all the ingredients for your Cherry Cheesecake Lush, let’s move on to the fun part—making this scrumptious no-bake dessert that everyone will love!
Step‑by‑Step Instructions for Cherry Cheesecake Lush
Step 1: Prepare the Crust
Preheat your oven to 350°F (175°C). In a mixing bowl, combine graham cracker crumbs, granulated sugar, and melted butter until well combined. Press this mixture firmly into the bottom of a 9×13 inch pan, ensuring an even layer. Bake for 8-10 minutes, or until it turns slightly golden. Allow the crust to cool completely before adding the filling.
Step 2: Make the Filling
In a large bowl, use an electric mixer to blend softened cream cheese and powdered sugar together until smooth and creamy. Add vanilla extract to enhance the flavor, mixing until fully incorporated. Gently fold in the whipped topping with a spatula, ensuring you maintain the lightness of the mixture. This creamy filling is the heart of your Cherry Cheesecake Lush.
Step 3: Assemble the Dessert
Once the crust has cooled, carefully spread the creamy cheesecake filling evenly over it using a spatula. Be gentle to create a smooth, even layer that reaches the edges of the crust. Next, spoon the cherry pie filling generously on top of the cheesecake layer, spreading it evenly to cover the surface. The vibrant red cherries add a beautiful pop of color and flavor to your Cherry Cheesecake Lush.
Step 4: Chill
Cover the assembled Cherry Cheesecake Lush with plastic wrap, ensuring it is sealed tightly to keep out any odors from the fridge. Refrigerate for at least 4 hours, but overnight is preferred for the best flavor and texture. This chilling step allows the layers to set perfectly and meld together, making each slice delightfully refreshing.
Step 5: Serve
When ready to serve, remove the dish from the refrigerator and cut the Cherry Cheesecake Lush into generous squares. For an extra touch, garnish each piece with a dollop of additional whipped cream and a few fresh cherries if desired. Enjoy chilled and watch as your guests savor every mouthful of this no-bake delight!
Expert Tips for Cherry Cheesecake Lush
• Softened Cream Cheese: Ensure your cream cheese is at room temperature before mixing to avoid lumps in your filling. This crucial step makes the Cherry Cheesecake Lush smooth and creamy.
• Chill Thoroughly: Don’t rush the chilling process! Refrigerate the dessert for at least 4 hours, or overnight, for the best flavor and texture.
• Homemade Whipped Cream: Consider making your own whipped cream for topping; it adds freshness and richer flavor compared to store-bought options.
• Even Layering: When adding the cherry pie filling, layer gently to keep the distinct layers of the cheesecake and crust visible in every slice.
• Flavor Variations: Experiment with different fruits or flavored extracts to create unique versions of the Cherry Cheesecake Lush that cater to your taste!
Cherry Cheesecake Lush Variations & Substitutions
Feel free to personalize this delightful dessert with a few simple adjustments and surprises that will tantalize your taste buds!
- Berry Swaps: Replace cherry pie filling with blueberries or strawberries for a fresh, fruity twist. The vibrant colors and flavors will awaken your senses!
- Chocolate Fudge: For a decadent variation, add cocoa powder to the crust or topping for a chocolate cheesecake experience that’s simply irresistible.
- Nutty Crunch: Stir in crushed nuts, like pecans or almonds, into the crust for a delightful crunch that enhances the texture of each bite.
- Dairy-Free Delight: Swap cream cheese for vegan cream cheese and use coconut whipped cream instead of the regular topping. This way, everyone can enjoy this luscious treat!
- Flavor Extravaganza: Experiment with almond extract instead of vanilla for a unique aromatic twist that adds depth to the creamy filling.
- Zesty Citrus: Fold in some lemon or lime zest into the cheesecake layer for a refreshing zing that complements the cherry topping beautifully.
- Graham Cracker Twist: For a unique crust, substitute graham cracker crumbs with crushed Oreo cookies for a rich chocolatey flavor that pairs well with cherries.
- Heated Up: For those who like a bit of spice, sprinkle some cinnamon or a dash of cayenne into the cheesecake filling to give it an unexpected kick.
If you’re eager to explore more delicious desserts, don’t miss our Cherry Cobbler Muffins—another tasty gem that’s sure to satisfy your sweet tooth!
How to Store and Freeze Cherry Cheesecake Lush
Fridge: Keep your Cherry Cheesecake Lush covered in the refrigerator for up to 3 days. This will ensure it stays fresh and delicious while preventing it from absorbing any unwanted odors.
Freezer: For longer storage, freeze the dessert for up to 2 months. Cut into squares, wrap each piece tightly in plastic wrap, and place them in an airtight container. Thaw overnight in the fridge before serving.
Serving: When ready to enjoy, garnish with fresh whipped cream and cherries to brighten the dessert. Serve chilled for the best experience!
Make Ahead Options
The Cherry Cheesecake Lush is a dream for busy home cooks looking to save time without sacrificing flavor! You can prepare the crust and cheesecake filling up to 24 hours in advance. Simply make the crust, let it cool completely, and then layer the filling on top. Cover it tightly with plastic wrap and refrigerate to keep it fresh. The cherry topping can also be added right before serving or can be prepped up to 3 days in advance and stored in the refrigerator. This way, you’ll ensure that your dessert is just as delicious while freeing up time during hectic days. When ready to serve, simply layer the cherries and enjoy the flavorful layers of your Cherry Cheesecake Lush with minimal effort!
What to Serve with Cherry Cheesecake Lush
Indulging in the creamy, dreamy layers of Cherry Cheesecake Lush is a delightful occasion, and the right sides can elevate your dessert experience.
-
Fresh Fruit Salad: A colorful medley of seasonal fruits brightens the palate, providing a refreshing contrast to the richness of the cheesecake.
-
Coffee or Espresso: The robust flavors of coffee or espresso create a delightful balance with the sweet cheesecake, making it a perfect end to a meal.
-
Homemade Whipped Cream: Light and fluffy, a dollop of freshly whipped cream enhances each bite, adding a delightful creaminess that complements the dessert beautifully.
-
Chocolate Chip Cookies: A crunchy, sweet sidekick that’s perfect for dipping into your Cherry Cheesecake Lush, offering a fun textural contrast.
-
Lemon Sorbet: A scoop of tangy lemon sorbet cuts through the richness, cleansing the palate and leaving a zesty finish.
-
Chilled White Wine: A sweet Riesling or fruity Moscato pairs wonderfully, balancing the tartness of the cherries and elevating the dessert experience.
-
Cheese Platter: Include mild cheeses like brie or goat cheese; the savory elements offer a delightful contrast to the sweet layers of Cherry Cheesecake Lush.
Pair these with your Cherry Cheesecake Lush, and you’re set for a feast that will leave everyone wanting more!
Cherry Cheesecake Lush Recipe FAQs
What type of cherries should I use for the topping?
Absolutely! Fresh cherries are a fantastic healthier option if you want to skip the canned cherry pie filling. Look for firm cherries that are bright in color and free of dark spots for that perfect pop of flavor. If using canned filling, ensure it’s well mixed to avoid too much liquid settling at the bottom.
How can I best store Cherry Cheesecake Lush?
You can store your Cherry Cheesecake Lush covered in the refrigerator for up to 3 days. Make sure to keep it airtight to prevent it from absorbing any unwanted odors from your fridge. A glass container with a lid works wonderfully for this purpose—just let it sit there and stay chilled!
Can I freeze Cherry Cheesecake Lush?
Yes, you can! Cut the dessert into squares, wrap each piece tightly in plastic wrap, and then place them in an airtight container. It can be frozen for up to 2 months. When you’re ready to treat yourself, simply thaw in the refrigerator overnight before serving. Garnish with fresh whipped cream for best results!
What should I do if my cream cheese is lumpy?
Oh no, we don’t want that! To fix lumpy cream cheese, make sure it’s at room temperature before mixing. I recommend letting it sit out for about 30 minutes prior. If you still encounter lumps, try beating it more vigorously with an electric mixer until smooth and creamy. This careful blending ensures your filling will be silky and flawless.
Is this dessert suitable for those with dietary restrictions?
Yes, very! You can easily tailor this Cherry Cheesecake Lush to accommodate various dietary needs. For a dairy-free version, use vegan cream cheese and substitute coconut whipped cream for the whipped topping. Just be sure to check the labels on all ingredients to ensure they meet your specific dietary requirements!
Cherry Cheesecake Lush: Your Easy No-Bake Sweet Escape
Ingredients
Equipment
Method
- Preheat your oven to 350°F (175°C). In a mixing bowl, combine graham cracker crumbs, granulated sugar, and melted butter until well combined. Press this mixture firmly into the bottom of a 9x13 inch pan, ensuring an even layer. Bake for 8-10 minutes, or until it turns slightly golden. Allow the crust to cool completely before adding the filling.
- In a large bowl, use an electric mixer to blend softened cream cheese and powdered sugar together until smooth and creamy. Add vanilla extract to enhance the flavor, mixing until fully incorporated. Gently fold in the whipped topping with a spatula.
- Once the crust has cooled, carefully spread the creamy cheesecake filling evenly over it using a spatula. Next, spoon the cherry pie filling generously on top of the cheesecake layer.
- Cover the assembled Cherry Cheesecake Lush with plastic wrap, refrigerating for at least 4 hours, preferably overnight for the best flavor.
- When ready to serve, cut the Cherry Cheesecake Lush into squares and garnish with additional whipped cream and fresh cherries if desired.
Leave a Reply