
As I stood in the kitchen, juggling flavors and colors, I realized I had stumbled upon a delightful solution to my weekday lunch dilemma: the Chicken Mason Jar Salad. Not only does this vibrant dish scream versatility, but it also transforms healthy eating into an exciting adventure. Layered with tender chicken, crunchy greens, and a burst of fresh vegetables, this salad is quick to prepare and utterly customizable to suit any palate. It’s the perfect make-ahead meal that keeps well for days, ensuring you’ll dodge the temptation of takeout. Whether you’re prepping for a busy work week or hosting a casual lunch with friends, this salad will steal the show. Ready to craft a masterpiece in a jar? Let’s dive into the details!
Why is this Chicken Mason Jar Salad a winner?
Healthy Eating Made Easy: This Chicken Mason Jar Salad is a fantastic way to enjoy nutritious, satisfying meals without the hassle of cooking daily.
Customizable to Your Taste: Choose your favorite veggies, proteins, and dressings to personalize each jar, making every lunch a new experience.
Quick Prep Time: With just a few simple steps, you can whip up several jars in under 30 minutes—ideal for busy weeks ahead!
No More Boring Lunches: Each layer is bursting with color and flavor, transforming a dull desk lunch into an exciting culinary treat.
Satisfying and Filling: With around 30g of protein in each serving, this salad will keep you energized and full throughout the day, making it a great alternative to fast food.
Perfect for Meal Prep: Enjoy this salad fresh for up to four days, ensuring every bite is crisp and delicious—just another reason why this recipe shines! For more meal prep ideas, check out Sticky Garlic Chicken and Chicken Enchiladas Savory.
Chicken Mason Jar Salad Ingredients
For the Salad Base
• Cooked Chicken – Provides protein for satiety; use freshly cooked chicken or rotisserie chicken for convenience.
• Mixed Greens – Adds volume and nutrients; choose seasonal greens like spinach or arugula for the best flavor.
• Cherry Tomatoes – Bring sweetness and juiciness; halving them enhances the salad’s visual appeal.
• Cucumber – Adds crunch and refreshing flavor; dice for easy consumption.
• Shredded Carrots – Contributes texture and natural sweetness; a standard option that brightens the salad.
• Red Onion – Offers sharpness and contrast; thinly sliced for even distribution and flavor.
Optional Ingredients
• Feta Cheese – Provides a creamy and tangy element; can be substituted with goat cheese or omitted based on preference.
• Salad Dressing – Combines all the flavors; experiment with ranch, vinaigrette, or any favorite sauce to complement the Chicken Mason Jar Salad.
Step‑by‑Step Instructions for Chicken Mason Jar Salad
Step 1: Prepare Your Jar
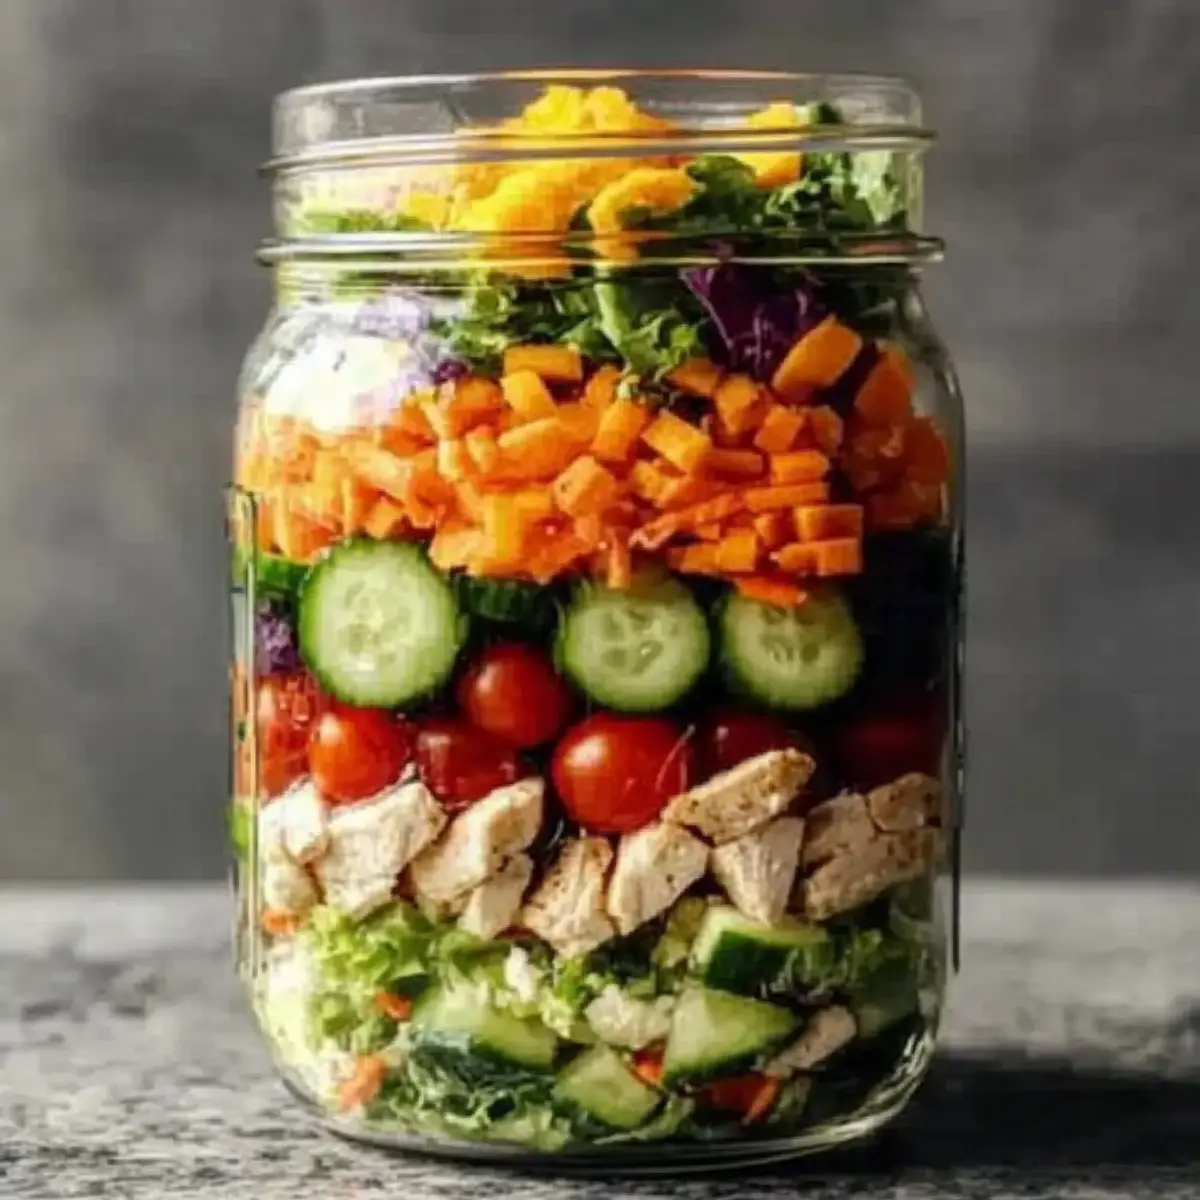
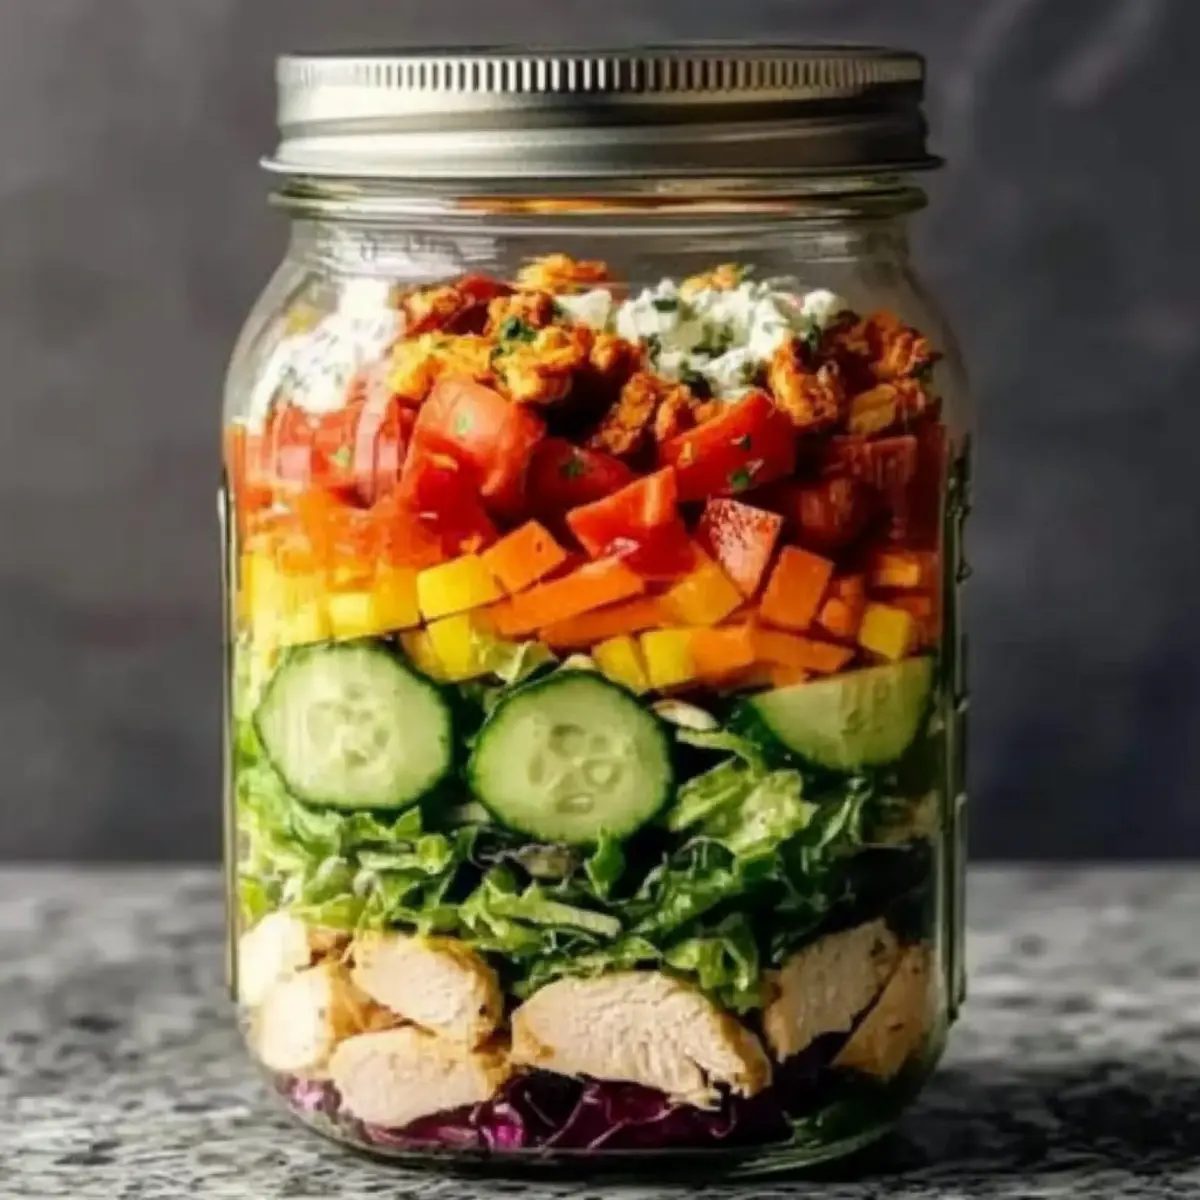
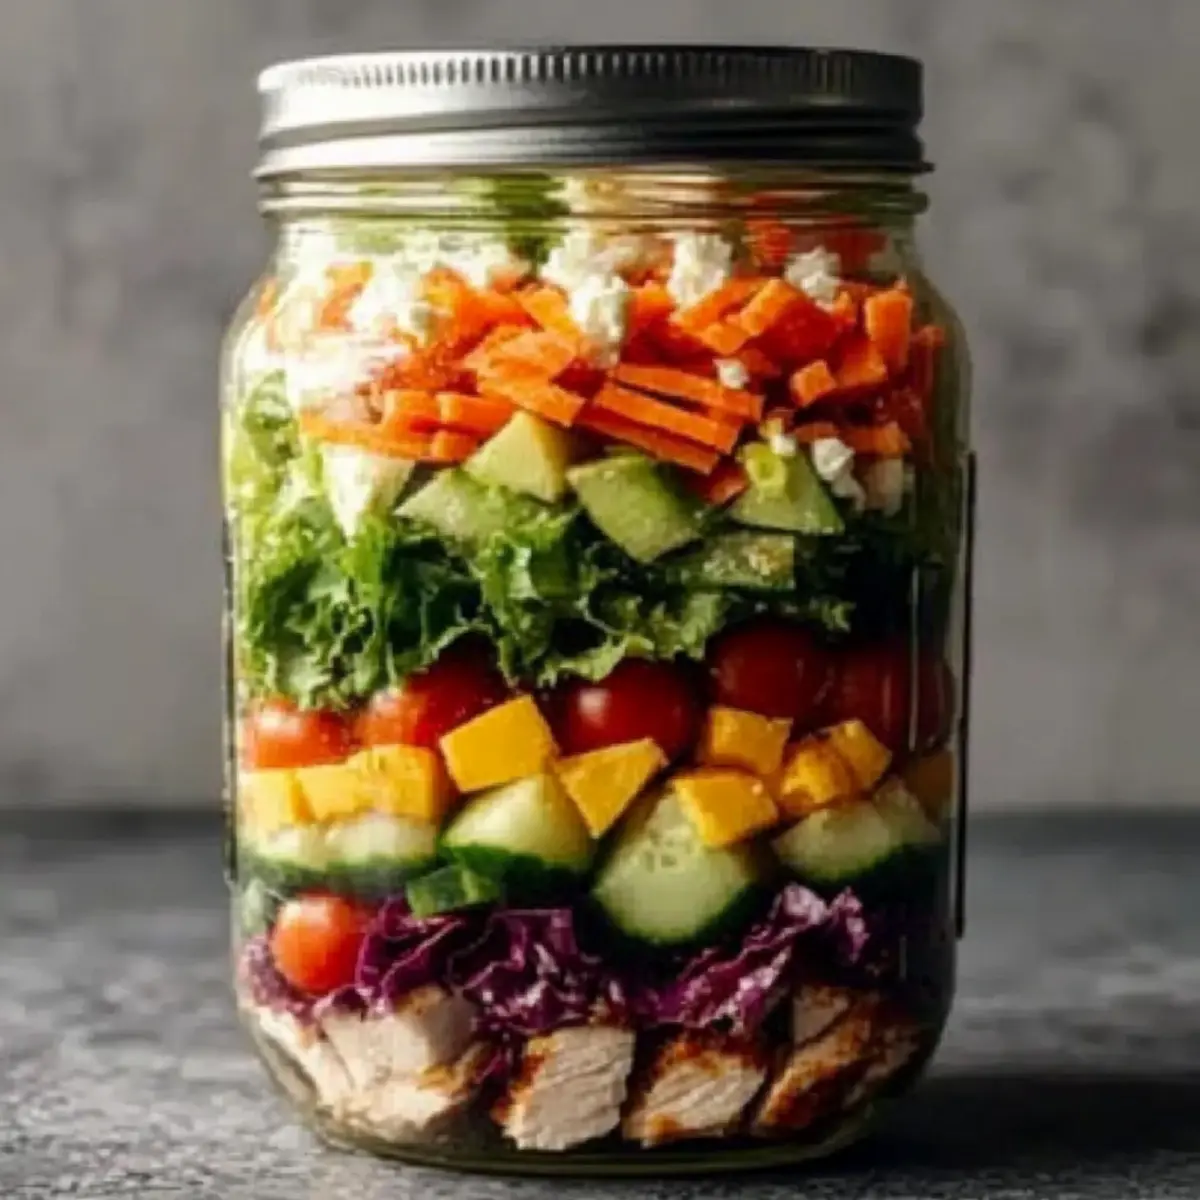
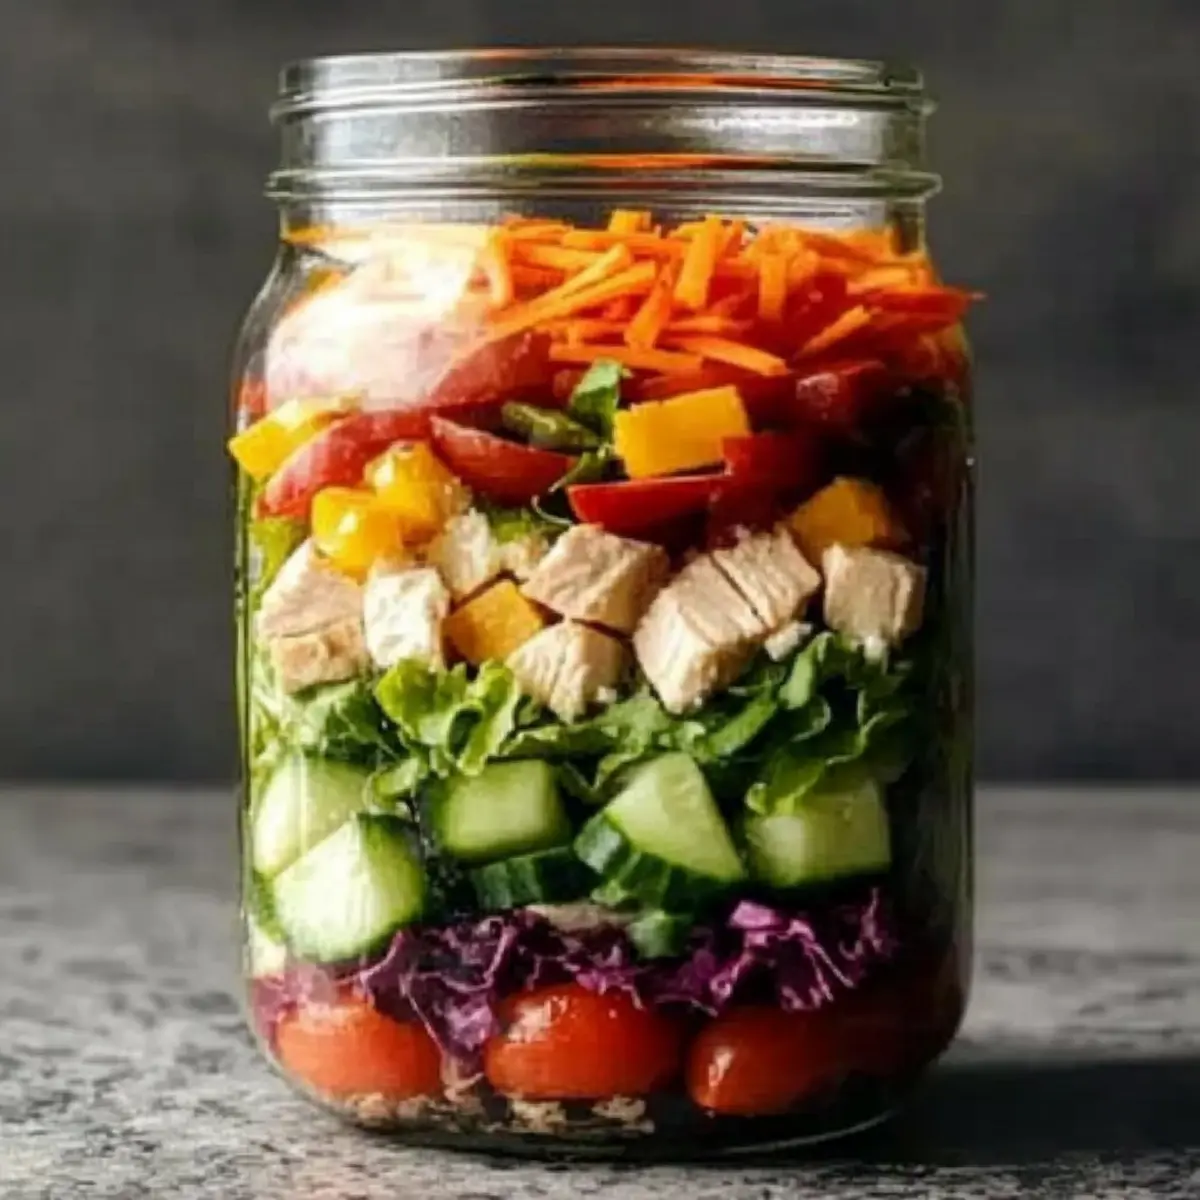
Start by selecting a clean quart-sized mason jar as the base for your Chicken Mason Jar Salad. Ensure it is dry and free of any residue. This will keep your salad fresh and prevent sogginess. Lay out your ingredients on a clean surface for easy access as you build the layers.
Step 2: Add the Dressing
Pour your favorite salad dressing into the bottom of the mason jar, about 2 to 4 tablespoons depending on how much flavor you prefer. This will keep the dressing separate from the greens, ensuring they remain crisp until you’re ready to enjoy your salad. Choose a flavorful vinaigrette or a creamy dressing to complement the Chicken Mason Jar Salad.
Step 3: Layer the Vegetables
Next, layer in the thinly sliced red onion, followed by the diced cucumber. The onion adds a sharp flavor, while the cucumber introduces a refreshing crunch. Ensure even distribution of each ingredient for balanced flavor throughout your Chicken Mason Jar Salad. You want to see vibrant colors peeking through your jar!
Step 4: Add the Carrots and Tomatoes
Now, sprinkle in the shredded carrots, followed by the halved cherry tomatoes on top. The carrots will add sweetness and texture, while the tomatoes contribute a juicy burst of flavor. Fill the jar with these colorful layers, making it visually appealing and ensuring each bite is delightful.
Step 5: Pack in the Chicken
Add your cooked chicken next, placing it directly on top of the tomato layer. This protein-packed ingredient elevates the Chicken Mason Jar Salad into a satisfying meal. Use shredded chicken or cubed rotisserie chicken for convenience—whichever you have on hand works perfectly!
Step 6: Finish with Greens
Top off your salad by packing in a generous handful of mixed greens. These should fill the jar to the brim without squishing the other layers. Make sure the greens are fresh and vibrant, as they add volume and nutrients. This final layer not only completes the Chicken Mason Jar Salad but also ensures it stays fresh longer.
Step 7: Optional Toppings
If you choose to include feta cheese, sprinkle it over the top of the mixed greens now. This creamy, tangy element adds an extra layer of flavor to your Chicken Mason Jar Salad. You can substitute with goat cheese or leave it out entirely based on your preference.
Step 8: Seal and Store
Finally, seal the mason jar tightly with its lid. Store it in the refrigerator until you’re ready to eat—ideally, enjoy it within four days for the best taste and texture. Your delicious Chicken Mason Jar Salad is now ready for grab-and-go meals, keeping healthy eating exciting and easy!
Expert Tips for Chicken Mason Jar Salad
- Prepping Ingredients: Choose fresh, high-quality ingredients for the best flavor in your Chicken Mason Jar Salad. Seasonal fruits and veggies often tastier!
- Layering Technique: Always start with dressing at the bottom and denser ingredients first to keep the greens fresh. This prevents sogginess and ensures a crisp bite.
- Mixing Flavors: Feel free to experiment with different dressings and veggies! Each combination can turn your Chicken Mason Jar Salad into a new favorite.
- Storing Tips: Ensure your jar is sealed tightly to maintain freshness for up to 4 days; consume within the first few days for optimal crunch and flavor.
- Protein Variations: Don’t hesitate to substitute chicken with proteins like chickpeas or hard-boiled eggs for different versions of your salad—keep it exciting!
What to Serve with Chicken Mason Jar Salad
Transform your delightful Chicken Mason Jar Salad into a complete meal experience with these delicious pairings.
-
Whole-Grain Bread: The hearty texture and nutty flavor of whole-grain bread create a perfect complement to the crunchiness of your salad. A slice of toasted bread can make each bite even more satisfying.
-
Crispy Baked Sweet Potato Fries: These provide a sweet, crispy contrast that matches beautifully with the fresh flavors of the salad. Their caramelized edges bring warmth and comfort to your lunch.
-
Creamy Avocado Toast: Rich in healthy fats, creamy avocado toast adds a luxurious touch next to your salad, enhancing both taste and nutrition.
-
Zesty Lemon Water: A refreshing drink that cleanses the palate perfectly complements the vibrant flavors of your Chicken Mason Jar Salad. Simple yet revitalizing!
-
Fruit Salad: A bright mix of seasonal fruits adds a sweet touch, balancing the savory notes of your salad. Choose juicy strawberries, citrus, or berries for a refreshing contrast.
-
Cheesy Garlic Crackers: These crunchy snacks introduce a savory twist, making each bite of your Chicken Mason Jar Salad even more enjoyable. They also add a fun texture that’s hard to resist.
By mixing and matching these ideas, you’ll create a lunch spread that’s not only satisfying but also bursting with flavor and nourishment!
How to Store and Freeze Chicken Mason Jar Salad
Fridge: Keep your Chicken Mason Jar Salad tightly sealed in the mason jar for optimal freshness. It can be stored in the refrigerator for up to 4 days, ensuring the ingredients remain crispy and vibrant.
Freezer: While freezing is not recommended for this salad due to the potential for soggy greens, you can freeze cooked chicken separately if desired. When ready to use, thaw it in the fridge overnight.
Reheating: If your jar includes ingredients that need warming, such as chicken, transfer the desired portion to a microwave-safe bowl. Heat gently to maintain flavor and texture.
Serving Suggestions: For a complete meal, pair your Chicken Mason Jar Salad with crusty whole-grain bread or your favorite crackers to create a satisfying and balanced lunch.
Make Ahead Options
These Chicken Mason Jar Salads are a meal prep game-changer! You can prepare all the layers up to 3 days in advance, ensuring fresh, crisp ingredients. Start by cooking and shredding the chicken, which can be stored separately or layered directly in the jar along with the other veggies. To maintain quality, seal the jars tightly in the refrigerator. Assemble the salad with the dressing at the bottom, followed by the heavier ingredients to prevent sogginess: red onions, cucumbers, and carrots. When you’re ready to eat, just shake the jar or transfer it to a bowl, and you’ll enjoy a delicious, nutritious meal without any stress!
Chicken Mason Jar Salad Variations
Feel free to explore these delicious twists that will take your Chicken Mason Jar Salad to new heights of flavor and nutrition!
-
Protein Swaps: Substitute chicken with turkey, chickpeas, or hard-boiled eggs for a satisfying variation. Each option brings a unique texture and richness, making your salad even more enjoyable.
-
Veggie Boost: Boost the crunch factor by adding bell peppers, radishes, or avocado. These fresh additions not only enhance the salad’s aesthetic appeal but also introduce a delightful medley of flavors and textures.
-
Cheese Alternatives: Swap feta cheese for goat cheese or skip it entirely for a dairy-free option. This simple switch can accommodate various dietary preferences while still keeping your Chicken Mason Jar Salad flavorful.
-
Dressing Variety: Experiment with different dressings like creamy avocado dressing or a zesty lemon vinaigrette. A new dressing can refresh the entire dish and make lunchtime feel like a gourmet experience.
-
Herbal Infusion: Toss in fresh herbs such as basil or cilantro for an added burst of flavor. These herbs can elevate your salad, making each bite a fragrant journey through tastes.
-
Spice It Up: Add diced jalapeños or a pinch of red pepper flakes if you crave some heat. An exciting kick can awaken your palate and turn a classic salad into a zesty affair!
-
Nuts & Seeds: Sprinkle in walnuts or sunflower seeds for an extra crunch and healthy fat. The textural contrast adds a satisfying bite, rounding out your Chicken Mason Jar Salad perfectly.
-
Sweet Additions: Try incorporating fruits like diced apples or dried cranberries for a touch of sweetness. This delightful hint of sugar beautifully offsets the savory elements of your salad, creating a lovely balance.
Each of these variations lets you craft a personalized Chicken Mason Jar Salad that reflects your taste while keeping every meal fresh and exciting. Enjoy this versatile dish, and for more meal prep ideas, check out Cheesy Chicken Crescent or Cowboy Butter Chicken!
Chicken Mason Jar Salad Recipe FAQs
How do I select ripe vegetables for my Chicken Mason Jar Salad?
Absolutely! When choosing vegetables, look for fresh, bright colors and firm textures. For example, cherry tomatoes should be plump and shiny, while cucumbers should be crisp with no dark spots. Mixed greens should be vibrant and free from wilting for the best flavor and freshness.
What is the best way to store my Chicken Mason Jar Salad in the refrigerator?
Very! Keep your Chicken Mason Jar Salad sealed tightly in its jar, ensuring no air can enter. This way, it maintains freshness for up to 4 days. I recommend checking the salad daily; if you notice any dampness, eat it sooner!
Can I freeze my Chicken Mason Jar Salad?
Not really! While freezing the entire salad is not advisable, you can freeze cooked chicken separately. To do this, place the chicken in a freezer-safe bag and remove excess air before sealing. It will stay good for up to 3 months. When ready to use, just thaw it overnight in the fridge!
What do I do if my salad goes soggy before eating?
No worries! If you find your salad is soggy, it could be due to the layering. Always place dressing at the bottom, followed by denser ingredients and greens on top. If it’s too late, try draining excess moisture before serving, or add a handful of fresh greens to revitalize the texture.
Is this Chicken Mason Jar Salad suitable for people with allergies?
Absolutely! Since the Chicken Mason Jar Salad is highly customizable, you can cater to various dietary restrictions. Omit ingredients like feta for dairy-free diets or substitute chicken for chickpeas if gluten-free. Always double-check ingredient labels for hidden allergens to ensure everyone’s safety.
How do I make my Chicken Mason Jar Salad more filling?
You can enhance the heartiness of your salad by adding grains like quinoa or farro. Start with a small layer of these cooked grains before adding the veggies. This will not only fill you up but also provide additional fiber and nutrients!
Delicious Chicken Mason Jar Salad for Easy Meal Prep Magic
Ingredients
Equipment
Method
- Start by selecting a clean quart-sized mason jar as the base for your Chicken Mason Jar Salad. Ensure it is dry and free of any residue.
- Pour your favorite salad dressing into the bottom of the mason jar, about 2 to 4 tablespoons depending on how much flavor you prefer.
- Next, layer in the thinly sliced red onion, followed by the diced cucumber.
- Now, sprinkle in the shredded carrots, followed by the halved cherry tomatoes on top.
- Add your cooked chicken next, placing it directly on top of the tomato layer.
- Top off your salad by packing in a generous handful of mixed greens.
- If you choose to include feta cheese, sprinkle it over the top of the mixed greens now.
- Finally, seal the mason jar tightly with its lid and store it in the refrigerator.
Leave a Reply