
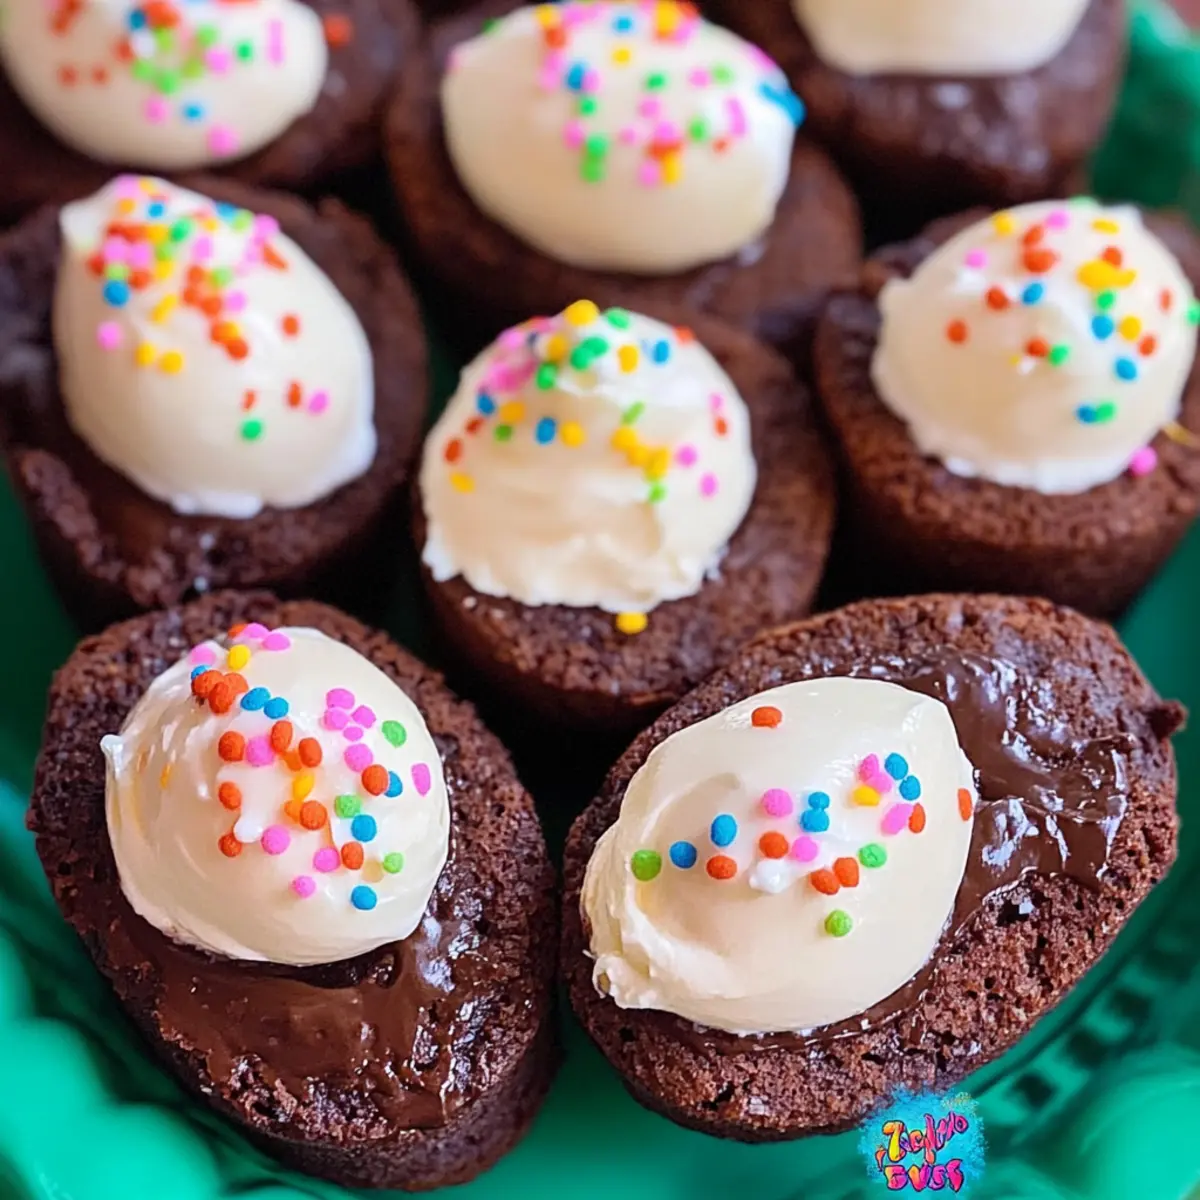
As I was sorting through my collection of seasonal recipes, I stumbled upon a treasure that instantly brought back memories of joyous Easters spent with family—the Deviled Brownies. These festive egg-shaped treats not only satisfy a chocolate craving but also boast a sweet cream cheese filling that brings a delightful tang. Perfectly easy to whip up, they are sure to become a crowd-pleaser at any gathering. Whether you’re celebrating Easter or simply looking for a fun dessert to brighten your day, these brownies will add a playful twist to your dessert table. Who wouldn’t want to impress guests with a treat that looks as good as it tastes? Ready to dive into a delightfully rich recipe that’s about to elevate your baking game? Let’s get started!
Why Make Deviled Brownies?
Simplicity At Its Finest: This recipe requires only a few easily accessible ingredients, making it ideal for both novice bakers and seasoned chefs.
Festive Presentation: The egg-shaped design adds a playful touch to your Easter celebrations, appealing to both kids and adults alike.
Decadent Flavor: The rich chocolate brownie combined with a creamy filling provides an irresistible treat that stands out on any dessert table.
Customizable Options: Feel free to swap in peanut butter or cookie butter for the filling, allowing for unique variations that cater to different taste preferences.
Crowd Favorite: These delightful brownies are sure to impress at gatherings—just imagine the smiles when you serve these colorful treats! Additionally, if you love festive dishes, check out my delicious Deviled Egg Macaroni for a complementary recipe!
Deviled Brownies Ingredients
For the Brownies
- Brownie Mix – The key base that delivers rich chocolate flavor; consider using homemade brownie batter for a personal touch.
For the Creamy Filling
- Cream Cheese – This softens perfectly to create a tangy, creamy filling; make sure it’s at room temperature for easy mixing.
- Marshmallow Cream – Adds a sweet, fluffy texture to the filling; you can swap it for buttercream frosting if you prefer a richer taste.
For the Decoration
- Sprinkles – Use these to give a colorful touch to your brownies; add them right before serving to avoid color bleeding.
With these ingredients on hand, you’re all set to create delicious Deviled Brownies that will perfectly complement your Easter festivities!
Step‑by‑Step Instructions for Deviled Brownies
Step 1: Preheat and Prepare
Begin by preheating your oven to 350°F (175°C). As the oven warms up, prepare your brownie mix according to the package instructions, blending until smooth. Once mixed, lightly grease your egg-shaped silicone molds with nonstick cooking spray to ensure easy removal later. This preparation sets the stage for baking your delicious Deviled Brownies.
Step 2: Fill the Molds
Using a 2-tablespoon portion scoop, fill each mold with the brownie batter, making sure to distribute it evenly for uniform baking. Fill each mold about three-quarters full to allow room for rising. Once all molds are filled, gently tap them on the counter to eliminate any air bubbles, ensuring perfectly smooth tops for your Deviled Brownies.
Step 3: Bake the Brownies
Place the filled molds in the preheated oven and bake for 24-26 minutes. Keep an eye on them, and check for doneness by inserting a toothpick into the center; it should come out clean or with a few moist crumbs. Once baked, carefully remove the molds from the oven and let them cool slightly before proceeding to the next step.
Step 4: Create the Indentations
While the brownies are still warm, use a ½ teaspoon measuring spoon to press down in the center of each brownie, creating a little divot for the filling. This step is key for the Deviled Brownies, as it will hold the delicious cream cheese filling. Allow them to cool in the molds until they are completely set.
Step 5: Prepare the Creamy Filling
In a mixing bowl, beat together the softened cream cheese and marshmallow cream until the mixture is smooth and creamy. This delightful cream will provide that tangy sweetness that contrasts beautifully with the rich chocolate brownies. Once well combined, transfer this filling into a pastry bag fitted with a 1M tip for easy piping.
Step 6: Fill the Brownies
Gently release the cooled brownies from the molds and place them on a serving platter. Pipe the cream cheese filling into each divot, creating a lovely swirl that adds a touch of elegance to your Deviled Brownies. Ensure each brownie is generously filled to make them extra delightful and appealing.
Step 7: Add the Finishing Touches
Optionally, sprinkle colorful sprinkles on top of the cream cheese filling for an enticing presentation. This adds a festive flair perfect for Easter celebrations. Once decorated, refrigerate the Deviled Brownies until you are ready to serve, allowing the flavors to meld and the filling to chill.
Expert Tips for Deviled Brownies
-
Cool Completely: Ensure brownies cool completely before removing them from molds to prevent breakage and preserve their lovely shape.
-
Softened Cream Cheese: Always use room temperature cream cheese for the filling. This ensures a smooth and creamy texture that blends beautifully.
-
Perfect Piping: Use a pastry bag fitted with a 1M tip for piping. It creates lovely swirls and makes filling your brownies a breeze!
-
Avoid Color Bleeding: Add sprinkles only right before serving. Putting them on too early can cause colors to bleed into the filling, detracting from the visual appeal.
-
Storage Tips: Store your Deviled Brownies in the refrigerator, covered, to keep the filling fresh and chilled. Enjoy them for up to 3-4 days!
-
Try Variations: Experiment with different filling flavors like peanut butter or cookie butter for a fun twist that your guests will love!
Deviled Brownies Variations
Get ready to personalize your deviled brownies with some delightful twists that will have everyone talking!
-
Nutty Twist: Add 2-3 tablespoons of creamy peanut butter into the filling for a luscious, nutty flavor. This combination really enhances the overall taste and gives your brownies a fun, sweet surprise inside.
-
Cookie Butter Swap: Replace the marshmallow cream with cookie butter for a spiced, decadent filling. This alternative adds warmth and a whole new level of deliciousness to your treat.
-
Buttercream Option: Use traditional buttercream frosting instead of marshmallow cream for a richer finish. The buttery sweetness pairs wonderfully with the chocolate brownies, creating a classic dessert experience.
-
Festive Colors: Tint the cream cheese filling with food coloring to align with your holiday theme. Bright yellows or pastel hues can transform these brownies into eye-catching treats.
-
Chocolate Chip Add-In: Fold in mini chocolate chips to the brownie batter for an extra chocolatey experience. These delightful morsels will melt into the brownies, offering an irresistible gooeyness.
-
Vegan Variation: Use a vegan brownie mix and substitute the cream cheese with a plant-based cream cheese alternative. This way, you can share the indulgence with friends who prefer a vegan diet.
-
Spicy Kick: Add a pinch of cayenne pepper or cinnamon to the cream cheese filling for those who like a little heat. The subtle spice will surprise and enchant your guests—a perfect contrast to the sweet brownies!
-
Flavorful Toppings: Instead of sprinkles, try crushed nuts, toasted coconut, or edible glitter to elevate the final presentation. These additions not only make your brownies look professional but also add exciting textures.
Feel free to mix and match some of these variations to create your ultimate batch of devilishly delicious brownies! And if you love themed desserts, you might also enjoy my Deviled Egg Macaroni to compliment your festive gatherings.
Make Ahead Options
These Deviled Brownies are a fantastic option for meal prep, saving you time and hassle during your festive gatherings! You can prepare the brownie batter and fill your egg-shaped molds up to 24 hours in advance; simply store them in the refrigerator to maintain their freshness. Once they are baked and cooled, create the indentations as instructed and then refrigerate them as well. The filling can also be made up to 3 days ahead—just keep it sealed in an airtight container until you’re ready to use. When you’re set to serve, simply fill the brownies with the cream cheese mixture, add sprinkles, and enjoy these delightful treats that taste just as wonderful as fresh!
What to Serve with Deviled Brownies?
Elevate your dessert table with these delightful pairings that perfectly complement the rich flavors of your brownies.
-
Vanilla Ice Cream: The creaminess of vanilla ice cream contrasts beautifully with the chocolate brownies, providing a cooling balance that everyone loves.
-
Fruity Berry Salad: A mix of fresh strawberries, blueberries, and raspberries offers a bright, tart contrast to the sweetness of the deviled brownies, refreshing your palate.
-
Chocolate Sauce: Drizzle warm chocolate sauce over your brownies for an extra indulgent treat. The rich addition amplifies the chocolate experience.
-
Whipped Cream: A dollop of fluffy whipped cream gets your guests swooning with its light texture, enhancing the overall richness without overwhelming it.
-
Coffee or Espresso: Serve a cup of freshly brewed coffee on the side. Its bold, roasted flavor perfectly complements the chocolate brownies, making each bite feel even more decadent.
-
Mint Chocolate Chip Milkshake: For a delightful twist, pair these brownies with a mint chocolate chip milkshake. The cool mint refreshing flavor offsets the warm, rich brownies in a playful manner.
-
Peanut Butter Cups: Add an unexpected crunch with mini peanut butter cups on the side. Their nutty richness marries well with the brownie’s chocolatey goodness.
-
Coconut Macaroons: These chewy delights bring a tropical sweetness and chewy texture that wonderfully contrasts with the soft pudding-like brownie and creamy filling.
The combination of flavors and textures here guarantees a dessert experience that’s anything but ordinary!
How to Store and Freeze Deviled Brownies
Fridge: Store deviled brownies in an airtight container in the refrigerator for up to 3-4 days. This keeps the cream cheese filling fresh and chilled.
Freezer: For longer storage, freeze deviled brownies by wrapping them tightly in plastic wrap, then place them in a freezer-safe container. They can be frozen for up to 3 months.
Reheating: To enjoy, thaw brownies in the refrigerator overnight. If you prefer them slightly warm, reheat in the microwave for just a few seconds.
Tip: Always add sprinkles just before serving for the best visual appeal and to avoid color bleeding on the delightful cream cheese filling.
Deviled Brownies Recipe FAQs
What type of brownie mix should I use for deviled brownies?
I recommend using your favorite boxed brownie mix for convenience, but you can absolutely use homemade brownie batter if you’re feeling adventurous! Just make sure it yields a rich and dense consistency for the best results.
How do I know when the brownies are done baking?
Keep an eye on your brownies while they bake for about 24-26 minutes. Insert a toothpick into the center; it should come out clean or with a few moist crumbs. If it comes out with wet batter, they need a few more minutes in the oven!
How should I store leftover deviled brownies?
To keep your deviled brownies fresh, store them in an airtight container in the refrigerator for up to 3-4 days. This will help maintain the deliciousness of the cream cheese filling. Make sure they’re fully cooled before covering them to avoid condensation.
Can I freeze deviled brownies?
Absolutely! To freeze, wrap each brownie tightly in plastic wrap, then place them in a freezer-safe container. They’ll keep well for up to 3 months. When you’re ready to enjoy, just thaw them in the refrigerator overnight, and for a warm treat, pop them in the microwave for a few seconds.
What if my cream cheese filling is lumpy?
If your cream cheese filling turns out lumpy, don’t worry! Simply let the cream cheese sit at room temperature for a bit longer before mixing. Then, beat it again until it’s smooth and creamy. Ensuring it’s softened adequately is key to achieving that perfect texture.
Are these brownies safe for people with allergies?
If you have guests with allergies, be mindful of the ingredients in the brownie mix and the cream cheese filling. You can opt for gluten-free brownie mix and dairy-free cream cheese to accommodate different dietary needs. Always double-check labels for allergens.
Deviled Brownies: Creamy Chocolate Eggs for Easter Fun
Ingredients
Equipment
Method
- Preheat the oven to 350°F (175°C) and prepare the brownie mix according to package instructions. Lightly grease the egg-shaped silicone molds.
- Fill each mold about three-quarters full with brownie batter and gently tap on the counter to remove air bubbles.
- Bake for 24-26 minutes, checking for doneness with a toothpick. Once baked, let them cool slightly.
- While warm, create indentations in each brownie using a ½ teaspoon measuring spoon.
- In a mixing bowl, beat the softened cream cheese and marshmallow cream until smooth, then transfer to a pastry bag.
- Fill each brownie divot with the cream cheese filling using the pastry bag.
- Sprinkle colorful sprinkles on top for decoration and refrigerate until ready to serve.
Leave a Reply