
The aroma of melted provolone cheese and garlic butter wafts through the kitchen, instantly transporting me to sunny Italian bistros. These Ultimate Italian Sliders are more than just a quick and easy meal; they are a celebration of flavors wrapped in soft, Hawaiian sweet rolls. Layered with savory deli meats, zesty peppers, and that gooey cheese, they’re sure to be a hearty crowd-pleaser at any gathering. With minimal prep time, you’ll find yourself serving up these delicious bites during game day or casual family dinners without breaking a sweat. Who knew that beating the fast food trap could taste this satisfying? Ready to dive into the joy of homemade sliders?

Why are Italian Sliders a Must-Try?
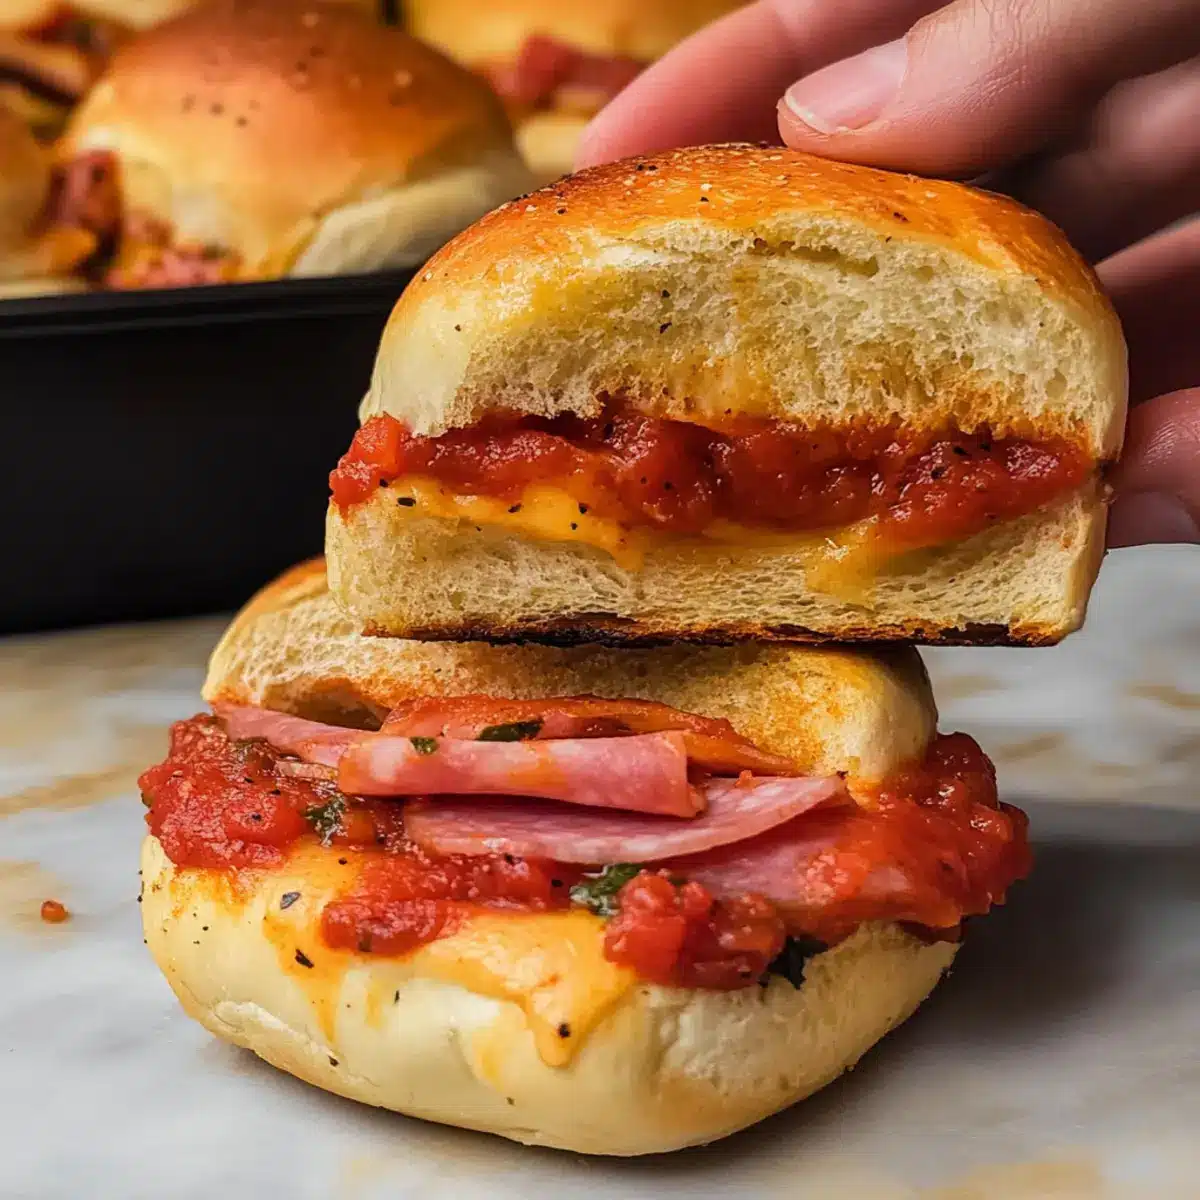
Flavor Explosion: These ultimate Italian sliders pack a punch, featuring layers of savory meats like ham, salami, and pepperoni that meld beautifully with melty provolone cheese. Each bite is bursting with robust Italian flavors!
Quick & Easy: With just a few simple steps, you can pull these together in no time—perfect for busy weeknights or impromptu gatherings. Consider serving them alongside some homemade Italian Herbs Cheese for an extra flavor boost!
Crowd-Pleasing Delight: Whether for game day or family dinners, these sliders are sure to impress. They are adaptable, allowing you to customize with different cheeses or sauces, making them versatile for many palates.
Comfort Food Reimagined: Enjoy the delightful combination of gooey cheese and savory meats encased in soft Hawaiian rolls. It’s like a gourmet pizza experience in slider form, an absolute treat for your taste buds!
Italian Sliders Ingredients
• Get ready to create deliciousness!
For the Sliders
- Hawaiian Sweet Rolls – The perfect base with a hint of sweetness; you can use store-bought or make them from scratch.
- Ham – Provides savory depth; ensure it’s thinly sliced for even layering, or swap for turkey if preferred.
- Salami – Adds a spicy and robust flavor; thinly sliced is key for great texture.
- Pepperoni – This classic adds a delightful kick; feel free to substitute with your favorite deli meat.
- Provolone Cheese – Melts beautifully for that gooey goodness; mozzarella is a great alternative if desired.
For the Veggies
- Pepperoncini – Offers a hint of spice and tang; for a milder taste, you can use banana peppers instead.
- Sweet Cherry Peppers – Bring a pop of sweetness and color; fresh bell peppers are a milder yet acceptable substitute.
For the Topping
- Butter – Essential for a rich, golden finish; melt before combining with seasonings, or use olive oil for a lighter touch.
- Italian Seasoning – Enhances the flavor profile; you can easily create your own blend at home.
- Garlic (minced) – Infuses the sliders with aromatic flavor; consider adding more for extra zing or use garlic powder if needed.
Optional Dipping Sauce
- Marinara Sauce – A delicious addition for dipping, adding moisture and flavor to every bite; it perfectly complements the Italian sliders!
Step‑by‑Step Instructions for Italian Sliders
Step 1: Preheat the Oven
Begin by preheating your oven to 350°F (175°C). This step is essential for achieving that perfect golden crust on your Italian sliders. While the oven warms up, gather your ingredients, and prepare a baking dish by lightly greasing it to ensure the sliders won’t stick.
Step 2: Prepare the Rolls
Slice the Hawaiian sweet rolls in half lengthwise, creating a top and bottom layer. Arrange the bottom halves neatly in your greased baking dish, ensuring they fit snugly together. This will form the base for your delicious Italian sliders, making the assembly process much easier.
Step 3: Layer the Meats
Start layering your uncooked ham, salami, and pepperoni generously over the bottom halves of the rolls. Aim for two even layers of meat to ensure every slider is stuffed with flavor. Take a moment to see the vibrant colors and textures come together, setting the stage for your scrumptious Italian sliders.
Step 4: Add the Cheese and Peppers
Place sliced provolone cheese evenly over the layered meats, allowing for gooey goodness once baked. Next, carefully layer the pepperoncini and sweet cherry peppers on top of the cheese. These vibrant veggies will add a delightful zing and sweet notes, complementing the savory meats and cheese perfectly.
Step 5: Top the Sliders
Once your layers are complete, place the tops of the rolls gently over the assembled sliders. Press down lightly, making sure everything is loosely compacted together. This step allows the flavors to meld beautifully during baking while ensuring the sliders hold their shape.
Step 6: Prepare the Garlic Butter
In a small bowl, melt the butter in the microwave or on the stove until completely liquid. Mix in the Italian seasoning and minced garlic until well combined, creating a fragrant garlic butter blend. This rich mixture will penetrate the tops of your Italian sliders, enhancing the overall flavor.
Step 7: Brush the Sliders
Using a pastry brush, generously apply the garlic butter mixture over the tops of the rolls. Be sure to cover every inch to create a wonderful, golden, and aromatic crust when baked. As you brush, take in the mouthwatering aroma—it’s a hint of the deliciousness to come from your Italian sliders!
Step 8: Bake to Perfection
Place the assembled sliders in the preheated oven and bake for 15-20 minutes. Keep an eye on the sliders as they bake; you want them to turn a beautiful golden brown and the cheese to melt perfectly. Check for doneness around the 15-minute mark to avoid over-browning.
Step 9: Serve Warm
Once your Italian sliders are done baking, remove them from the oven and allow them to cool for a few minutes. This short resting period helps the cheese set slightly, making it easier to slice and serve. Pull apart the sliders, and enjoy them warm, possibly with a side of marinara sauce for dipping!
Italian Sliders Variations & Substitutions
Feel free to get creative and tailor these sliders to your taste buds!
-
Dairy-Free: Use dairy-free cheese alternatives like cashew cheese or coconut-based cheese for a creamy, non-dairy option.
Boost your sliders with a flavorful sprinkle of nutritional yeast for that extra cheesy flavor without the dairy! -
Turkey Twist: Replace ham and salami with lean turkey or chicken slices for a lighter but equally savory bite.
This variation not only slashes calories but also keeps the slider juicy and satisfying. -
Spicy Kick: Add jalapeños or banana peppers for a fiery flavor boost! They’re a fantastic way to add heat that complements the cheese.
You can even serve with a side of spicy marinara for extra dipping delight! -
Herbed Delight: Incorporate fresh herbs like basil or oregano instead of dried Italian seasoning for a fresher, vibrant taste.
This addition will elevate your sliders, giving them a garden-fresh flavor profile that’s simply irresistible. -
Barbecue Fusion: Drizzle your favorite barbecue sauce onto the layers before baking for a smoky twist on the classic Italian sliders.
The sweet and tangy notes of BBQ will give your sliders a new identity that is sure to be a hit at gatherings! -
Veggie Blast: Add a layer of sautéed mushrooms or spinach for an extra veggie boost that brings more nutrition without sacrificing flavor.
This approach creates a heartier slider while maintaining a delicious balance of textures. -
Sweet & Savory: Consider a layer of fig jam or caramelized onions for an exceptional sweet-savory contrast that surprises the palate.
These additions can create a gourmet feel, elevating your sliders to new culinary heights.
For additional flavor hints, why not try them alongside some mouthwatering Italian Herbs Cheese? It’s a delightful pairing that enhances the warmth of your homemade sliders!
What to Serve with Ultimate Italian Sliders
The perfect meal is completed with delightful sides that elevate your sliders to a full feast.
-
Creamy Coleslaw: Adds a refreshing crunch that balances the richness of the sliders. Its crisp vegetables and creamy dressing provide a contrast that’s simply irresistible.
-
Garlic Bread Sticks: A classic Italian side, these buttery, savory sticks are perfect for soaking up marinara sauce served alongside the sliders. Nothing says indulgence like pairing garlic with gooey cheese!
-
Marinara Dipping Sauce: A necessary accompaniment that adds moisture and flavor, enhancing each bite of your sliders. It’s like a security blanket for your flavors, ensuring every slider is dipped to perfection.
-
Caprese Salad: A light and fresh counterpoint, this salad with ripe tomatoes, mozzarella, and basil provides a burst of freshness. The flavors complement the rich Italian sliders beautifully.
-
Potato Wedges: Crispy on the outside and fluffy inside, these hearty wedges offer a satisfying crunch. Dipping them in marinara creates a delightful flavor explosion with every bite.
-
Sparkling Lemonade: A refreshing beverage that cleanses the palate between bites. Its zesty sweetness pairs nicely with the flavors of the Italian sliders and enhances the overall dining experience.
-
Fruit Salad: Light and sweet, a fruit salad serves as a refreshing finish to the meal. The natural sweetness balances the savory elements of the sliders, making it a delightful addition to your table.
Storage Tips for Italian Sliders
Fridge: Store leftover Italian sliders in an airtight container, and they’ll keep fresh for up to 3-4 days. Simply cover them well to maintain their soft texture.
Freezer: For best quality, do not freeze assembled sliders. However, individual components can be frozen for up to 3 months—just assemble fresh before baking!
Reheating: To reheat, place the sliders in a preheated oven at 350°F (175°C) for about 10-15 minutes or until warmed through. This keeps the bread crispy and the cheese melty.
Make-Ahead: You can prep Italian sliders by assembling them a few hours in advance; simply cover and refrigerate until you’re ready to bake. Enjoy the convenience of a quick meal!
Expert Tips for Italian Sliders
-
Layer Wisely: Don’t overload your sliders with too many veggies. Excess moisture can make the buns soggy; add lettuce after baking for crunch.
-
Timing is Key: Keep a close watch on the sliders towards the end of the 15-minute baking time to ensure they don’t over-brown.
-
Cheese Choices: Experiment with different cheeses; swapping provolone for mozzarella can provide a delightful flavor twist while keeping the essence of Italian sliders.
-
Brush Generously: Use plenty of garlic butter on top to ensure a rich, golden finish that enhances the flavor and texture of your sliders.
-
Cool Before Cutting: Allow the sliders to rest for a few minutes after baking. This helps the cheese set, making slicing easier and ensuring a tidy presentation.
Make Ahead Options
These Italian Sliders are perfect for meal prep aficionados! You can assemble the entire slider dish up to 24 hours in advance by following the recipe steps, including layering the meats, cheese, and peppers. Simply cover the assembled sliders with foil and refrigerate to maintain their yumminess (this prevents the rolls from getting soggy). When you’re ready to serve, preheat the oven, uncover the sliders, brush with the garlic butter mixture, and bake as directed for 15-20 minutes. This prep-ahead strategy allows busy home cooks to enjoy homemade sliders without the last-minute rush, ensuring that every bite remains just as delicious as if freshly made!

Italian Sliders Recipe FAQs
How do I choose ripe ingredients for Italian sliders?
Absolutely! For the peppers, select ones that are firm, brightly colored, and without dark spots. Fresh provolone cheese should be creamy and not dried out. If using deli meats, look for thin slices with no visible moisture to maintain the sliders’ structure.
How should I store leftover Italian sliders?
These delightful sliders can be stored in an airtight container in the fridge for up to 3-4 days. Make sure they are fully cooled down before sealing the container to avoid excess moisture buildup. If you’d like to maintain their freshness, cover them tightly with plastic wrap.
Can I freeze Italian sliders?
It’s best not to freeze assembled sliders, as the bread can become soggy upon thawing. Instead, consider freezing the individual components—like sliced meats and cheese—separately for up to 3 months. When you’re ready to enjoy them, just assemble and bake fresh!
What if my sliders come out too soggy?
Very! Sogginess is usually caused by excess moisture from vegetables or not allowing the sliders to cool slightly before serving. Avoid loading the sliders with watery veggies, and let them rest for a couple of minutes after baking to help set the filling.
Are Italian sliders suitable for guests with allergies?
Keep in mind that these sliders contain common allergens like dairy (cheese) and gluten (rolls). For gluten-free options, use gluten-free slider rolls, and if you’re concerned about dairy, consider using plant-based cheese alternatives. Always double-check ingredient labels if serving to guests with specific dietary restrictions.

Savory Italian Sliders for Easy Game Day Feasting
Ingredients
Equipment
Method
- Preheat your oven to 350°F (175°C) and prepare a greased baking dish.
- Slice the Hawaiian sweet rolls in half lengthwise and place the bottoms in the baking dish.
- Layer the ham, salami, and pepperoni over the bottom halves of the rolls.
- Add sliced provolone cheese on top of the meats, then layer with pepperoncini and sweet cherry peppers.
- Place the tops of the rolls over the layers and press lightly.
- Melt the butter and mix in Italian seasoning and minced garlic.
- Brush the garlic butter mixture over the tops of the rolls.
- Bake in the preheated oven for 15-20 minutes until golden brown and cheese is melted.
- Allow to cool for a few minutes, then slice and serve warm with marinara sauce if desired.
Leave a Reply