
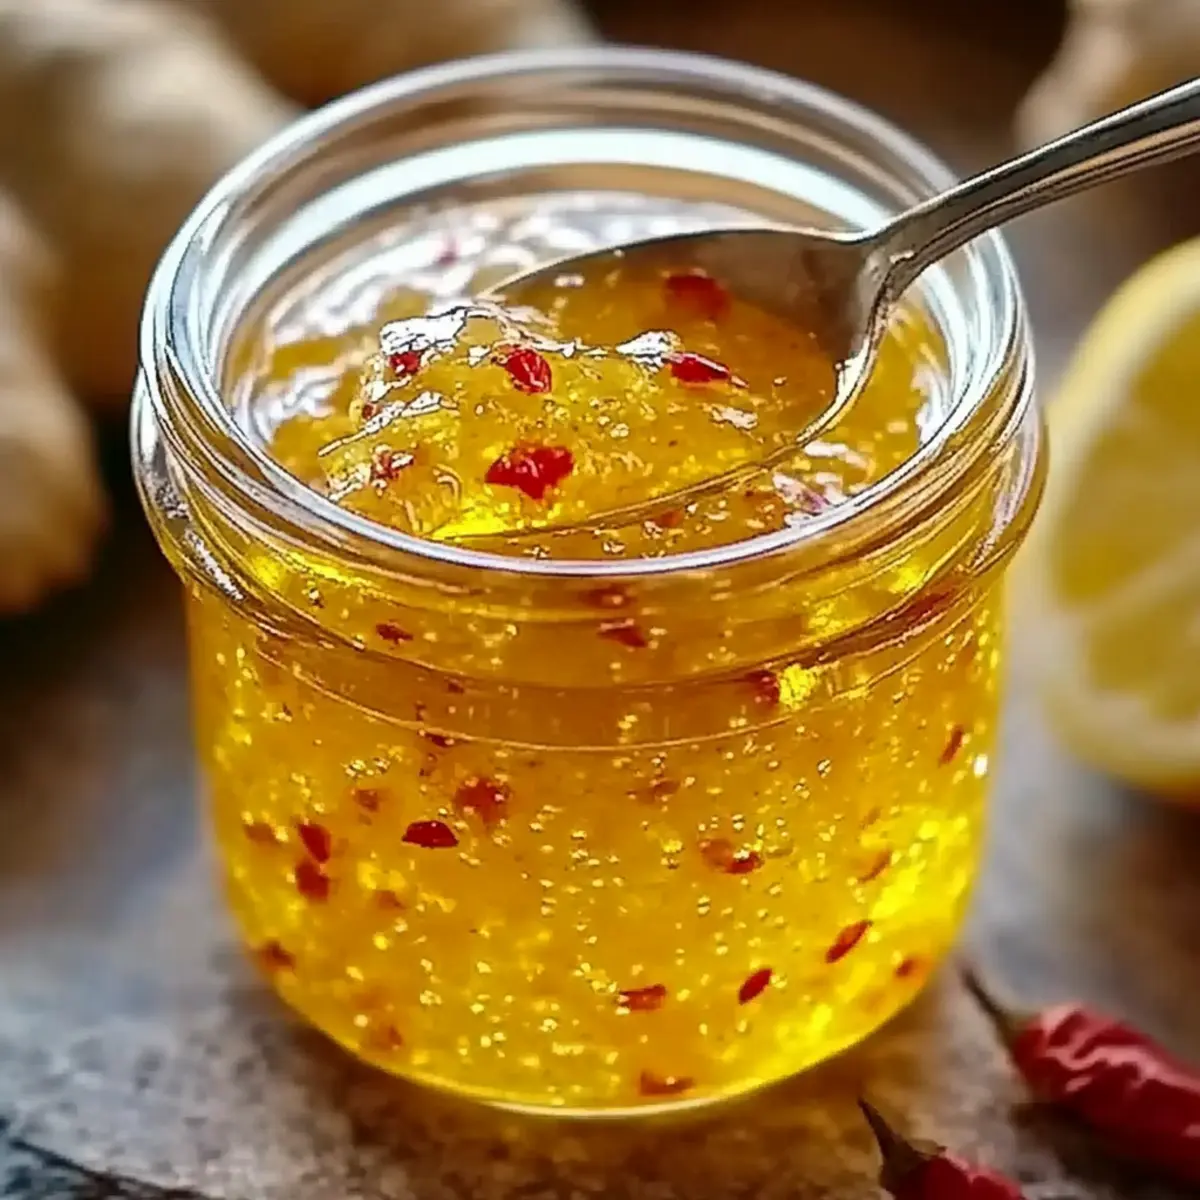
The other day, I was rearranging my pantry and discovered an unopened bag of fresh ginger hiding in the back. It sparked a wild idea: what if I turned my store-bought jam habit into something vibrant and homemade? That’s when I rolled up my sleeves and whipped up a batch of Lemon-Ginger Chili Sunshine Jam. This jam isn’t just quick and easy to make; it also adds an unexpected zesty kick to your favorite dishes, transforming even the simplest of meals. With bright, tangy lemons and a warming touch of ginger, plus just a hint of chili heat, this condiment embodies the spirit of sunny afternoons. Curious about how to create this delightful spread? Let’s dive into the recipe!
Why is this jam so unforgettable?
Simplicity at its finest: This Lemon Ginger Jam requires minimal ingredients and can be effortlessly prepared in under an hour.
Zesty Kick: The vibrant combo of lemon and ginger, with a gentle hint of chili, provides a thrilling flavor explosion that elevates everyday meals.
Versatile Usage: Perfect as a spread on toast, this jam shines equally in marinades or drizzled over cheese, making it a crowd-pleaser for various occasions.
Make Ahead: With the option to make it a few days in advance, you’ll have a delightful condiment ready to impress at a moment’s notice.
Storage Friendly: Preserve the bright flavors for months by freezing, allowing you to enjoy a taste of summer all year round. Try pairing it with ideas from our Light Choux Pastries for an imaginative dessert!
Lemon Ginger Jam Ingredients
For the Jam
• 3 large lemons, zested and juiced – Fresh lemons are crucial for a bright, tangy taste that forms the backbone of this Lemon Ginger Jam.
• 1.5 cups granulated sugar – Essential for sweetness and a proper jam consistency; alternatives like honey can change the texture.
• 0.5 cup water – Used to help dissolve the sugar during cooking.
• 2 tablespoons fresh ginger, finely grated – Adds a warm spice depth; always use fresh for maximum zing.
• 1 small red chili, finely minced – Imparts a mild heat; chili flakes are a good substitute if you prefer more control over the spice level.
• 0.5 teaspoon turmeric (optional) – Enhances the color and adds a hint of earthiness.
• 1 tablespoon apple cider vinegar – Balances out the sweetness with a touch of acidity, enhancing overall flavor.
• A pinch of salt – Always important in enhancing the jam’s overall taste.
Feel free to explore the unique flavors of this homemade delight and relish the many ways Lemon Ginger Jam can brighten up your meals!
Step‑by‑Step Instructions for Lemon-Ginger Chili Sunshine Jam
Step 1: Prepare the Lemons
Begin by zesting the three large lemons, ensuring to capture only the bright yellow outer layer and avoiding the bitter white pith. Next, cut the lemons in half and juice them, collecting the juice in a medium-sized pot. The combination of the zest and juice will form the tart base of your Lemon Ginger Jam, so make sure to do this carefully.
Step 2: Dissolve the Sugar
Add 1.5 cups of granulated sugar and 0.5 cup of water to the pot with the lemon mixture. Place the pot over medium heat, stirring gently until the sugar dissolves completely, which should take about 5 minutes. The mixture will become clear as the sugar dissolves, creating a beautiful lemonade-like base for your jam.
Step 3: Incorporate the Flavorings
Once the sugar has dissolved, stir in 2 tablespoons of finely grated fresh ginger, 1 small minced red chili, 0.5 teaspoon of optional turmeric, 1 tablespoon of apple cider vinegar, and a pinch of salt. These ingredients will introduce warmth and complexity to your Lemon-Ginger Chili Sunshine Jam, giving it a delightful kick. Mix well and prepare for the next step.
Step 4: Simmer the Jam
Increase the heat to bring the mixture to a gentle boil, then reduce the heat to maintain a steady simmer. Allow the jam to simmer uncovered for approximately 35 minutes, stirring occasionally. Keep an eye on it; the jam should thicken significantly and coat the back of a spoon, indicating it’s nearing doneness.
Step 5: Jar the Jam
Once the desired thickness is achieved, remove the pot from the heat. Carefully transfer the hot jam into sterilized jars, filling them while the jam is still warm to create a vacuum seal. Tightly screw on the lids and allow the jars to cool at room temperature, ensuring your Lemon Ginger Jam is properly sealed for freshness.
How to Store and Freeze Lemon Ginger Jam
Fridge: Store your Lemon Ginger Jam in a sealed jar in the fridge for up to 3 weeks, allowing you to enjoy its bright flavors whenever you please.
Freezer: For longer preservation, freeze the jam in airtight containers for up to 3 months. Make sure to leave some space at the top as it may expand when frozen.
Reheating: When ready to enjoy, simply thaw in the fridge overnight or warm gently in a saucepan over low heat until it reaches your desired consistency.
Jarring Tips: Ensure that the jars are properly sealed while hot to keep your homemade jam fresh and flavorful for as long as possible.
What to Serve with Lemon-Ginger Chili Sunshine Jam
Brighten up your table with delicious pairings that enhance the vibrant flavors of your homemade jam.
-
Creamy Goat Cheese: The tanginess of goat cheese pairs beautifully with the zesty sweetness of the jam, creating a delightful contrast.
-
Crusty Baguette: Slice up a fresh baguette for a perfect base, its chewy texture complementing the smooth spread of citrusy goodness.
-
Charcuterie Board: Add a spoonful to your platter; the jam’s sweet heat elevates cured meats and rich cheeses, making every bite exciting.
-
Grilled Chicken: Drizzle over grilled chicken for a sweet and spicy glaze that transforms a simple dish into a gourmet experience.
-
Pancakes or Waffles: Use as a vibrant topping; fluffy pancakes soaked in the jam’s brightness will dance on your taste buds with every bite.
-
Salad Dressings: Incorporate into vinaigrettes; the jam brings a refreshing twist to greens, enhancing both flavor and vibrancy.
Embrace culinary creativity and enjoy the sunshine in every serving of your Lemon-Ginger Chili Sunshine Jam!
Make Ahead Options
These Lemon-Ginger Chili Sunshine Jam jars are perfect for meal prep enthusiasts looking to save time during busy weeks! You can prepare the jam up to 3 days in advance, giving the flavors a chance to deepen for an even more delicious experience. Simply follow the recipe until the jarring step, then allow the jam to cool completely before sealing in sterilized jars. To maintain the vibrant flavors, refrigerate the jam promptly and securely, ensuring it stays fresh. When you’re ready to serve, just open a jar, and you can enjoy that bright burst of homemade goodness with minimal effort—perfect for enhancing your meals or sharing with friends!
Lemon Ginger Jam Variations
Feel free to get creative and make this delightful jam your own with these tasty variations!
-
Ground Ginger: Use ground ginger instead of fresh for a simpler swap. It gives a different spice profile while still maintaining the jam’s lovely warmth.
-
Heat Adjustment: Swap the red chili for jalapeño for a bolder kick. If you prefer mild heat, leave out the chili altogether and add crushed red pepper flakes to taste instead.
-
Vinegar Swap: Substitute apple cider vinegar with freshly squeezed lemon juice. This will enhance the zesty flavor even more, making it a bright addition to your breakfast.
-
Fruit Boost: Add finely chopped apples or pears to the jam for added texture and a fruity sweetness. This will create a lovely depth, making your jam even more special.
-
Turmeric Twist: For an added earthy flavor, you might want to boost the turmeric to 1 teaspoon. It pairs well with apples, especially in seasonal dishes.
-
Citrus Blend: Combine lemon with other citrus fruits like grapefruit or orange for a colorful citrus medley jam. This adds complexity and a vibrant twist to your spread.
-
Sweetener Swap: Try using honey or maple syrup instead of granulated sugar. Just keep in mind that this may alter the texture but will still be mouth-wateringly delicious!
Looking for ideas on what to pair this jam with? Don’t miss out on adding your jam to toast alongside some decadent Light Choux Pastries for a sublime dessert!
Expert Tips for Lemon Ginger Jam
-
Check the Thickness: Test the jam by ensuring it coats the back of a spoon. If it drips, continue simmering for a few more minutes to reach your desired consistency.
-
Use Fresh Ingredients: Fresh lemons and ginger create a vibrant flavor. Avoid using old or dried spices to ensure the best outcome for your Lemon Ginger Jam.
-
Control the Heat: Adjust the spiciness by using more or less chili, or swapping fresh chili for chili flakes to make it milder or hotter, based on your preference.
-
Sterilize Jars Well: Always use sterilized jars to ensure your jam remains fresh. Boiling the jars for 10 minutes is a great way to prepare them.
-
Experiment with Add-Ins: Consider adding a strip of lemon peel during simmering for a fragrant twist. Remember to remove it before jarring the jam.
-
Cool Completely Before Sealing: Allow the jam to cool completely in the jars before sealing. This ensures a proper vacuum seal, keeping your Lemon Ginger Jam fresh longer.
Lemon-Ginger Chili Sunshine Jam Recipe FAQs
What kind of lemons should I use for the jam?
Absolutely! For the best flavor, always opt for fresh, large lemons. Look for lemons that are bright yellow and slightly shiny, as they have the most juice. Avoid any that feel hard or have dark spots all over.
How long can I store Lemon Ginger Jam in the fridge?
You can store your Lemon Ginger Jam in a sealed jar in the fridge for up to 3 weeks. To keep it fresh, make sure to use clean utensils when scooping out the jam to avoid contamination.
Can I freeze Lemon Ginger Jam?
Certainly! To freeze, transfer your jam into airtight containers, making sure to leave some space at the top for expansion. You can freeze it for up to 3 months. When you’re ready to enjoy it, thaw in the fridge overnight or warm gently in a saucepan.
What if my jam doesn’t thicken?
Very! If your jam is not thickening after 35 minutes of simmering, continue to simmer it on low heat while stirring occasionally. You want to achieve a consistency that thickly coats the back of a spoon. If needed, you can also add a little more sugar, stir well, and let it cook longer.
Is this jam safe for pets or those with allergies?
It’s important to note that while Lemon Ginger Jam is generally safe for humans, it contains ingredients like sugar and ginger that may not be suitable for pets. As for allergies, the primary allergens here are sugar and ginger, so make sure to check with anyone you plan to serve it to regarding these ingredients.
What if I want a sweeter or spicier jam?
Feel free to adjust! If you like your jam sweeter, add a bit more sugar while you’re simmering. For more heat, increase the amount of chili or substitute with a hotter variety. Always taste as you go to find your ideal balance.
Zesty Lemon Ginger Jam
Ingredients
Equipment
Method
- Begin by zesting the three large lemons and then juicing them into a medium-sized pot.
- Add 1.5 cups of granulated sugar and 0.5 cup of water to the pot. Place the pot over medium heat and stir until the sugar dissolves, about 5 minutes.
- Stir in the grated ginger, minced red chili, optional turmeric, apple cider vinegar, and a pinch of salt.
- Bring the mixture to a gentle boil, then reduce the heat to a steady simmer for approximately 35 minutes, stirring occasionally.
- Once thickened, remove from heat and transfer the hot jam into sterilized jars while still warm.
Leave a Reply