
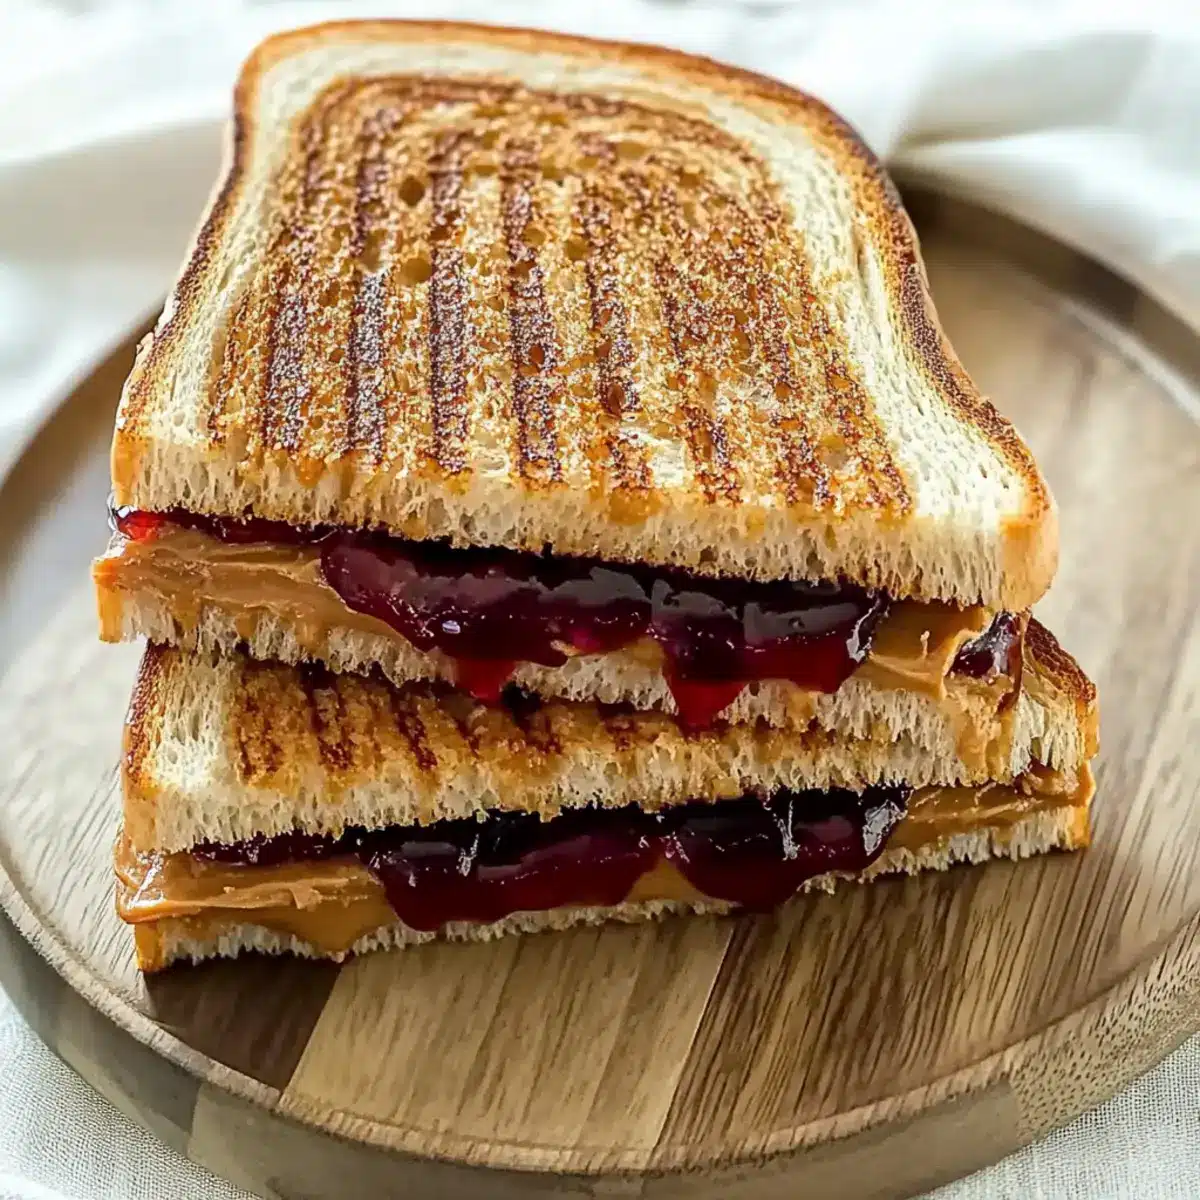
As I stood in my kitchen, the smell of warm bread brought back a flood of memories—laughter, summertime, and that unmistakable crunch of a peanut butter and jelly sandwich. This simple yet perfect comfort food is a nostalgic reminder of carefree childhood days. With my Classic Peanut Butter and Jelly Sandwich recipe, you’ll not only whip up this timeless favorite in no time, but you can also customize it to suit your palate. Whether you prefer creamy or crunchy peanut butter, or wild berry jelly, the options are endless! This quick-to-prepare treat makes for a satisfying meal that brings both kids and adults together, while also sparking creativity in the kitchen. Ready to journey down memory lane and rediscover the magic of the peanut butter and jelly sandwich? Let’s dive in!
Why is this sandwich so special?
Nostalgia at Its Finest: There’s something magical about a peanut butter and jelly sandwich that stirs childhood memories, making it a quintessential comfort food for people of all ages.
Endless Customization: With options for creamy or crunchy peanut butter, and various jellies, you can tailor each sandwich to your flavor preferences.
Quick and Easy: In just a few minutes, you can create a satisfying meal, perfect for busy days.
Crowd-Pleaser: This timeless classic is loved by everyone, making it an excellent choice for family lunches or gatherings.
Texture Delight: Experience the perfect contrast of crispy bread and gooey, sweet filling with every bite. Pair it with a glass of cold milk for a nostalgic touch!
Peanut Butter and Jelly Sandwich Ingredients
Explore the essentials for this classic favorite!
For the Sandwich
• Bread – A soft, white or whole grain variety works best; toasting can enhance texture and prevent sogginess.
• Peanut Butter – Provides that creamy richness; both crunchy and smooth options are acceptable based on your preference.
• Jelly – Adds sweet, fruity flavor; popular choices include grape or strawberry, but feel free to experiment!
• Butter – Used to spread on the exterior for a crispy finish when grilled; optional, but adds a lovely richness.
Optional Add-Ons
• Sliced Bananas – For a sweet twist that pairs beautifully with the peanut butter and jelly sandwich.
• Honey – A drizzle for added sweetness that complements any jelly.
• Alternative Nut Butters – Try almond or cashew butter for different flavors if you’re feeling adventurous!
Remember, the beauty of a peanut butter and jelly sandwich lies in its simplicity and the joy of making it just the way you like!
Step‑by‑Step Instructions for Peanut Butter and Jelly Sandwich
Step 1: Gather Your Ingredients
Begin by collecting all the ingredients for your Peanut Butter and Jelly Sandwich. Make sure your bread, peanut butter, and jelly are at room temperature for the best spreading consistency. Lay everything out on a clean surface, including butter if you’re choosing to grill the sandwich. This preparation will streamline your assembly process and keep things mess-free.
Step 2: Prepare the Bread
Take two slices of your chosen bread and place them flat on a clean cutting board. If desired, spread a thin layer of butter evenly on one side of each slice using a butter knife. This step is optional but will add a delightful crispiness when grilled. Make sure the butter is smooth and covers the entire side for even browning.
Step 3: Spread the Peanut Butter
Flip the bread slices over so the unbuttered sides are facing up. Grab your peanut butter and use a clean knife to spread a generous layer across one slice. Aim for an even coverage that extends to the edges for maximum flavor in every bite. This step ensures your Peanut Butter and Jelly Sandwich has that rich and creamy base we all love.
Step 4: Add the Jelly
Now it’s time to add the jelly! Using a separate clean knife, spread your chosen jelly on the second unbuttered slice of bread. Keep the jelly layer thin to avoid making the sandwich soggy, but feel free to adjust to your sweetness preference. Choose a jelly flavor that complements your peanut butter—grape or strawberry are classic choices!
Step 5: Assemble the Sandwich
Carefully press the two slices together, ensuring that the peanut butter and jelly sides are facing each other. Align the edges for a perfect seal. This part of creating your Peanut Butter and Jelly Sandwich is crucial, as it holds all the gooey goodness inside. Gently press down to secure them together without squeezing out the filling.
Step 6: Preheat the Pan
Heat a griddle or non-stick skillet over medium heat, aiming for a temperature of about 350°F (175°C). Allow the pan to warm for a few minutes until it reaches the right temperature. This step is essential to achieving that perfect golden brown crust on your Peanut Butter and Jelly Sandwich while ensuring the peanut butter warms up, making it all the more comforting.
Step 7: Grill the Sandwich
Place the assembled sandwich into the preheated skillet, buttered side facing down. Cook for about 4 minutes, or until the bottom is a lovely golden brown and crispy. Keep an eye on it; you want the bread to be toasted without burning. This sizzling sound will be a great indication that your sandwich is developing that irresistible crust.
Step 8: Flip and Cook Again
After the first side is nicely toasted, use a spatula to carefully flip the sandwich over. Press down gently with the spatula to enhance browning and crispiness. Cook for another 4 minutes, checking for the same golden color on this side. The smell wafting through your kitchen at this point will surely evoke memories of your childhood favorite.
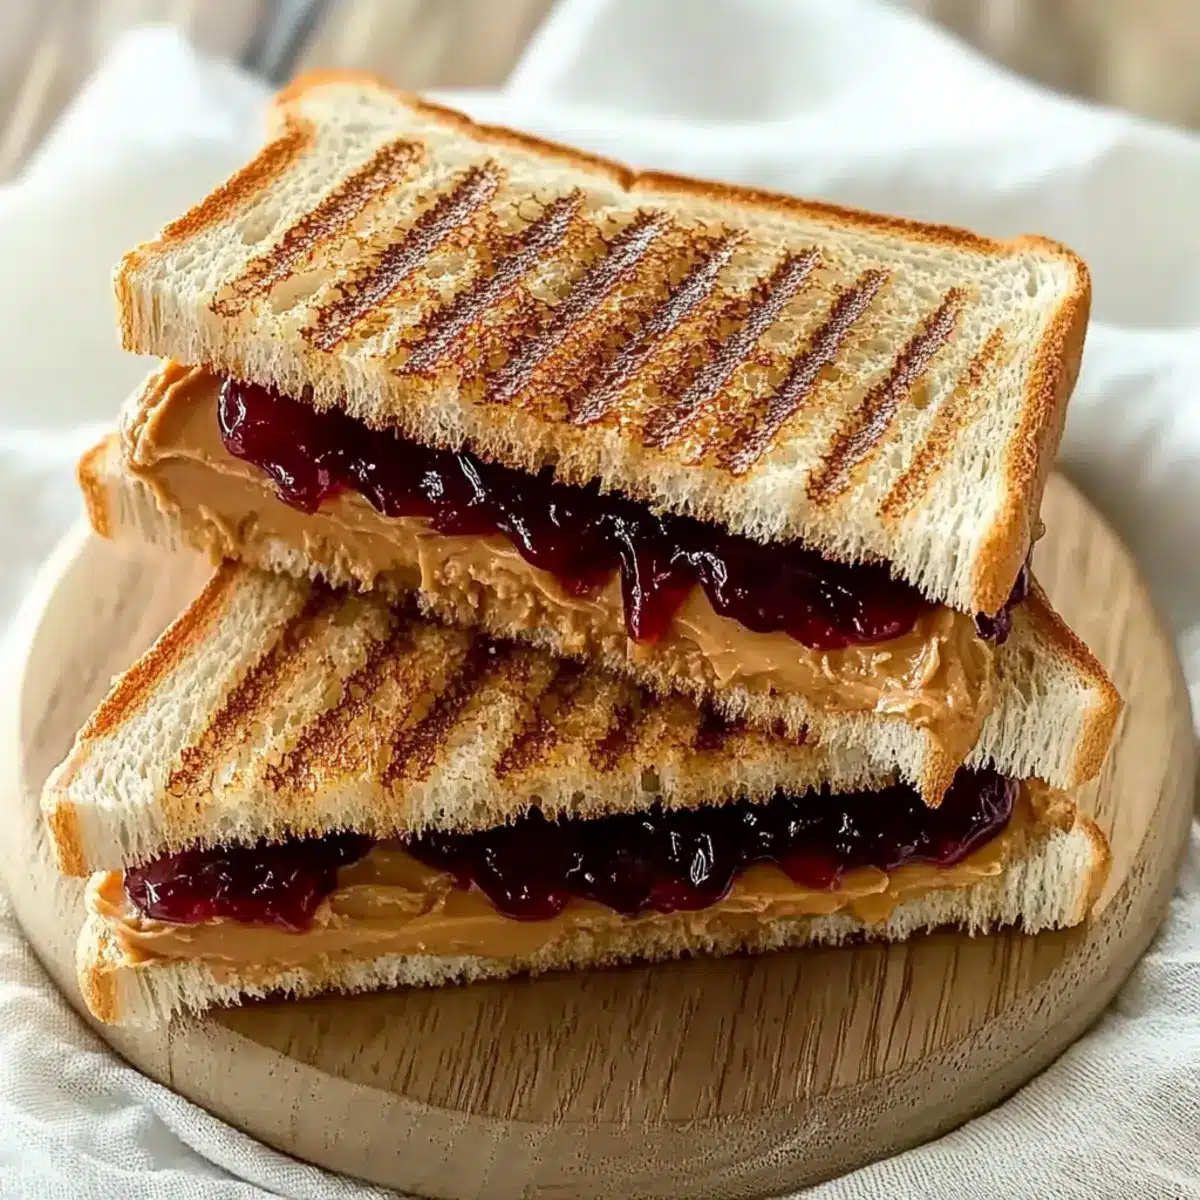
Step 9: Slice and Serve
Once both sides are perfectly golden, remove your Peanut Butter and Jelly Sandwich from the skillet and let it cool for a moment. Using a sharp knife, slice the sandwich diagonally for that classic presentation. This makes it easy to enjoy and adds a touch of nostalgia as you prepare to take that first satisfying bite.
Make Ahead Options
These Classic Peanut Butter and Jelly Sandwiches are perfect for busy home cooks looking to simplify meal prep! You can assemble the sandwiches up to 24 hours ahead of time by spreading the peanut butter on both slices of bread to create a barrier that prevents sogginess. Then, add your chosen jelly just before serving to maintain the ideal texture. Wrap them tightly in plastic wrap or place them in an airtight container and refrigerate. When you’re ready to enjoy, simply grill the sandwiches as directed, and they’ll be just as delicious as when freshly made! This prep-ahead approach saves time without sacrificing taste, making it an ideal choice for snacks or quick lunches.
Expert Tips for Peanut Butter and Jelly Sandwich
- Room Temperature Ingredients: Start with room-temperature peanut butter and jelly to ensure easy spreading without tearing the bread or making it soggy.
- Clean Utensils: Always use a clean knife for spreading jelly after peanut butter to prevent contamination and maintain flavors.
- Perfect Slicing: For a classic presentation, slice the sandwich diagonally. It’s not just visually appealing; it makes for easier handling, too!
- Prevent Sogginess: Apply a thin layer of butter to both sides of the bread if grilling; this keeps the sandwich fresh and crispy longer.
- Experiment with Variations: Don’t be afraid to customize your peanut butter and jelly sandwich with different nut butters or jellies for exciting new flavors!
What to Serve with Classic Peanut Butter and Jelly Sandwich
Imagine lounging in the sun, a crispy sandwich in hand, with a feast of delightful sides to create a memorable meal experience.
- Cold Glass of Milk: The ultimate pairing, milk’s creaminess complements the rich peanut butter and sweet jelly perfectly, enhancing that nostalgic taste.
- Crunchy Potato Chips: The salty, crispy texture of potato chips offers a delightful contrast to the sweet and creamy flavors of the sandwich, making each bite exciting.
- Sliced Apples: Fresh, crisp apple slices add a refreshing crunch and a hint of tartness that balances the sweetness of the jelly beautifully.
- Carrot Sticks with Hummus: The crunch of carrots and the creaminess of hummus create a wholesome side that adds nutrition and color to your lunch plate.
- Chocolate Chip Cookies: For a decadent finish, serve warm cookies alongside, creating a playful dessert moment that evokes childhood joy with every bite.
- Fruit Salad: A medley of berries, melon, and citrus not only brightens the plate but also provides refreshing, juicy bites that enhance the overall meal experience.
Pairing your classic peanut butter and jelly sandwich with these delightful options guarantees a comforting meal that celebrates the best of childhood flavors.
How to Store and Freeze Peanut Butter and Jelly Sandwich
Room Temperature: Store your sandwich wrapped tightly in plastic wrap or in an airtight container for up to 4–6 hours to maintain freshness.
Fridge: If you need to keep it longer, refrigerate the sandwich for up to 24 hours. Make sure it’s sealed well to prevent it from drying out.
Freezer: For longer storage, you can freeze the sandwich for up to 1 month. Wrap it tightly in plastic wrap, then place it in a freezer-safe bag or container.
Reheating: To enjoy your frozen peanut butter and jelly sandwich, simply thaw it in the fridge overnight and reheat it in a skillet on low until warmed through and slightly crispy.
Peanut Butter and Jelly Sandwich Variations
Feel free to get creative and make this classic sandwich your own with these delightful twists!
-
Nut Butter Swap: Try almond or cashew butter for a unique twist on flavor and texture. Both options bring a deliciously nutty richness!
-
Jelly Variety: Use different jellies or preserves like raspberry or blackberry for a fruit-forward experience. Each choice surprises the palate in a delightful new way!
-
Banana Boost: Add sliced bananas for a naturally sweet touch that complements the peanut butter and jelly beautifully. It’s a nostalgic touch reminiscent of childhood treats.
-
Honey Drizzle: A drizzle of honey can elevate the sweetness and add a floral note to your sandwich. This simple addition transforms the classic into something extraordinary!
-
Spicy Kick: If you’re feeling adventurous, add a pinch of cinnamon or a sprinkle of cayenne pepper for a surprising heat element. The combination is surprisingly delightful!
-
Grilled Cheese Style: For an even richer experience, grill your sandwich with cheese, like sharp cheddar, for an unexpected savory twist. It might sound unusual, but it’s a flavor explosion you won’t forget!
-
Coconut Flakes: Stir in unsweetened shredded coconut for a tropical flavor that pairs beautifully with the peanut butter. The added texture is fun and mouthwatering!
-
Yogurt Spread: Substitute Greek yogurt for jelly for a tangy, protein-packed option. This twist not only enhances flavor but also boosts the nutritional profile!
As you explore these variations, consider pairing your sandwich with a side of crunchy potato chips or fresh apple slices for a balanced meal! If you’re up for more adventurous recipes, check out my Avocado Melt Sandwich or the comforting Texas Roadhouse Butter for additional inspiration!
Peanut Butter and Jelly Sandwich Recipe FAQs
What is the best type of bread for a peanut butter and jelly sandwich?
Soft white or whole grain bread works wonderfully for making a peanut butter and jelly sandwich. If you prefer a crispier texture, toasting the bread beforehand can enhance both texture and flavor while preventing sogginess!
How long can I store a peanut butter and jelly sandwich?
If you plan to eat your sandwich the same day, store it wrapped in plastic wrap or in an airtight container at room temperature for up to 4-6 hours. For a bit longer, refrigerate it for up to 24 hours, ensuring it’s well sealed to maintain freshness.
Can I freeze a peanut butter and jelly sandwich?
Absolutely! To freeze, wrap your sandwich tightly in plastic wrap and place it in a freezer-safe bag or container. It can be frozen for up to 1 month. When you’re ready to enjoy it, allow it to thaw in the fridge overnight and reheat in a skillet on low until warmed through.
What should I do if my sandwich gets soggy?
To avoid a soggy sandwich, stick to a thin layer of jelly and consider spreading a small amount of peanut butter on both sides of the bread before adding the jelly. This creates a barrier against moisture. Using toasted bread can also help keep it from getting soggy.
Are there any dietary considerations to keep in mind?
Yes! When making a peanut butter and jelly sandwich, be mindful of allergies, especially peanuts or gluten. For gluten-free options, choose a certified gluten-free bread, and if anyone has nut allergies, you can use sunbutter or soy nut butter as alternatives.
Peanut Butter and Jelly Sandwich: A Nostalgic Comfort Treat
Ingredients
Equipment
Method
- Gather your ingredients, ensuring bread, peanut butter, and jelly are at room temperature.
- Prepare the bread by laying down two slices and optionally buttering one side of each.
- Spread peanut butter on one unbuttered slice for an even coverage.
- Spread jelly on the second unbuttered slice, keeping the layer thin.
- Assemble the sandwich by pressing the two slices together.
- Preheat a skillet over medium heat, aiming for about 350°F (175°C).
- Grill the sandwich in the preheated skillet for about 4 minutes until golden brown.
- Flip the sandwich carefully and grill the other side for another 4 minutes.
- Slice the sandwich diagonally and serve warm.
Leave a Reply